Film cameras
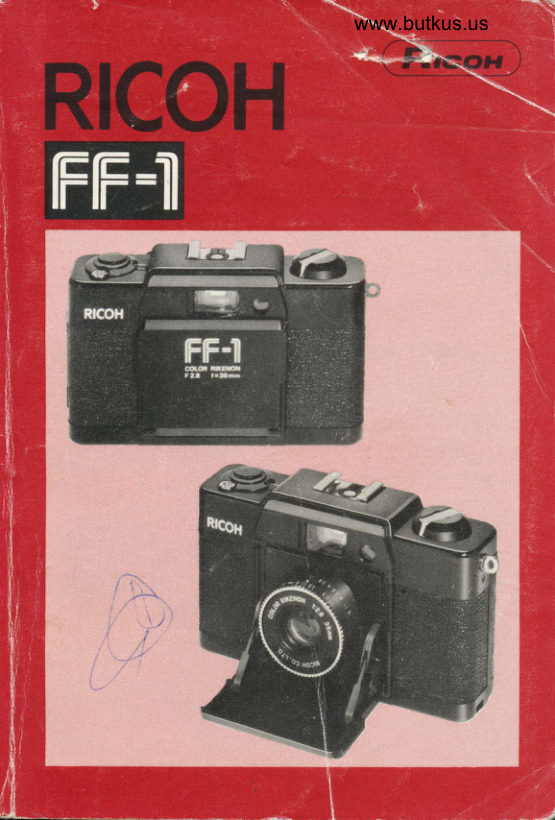
Ricoh FF-1 User manual
User manual for Ricoh FF-1. 20 pages. Read the original PDF, download or print a copy without registration.
20 pagesOriginal document3.6 MB PDF
Loading your manual…Open PDF directly
Document details
- Brand
- Ricoh
- Model / document
- Ricoh FF-1
- Document type
- User manual
- Language
- Check the original document
- Pages
- 20
- File size
- 3.6 MB
- Category
- Film cameras
- Document date
- Not specified in catalog
Search available document text
Find a term, then jump to its page in the original PDF. Image-only pages may not be searchable; check the PDF for exact wording and diagrams.
Page 8 · Read text
b.I- DESCRIPTION OF PARTS
    1, Film Rewind Knob
   2. Film Rewind Crank
   3. Electric Eye
    4, Viewfinder
    5. Hot Shoe/Flash Contact
   6. Exposure Counter
   7. Shutter Release Button
   8. Cable Release Socket
   9, Front Cover
  10, Distance Scale Ring
   1 1. Auto/Manual Ring
   12. Film Advance Lever
   13. Viewfinder Eyepiece
  14 Battery Check LED
  15. Film Speed Selector
  16. Film Speed Window
   17. Strap Eyelet
   18. Film Rewind Shaft
   19. Film Chamber
  20. Back Cover Latch
  21. Film Rail
   22. Battery Compartment Cover
  23. Tripod Socket
   24. Sprocket Teeth
   25, Film Rewind Release Button
   26. Film Take-up Spool
   27. ASA/DIN Conversion Label
   28. Back Cover
  29. Film Pressure Plate
View original page 8Page 9 · Read text
HOW TO FIX STRAP
 1) Pull out the hanging metal (Fig. 1-A) and turn the
     plastic tip by 90' (Fig. 1-B).
 2l How the hanging metal into Strap Eyelet (17) (Fig.
     1-C), and turn the plastic tip by 90o to fix the strap
     (Fis. 1-D).                                                                                                                                                                                                                  {-a;,'"'

OPENING AND CLOSING FRONT COVER
Front Cover (9)controls shutter release "LOCK-
UNLOCK" and exposure meter "ON-OFF".
  1. When Front Cover (9) is closed, the electric circuit
      is switched off and Shutter Release Button (7) is
     locked.
 2. Open Front Cover (9) fully until it snaps to get ready
     for picture-taking (Fig. 2, 3l
Tips for Better Results
 * Make sure that Front Cover (9) is opened all the
   way down when you take a picture.
 * To close Front Cover (9), push the cover toward the
   camera body (Fig. 4).
 * When your camera is not used and/or is carried
    with you, close Front Cover (9) always to protect
    the lens from dust or to avoid an accidental Shutter
     release.
View original page 9Page 10 · Read text
BATTERY LOADING
 1. Open Battery Compartment Cover l22l bV pulling it
     in the direction of arrow and lift it up (Fig. 5).
 2, Place the two batteries into the compartment
    according to polarity diagram (Fig. 6).
 3. Replace Battery Compartment Cover (22).
Tips for Better Results
                                                     the * Before loading, wipe off the surfaces of
     batteries with a clean and dry cloth.
 * When your camera is not used for a long period,
    remove the batteries.
  * The batteries will last about one year in normal use'
  * The batteries may explode if disposed of in fire.
BATTERY CHECK
  1. Open Front Cover (9) all the way down.
  2. Press Shutter Release Button (7) lightly half way
   down. lf Battery Check LED (Green) (14) turns on,
    the batteries have sufficient power, and if it does
     not, the batteries must be replaced (Fig. 7),
Tips for Better Results
 * For replacement, use tvvo new JIS G13, Mallory
   MS76, Eveready 576 or equivalent.
                         (Green) (14) does not turn on,  *  lf Battery Check LED
                                                 pressed,    Shutter Release Button l7l can be
    however, the shutter will not open.
View original page 10Page 11 · Read text
www.butkus.us
  * Make sure each time whether Battery Check LED
    (Green) (14l' turns on or not when you press
    Shutter Release Button (7).

FILM LOADING
  1, Open Front Cover (9) all the way down.
 2. Pull Back Cover Latch (20) until Back Cove r (2gl
    snaps open (Fig. 8).
 3. Pull Film Rewind Knob (1) out all the way to allow
    for insertion of the film cartridge (Fig. 9).
 4. Place film into Film Chamber (1g) and push down
    Film Rewind Knob (1) to its original pcsition (Fig.
     10),
 5. Draw the film leader across the camera back and
    insert it into one of the slits of Film Take_up Spoot
   (26) (r;s. 1 11.
 6. Wind Film Advance Lever (12) to take up any slack
    in the film and check to see that the firm tip is firmry
   hooked onto Film Take-up Spool (261 and that
   sprocket holes on the film are fuily engaged on
   Sprocket Teeth (2+y 17in. 1rr.
7. Close and press Back Cover (2g) firmly until  it
   snaps shut.
8. Advance Film Advance Lever (121 po or three
   times, after depressing Shutter Release Button (7)
  each time, until the number ,'1', is opposite the
   index line in Exposure Counter (6) (Fig. 13).
View original page 11Page 12 · Read text
Tips for Better Results
 * Always load your camera in the shade or in a
     poorly-lit place, never in direct sunlight or other
    bright light.
 * As you advance the Film Advance Lever (12),
   the Film Rewind Knob (1) will also rotate
    indicating that the film is advancing properly.
   (When the Film Rewind Crank (21 is not lifted
    up, the Film Rewind Knob will not rotate).
 * Do not advance Film Advance Lever (12) while
    pressing Shutter Release Button (7) to avoid the
    trouble of the shutter.

SETTING FILM SPEED
  1. Rotate Film Speed Selector (15) until the ASA
    number of your film is seen in Film Speed Window
    (16) (Fig. 1a).
Tips for Better Results
 * Each time a film with a new film speed rating is
    loaded in your camera, the film speed must be set
    to assure accurately exposed photographs.
 *  Refer to ASA/DIN Conversion Label (27l. for the
    relation between ASA and DIN numbers.
 *  lf you use film the ASA number of which is not
   mentioned in Film Speed Window (16), select the
    appropriate setting -according to the following
     table.
View original page 12Page 13 · Read text
www.butkus.us


        ASA 25      ASA 50     ASA 100     ASA 200     ASA 4OO
        20 25 32     40 50 64    80 100 125      1 60 200 250  320 400 500

 * Please note, however, intermediate position
    in-between the two ASA settings will not give you
    the correct exposures, i.e., if you use ASA 64,
    please set at click position of ASA 50.

AUTOMATIC EE EXPOSURE
Set the camera to "AUTO"
  1, Rotate Auto/Manual Ring (11) until the "A" is set
    opposite the index line (Fig. 15).
   Your camera sets the aperture and the shutter
    speed automatically.

Shutter Speed Checking
  1. Advance Film Advance Lever (12).
 2. Press Shutter Release Button (7) lightly half way
   down and check to see the slow shutter speeds
    warning LED (Red) above the viewfinder (Fig. 16).
       lf the LED (Red) turns on and stays on, hold the
    camera as steadily as possible to prevent camera
   movement and blurred pictured and also keep
     pressing Shutter Release Button (7) until LED turns
     off because the shutter speed is slower than 1/60
    sec. .We suggest you use a tripod or flash.
  3. When the LED does not turn on. press Shutter
     Release Button (7) as it is since the shutter speed is
     faster than 1/60 sec.
View original page 13Page 14 · Read text
Tips for Better Results
  * The programmed electronic shutter of the camera
    automatically determines the best combinations of
    shutter speed and aperture value for a given
     lighting situation within the range of EV2 (F2.8,2
     sec.)   EV 17 (Fl6, 1/5OO sec.) (ASA 100 film).          -
  * Be sure to advance Film Advance Lever (121 first
    before checking to see slow shutter speeds
   warning LED (Redl.
  * Do not set Auto/Manual Ring (11) to the
    positiOns other than "A" unless you take flash
    pictures, otherwise accurately exposed pictures
    will not be taken.
 * Keep your fingers away from Electric Eye (31 to
    assure correct exposure.
  * When the bright subject is being shot by using
  ASA 4OO reversal film for slide picture, the
    over-gxposed picturo may come out.

TAKING FLASH PICTURES
Since proper flash exposure may not be obtained by
automatic exposure setting, always override
Auto/Manual Ring (11) from ",A" setting.
  1. Mount an electronic flash unit with a built-in hot
   shoe contact on Hot Shoe (5).
Exposure for Flash Photography
Using the flash guide number, you can determine the
                    -7-
View original page 14Page 15 · Read text
correct f-stop for a given flash situation using the
following formula:
   F-stoP :  Guide number *
              Flash-to-subject distance
                                                                           il Fcir example, if your flash unit has a guide number of
16m or 52.8 ft for the type of film you are using, and
your subject is 2 meters (6.0 ft) from the flash unit,
divide 16 (52.8) bV 2 (6.6). The answer is 8; set
Auto/Manual Ring (1t) to B (f/Bl (Fig. 17).
Tips for Better Results
 * Use a flash unit with a built-in hot shoe contact
    only because the camera is not equipped with flash
    terminal for a flash unit with connecting cord.
 * The shutter speed is automatically set at 1/60 sec.
   when your flash unit is mounted on a built-in hot
    shoe contact.
 *   lf you are using an electronic flash unit with power
     ratio control, follow instruction sheets packed with
    the flash unit.
 * Most electronic flash units have a built-in dial or
   exposure tablo which enables you to quickly
   compute f-stops based on flash-to-subject
    distances.
 * After taking flash pictures, pult out your flash
   unit from hot shoe contact and set always
   Auto/Manual Ring (1 1) at "A" setting.
                    -8-
View original page 15Page 16 · Read text
1',
     $      * No flash bulb can be used with this camera'
   *  * The Hot shoe is only designed for an electronic
          flash and no other accessories can be used'

   SETTING THE DISTANCE
       1. Measure the camera-to-subject distance in meters
         with your eyes.
      2. Rotate Distance Scale Ring (10) until the number
       or in-between number corresponding to the
        measured distance is opposite the index line.
       METER/FEET CONVERSION TABLE

                    Meter           0.9           1.5       o 2.5         5.O
                        F6et           3.O           5.O           4.2         16.4

     Tips for Better Results
                                            pressing Shutter     * When you take pictures by merely
        Release Button (7) without adjusting exposures
        and distances. To do so, simply set Distance Scale
        Ring (10) at.the green "O" mark, Auto/Manual
         Ring (11) at the green "A" (Auto) (Fig. 18).

   VIEWING
       1. Look into viewfinder Eyepiece (13) and compose
         your picture inside the bright frame line (Fig. 19).

   UNLOADING FILM
       1. Press Film Rewind Release Button (25) (Fig. 2O).
l
  I
 I
View original page 16Page 17 · Read text
www.butkus.us

 2. Lift up Film Rewind Crank (2) and turn  it clockwise
     until you feel the film tension released (Fig. 21)'
 3. Open Back Cover l28l by pulling Back Cover Latch
     (20).
 4. Pull out Film Rewind Knob (1) all the way, remove
    the film cartridge and have the film processed as
    soon as possible.
Tips for Better Results
                                                            a * Always unload your camera in the shade or in
     poorly-lit place, never in direct sunlight or other
     bright light.
                                                      Film  * When you reach the end of the roll film,
   Advance Lever l12l will tighten and refuse to
    advance.  lf this happens, do not advance Film
    Advance Lever (12) by force for "Just one more
     shot", otherwise the film will be torn out of the
     cartridge.
  *  Film Rewind Release Button (25) will remain in
     place once it is pressed, and return automatically to
      its original position when Film Advance Lever (12)
      is advanced.
  * Keep your fingers away from Film Rewind
    Release Button {251 while taking pictures to
    prevent from double exposed pictures.
View original page 17Page 18 · Read text
I   PROPER CARE OF YOUR CAMERA
       * When you use a self-timer or cable release on the
          market. screw them into Cable Release Socket (8).
       * Use a self-timer after adiusting its plunger length
        between 3.5 N 4.O mm according to the
           instruction sheets packed with the self-timer.
       * When using a tripod with a long thread length
         (more than 5.7 mm), be careful not to forcibly
         screw in the thread further than the depth of the
           oscket.
       * Always keep the lens clean' To clean the lens'
           gently wipe it with a lens cleaning paper or a soft'
          clean and lintless cloth.
       * Do not wipe the camera body with chemicals' such
         as benzine, thinner, etc....', use only soft cloth or
          cotton swab sprinkled lightly with alcohol on the
         camera body.
       * Never expose your camera to excessively high or
          low temperature  for an extended period of time' In
           extremely hot climates, do not leave your camera
            inside closed automibiles during the daytime or in
            direct sunlight.
       *  Protect your camera from dust, dirt, water,
          dampness, salt air and rough handling'
        * When your camera is not used for an extended
            period of time. remove the batteries and store  it in a
           dry and cool Place.
View original page 18Page 19 · Read text
www.butkus.us

 * Do not attempt to disassemble or repair your
   camera yourself. lf service is necessary, get in
    touch with your dealer or authorized Ricoh service
     station.

MAJOR SPECIFICATIONS OF FF-1
Lens:
   35 mm Color Rikenon f/2.8 lens
   3 groups 4 elements
Shutter:
    Programmed system electronic shutter, 2-1/5OO
     sec. (Auto EE exposurel, 1/60 sec. for flash picture
Exposure Meter:
   Cds exposure meter, fully automatic control and
    manual override for flash picture
   Two 1.5V silver-oxide batteries (JlS G13, Mallory
   M576, Eveready 576 or equivalent)
    Coupling range EV2- 17 (ASA 1OO)
    Film speed range ASA 25 -4OO (DlN 15 -27l
Viewfinder:
    Albada type bright frame viewfinder
   Slow shutter speeds (below 1/6O sec.) warning
   LED visible
    Magnification 0.46 X
    Coverage of actual picture area over 83%
Focusing:
   By distance scale from O.9 m (3 ft) to infinity
Film Loading:
     Multi-slit easy loading
                 _ 12_
View original page 19Page 20 · Read text
Film Advance:
     Single stroke film advance lever
Film Rewind:
    Crank lever
 Film Counter:
     Additive, automatic resetting
 Flash Contact:
    Hot shoe for cordless electronic flash unit
Other Features:
     Retractable lens system
     Feather touch shutter release button
     Battery check LED
     Shutter release lock (with front covei)
    Exposure meter on/off (with front cover)
    Cable release socket
    Tripod socket
Dimensions:
    107 (width) x 64.6 (height) x 30.4 (depth) mm
Weight:
   225 g
View original page 20Related documents and language editions
From the M. Butkus archive. Original publisher and archive notices are retained.
Check the model and edition against your equipment.
PDF verified 2026-10-10.