Film cameras
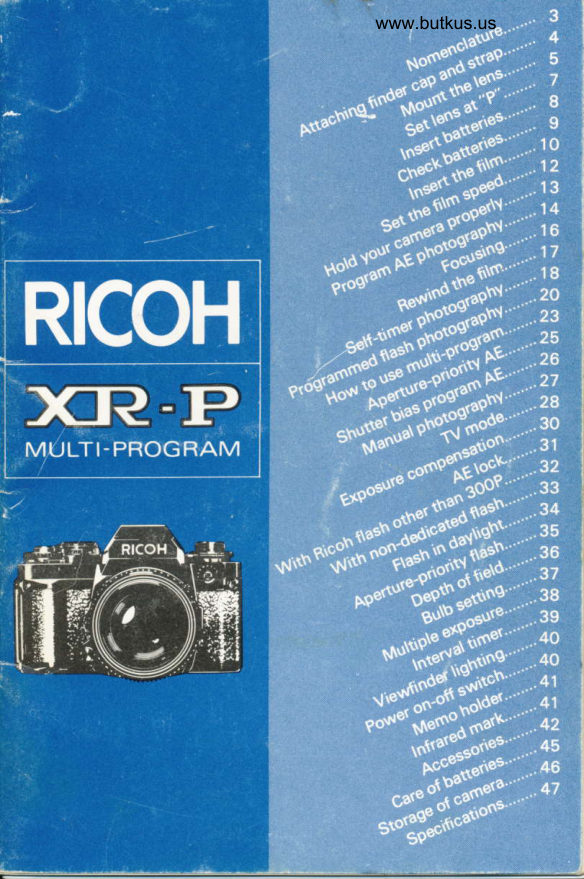
RICOH XR-P Multi-Program - - Direct User manual
User manual for RICOH XR-P Multi-Program - - Direct. 49 pages in English. Read the original PDF, download or print a copy without registration.
49 pagesEnglish8.5 MB PDF
Loading your manual…Open PDF directly
Document details
- Brand
- Ricoh
- Model / document
- RICOH XR-P Multi-Program - - Direct
- Document type
- User manual
- Language
- English
- Pages
- 49
- File size
- 8.5 MB
- Category
- Film cameras
- Document date
- Not specified in catalog
Search available document text
Find a term, then jump to its page in the original PDF. Image-only pages may not be searchable; check the PDF for exact wording and diagrams.
Page 3 · Read text
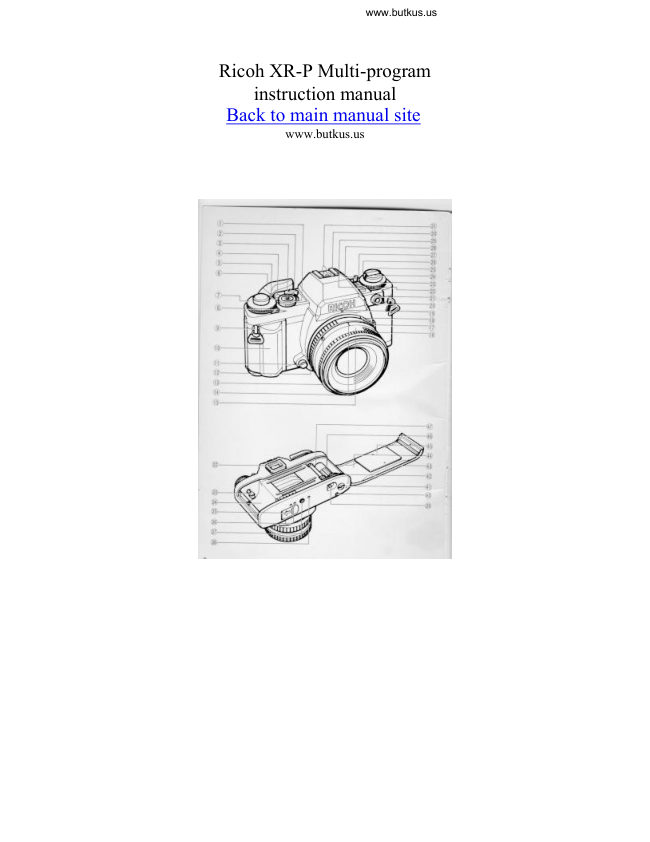
www.butkus.usNOMENCLATURE
 1. Program Selector          36. Motor Drive Contacts
 2. Power ON-OFF Switch       37. Tripod Socket
 3. Shutter Release Button      38. Winder Contact
 4. Exposure Counter          39. Film Rewind Release Button
 5. Shutter Speed Index Line     40. Hand Grip Release Button
 6. Film Advance Lever          41. Winder/Motor Drive Coupler
 7. Shutter Speed Dial            42. Winder Positioning Hole
 8. Multiple Exposure (ME) Lever  43. Memo Holder
 9. Strap Eyelet              44. Back Cover
10. Removable Hand Grip         45. Film Pressure Plate
1 1. Lens Release Button         46. Film Take-up Spool
12. F-Stop Ring               47. Sprocket
13. Lens Locator Mounting Node
14. Depth of Field scale
15. Focusing Ring
16. Flash Synchro Terminal
17. AE Lock/llluminator  Button
18. P Lock Button
19. Aperture Relay port
20. Self/lnterval Timer Button
21. Self/lnterval Timer
22. Film Speed Dial
23. Exposure Compensation Dial
24. Film Rewind Knob/Back Cover
     Lock Release
25. Film Rewind Crank
26. Film Speed Index Line
27. Exposure Compensation Index
     Line
28. Beep Switch
29. llluminating Window
30. Hot Shoe
31. Flash Control Contacts
32. Viewfinder Eyepiece
33. Film Rewind Shaft
34. Film Chamber
35. Battery Compartment Cover
View original page 3Page 4 · Read text
Venmo @mike-butkus-camera  Ph. 2083
PayPal Name  Lynn@butkus.org      www.PayPal.me/lynnbutkus
View original page 4
Page 5 · Read text
ATTACHING TH E VIEWFIN DER
     CAP AND STRAP
       1. Slip the Viewfinder Cap on to the
            strap. (Fig. 1)


Fig. 1
       2. Run the strap through the strap lug un-
                    til the strap protrudes about 3 cm from
           the lug. Then adjust the strap length as
            desired. (Fig.2)
View original page 5Page 6 · Read text
MOUNT THE LENS
        1. Pull the back lens cap to remove  it from
            the lens. (Fig. 3)


 Fig.3
       2. Pull off the body cap. (Fig. a)


Fis.4
           Align the red dot on the camera with
           the red dot on the lens and mount the
             lens on the camera. (Fig. 5)


Fig.5
View original page 6Page 7 · Read text
4. Turn the lens in the arrow direction un-
                    til it clicks into place. (Fig. 6)

         To remove the lens, turn the lens in the
          arrow direction with the Lens Release
           Button depressed. (Fig. 7)

         The conventional K mount lens can be
         used as aperture-priority and manualFig.6           but cannot be used for programmed AE
           photography.

           Proper performance of camera may not
          always be guaranteed with lenses other
         than Ricoh. For best results, use a
           Ricoh original equipment lens.


Fig.7
View original page 7Page 8 · Read text
www.butkus.us


                   SET LENS AT "P" POSITION
                           1. Turn the F-Stop Ring while p Lock But-
                                ton is pressed. (Fig.8)

        rt-'-

                          Set it to the locking "P" position as
                        shown for programmed auromattc ex-
                               posure photography. (Fig. 9)

                     To unlock "P", turn the F-Stop Ring
                                while P Lock Button is deoressed.
-i,7                        )'
                -\
View original page 8Page 10 · Read text
www.butkus.us


              CHECK CONDITION OF
                BATTERIES
                       1. Turn the Power ON-OFF Switch ON.
                                (Fis. 12)
-2/'\


               Fig.12
                    2. Batteries are in good condition, when a
                                liquid crystal display such as a Shutter
                      Speed Indicator appears in the finder.
                               (Fig. 13)


                  Fig. 13
                     *  The BAT (battery low warning) blinks in
                         the finder to warn against their failure
                     when capacity of batteries drops below
                          proper operating level. Change batter-
                               ies as soon as possible. (Fig. 1  )


                 Fig 14
View original page 10Page 11 · Read text
INSERT THE FILM
                           (Do not expose the film to direct sunlight
                        when inserting the film.)
                                         '1. Pull up the Film Rewind Knob until the
                               Back Cover snaps open. (Fag. 1 5)


                            Fig. 15
                           2. Insert the film in the Film Chamber and
                            push the Film Rewind Knob down to
                                 the original position. You may have to
                                      rotate the knob slightly to push it down
                                 completely. (Fig. 16)


                             Fis. 16
                           3. Insert the film leader in the slit on the
                                     Film Take-up Spool. (Fig. 17)


                       Fis.17

10
View original page 11Page 12 · Read text
www.butkus.us

      ooooot-:i


      0o0oollrr!    7


                           4. Advance the Film Advance Lever to
oooooo                    wind the film round the Film Take-uo                               Spool. Check that the sprocket holes
                          on the film are fully engaged on the
                                 Sprocket Teeth. (Fig. 18)
 oD0o0(rge.l00
                                Close the Back Cover, unfold the Film
                             Rewind Crank and turn  it gently in the
                             Fis. 18      arrow direction until anv slack is taken
                                 up. (Fig. 19)

                             Advance the film and press the Shutter
                               Release Button a few times until "1"
                                 appears in the Exposure Counter.
                          The film is properly advanced if the
                               Film Rewind Knob rotates when the
                                Film Advance Lever is stroked to ad-
                                vance the film. (Fig. 2O)
                            Fig. 19
                         When inserting the film in a cold place,
                               the film leader may be hard and be-
                       come brittle. Warm the film leader
                                  with vour hand in such conditions.
                           1/125 second shutter speed is auto-
                                   matically selected until "l" appears in
                             the Exoosure Counter. This is a con-
                               venient device that prevents a long
                                   shutter speed when film loading with
                                   the lens caD on.
View original page 12Page 14 · Read text
www.butkus.us


     HOW TO HOLD YOUR CAMERA
       (Good position for photography)
       (1) Lightly put your right-hand forefinger
          on the Shutter Release Button and
              hold the camera body with other fing-
                  ers.
       (21 Make your right arm comfortable.
        (3) Cradle your camera in your left hand
           and hold  it so that the Focusing Ring
Fis.23        can be easily turned with fingers.
        (4) Brace your left elbow to your body
          and put the camera to your face.
            Look through the viewfinder to com-
             pose your picture. (Fig.23)
         *   lt  is important to practice correct
           shooting position to avoid blurred or
                tilted pictures.
View original page 14Page 16 · Read text
www.butkus.us


                          4. Set the Program Selector to "P". (Nor-
lLl                           mal Program Setting) lFig.27)
                         *o Pn (Action Program Setting) is used for
                             taking fast moving subjects as in
                                  sports photography.
                          o Po (Depth Program Setting) is used for
                            scenery pictures or close-up shots
                           which will bring both the foreground
                            and background into sharpest possible
                                   focus.
                            o P (Normal Program Setting) is used for
                                   general snap shots.
                        *  Refer to "Applications" for other shoot-
                                   ing modes.
                        *  Refer to "Applications" for further de-
                                                tails.
                          5. Look through the viewfinder and turn
                              the Focusing Ring to focus. You can
                                focus either by using the Split lmage or
                                 Microprism.
View original page 16Page 17 · Read text
FOCUSING (Fig. 28,291
                           Split image Focusing
                When the split images in the Split-lmage
                    Spot form a single, clear image, the sub-
                          ject is in focus.

                     Microprism Focusing
                When the subject loses its "shimmering "
                           effect and becomes very sharp, the subject
Fig.28       Fig.29  is in focus.
View original page 17Page 18 · Read text
www.butkus.us
  llo/f=:l          I4hrY'              .'l   -    a


                REWIND THE FILM
                       (Do not expose the film to direct sunlight
                    when unloading the film.)
                                        1 . Push the Film Rewind Release Button.
                     The button stays locked in position
                              (Fig.30)
                      2. Unfold the Film Rewind Crank and turn
                                                    it in the arrow direction. When the film
                 Fis.30      has been completely rewound, the ten-
                            sion of the Film Rewind Crank is sud-
                           denly released and turns freely. (Fig.
                            31)
                       3. Open the Back Cover and unload the
                                 film. (Fig.32)

                          Never open the Back Cover until film
                           rewinding is completed. lmmediately
                       Fig. 31       close the Back Cover to save some of
                            your shots if the Back Cover is opened
                            by mistake during or before rewinding.
                                          lf you wind the film beyond the set
                       number of frames, the Film Advance
                           Lever may get stuck mid-stroks. The
                          Film Rewind Release Button will not
                          stay depressed in. lf this occurs, re-
                          wind the film while holding the Film Re-
                         wind Release Button oressed down.
                 Fig.32
View original page 18Page 19 · Read text
SELF.TIM ER PHOTOGRAPHY
                           The self-timer  is used to include yourself in
                                 party pictures or commemorative shots.
                               1. Advance the film.
                            2. Set "10" in the Self ooition on the     I          Self/lnterval Timer to the index line.
                                   (Fig.33)


                       Fis.33
                           3. Press the Self/lnterval Timer Button.
                         The Self-Timer Indicator Lamo blinks
                       and the self-timer audible beep is
                              heard. In 1O seconds, the shutter is
                                    automatically released. (Fig. 3a)


                      Fig.34
                                        4.  After shooting is completed, turn the
                                        Self/lnterval Timer OFF. (Fig. 35)
                          To cancel the self-timer after it is set,
                             oress the Self/lnterval Timer Button
                               again or turn the Self/lnterval Timer
                                OFF.


                      Fis.35

18
View original page 19Page 20 · Read text
www.butkus.us


           Use the Viewfinder Cap attached to the
             strap to cover the Viewfinder Eyepiece
        when using the self-timer in modes
             other than "Manual" to avoid incorrect
           exposure due to incident-light from the
            Viewfinder Eyepiece. (Fig. 36)
            Set "0" in the Self position to the index
             line to release the shutter instantly
Fis. 36     when the Self/lnterval Timer Button is
            pressed. This serves as a handy "Left-
           Hand" shutter release. (Fig.37)

        B (Bulb) setting is not available when
             the Self-Timer is used.

          The Self-Timer sound can be eliminat-
           ed with the Beep Switch. (Fig. 38)

Fig.37


Fis.38

                                            19
View original page 20Page 21 · Read text
FLASH PHOTOGRAPHY
                     (PROGRAM MED FLASH PHOTO-
                       GRAPHY}
                                                    lf the RICOH SPEEDLITE 30OP is used on
                                the RICOH XR-P camera, the shutter speed
                         and the f-stop number are automatically
                                 set with the camera is set to program AE
www.butkus.us                  photography.
                              Flash photography is direct metering sys-
                       Fis.39  tem and light is measured off the film
                            olane to control the flash duration. This
                        make possible a world of special applica-
                                 tions as well as the ultimate in "Point and
                              Shoot" simplicity.

                              1. Slide the flash unit into the Hot Shoe
                               and tighten  it with the lock screw. (Fig.
                                  39)
                        Fig.4O   2. Set the Shutter Speed Dial to "A". (Fig.
                                  40)
                            3. Set the F-Stop Ring to "P". (Fig. 41  )
   . :--i.t

                        Fis.41

20
View original page 21Page 23 · Read text
7. When fully charged, the Flash Ready In-
                                    dicator (red LED) lights in the finder.
                                            (Fis. a5)

                                Focus the subject and press the Shut-
                                          ter Release Button for shooting.


                       Fis.45
                                        8. When flash shot is made with correct
                                 exposure, the Flash Ready Indicator/
                                   Correct Auto Flash Indicator (red LED)
                                      blinks for one second.
                               Exoosure is not correct when it does
                                   not blink. Change taking conditions  (F-
                               Stop, Distance etc.) and try shooting
                                    again. (Fig.46)

                       Fis.46       Refer to Operating Instructions for the
                                    flash unit for more creative technioues
                               and technical details.


22
View original page 23Page 24 · Read text
APPLICATIONS
      HOW TO USE MULTI-PROGRAM
        The RICOH XR-P camera is designed with
       a Multi-Program system. 3-"customized"
         programs can be chosen by the Program
          Selector according to taking conditions
         and subject.
         1. Po program:
               This is used for shooting with a
                deeper focus (an increased depth-
                    of-field) as in scenery or close-up
                 shots. (Fig. a7l
        2. P program:
            An "average" shutter speed and f-
              stop number are combined. This
               program is used for general shoot-
                   ing. (Fig.48)
Fig.48
        3. Pe program:
                 This program is used for fast mov-
                  ing subjects as in sports, car races
                 etc. This program bias wider aper-
              tures with decreased depth-of-
                   field. This results in a less sharp
               background. This is ideally suited
                   for portrait taking. (Fig. a9)

Fig.49

                                         23
View original page 24Page 25 · Read text
*  Fig. 50 shows 3 programs of XR-P
   :pp  rop  ewp4              which will give you a general idea of
                               the combination of shutter speed and
                                  aperture in 3 different programs (Po, P,
                                              pn).


                      Fis.5O


24
View original page 25Page 26 · Read text
www.butkus.us


                    MANUAL

      APERTURE-PRIORITY AE
      PHOTOGRAPHY
         In aperture-priority AE photography, the
        camera automaticallv sets correct shutter
        speeds according to a pre-selected f-stop
        number and brightness of subjects. This is
          suitable for photography taking advantage
          of specific depth-of-field results as in por-
           traits or scenery pictures.
Fig 51    1. Set the Shutter Speed Dial to "A".
        2. furn the F-Stop Ring to set the desired
             f-stop number. The f-stop number can
           be seen in the bottom area of the view-
              finder through the Aperture Relay Port.
                (Fig. 51)
         When the Shutter Speed Indicator is in
            the orange range, the shutter speed is
           too slow. Select a new f-stop number
           or mount the camera on a triood or
             other suitable platform.
         * When overexposure mark (r) or under-
           exposure mark (V) appears in the view-
              finder, exposure is not correct. Turn
           the F-Stop Ring to change the f-stop
            numoer.
View original page 26Related documents and language editions


From the M. Butkus archive. Original publisher and archive notices are retained.
Check the model and edition against your equipment.
PDF verified 2026-10-10.