Film cameras
Ricoh XR-P Pocket Guide - - Direct Reference guide
Reference guide for Ricoh XR-P Pocket Guide - - Direct. 8 pages in English. Read the original PDF, download or print a copy without registration.
8 pagesEnglish2.5 MB PDF
Loading your manual…Open PDF directly
Document details
- Brand
- Ricoh
- Model / document
- Ricoh XR-P Pocket Guide - - Direct
- Document type
- Reference guide
- Language
- English
- Pages
- 8
- File size
- 2.5 MB
- Category
- Film cameras
- Document date
- Not specified in catalog
Search available document text
Find a term, then jump to its page in the original PDF. Image-only pages may not be searchable; check the PDF for exact wording and diagrams.
Page 1 · Read text
www.butkus.us
RICOHffi-e


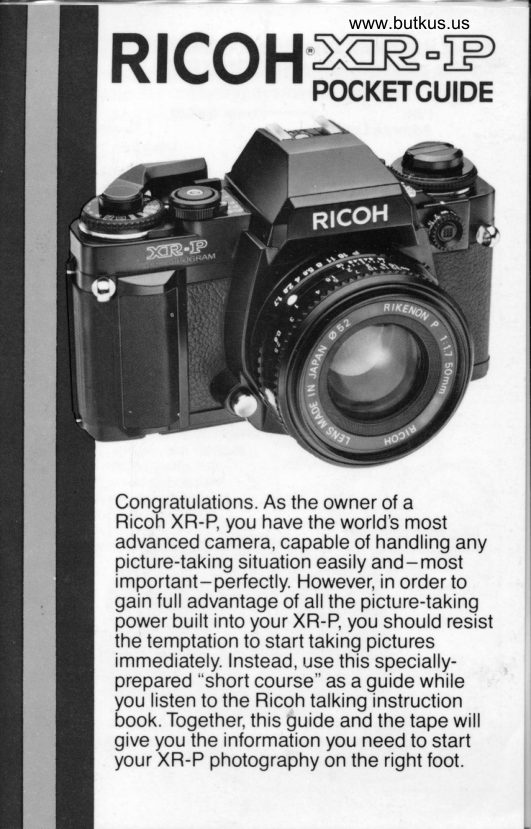
Congratulations. As the owner of a
Ricoh XR-P, you have the world s most
advanced camera, capable of handling any
picture-taking situation easily and-most
important-perfectly. However, in order to
gain full advantage of all the picture-taking
power built into your XR-P, you should resist
the temptation to start taking pictures
immediately. Instead, use this specially-
prepared "short course" as a guide while
you listen to the Ricoh talking instruction
book. Together, this guide and the tape will
give you the information you need to start
your XR-P photography on the right foot.
View original page 1
Page 3 · Read text
Operating the camera
Once the camera is loaded and the exposure index
entered into the metering system of the XR-P, you are
ready to take pictures.
Getting Ready
A. Insert Batteries: Slide      being sure to observe + and
                                          as marked on thecover of battery compartment - positionsto open, then insert four LR-44 cover, then close'
ortwo CR 1/3N batteries,
 A'1 @
         ilrd
 o@    o


B. Mount Lens: Remove rear
 lens cap. Then remove camera
body cap which covers lens
 mount. Align red dot on lens
 barrelwith red dot on lens
 mount, then insert lens and
 turn until lens is seated firmlY.
 You'll hear a click when this
 happens.


 C. Set Gamera: Set shutter
 speed dial to'A' setting. Set
 program selector to "P" setting.
 Press lock button and set lens
 aperture ring to "P" setting.
 Your XR-P is now in basic
 automatic program readY for
 picture taking. Now turn
 camera "ONl'
View original page 3Page 4 · Read text
D. Load Film: Pull up rewind      holes of film engage teeth of
knob to release back latch.           film transport system. To check,
Open back. Insert film cassette     turn film advance lever to make
in film chamber, then pullout       sure film is firmly attached to
film leader so that  it can be in-     take-up spooland traveling in
serted into louvre of take-up         straight line.
spool. Make sure sprocket


    www.butkus.us
View original page 4Page 5 · Read text
www.butkus.us
E. Once film is properly
loaded, close camera back.
Then unfold rewind crank and
turn  it gently in direction of
arrow. Thistakes up slack in
cassette. Do not turn after you
feel slight resistance.


F. Advance film to first
exposure by winding film ad-
vance lever, releasing shutter
and repeating process until
you see #1 in film counter win-
dow. While doing this, watch
rewind crank.  lf everything  is
working properly, crank will
turn in direction opposite
arrow.


G. Set film speed according
to information on film box or
cassette.  Lift film speed ring
and turn to proper setting.  lt
will drop into place. Tear end of
film box and slide into memo
holder.


          mi H. You are now ready to take
 pictures.
View original page 5Page 6 · Read text
Three automatic programs for
creative control plus convenience
Your Ricoh XR-P offers not one program, but three
programs to provide creative control without losing the
spe-ed and convenience of "point and shoot" operation.
Before going into the three, lets take a brief look at
what they do.
"PA'LThe'A' stands for
"action" and is used when you
are shooting sports or other
action subjects. By setting your
XR-P in "PA'program mode,
you tell the camera to set the
fastest possible shutter speed
which willstill give you perfect
exposure. The lens will gener-        www.butkus.us
ally have a large aperture.

 "P'LThe basic all-purpose
program for automatic ex-
oosure control under most
 iignting conditions to handle
most sublects. This is your
 plain, everyday "average"
program, for general
photography.

 "Pg"-The "D" stands for
depth and is used when you
are photographing close-ups,
copies or other subjects where
you want the most sharpness
from front to back. (This is, in
technical terms, depth of field.)
 In this setting, you tell your
XR-P to use the sma//est lens
opening which willgive you
correct exposure.
 Regardless  of the program you choose, your XR-P will automatically
 set the correct exposure. The difference is that when you have to
 handle a special situation, you are ready for  it without having to wony
 about setting your lens openings or shutter speeds: your XR-P
does the thinking for you, following your orders.
                              6
View original page 6Page 7 · Read text
www.butkus.us
Why the RICOH XR-P Program works-
A program is a set of instructions from your camera's
computer on how to set lens apertures (f/stops)
and shutter speeds under a wide range of lighting
conditions. Correct exposure is a combination of these
two factors. Cameras with only one program usually
provide a compromise which, in many cases, works.
But what happens when you need to emphasize one
factor more than the other? Programmed cameras just
can't handle this unless it is the Rlcoh XR-P with its
three programs.

                       AUTOMATIC PROGRAM                                  ..PA"
                             You need a fast shutter to stop
                                      action. whether lootball. car
                                 races or kids in action-vour
                           XR-P in "PA' handles  it.'..
                                    automatically.


                         AUTOMATIC PROGRAM
                              "P"
                        A basic program for those
                                "happy medium" pictures.
                               Handles average subiects,
                                     family pictures, perfectly.  .  .
                                     automatically.


                          AUTOM.ATIC PROGRAM
                          "PD"
                             Use this program when you
                               want maximum sharoness and
                                   depth. Still lifes, closeups of
                                      flowers, macro...your XR-P in
                               "PD" gets  it... automatically.


                            7
View original page 7Page 8 · Read text
The Viewfinder
The reflex finder of the Ricoh XR-P is one of the most
sophisticated finders of any camera and provides all ol
the operating data needed for perfect control. The
finder can show:


    www.butkus.us


A. Matte surface focusing           J.  Shutter soeed indicator
   screen                            K. Flash ready lamp  (if this
B. Microprism collar               lamo blinks, check the
C. Diagonal split-image             charge in your flash unit)
    ranoefinder circle                  L. Camera shake warning
D. Aut6matic exposure (AEL,        (meter needle changes
    lock indicator                        coror)
E. Exposure compensation       M. Long-time exposure
    indicator                         warnrng
F. Manual exgosure control       N. Under-exposure  indicalor
    indicator                     o. Bulb setting indicator
   Prooram mode indicator        P. Low battery warning
H TV inode indicator            o. F/stop indicators (LCD
 t.  Overexoosure indicator           and/or optical)

RICOH wc respond.

Nole: Specilications  subiect to change without notice
                                                                                                                              1 /84-570
View original page 8Related documents and language editions
From the M. Butkus archive. Original publisher and archive notices are retained.
Check the model and edition against your equipment.
PDF verified 2026-10-10.