Film cameras
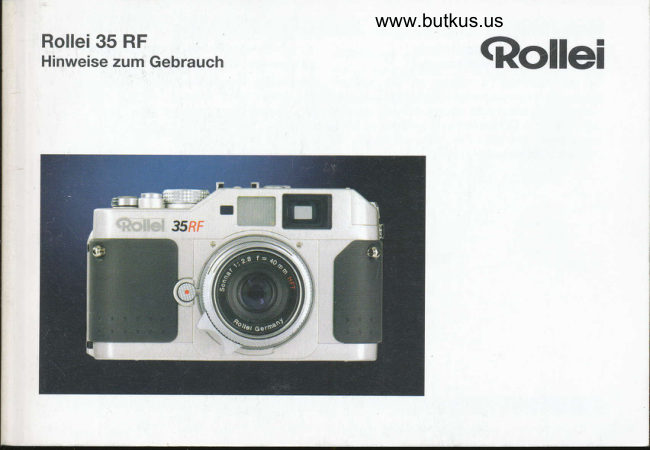
Rollei 35 RF User manual
User manual for Rollei 35 RF. 23 pages in English. Read the original PDF, download or print a copy without registration.
23 pagesEnglish7.1 MB PDF
Loading your manual…Open PDF directly
Document details
- Brand
- Rollei
- Model / document
- Rollei 35 RF
- Document type
- User manual
- Language
- English
- Pages
- 23
- File size
- 7.1 MB
- Category
- Film cameras
- Document date
- Not specified in catalog
Search available document text
Find a term, then jump to its page in the original PDF. Image-only pages may not be searchable; check the PDF for exact wording and diagrams.
Page 4 · Read text
www.butkus.us
GENEHAL
Congratulations on your new                   Preventive police recommendation:
high-performance Rollei 35mm camera.       Marking your valuables, photographing and
Your Rollei35 RF is a compact rangefinder camera   cataloging them will make it more difficult for
with TTL metering and interchangeable lenses.   thieves to sell them and may save you a lot
May we suggest that you read these instructions    of trouble.
carefully so you will be able to make optimum use
of the great potential of your camera.
View original page 4
Page 5 · Read text
Lrsr oF colffExTe
 Getting ready                                Miscellaneous
Camera body                     ,26   Camera care
Attaching the camera strap            ,28
Changing lenses                   ,29   Technical data
Loading batteries                  r30
Checking the batteries                )31
Loading film                      ,32
Picture taking
Setting the film speed                r33
Setting the shutter speed             )34
Setting the aperture                  )35
Selecting the bright-line frame
Focusing                        ,37'36
Holding your camera properly          r38
Rewinding the film                  )39
Bulb setting (B)                   ,40
Flash photography                   ,41
View original page 5
Page 8 · Read text
www.butkus.us         r


Attaching the camera strap                The end of the strao should be on the inside
Attach the strap as illustrated.                          of the strao.
View original page 8
Page 9 · Read text
(B),Changing lenses                                    I To remove the lens, press the release button
r Hold the lens at its rear ring and attach  it with its     disengage the lens by slight counterclockwise
  red index opposite the lens-release button (B).      rotation and pull it straight out.
   Insert the lens straight in this position, then turn  it
  clockwise until it clicks into place.
View original page 9
Page 10 · Read text
LOADING.,BATTENITS                       www.butkus.us


Loading batteries                               Note:
r The camera is powered by two type LR44 or  Be sure to observe local regulations regarding the
  SR44 batteries.                                    disposal of batteries.
I Use a coin to open the battery-compartment
  cover (21), turning  it counterclockwise.
l  Insert the button cells one above the othet their
   positive poles (marked ,,+")facing down
r Replace the cover and turn it clockwise to
  engage.


 30
View original page 10
Page 11 · Read text
GHECKING THE BATTERIES


Checking the batteries                                                                  lf the batteries provide sufficient power, the LED
With the shutter cocked,  lightly depress the shutter      display will come on for about 12 seconds after
release (4) without triggering an exposure. Power       light depression of the shutter release.
is sufficient if one of the three LEDs lights up.     After an exposure, the metering system  will
Should none of the LEDs light, replace the two     automatically be disabled until the shutter
batterres.                                              release is once more depressed  lightly with the
                                                          shutter cocked.


                                                                                              e1
View original page 11Page 12 · Read text
www.butkus.us


Loading film                                      Stroke the wind lever and press the shutter
                                                          release untilthe sprocket wheel engages the filmr Open the camera back (27) by pulling up the
  rewind crank (12). As the camera back swings      oerforation on both sides.
  open, the frame counter (6) will automatically     Close the camera back so that  it snaps shut.
   reset to ,,S".                             Wind the film and press the shutter release
                                                                                                                                 1,r  Inserl the film cartridge into the empty carlridge      repeatedly until the frame counter reads
  compartment with the film leader facing the     watching the rewind shaft. This should turn
  take-up spool.                                    during the process, indicating that the film is
I Press the rewind crank down into its seat.           being wound.
r Pull out a sufficient length of film and thread  it
   into the slot of the take-up spool.
View original page 12Page 13 · Read text
SETTING THE FILM SPEED


Setting the film speed                         The speed of your film can be found on the film box
Lift up the rim of the shutter-speed dial (2) and   or the instructions cominq with  it.
turn it until the desired ISO number appears in the
window of the ISO displav.
View original page 13
Page 15 · Read text
Setting the aperture                           r To activate the metering system, lightly depress
                                                           the shutter release (4). Should the display <+ warnt Turn the aperture ring until the lens index  is
  opposite the desired f-stop.                        against overexposure,  turn the shutter-speed
r The proper aperture is a function of subject       dial towards a faster shutter soeed. lf -> warns
  brightness, the desired depth of field and the     against underexposure, turn the shutter-speed
  speed of your film.                                          dial towards a slower shutter speed. Then use
                                              the apefture ring to balance the setting  until
                               O is displayed.

                                                Note:
                                                 Proper metering is impossible beyond the limits of
                                                     the metering range (EV 1 to EV 19).


                                                              ;,';,,::i1,1,;:,i;,,:1;:,,,;1:,,''r:ii:;a,?:i:,i:t,,lt,,l:'1,,,:iUi;,,1;1*ii;:,,,1,:i:l;;il:#$T$iiiriili;il$i1*:#$$$jEi*Fi$ili;$m##$
View original page 15Page 16 · Read text
www.butkus.usSELECTING THE BRIGHT-LINE FRAME


Selecting the bright-line frame                                             50 mm
Set the focal length of your lens with the aid of
the selector lever (10).
A matching bright-line frame will appear in the
viewfinder. Parallax will be corrected automaticallv
to suit your lens.
                                                                      BO mm
View original page 16Page 17 · Read text
FOCUSING
Focusing
Your Rollei 35 RF has a highly precise coincidence-            focusing field blurred
type rangefinder  for pin-point focusing. The brilliant
focusing area is in the center of the viewfinder.
As long as the lens is not focused on your subject,
this will appear with double contours  in the focusing
area. Turn the focusing ring until only one sharp
image remains. Your lens is now focused on
vour subiect.


                                                             focusing field sharp
View original page 17Page 18 · Read text
www.butkus.us
 HOLDING YOUR CAMERA PROPERLY
Holding your camera properly              To ffi+Mshoot in vertical format, turn the camera
Wrap your right hand around the camera body   through 90'.
so that your index finger rests comfortably on the
shutter release, your thumb inserted between the
camera body and the wind lever. Hold the camera
with your left hand so that your left thumb and index
finger can turn the focusing ring of the lens.


 3B
View original page 18
Page 19 · Read text
REWINDING THE FILM


Rewinding the film                         When there is a noticeable drop in tension, make
I Oncethe lastframe of yourfilm has been exposed,      a few additional turns to be sure that all of the film
  the latter cannot be wound any further and will     has been rewound into the cartridge.
  have to be rewound into its cartridge.             Open the camera back and remove the cadridge,
) Press the rewind release button (29) in the      taking care to avoid direct sunlight.
  bottom plate of the camera to disengage the
  sprocket wheel.
r Swing out the rewind crank  (1 2) and rewind the
   film in the direction of the arrow.
View original page 19
Page 20 · Read text
www.butkus.us


Bulb setting (B)                                  Sincethe metering system is activewhilethe  shutter
With the shutter-speed dial (2) set to ,,B", the shutter   release is being depressed,  it is advisableto remove
will remain open for as long as you keep the   the batteries from the camera if you are planning
shutter release fully depressed.  lt is thus possible   to make very long exposures.
to attain long or very long exposures. However,
be sure to use a tripod and a cable release to
avoid camera shake.
View original page 20
Page 21 · Read text
FLASH PHOTOGRAPHY


Flash photography                            r Select the f-stop to be set according to  tne
                                                                                                                                                                                                                                 it ont All commercial flash units can be used on your      instructions of your flash unit and set
   Rollei 35 RF. They can be synchronized via the     the lens.
  X contact in the hot shoe (9). Studio flash units
  or other flash units can be triggered via the
  PC terminal (17).
r Set the shutter-speed  dial (2) to the sync speed
  (1/125 s) engraved in red. Faster speeds cannot
  be used!
View original page 21Page 22 · Read text
www.butkus.us
       Your camera is a precision instrument and      r Nevertrytoclean adirtyfrontlens bybreathing on
        deserves careful treatment.                                                       it or using a silicon cloth. This would unavoidably
          1. Cleaning the camera body                           result in scratches.
                                                      r Clean the viewfinder in the same wav as the         I Never use organic solvents, such as thinner                                                              lens. Dust and smudges on the viewfinder            or alcohol!
         I Use a soft, fluffless cloth to clean the camera    window will degrade the clearness of your                                                              vieMinder image.           body.
        r Dust accumulating  in the film compartment may                                                      Optional accessories           scratch your film. To avoid this, clean the interior
            of the camera with a blower brush.                  Rollei QW 35 Rapid Manual Wind, recommended
                                                                         for shooting fast-breaking action.
          2. Cleaning glass surfaces
         I Scratches on the front lens will degrade image
           sharpness.  lf your pictures seem low in contrast
         and slightly blurred, scratches on the lens may
         be the cause.  lt is therefore recommended  that
         you regularly clean the front lens as described
            below.
fiil       ) Remove dust with the aid of a blower brush.         t To remove obstinate marks, carefully wipe the lens
                 in circles from the center outwards using cleaning
            tissue moistened with cleanino fluid.
View original page 22Page 23 · Read text
Camera type: 35mm rangefinder camera with   Film advance: By full stroke or several partial
die-cast aluminum body, focal-plane shutter and   strokes of wind lever; double-exposure  lock; Rollei
TTL metering                     QW 35 Rapid ManualWind (optional accessory)
Film type:                                   Film rewind: By folding crank; rewind release
Size 135, negative size 24 mm x 36 mm            button in bottom olate
Lens mount: M-type bayonet                 Frame counter: Additive (even without film); resets
shutter: Verticat-traver raminar metat rocar-prane FilH{;::3 [ru.:i3&i:f,":"','""Jr"ff1u"shutter, 1 - 1/2OOOs plus B (bulb)
                                  Power supply: Two 1.5V batteries (LR44 orFocusing: Coincidence-type  rangefinder                                              SR44)
Exposure-metering display: LED light balance Dimensions (mm):
Metering range:                                 135.5 (w) x 81 .O (h) x 33.5 (d)
EV 1 - 19 (lSO 1OO/21', f/1 .4, 1 s - f/16, 1/2000 s)  Weight 440 g (body without batteries)
Metering mode: Center-weighted TTL average
metering
Flash synchronization: X-contact, sync speed
1/125 s or slower


                                                   Subject to change without notice,
                                                            .q{ffilwgw
View original page 23Related documents and language editions
From the M. Butkus archive. Original publisher and archive notices are retained.
Check the model and edition against your equipment.
PDF verified 2026-10-10.