Film cameras
Rolleiflex SLX User manual
User manual for Rolleiflex SLX. 43 pages in English. Read the original PDF, download or print a copy without registration.
43 pagesEnglish7.2 MB PDF
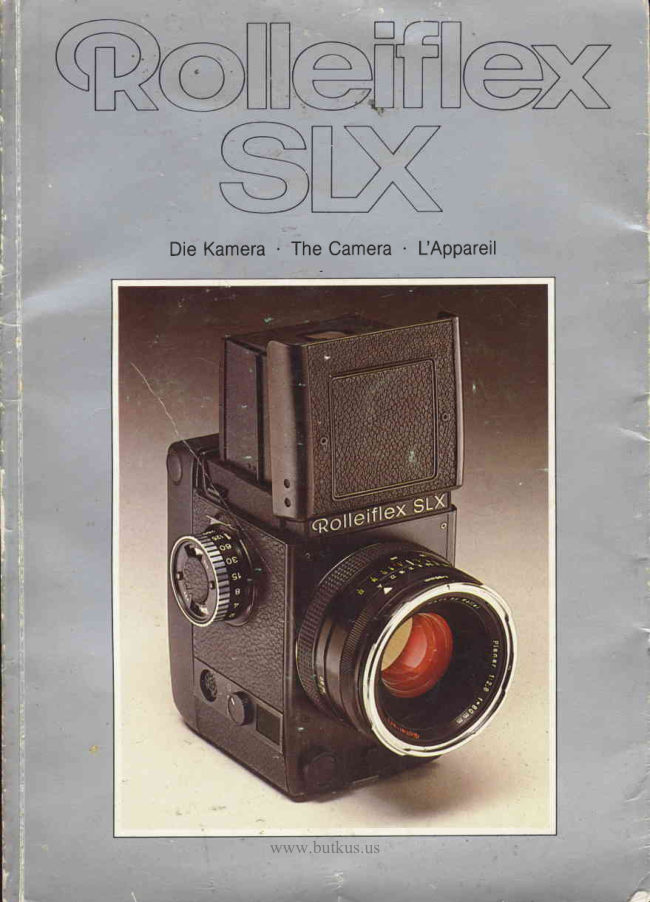
Loading your manual…Open PDF directly
Document details
- Brand
- Rollei
- Model / document
- Rolleiflex SLX
- Document type
- User manual
- Language
- English
- Pages
- 43
- File size
- 7.2 MB
- Category
- Film cameras
- Document date
- Not specified in catalog
Search available document text
Find a term, then jump to its page in the original PDF. Image-only pages may not be searchable; check the PDF for exact wording and diagrams.
Page 3 · Read text
Digitally signed by mike butkus
                             DN: cn=mike butkus,
                              o=orphancameras, ou=29,mike butkus email=mike@butkus.org, c=US
                                  Date: 2020.01.27 19:06:51 -05'00'
View original page 3Page 4 · Read text
I

 Individual  parts and  functions

  1  Interchangeablelens                    31  Red LED for overexposureindication
  2  Needlefor automaticexposurecontrol       32  Interchangeableviewingmagnifier
  3  Needlefieldfor automaticexposurecontrol    33  Flapfor framefinderf : 80 mm
      or red fieldfor manualaperturesetting       34  Unlockingbuttonfor foldingframe
  4  Indexfor automaticexposurecontroland      35  Red LED for checkingbatteryvoltage
     manualaperturesetting                  36  Mountfor additionalframefinderf : 150,
  5  Settingring for automaticexposurecontrol        250 and 350 mm
     and manualaperturesetting               37  Framefor focusingscreen
  6  Doublebayonetlens mountfor filterand      38  Pivotedmirror
     lens hood or combinedbellowsand copying   39  Red indexon camerabayonetmount
     attachment                            40  Contactstrip on camera body
  7  Releasebutton,l. h.
  8  Lens releaseslide                      41  Fuse
  9  Thread for cable release                  42  Distanceindex
 10  Screw cap for cable releasesocket          43  Depthof field scale
                                          44  Aperturescale
 11  Releasebutton,r. h.
 12 Camerabayonetmount
 13  Meterkey for apertureindication,
      depth-of-fieldpreviewand checking
      batteryvoltage
 1 4  Centralswitch for continousexposure
        - singleexposure-  off : C-S-O
 1 5  Holderfor cattyingstrap,r. h.
 1 6  Indexfor shutterspeed,also red mark for
      indicationof exposurelimitvalue
 1 7  Universalplug connectionfor external
      controland auxiliaryequipment
 1 8  Settingdialforfilmspeed
 1 9 Releasebuttonfor focusinghood,
     magnifyinghood or prismfinder
 20  Protectivecap for plug connection

 21  Emptyspool
 22  Unlockingbuttonfor back hinge
 23  Filmgauge
 24  Film pressureplate
 25  Unlockingbuttonfor back,r. h.
 26 Windowfor film type indication
 27  Filmtransportsprocket
 28  Symbolfor film motion
 29  Foldingfocusinghood cover
 30 Red LED for underexposureindication


 40                       www.butkus.us

.*frLffi.$#:,                                                      ri*!M    .,M
View original page 4Page 6 · Read text
Individual  parts and functions

45 Peep-sightfor framefinder                71  Slidefor replacementfuse
46 Unlockingbuttonfor cameraback,l. h.        72  Clip for batteryplug-inunit
47  Rotaryknob for tilml2O/220               73  Batteryplug-inunit,externallyrechargeable
48  lndex for tilm 12O/22O                   74  Replacementfuse
49 Framecounter                         75  Center X synchronizationcontact
50 Interchangeableback                    76  Hot shoe for flash unit or accessories
                                        77  Holderfor carryingstrap,l. h.
51  Slot for film box tear-off strip               78  Focusingscreen
52 Springclipfor spindleof filmspool          79  Mountfor viewingmagnifier
53  lndexfor arrowmark on film leader          80  Detachablefocusinghood
54  Filmcartridge
55 Bearingfor film spool with symbol FC
56  Rotaryknob for shutterspeed
57 Bearingfor emptyspoolwithsymboll-l
58 Cameraback hinge
59 Releasebuttonfor synchronizationcord
    withRolleiplug
60 3/e"tripodbush
61  1/r"tripodbush
62  Batterycompartment
63 Rapidtripodcoupling
64 Lens contactstrip
65 Focusingringwith distancein m and ft
66 Lockingbuttonfor aperturesettingring
67 Lens bayonetmountfor cameraconnection
68 Red mark on lens bayonetmount
69 X synchronizationcord contactfor standard
   and Rolleiplugs
70  Protectivecap for synchronizationcord
    contact


                                                                   J"l*i:A:*{ji        ,                      -.{-*€.r    .,..'$ffi;                                                                      'l"l  :   rl,
View original page 6Page 7 · Read text
lntroduction

With the RolleiflexSLX, the mediumformat       The alphabeticalindexmakesallthe information
photographeris equippedwith a high-perfor-      containedin the instructionseasilyaccessible.
mancecamera,fullyelectronicand capableof
takinga wide rangeof auxiliaryequipment,with     For interchangeablecomponentsand acces-
many new featuresand the latestphotographic    soriesof the SLX systemseparateinstructions
innovations:the accurateand convenient         are provided- they are all includedin the "SLX
mediumformat system camerato meet every      SystemCatalog"accompanyingthe camera,or
demand.                                      else availableon request.

To take full advantageof the camera'scapa-      Due to the almosttotal automationof the camera
bilities,some specifictechnicalknowledgeof the    and the logicalarrangementof the controls,the
SLX is necessary,alongwith the basictheo-       user will soon be familiarwith the use of the
reticalknowledgeneededto use any camera.       RolleiflexSLX. However,we recommendread-
We can safelyassumethat SLX ownersalready    ing these instructionscarefullybeforeusingthe
knowthe theory - thereforethis book is in-       camerafor the firsttime;we also recommend                                                                                                                                                                                                                                             'tendedto providethe specificfacts neededto       carryingout each of the variousoperationswhile
use the cameracorrectly.                       reading,so that the camerais usedcorrectly
                                            from the start.
First,allthe individualpartsand functionsare
shown,and followedby a briefintroductionfor
the readerwho is in a hurry.

Subsequently,everythingthat it is importantto
know aboutthe SLX camerais describedand                                                                                               *illustratedin greaterdetail,from the assemblyof   We send our best regardsto all RolleiflexSLX
the basiccomponentsof the camerato the        ownersand wish them successand continued
removalof the exposedfilm.                   enjoymentof mediumformatphotography.

There then follows a number of practicaltips,       Rollei-Werke
with additionalinformationfor betterunder-        Franke & Heidecke
standingof the camera,supplementedby notes
for specialsituations.

In the eventof problemsoccurringin operation
 - as happeneven to the experiencedphoto-
grapherwhen takingpicturesquicklyor after
long intervalsbetweenpictures- a problem
locationtablewill helpto find the possiblecause
and its solution.

lndividualpart numbersgiven in the text and
picturesalways refer to the same part and are
takenfrom the two picturegatefolds,whichare
best left unfoldedwhen readingthe instructions.


42                      www.butkus.us


                                              ;r*i,*M*i*L;;-r'                                                     ,, r;i*i*A*-'rr   ."r.  ''       l+,@
View original page 7Page 8 · Read text
Essential  information   in brief

Briefinformationin telegramstylefor readersin
a hurry:The most importantcontrolsand ope-
rationsfor gettingto know the cameraand its
functions.

Chargingthe battery

Setthe chargerto the propervoltageand con-
nectto the mains-+ fig. C. Pushup clip72,
removebattery73 and insertin the chargerin
thepositionshowh--+fig. D. Chargingtime:
10minutesminimum,normallyt hour,max.
3 hours.Pushthe chargedbatteryintothe
camerawith the clip facingdownwardand
engagethe clip.

Insertingthe lens

Pressslide8 upward,disengagelenscaps by
turningin counter-clockwisedirection.Insert
lens1 in the camerawith red mark 68 on red
index39 as far as it will go and engageby
turningin a clockwisedirectioo+  fig. E.


                                                                            43
View original page 8Page 9 · Read text
Essential information  in brief

Loading the film

Pressunlockingbuttons25 and 46, open camera
back 50 and removefilm cartridge54 --->fig. F.
Pullout red clip 52, insertfilm spoolaccording
to symbol28+  fig. G. Threadpaperleaderin
empty spool and wind on untilthe arrow mark
pointsto the white index53 +  fig. H. Insertend
of film box in slot 52 (on the film spoolside).
Positionfilm cartridgeonto rear of camera:with
film spool on Fl and with empty spool on H.
Close and lock camera back.

With knob 47, seI frame counter 49 to 120 or 220
accordingto the type of film--+fig. J. Set dial 18
to the ASA/DINvalueused.Set centralswitch14
to ,'S...Pressreleasebutton8 or 1 1: the film
advancesto the first frame,the frame counter
shows       lf     is not visible,pressthe release       "1 ".  "1 "
buttononce more.


44
                         www.butkus.us
View original page 9Page 10 · Read text
Essential information  in brief

Focusing                                   Selectionof shutter sPeed
Raisefocusinghood 80, pressin flap 33 until      Setshutterspeedvaluewithrotaryknob56 on
viewingmagnifierswingsupward--+fig. K.         index16+  fig.L. Intermediatevaluescannotbe
Focusby turningfocusingring 65.               used.lf thisindexchangesfromwhiteto red,the
                                             shutterspeedselectedliesoutsideof the auto-
                                                                                 -                                                          selectanothershutterspeedwithFramefinderfor sightingat eye-level:Press       maticrange
downflap 33 untilit engagesin place,then view    a whiteindexindication.
throughpeep-sight45 (focusingin this position
cannotbe monitoredon the focusingscreen).


                                                                             45
View original page 10Page 11 · Read text
Essential  information   in brief

Exposure measurement

Pressin lockingbutton66, set index4 on the
lensto ,,A..- automaticexposure+  fig. M.
Pressmeterkey 13, needle2 pointsto aperture
automaticallyset. Warningsignalsin viewfinder
+  fig N: red signal30 bottomright - dangerof
underexposure,red signal31 top right- danger
of overexposure,both red signalssimultaneously
 : rTleosuringrangeexceeded,red signal35 top
centre - rechdrgebattery*.

Adjustthe exposuretime with the rotarybutton
56 untilbothred signals30 and 31 go out.


* Batteryvoltagewill,however,be sufficientat
leastto completethe film loaded


                          www.butkus.us
View original page 11Page 12 · Read text
Essential  information   in brief

Mirrorpre-release                             Shutter release

canbe activatedas required.Connectspecial      For singleexposures*:centralswitchon ,,S..,
release81 to plugconnection17 -+ fig. O.           brieflypressshutterrelease;for continuous
Determinethe aperturevaluewith the meterkey    exposures*:centralswitchon ,,C..,keep shutter
as describedabove.Then switchoff automatic     releasepresseddown for requirednumberof
exposurecontrol:unlockaperturesettingring5     exposures-> fig. Q. Centralswitchon ,0":
by pressingred lockingbutton66 -+ fig. P. Set     powersupplyis disconnectedand shutterre-
previouslymeteredaperturemanuallv.Move       lease locked.Releaseshuttereitherwith left or
orange-colouredslide82 on the specialrelease     righthand shutterreleaseon cameraor with
outwards.                                  standardwire releasein thread9, or elsewith
                                             specialreleasein plugconnection17.
Note:Mirrorpre-releasecannotbe resetand
mustbe followedby releasingthe shuttereach
time.Pressingthe meterkey when the mirror
hasbeen pre-releasedwill not producea usable
apertureindication,as therewill be no light
metering.


                                        *S -singleexposures,
                                  C - continuousexposures
View original page 12Page 13 · Read text
Essential  information   in brief

                                            Closing the focusing hood

                                                   Lightlypressin both side sectionsof the focusing
                                       hood and allowflap 33 to springup +  fig. S.
                                            Fold down focusinghood cover29 with viewing
                                             magnifierflat againstfrontflap. Pressin side
                                             sectionsand allowfocusinghoodto compress.


Reading the frame counter

Frames1 to 12 or 1 to 24 are indicatedin frame
counter49, dependingon the type of film used
and whetherthe camerahas been set for +  fig.
R. Reading,'Q" - ho film loadedor film not yet
rolledin;    wedg@<<_ film not advancedto        "white
frame 1; 'red field" - film end, or film already
rolledup.


                                      Removingthe film

                                                  After the last exposure,the film is automatically
                                                    rolledup. The cameraback can then be opened
                                        and the film removedfrom the cartridge.


                                      Theseand all the otherfunctionsare described
                                                       in greaterdetailon the followingpages.You will
                                                     find some practicaltips on page 64. The tableon
                                       page74will help remedyany operational
                                           problems.

48                       www.butkus.us
View original page 13Page 14 · Read text
Handling and use

Preparingthe camera for use

Insertthe lens:turn rear and front protectivelens
capscounter-clockwiseand remove.Pressup
slide8 and disengageprotectivebody cover by
turningin a counter-clockwisedirection.Insert
lens1 with red mark68 on red index39 in        The camerais suppliedin a specialpackagein
camerabayonetmountuntilits stop and turn in     whichall the basiccomponentsare securely
a clockwisedirectionuntilthe lens locksin        accommodated.We recommendthat you keep
place+fig.1.                                      this packagefor use when shippingthe camera.
                                     The serialnumbers*of the cameraand lenses
                                          shouldbe notedas a precaution.They will help
                                                       in replacementand as evidenceof ownershipin
                                        case of loss.


lnsertbattery:slidebattery73 with clip72 facing
downwardinto batterycompartment62 and
pressretainlngcliptighttowardscamero,+ fig.2.

Openfocusinghood:Pulltop sectionupward
untilvertical.Pressfrontfocusinghoodflap 33
slightlyinwarduntilcover29 with viewing
magnifier32 springsup -+ fig. 3.
                                                            *                                         on camerabase or lens mount
View original page 14Page 15 · Read text
Handling and use

Checkingthe power supply

Switchon automaticexposurecontrol:pressin
red lockingbutton66 on the undersideof lens
and set whiteindex4 to ,,A.._+ fig. 4. Set central
switch14to ',$.. : singleexposure.Pressin
meterkey 13 and observethe viewingimage      Charging the battery
+  fig.5. lf diode35 does not lightup and an
apertureindication(setwith an audibleclick)is      Set voltageselector83 on the charger84
shownon the lens,then the batteryhas sufficient   suppliedto the availablemainsvoltageusinga
voltage;if diode35 lightsup red,the batteryhas    pointedobject(e.g. ball-pointpen)+  fig.6. Fit
onlyenoughvoltageleft for a few picturesand      connectingcord 85 in socket86 and connectto
mustsoon be recharged;if the dioderemains     mainssupply.
unlitwith no apertureindication,the batteryis
totallydischargedand must be recharged
immediately.

Foreverylight-meteringoperationand exposure,
the cameraelectronicscarryout an automatic
voltagecontrol.They registera criticalor in-
sufficientbatteryvoltagethroughcorresponding
signalsin the vieMinderand will finallyswitch
off the cameraif the availablevoltageis no
longersutficientfor an exposureand film
transportcycle.


50                       www.butkus.us
View original page 15
Page 16 · Read text
Handling and use

                                     The rapidchargerautomaticallycontrolsthe
                                        wholechargingprocess,whichconsistsof a
                                          continuousnormalchargeand an additional
                                              rapidcharge,dependingon the specificcharge
                                       and temperatureof the battery.Two indicator
                                                    lightson the chargershowthe type of charge:
                                          green :  florrTlalcharge,red :  rapidcharge.The
                                                     totalchargingtime dependson the specific
                                               conditionof the battery(numberof exposures
                                      made,self-discharge)and amountsto about
                                                                                    t hourafternormaldischarge.After10-15 min.
                                           chargingtime,there is sufficientpowerfor about
                                       100 exposures.When the red indicatorlighton
                                             the chargergoes out,the rapidchargeis com-
                                               pleted.The chargingcapacitythus obtainedis
                                                   sufficientfor up to 1 ,000photographsat tempe-
                                              raturesaround68" F (20'C).
Pressup retainingclip72 and therebyremove
battery73 from the camerabodl --->tig.7 . Insert
batteryin chargeraligningbatterycontact
socketson contactpins in the charger.


                                 When rapidchargingis discontinued,normal
                                           chargingstillcontinues,and the batteryis
                                         chargedto maximumcapacityafter a total
                                           chargingtime of approximately3 hours.Occa-
                                               sionalexceedingof this chargingtime by a few
                                          hourswill not harmthe battery,but frequent
                                          overchargingshouldbe avoided.

                                     The ambienttemperatureduringrapidcharging
                                         shouldbe between40'F (+5"C) and about95"F
                                            (+35"C). lf the batteryhas becomevery hot
                                           throughexternalinfluences,rapidcharging
A constantpower reserveis particularlyim-        (delayedby the built-intemperaturecut-off)will
portantwiththis fullyelectroniccamerasince       only beginwhen the batteryhas cooleddown
lightmetering,exposureand film transport          sufficiently.
cannotbe controlledmanually.However,due to
theveryshortchargingtime and the easilyex-
changeablebattery,the powersupplyrequires
onlyminimalmaintenance.


                                                                        51
View original page 16Page 17 · Read text
Handling  and use

 Loading the film cartridge                  The camerais suppliedwith one film cartridge.
                                            For efficientoperationduringa shootingsession,
 Pressin releasebuttons25 and 46, open                   it is advisableto use severalfilm cartridges.
cameraback 50 and removefilm cartridge54.     They can be loadedin advancewith the film
 Pull red clip 52 outwards,insert'filmspool as        requiredand taken along conveniently.The film
shownby symbol28 (blackleaderside inward)     cartridgehas clear markingsfor the film motion
and allowclip to re-engage-+ fig. 8. Thread       and for the film leaderposition.The retaining
 film leaderinto empty spool21 and wind on          slot on the film spoolside holdsthe end of the
 tightlywith transportsprocketwheel27 untilthe      film box which allowsthe type of film used to be
arrow mark on the protectivepaper pointsto       checkedwhen the cameraback is closed.The
index53 +  fig. 9. lnsertthe end of the film box     same film cartridgecan be used for 120 and 220
 in slot 51 (on film spool side) as indicationof the      film.
filmtype+  fig. 10.


52                        www.butkus.us
View original page 17Page 18 · Read text
Handling  and use

   Insertingthe film cartridge

  Openthe cameraback as describedand insert
  the loadedcartridgeso that the full film spool
   pointsat symbolFl, the empty spool at symbol
  H +  fig. 11. Closethe cameraback and lock.
  Setthe centralswitchto S, brieflypress release     Setting the film speed
  button7 or 11: the film advancesautomatically
   to the shootingposition,and €l "1 " appearsin       Set film dial 18 to the ASA/DIN value used or re-
  framecounter49.                              quiredin each situation+  fig. 12. Intermediate
                                                  positionsare not permissibleas lightmetering
                                           would not then functioncorrectly.

                                        The film speedcan be set tor 25 ASA/15 DIN to
                                         6400 ASA/39 DlN, which coversnearlyall the
                                                       film emulsionscurrentlyavailable.The click
                                               stops can be felt quite distinctlyand thus enable
                                                 the value initiallyset to be alteredeasilyand
                                                 withoutlookingif bracketingis required.


   Hint:Pressreleasebuttonagain if the ,,1" is not
   visible(whichcan happendependingon the
   typeor brandof film).

  Toprotectagainstdust and possiblefogging,
   keepthe cartridgesin their cases and only take
  themout when you need them.


I                                                                             53
i


  t
View original page 18Page 19 · Read text
Handling and use

Setting the film length                       Focusing

Set index48 by turningrotaryknob47 counter-    Openfocusinghood,fold up viewingmagnifier
clockwisethrough45" for 120 film or through      as required.Adjustsharpnessof imageby turn-
45'clockwisein the case of 220 film+  fig. 13.      ing focusring65. The measureddistancein ft
                                                    (or meters)can be readon index42 +  fig. 14.
Withthe standardcameraback,either120 roll     Determinethe depthof fieldas requiredon the
film for 12 shots or 22Oroll film for 24 shots in      greendoublescale43 on both sidesof the
6 x 6 cm (21/+x21/qin) formatcan be used.Other    focusingindex.For photographson infraredfilm,
formatsrequirespecialinterchangeablecamera     set the distanceread off on the red index.All
backs.                              SLX lensesare focusedwith the aperturefully
                                        opened.

                                      The standardfocusingscreenoffersthree dif-
                                                ferentfocusingaids:the centralsplit-image
                                              rangefinder,the microprismringand the prism-
                                        shapedfocusingscreenitself.

                                              This standardfocusingscreenis idealfor most
                                                applications-  for specialphotographsthere are
                                                     five furtherinterchangeablefocusingscreens.


Attaching the camera strap

Connectself-lockingcarryinghooksto holders
15 and 77 andallowto snap shut.To releasethe
strap,press in the lockingbuttonson the carry-
ing hooks.

The carryingstrap holderson the camerarotate
in any directionand enablethe SLX to be carried
in a varietyof differentpositions.


                         www.butkus.us
View original page 19Page 20 · Read text
Handling and use

Framing

Thequadraticgrid of the standardfocusing
screenassistsin the verticalor horizontalalign-
mentof the camera.The linesare 9.5 mm apart;
smallerframedviewscan be establishedin
4.5x6cm verticalor horizontalformatand also      Selection of shutter speed
in4x4cm formatthroughlineintersectionpoints.
Interchangeablelensesexpandor narrowdown    The fast speedsof 1lzto 1/soosec are marked
theframedview (fromthe same cameraposition)   on the rotaryknob in white,the slow speedsof
andare availablein variousfocal lengths.        30 to 1 sec and B are markedin green+  fig. 16.
                                            Intermediatevaluescannotbe used;the "B..
Foreye levelviewing:Pressthe frontfocusing      settingcan only be usedwith manualaperture
hoodflap 33 completelyin untilit clicksin place,     setting.
thenviewthroughpeepsight45 --->fig. 15.


As an alternativeto the standardfoldingfocusing
hood,thereis a rigidmagnifyinghoodand
rotableprismfinderswith 45" of 90" view.
View original page 20Page 21 · Read text
Handling  and use

 The cameraregistersthe limitsof the light-
 measuringrangeand of the automaticoperation
 rangewith correspondingwarningindicators.A
 practicalresultcan most easilybe achievedif
 the presettime lies approximatelyin the centre
 of these rangesso that adjustmentscan still be
 madefor higheror slowerspeeds+  tip 18.        Exposure measurement

 Example:When using400 ASA/27DIN film out-    Pressin red lockingbutton66 on the lens,set
 doorsin relativelybrightexposurelight,llsoor       index4 on aperturering to A - automaticex-
 l/rs sec shouldnot be preset,but rather1lrzsor     posurecontrol(lightmeteringis possibleonly
 1/zso Sec.                                       with this setting)+  tig. 17.
                                             Set centralswitch 14 to S (or to C for con-
On the otherhand,when using100 ASA/21 DIN    tinuousexposures).Pressmeterkey 13, needle
 film for interiorshotswith the ,,availablelight",      2 pointsto aperturevalue measuredand set.
 1/goor 1/oosec shouldbe preset,and not 1/rzsor     Look for any warningsignalsin the viewfinder
 1/zso Sec.                                        -+ fig. 18: LowerLED 30 : lensaperturecannot
                                         be openedany further(dangerof under-
When usingautomaticexposurecontrol:          exposure);upperLED 31 - lenscannotbe
                                          stoppeddown any further(dangerof over-
Set selectedshutterspeedto index 16 with        exposure);both LED'ssimultaneously-
rotaryknob 56. lf a red fieldthen appearsin this    measuringrangelimitsare exceeded.
index,the selectedspeed exceedsthe ope-
rationalrangeof the automaticexposurecontrol.
Alterthe shutterspeed untilthe red field dis-
appearsagain.The finalshutterspeedis then
obtainedby lightmetering.

For manualaperturesetting:

In this case,the shutterspeedcorrespondingto
the preselectedaperturevalue is determined
eitherwith a separatehand-heldexposure
meteror by the camerameteringsystemwith
the automaticexposurecontrolbrieflyswitched
on for this purpose(withappropriateconversion)
as describedunder               "Exposuremeasurement".


56                        www.butkus.us
View original page 21Page 22 · Read text
Handling  and use

                                                 Afterthis adjustmenthas been made,the pre-
                                             selectedshutterspeed and the set aperturelie
                                                 withinboth the automaticand the measuring
                                         rangeof the camera:with this speed and the
                                           correspondingapertureautomaticallyset, the
                                                 resultingphotographwill be correctlyexposed.

                                          With an unsuitablefilm speed,very weak or
                                           extremelybrightshootinglightmay resultin the
                                                shutterspeed adjustmentbeinginadequateto
                                       matchwith the exposurewarningindications.
                                              Tip 18 gives appropriatesuggestionsfor that
                                             kind of situation.


                                          Extraneouslight compensation

                                         Extraneouslightenteringthroughthe open
                                             focusinghood is taken into considerationin the
                                           meteringprocessand compensatedfor up to an
                                                   intensityratioof extraneouslightto measure-
                                      ment lightof approx.20 to 1 . This compensation
                                                            is effectivewhen observingthe viewfinderimage
                                          throughthe pentaprismfinder,with the rigid
                                           magnifyinghood or with the standardfolding
                                      hoodwith a raisedviewingmagnifier.

                                                                                 lf the imageis observedthroughthe folding
                                      hoodwithoutthe viewingmagnifier,then direct
                                            incidenceof lighton the focusingscreen(e.g.
                                               sunlightand artificiallightsources,particularly
                                               fluorescentlamps)must be avoided.

                                          For longtimeexposures,the foldinghoodshould
lf the upperor lowerLED lightsup, the pre-        be closed.
selectedshutterspeed is alteredby turningknob
56in the directionof the glowingdiodeuntilthis
diodegoes out.

lf bothdiodeslightup simultaneously,then the
shutterspeed must likewisebe readjusteduntil
thediodesremainunlit(andthe red fieldin the
rotaryknob disappearsagain).


                                                                           57
View original page 22Page 23 · Read text
Handling and use

 Mirror pre-release

 Forvibration-freeexposure,especiallywhen
 usinglongfocallengthsor when takingclose-
 ups: removeprotectivecap 20, connectspecial
 releasesuppliedto plug connection17 (thedot
 abovethe connectionsocketindicatesthe plug
 connectionposition).Measurethe exposureas
 describedabove,then switchoff the automatic
 exposurecontroland set the measuredaperture
 manuallv.Finallymovethe orangeslidemarked
Aoutwards.

 Pleasenote:Lightmeasurementwith a pre-
 releasedmirrorwill not producean accurate
 apertureindication,sincethe measuringcells
 are attachedto the pivotedmirrorand are un-
 ableto receiveany measuringlightwhen this is
 in the raisedposition.lt is also importantto note
 that the mirrorpre-releasecannotbe resetand
 that subsequentshutterreleaseis always
 necessary.


 Releaseand exposure

 With camerarelease:pressrelease8 or 11 as
 desired.

 With specialrelease:removeprotectivecap 20,
 connectspecialrelease81 to plugconnection
 17 --->fig. 19. Pressgreenbutton87 marked
 with6.

 With mechanicalcablerelease:unscrewscrew      After release,the exposuretakes placeat the
 cap 10 belowlensby turningit counter-clockwise.  preselectedspeed and with the appropriate
 Screwstandardmechanicalreleaseinto thread     aperturebeing measuredand adjustedat the
 9 -> tig.2O.                           momentof release.This is followedby auto-
                                            maticfilm advance,and then the camerais
                                           immediatelyreadyfor furtheruse.


 58                       www.butkus.us
View original page 23Related documents and language editions
From the M. Butkus archive. Original publisher and archive notices are retained.
Check the model and edition against your equipment.
PDF verified 2026-10-10.