Film cameras
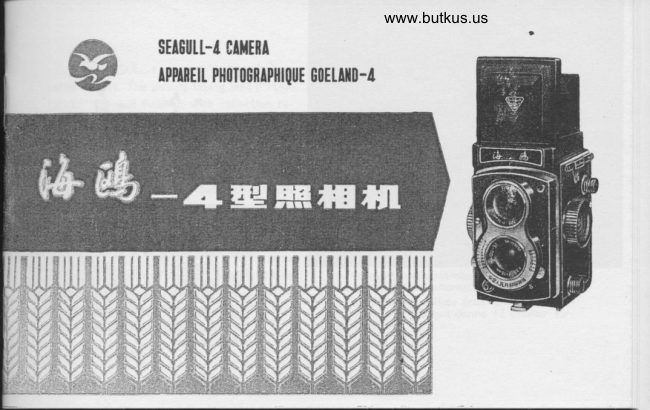
Seagull-4 User manual
User manual for Seagull-4. 26 pages in English. Read the original PDF, download or print a copy without registration.
26 pagesEnglish5.2 MB PDF
Loading your manual…Open PDF directly
Document details
- Brand
- Seagull
- Model / document
- Seagull-4
- Document type
- User manual
- Language
- English
- Pages
- 26
- File size
- 5.2 MB
- Category
- Film cameras
- Document date
- Not specified in catalog
Search available document text
Find a term, then jump to its page in the original PDF. Image-only pages may not be searchable; check the PDF for exact wording and diagrams.
Page 1 · Read text
www.butkus.us
               sErEUt t-[ ctiltnt
                 rpPlREil. P||olo8nml|lol|E 00Euxo-rg
View original page 1Page 4 · Read text
www.butkus.us

   The SEAGULL-4 camera is a twin-lens         Le GOELAND-4 est un aPPareil photo
                                                 Reflex bi-obiectif dont I'objectif photographi-reflex camera. The picture-taking lens ("HAl-     que "HAIOU-31" fait de trois lentilles s6pa-
OU-31" type) is finished with reflection re-      r6es est de l:3,5, l'obiectif viseur de l:2,8
ducing coating, and is featured with a maxi-      et la loneueur focale de 75mm. Les lentilles                                              sont recof.rvertes d'une pellicule les prot6-
mum relative aperture of F l:3.5 and a focal      geant de la r6verb6ration, garantissant  ainsi
length of 75mm. The viewing lens of F l:2.8     une pr6cision excellente.
                                             Le GOELAND-4 est 6guip6 d'un obtura-and f=75mm is also finished with coating                                               teur qui permet d'obtenir des temps,de Pose
to reduce reflection. The between-the-lens         su ivants: la seconde,   I i2,    | ;4,    | ,'8,   | /'l 5,
                                                                                                                                     f ,30, l,:60, lz'125 et l/300 de seconde.shutter provieds the following speeds: l,   I /2,                                      Le GOELAND-4 est 6galement muni 1,,4, l/8,  l,'15, l/zo, li6o, l,'125, l//3oo      d'une prise de d6clenchement souPle, d'un
second and Bulb. The camera is equipped       retardateur, d'une prise flash, d'un compteur
                                                                                      duwith built in self-timer, "X"  flash syn-      d€roulementautomatique,dud'unfilm arr€tet d'uneautomatiquemise au point
chronizer, automatic counter, automatic film       fonctionnant conjointement avec une correc-
stopper, automatic focusing and parallex      tion de parallaxe automatique.                                             La pellicule utilis6e pour le GOELAND-4eliminating device. A roll of 120 film will      est le film no 120 oui donne 12 photos for-
take l2 pictures of 6x5cm.                         inat 6x 6 cm2.

                                3-
View original page 4Page 7 · Read text
DESCR|PI|0IfS 0U HEC[iltstE


                                                                                                                                                  !                   l. Viseur sportif
              7. Bloc viseur
             3. Levier d'armement
             4. Avancement du film
              5. Levier de vitesse
             5. D6clenchement
             7. Retardement
             B. Axe de bobine
             9. Levier de diaphragme
             10. Mise au point
                         I l. Axe de bobine
             12. Fixation de la courroie
             13. Prise de flash
             14. Loupe
             15. Bouton de fermeture
' ,_          15. Couvercle arridre
lr           17. Plaque pression du filmlfl           18. Repdre-film
             19. Dispositif du compteur
            20, Voyant du compteur
            21. Ecrou de tr6pied    q-
View original page 7Page 8 · Read text
IIFtr#www.butkus.us
l. wtr#frxfi ($) effi*Ffita ofr' +tHffiflA' lE
K l Ffmr tTrtr-*"
tr 6!&#H/.T*[. fns&#ffi1fifl(8) , wtftfr+d
E, fr flAlfi +fl&'EF.a|JtrX& E, lfr ft,&# ffi "3 . DJ Ht+u i*Fft#affi HAr*[& #E,H &#ffi]nfl
(11)lF,fi"
24. W&#ftiFRrft B!-jktfi l't[&8effi KH' lEE
Fft tF Xffi' fr +|F:ltE t,, UE+ E =+A##e&W# dt# hffiG), & ffi #ffi tF,Rtm,6E+H W#+&.W#tr
Hl.-uJ.R"
6View original page 8Page 9 · Read text
LOADING                 CHARGEMENT
      l. Turn the locking disk (lS1 in the               l. Tourner le bouton de fermeture (15)
direction "open" as indicated by the arrow      selon le sens de la fldche "OPEN" et ouvrir
(see Fig. l) and open the back cover.                                               le couvercle arridre comme le montre  la    2. Pull out the spring knob (8) and fit
the unsealed film into the lower chamber.       fig. l.
Restore the spring knob to its original posi-           2. Tirer l'axe de bobine (8) et placer la
tion, pressing it against the spool.                   pellicule dans I'emplacement du bas, puis
                                                     like    3, Pull out the spring knob (lf ) in                                                    relacher I'axe pour qu'il fixe la pellicule.manner and fit the bare spool into the uPPer                                                         3. Tirer I'axe de bobine.(ll) et placerchamber.
    4. Slowly pull out the protective paPer     une bobine dans l'emplacement du haut.
of the roll and insert its front end into the          4. D6rouler doucement le papier protec-
wider slot of the bare spool. Press the pro-      teur de la pellicule et I'insdrer dans la fente
tective paper gently with two fingers of your                                                            la plus large de la bobine. Faire tourner lente-left hand (see Fig. 2), while rotating the                                            ment, comme on voit dans la fig.2,le papierwinding knob (4) with your right hand, enab-
                                                                           I'aide du bouton d'avancementling the paper to be rolled smoothly onto      protecteur )
the bare spool.                                     (4) pour le resserrer sur la bobine.
View original page 9Page 10 · Read text
www.butkus.us


    6. tt*ffi#E hffi , # Efi&R#ffi TFRTEJ.FI
          tErr\ffi ikrf WEne+fif, (18) ft, ln K a Ffr 7r.                     O*'    6. €'J'trH, EffiJKFfrTE                         +fifrE'FtrH7f"
       9qfr(16).
                                              (zo) Hv6H     7 . gfrt*#HftJ H *F.r.h., ftrfi+fifr
           il,o Lr.i,ln tr I Fft E, EpqEeffi flR.
   8. *ffifnttFl#htilVrl5trn&fl G) f.dh E
     tt6eX&&tr n &fl ffiffifot.{-tr, t EEEa\
     T_9K"
     e . tfrfrrzlKE  t #*ffift# hfr  , HglF.fr"HE'
    F ,Elnffif.#,ftilLh&# E 0FR*-t4:*F#FIJ
     J'gF&6  ffi tr, t  tri+IT fr tr#.,il u &# "   r0. tAfftrHnt, itfifr(2o) +*+* HdtE,gJoo,
    +. wtt4tr-&#fHtritE+, EBfi66E
                                 -dJ, uFfi r*fr trH, EFEi+ fi H    & tr # trX fr*
         tr. ffi)t+fl*"

8
View original page 10Page 11 · Read text
5. Continue to turn the winding knob          5. Continuer ) tourner et arr€ter lors- until the two arrows on the protective paper     que les deux fldches du papier protecteur
are aligned with the red locating index (18)      atteignent le repBre-film (18). fig. 3.
on the camera, as indicated in Fig. 3.                6. Refermer le couvercle ariidre et re-    6. Close the back cover and- turn the      tourner le bouton de fermeture (15) selon le
 locking disk in the direction "close" to lock      sens de la fldche "CLOSE". Attention  i cethe back coyer. Be sure its bolt is right     que le crochet de fermeture soit entrdin the groove of the camera.               dans la giche.    7. Continue to turn the winding knob          7. Faire avancer le film jusqu'l son arr€t.(4) until the knob stops. The number " l"     Le chiffre I apparait alors dans le voyantappearing in the counter window (20) indic-       (20). La fig. 4 montre I'appareil charg6 etates the first frame (see Fig. a). The camera      pr6t i fonctionner.
 is now ready for taking pictures.                      8. Le film se d6roule avec le mouvement
     8. The winding mechanism of the camera     du d6clencheur (6). ll faut terminer compld-
 is interlocked with the shutter rele?se but-     tement une prise de vue avant de tournerton (6). The winding knob can be turned     au num6ro suivant.
for the next frame only when the exposure           9. Apr€s la l2e exposition,tourner  le bou-
of the previous one has been done.             ton de d6roulement du film iuseu'au moment
    9. When a roll of 12 pictures has been     oU un bruit "ta, 1a,....." se'fait entendre.  lltaken, continue to turn the winding knob       faut tourner encore un peu pour terminer le
until you hear the "clicks" of the gears.      d6roulement du papier protecteur. Ouvrir le
With a few more turns to roll up completely       couvercle arridre et sortir la pellicule.
the protective pap€r, /ou may then open the            10. Le compteur se remet imm6diate-back cover and take out the film.             ment au "0" lorsque s'ouvre le couvercle     10. When the film is completely rolled        arridre. Par consdquent, avant de terminer un
up and the back cover opened, the number       film,  il faut veiller i ce que le couvercle arridrein the counter window will be reset to "0"       soit bien ferm6 pour 6viter toute erreur du
automatically.                                 compteur et d'autres dommages 6ventuels.

                                              9
View original page 11Page 13 · Read text
| . First, push open the d irect view-              l. Ouvrir le bloc viseur (2) comme le
finder frame with your thumb upwards, as     montre la fig. 5.
 indicated in Fig. 5.
    2. Hold the camera with your right
hand and turn the focusing knob (lO) with
your left hand until the image of the object           2. Mettre au point en tournant le bouton
shown on the ground gfass is sharply defined.     de mise au point (10). Choisir une image trds
Then the focusing is done. The frame seen       nette sur l'6cran de verre quadrilld. L'image
on the ground glass corresponds to what       d6finie est exactement celle qui se trouve
will appear on the film.                        dans fe plan focaf du film. fig. 6.

                                                                    tl
View original page 13Page 16 · Read text
9 FF,€ME*ry*E (2) rf , trtrEBFH(T> {TT'f,F|JTf;X&f;,,www.butkus.usffitrAHATE F.4.}.frIfiJtrIf,' IHK>r,"d,* HA3+T"View original page 16Page 17 · Read text
5. When closing the direct viewfinder          5. Remettre en place le viseur sportif(2), press its upper corner downwards as                                                            (l), puis fermer le bloc viseur (2). fig. 9.indicated in Fig. 9.
    5. The indicator of depth of field of          6. Profondeur de champ: ll y a deux gra-
view: the focusing knob (10) is provided                                                 duations sur le levier de mise au point (10).with two scales (see Fig. l0). The outerscale,  i. e. the distance scale (metric)  is     La roue dentale ext6rieure peut €tre tourn6e
rotated by turning the focusing knob. The      avec le levier. Les graduations sur l'6chelle defixed scale in the centre is the diaphragm
factor. The two terminals of the curved      mise au point d6signent les distances en md-
strips, shown alternatively in black and white,      tres. Le chiffre au centre indique le num6reare each provided with a short index linewhich indicates the depth of field of view     du diaphragme. La mise au point d6cid6e, le
obtainable with the diaphragm setting. The      diaphragme ouvert sur le point voulu, la
red arrow in the centre indicates the focus-                                                profondeur de champ sera facilement trouv6e.
ing- distance.   For example: if the red arrow, after      Par exemple, I'objectif 6tant mis au point
focusing, is pointed to 2 meters and a di-         i 2m et le.diaphragme ouvert sur ll, la pro-aphragm setting of F  I I  is selected, thedepth of field of view is about l.7-2.5 me-      fondeur de champ sera approximativement
ters. Any object within this range will be     de 1,7 a 2.5m et le diaphragme ouvert sur
clearly shbwn in the picture. lf a diaphragm     8 donne une profondeur de champ approxi-setting of F 8 is selected, the depth of field                                           mative de 1,8 e 2.4m, Et ainsi de suiteof view is about 1,8-2.4 meters, and so on.
(see Fig. l0)                           comme le montre la fig. 10.
                              -t5-
View original page 17Page 19 · Read text
SETTING OF THE SHUTTER      VITESSE DE L'OBTURATEUR
           SPEED
     Set the index line of the shutter speed          Mettre le levier de vitesse (5) e la vitesse
 adjusting lever (5) to the desired speed value.      voulue sur l'indicateur selon le sens de la
                                                      flEche. Fig.  I l.


SETTING OF THE DIAPHRAGM        DIAPHRAGME IRIS
     Set the index line of the diaphragm set-          Mettre le levier de diaphragme (9) e la
 ting lever (9) to the desired diaphragm value.       position voulue sur l'indicateur selon le sens
                                      de la fldche. Fig.  I l.
View original page 19Page 21 · Read text
FLASH      SYNCHRONISATION DUTHE USE OF THE "X''
     SYNCHRONIZER                FLASH "X''
   The SEAGULL-4 camera is suitable for         Le GOELAND-4 peut €tre utilis6 avec un
"X" flash photography. All speeds may be       flash 6lectronique "X" i toutes les vitesses.used synchronously. When an "M" flash      Pour un flash i lampe "M", n'utiliser que l/30bulbis used, a shutter speed of l/30 sec, or     de seconde ou un temps plus long. Mettre
slovrer should be selected.                          le connecteur dans la prise de flash (13t.
THE USE OF THE SELF.TIMER         RETARDEMENT
    After cocking the shutter, push the self-         Pour utiiiser le retardateur, pousser le
                                                                                  gauchetimer lever (7) in the clockwise direction       fevier de retardement (7) vers la                                                                   Lorsque toutes lesuntil it stops (see Fig. l2). Then press the      jusqu'au bout. Fig. |'2.                                                  autres op6rations sont faites, appuyer sur le
shutter release button (6), and the self-timer      bouton de d6clenchement (6) et le retardateur
will run automatically. The time delay  is      part de lui-m6me.  ll se passe de I e 12
8-12 seconds.                                    secondes entre le d6clenchement et la prise                                        de vue. Mais il faut se rappeler de bien
    Gaution: Never push the self-timer     armer I'appareil.
lever in the counter-clockwise direction         Attention: Ne pas forcer le levier
by hand after it is cocked lest the shut.    de retardement dans le sens opposd de
ter should be damaged.                         la ffEche.

                               -t9-
View original page 21Page 23 · Read text
THE COCKING               ARMEMENT
                                                        Appuyer sur le levier d'armement (3)           OF THE SHUTTER               jusgu'au bout, puis relAcher afin qu'il revien-
                                                                                           L'obturateur est                 Press the cocking lever (3) downwards     ne a sa position initiale.
                                                                                                                                                   13.               until a resistance is felt and then let it re-       ainsi arm6 comme le montre la fig.                                                                                                                                                                            | | faut se rappeler de             turn to its original position (see Fig. l3).         Attention:
                                                                                                     16916          The shutter is now cocked. NOTE: The     n'armer I'appareil qu'aprEs avoir                                                            le levier de vitesses. Sinon, un dommage             shutter should be cocked only after the                                                            serait indvitable. Ne pas armer lorsque             shutter speed has been set, otherwise the
            shutter mechanism would be damaged.       I'on n'utilise pas Itappareil.
            Don't cock the shutter when the camera
               is not in use.                      PROCESSUS ORDINAIRE
                                     D'UNE PRISE DE VUE
                                                                                                     puis 169ler le           TAKING PICTURES                  Charger d'abord I'appareil,                                                                           levier de vitesse, mettre le levier de diaphra-
                 General procedures: Advance the film,     gme ) la position voulue et armer I'appareil.               set the shutter speed and diaphragm, and     Les op6rations qu i viennent aprds sbnt la             cock the shutter. Then do the focusing and      mise au point et la prise de vue.
              framing, and release the shutter.                    Tenir bien I'appareil et lorsque I'objet
            When taking pictures, hold the camera      est vu sur l'6cran d6poli, ou dans le viseur              firmly with your hand, align it with your       sportif, appuyer sur le bouton de d6clenche-
               subject, ?nd Press the shutter release button     ment. Fig. 14. La prise de vue est ainsi I              (6) with your index finger as indicated in       termin6e.
                Fig. 14. Shock or vibration should be avoided          Pour rendre plus pr6cises les photos i           when the shutter is released, otherwise the       tirer,  il faut 6viter toute vibration ) I'appa-"l{            image in the picture may blur. For shutter        reil. L'utilisation d'un t16pied est pr6f6rable
            speeds longer than l/15 second, a tripod      pour une vitesse de l/15 de seconde ou un
             should be used.                            temps plus long.
                                    -21
View original page 23Page 24 · Read text
www.butkus.us
 >=FE=t=rE
r. iEggfi+ 4 4ffifnfnF'lftfltILI66EEi!1#E-9KIR,H}. IF=h*"*7$WJC" {EHF.JEI# riJ/(H)Y,fr,F-Ffai,
  4*#H,fi t/.-L'FWll'itfrX-RW)Y;E-Ffrfr a1-"lb5tJ*tkE)tf!F>F"

                                                                                                                    o                                             + E E f F tE tH                                      7tW)Y,, t ttt&              4 4l FH tE tJ14 U)Efv *2 . H T i6 f4                                            - ft{F f
B. i68fi4 4 4flRfHtllEBH'iF.€frdfr)fFfi#*F,t'r4ffi71 M31x 0.5 EAfi4 a36 4*rl.€=t"
4. ffitHfjlFc-ffiX,tjl. €Ff t6F!,H!ffi&Fffi' EH fiffiffi+E{+EIJitHt€i-t. pti#. FF.,Eifr. f RDJ&m
  trmi*+.
b. tH*EflHfnt/tg*lH)fi*Fh'Z-,+/nffiF;'ffiF++ElJtEtF,FvnAR:*.fi[rE+tEWrW,lLfiffift.+*tyr.
     LffiiJffi *}RA,FH*f  HlHf"tnf..tft *nfi .XE4tft EEiE${,l.FFf EIffi '9'BZ,$dltt+,'t+'Mffi  o
6. f.Etltt7frf.fiqeEff?H?i5r H-iYe+I*tttf                                lnEntTH,&iTEIXF.h*,UFfF.&fFlqiJHH  }                                                "
    fE+Jlfrtt*€'8"


                             -22-
View original page 24Page 25 · Read text
NOTES                     NOTES
                                                    mdcanisme du GOELAND-4 permet      l. The shutter mechanisnn of the SEAGULL-            l. Le4 camera is capable of exposing more than   de pratiquer deux ou plusieurs exPositions sur
once. When a'second exPosure is needed, just    un m6me clich6. En ce cas, r6armer I'obturateur
cock the shutter and press the release button    aprds la premidre exposition et, sans tourneragain after the first exPosure has bben done.      la bobine, proc6der i  la seconde exposition, -    2. Because of the feature mentioned above,    R6p6ter cette op6ration, si c'est pour obtenir
care should be taken to guard against undesir-   un n6gatif plusieurs fois exPos6.
able exposure repetitions, The safest way  is           2.- ll faut se rappeler de passer au clich6
                                                                                                      n6gatifto wind the film immediately after each ex-     suivant, si ce n'est pour obtenir un
                                                              expos6.                                                               fois                                         deuxPOSure. '                                               Le                                                         3.                                                                         filtre et le parasoleil utilis6s pour le    3. The connector size of the filter and lens
shade for the SEAGULL-4 camera is as follows:   GOELAND-4 sont:
M 34x0.5 thread, or d 36mm elastic mounting.     A vis M34x0.5 ou
    4. The SEAGULL-4 camera is a precision     A emboitement diamEtre 35 mm.
 apparatus. Special attention should. be pa.id        4. Le GOELAND-4 est un aPPareil de gran-
                                                                                               avecto keeping  it clean and guarding  it against mois-   de pr6cision.  ll doit €tre utilis6 et rang6
                                                                                                poussidre,ture, vibration, heat and cold.                     soin. ll faut le prot6ger contre la                                                                                                les couPs et la chaleur.    5. Being the most important part of the     I'humidit6, les vibrations,
camera, and of high precision, the lens needs         5. L'objectif est une partie importante de                                                                                                      fautspecial care. Dusting should be done with a    cet appareii. S'il y a de la poussidre, il                                                                                            encimel-hair brush; the.'n rub it  lightly with a   en enlever soigneusement avec une brosse
piece of lens paPer. Don't touch it with your     poils souples, puis essuyer I'objectif avec unfr ngers.                                            papier sp6cial. L'utilisation de l'6ther ou de   -                                                                                                                                les    5. While  it is not in use, the camera should     I'aicool pur est pr6f6rable Pour enlever
be cleaned, put in a dry place and kept sePa-    taches de l'objectif.
rately from the leather cd5s, in order that the        6. ll est r-ecommand6 de ranger I'appareil
lens'may not be affected by mould.              s6par6ment de son 6tui et dans un endroit sec.
View original page 25Page 26 · Read text
www.butkus.us


                         El#|J iE     +#.L-frJttn
     MAOE IN THE PEOPLE,S REPUBLIC OF CHINA
FABRICATION DE LA REPUEILIQUE POPULAIRE DE CHINE
View original page 26Related documents and language editions
From the M. Butkus archive. Original publisher and archive notices are retained.
Check the model and edition against your equipment.
PDF verified 2026-10-10.