Film cameras
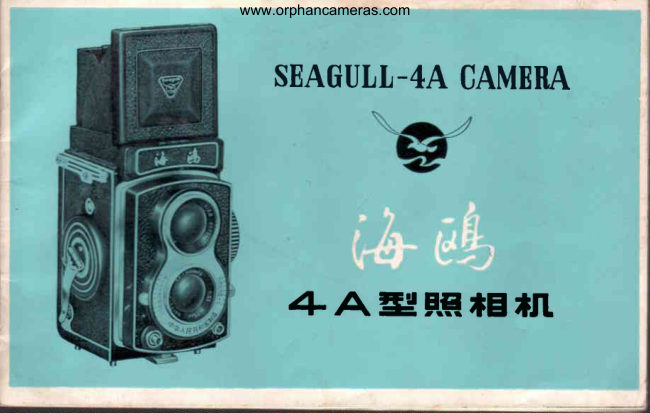
SEAGULL 4A SERIES User manual
User manual for SEAGULL 4A SERIES. 14 pages in English. Read the original PDF, download or print a copy without registration.
14 pagesEnglish1.6 MB PDF

Loading your manual…Open PDF directly
Document details
- Brand
- Seagull
- Model / document
- SEAGULL 4A SERIES
- Document type
- User manual
- Language
- English
- Pages
- 14
- File size
- 1.6 MB
- Category
- Film cameras
- Document date
- Not specified in catalog
Search available document text
Find a term, then jump to its page in the original PDF. Image-only pages may not be searchable; check the PDF for exact wording and diagrams.
Page 6 · Read text
Specifications
    Seagull  4A .4A-l   and  4A-103   calneras  are  120 twin-lens  reflex
cameras.    Their   constructions,   external  forms  and  use  are  basicly  the
same.  There  are  somewhat improvements  in  constructions  for  the  4A-l
                                 'l'heybased on 4A  cameras.                                    are:   ( l) The  lens  is  constructed  in  Tessar
type,  3.groups, 4.elements.    lt  can provide more excellent performance in
imaging quality;  (2) With  the  newly-constructed top  cover,   it   is   easier
to  open/close  the  direct  viewfinder  frame  and  tighter  to  prevent  from
dust;  (3)  It   is  provided with  the  Fresnel  lens  in  the  viewfinder.  and so
 it can offer  brighter and sharper  fielj  of  view;  (4) The camera is equipped
with  hot-shoe so  as  to  accept compact strode  light.  4A-103  camera  is
the same as  4A-l  except the  picture-taking    lens.
          . F i l m :                120 roll   film
          . Format  size:        6x6cm  (2t  " xz|   ")  12 pictures can  be   taken
                               with  a  single  roll  120 film.
         . Picture.taking  lens:  SEAGULL  75mm f/3.5.  3-groups.  4elements.
                                 (for  4A-l)
                      SEAGULL  75mm f/3.5,  3- groups, 3-elements,
                                   (for  4A-103)
                     SEAGULL  75mm f/3.5,  3.groups. &elements.
                                   (for  4A)
                             Their  aperture  scales are  all  f/3.5-Il22.
          . Viewing  lens:      SEAGULL  7*nm  f/2.8,  3-groups, 3-elements.
          . Shutter:             Beiween-lens,   l-  l/300  sec.  plus  "B'.
          . Flash  contact:         "X',    all  speeds may be used synchronously.
       i. Focusing:               Full -field  precision  ground  screen  focusing.
          . Viewfinder:            Waist-level   viewfinder   with   Fresnel   lens
                                 (for   44-l)
                             Waist-level    viewfinier    with   grorurd glass
                                 (for  4A)
         . Film  advance:      Winding   crank,  format locating automatically
                        The   crank  advances  film   and  cocks  the
                               shutter   synchronously.
         . Self-timer:             Built-in,  approx.  8-  l2  sec.  delay.
         . Exposure  counter:    Count and  reset  automatically.
         . Accessory  shoe:     Hot'shoe.  (for  4A-l)
         . l)imensions:           l02xl02x  146 mm.
         . Weight:             980 g   (for   4A-l)
                          975 g   (for   4A)
View original page 6Page 8 · Read text
( 3) {f&.JB&F u,#t- X &^ri. {-
                           &t&il + ,tllt*-4,*'h &*a,lL
                                           fikf fi.L#tft  *,if,iaFl )EnL* AE
                                  F-ia.ei,116,F...
                         +-LEL, *t  J(t-L"*."+
                                           ,, A e.'F-efFlbr*.ft il{ts, rLEt&.
                     JBe-+*.-*.
                                           ( Etl  il*E  t,tt + il.tlil
                               h&)\il.*  fit   f  .
 (3) Slowly   pull   crt  the  protccti""     ,.*,     of  the  roll  urd  insert   its   frot   end
 into  thc  widcr  alot  o[  thc  epol   .  Rotete  the   filn   winding  crork    rmtil   thc
 tsir  arrowg   cr  the  protcctivc   prFr    rrc   alipcd   with  the red  locating   inder
m  the  cerncra  body.
                                                                                      'close'     Closc  the  bacl  cgvcr,  tum  thc  locling   disl   in  the  dircctiqr              until
 thc  safcty  lcvcr   is  loctcd.     Filn   lording   ig  not   complctcd.
     (Ceution)    Be  eurc   tlc   locling  bod   ia   riglrt   in  thc  gloove  of cancra.


                                   (f) jtfi,  i+*.  t*nrr*
                                 ffifi1+iA*A *h *taEA
                                ,-4++.tt,rt,Ffit&f  * n'  t, +, jk
                               fr,ftrU-s{.11fr-lK"
                          o f +fi tufrh +*nrr*irrt
                             fra , 4,tt.fi E rfr4+*i6fi4 *  ,
                         _trf*Tcthn,  ttrfe,ttn*
                            rE.

({)  Film  Advancing And  Erposure  Counting  And  Coding  The  Shutter
    Rotate  the  winding  cranl   cloclwise    until  the  cranl   stops.   The  number
'l'eppcarcd                  in  the cornter  window indicates  the  first  frame. Now  the
cemera  is  ready  for  taling   pictures.
    As  the  winding mechanism is  interlocked  with  shutter cocking device,  the
shutter  release  button.   after  cach  film  advancint.  can  bc  pressed  crly  when
tbc  winding  crml    is  wound  reverscly   until    it  stope.
View original page 8Page 9 · Read text
Framing


                                       (l) JcEfri )*hLh  t 4Lfr+8,


                                    J6ttrft, E .


(l) Push open  the  viewf inder     f rame  as  indicated  in  figure.

The image of  the  obiect  seen on  the  focusing screen  eorres-

ponds  to  what  will  appear on  the    f i l m .


                              .(2) frt+q*#


                                                                                                                  Ib                             iH;EfrE*,E , )F+I\fr E_,
                             !RFt.F#\\F  +tr8fr #t,).i 4L, ,L

                            +tl#rF4hvr &_W.hthttlt tA                                                                              "


(2 ) Di rect  Framing
    After  the  focusing   is  done,  push  open   t h e  v i e w f i n d e r
cover and o b s e r v e  c l o s e l v    t h r o u g h   t h e  s m a l l  square aperture
behind the  v i e w f i n d e r    f r a m e . W h a t      i s   s e e n corresponds   to
the   f rame that  wi | |  be  taken on  the    f i lm.
                            www.butkus.us
View original page 9Page 11 · Read text
(z',)fr#.it{3f  , #
                                   *ftu,*.X*,n  **.
 A  {AE  Typc  4A                    E#,t*frfr-,4A-l4
 Y  {A-ld  Typc  fA-l                ?r*Elfrff * rhr\
                             a*# A, AAa.frrT
                                fr,a*.x*.11h, i*.
                           X*,aPA4,#&"
                              n+8,  *lti*.
                                     x-il.ia-|rET#krl E

                                          |i,i*.X1*.8p,tiiltt"


(2) When  focusing. the  magnifier   will   be  helpful   in  observing   the
sharpness of  the  image  to  be  taken.  For   4A-l,   push  the  viewfinder
eover  as  indicated  br-  the  arrow,     ( For  4A.  press  the  lock   button
downwards) the matnifier  will  spring up automatically.
                                                                                's
     After  the  focusing  is  done,  press  the  magnifier    frame down  to
its  original  position.  the magnifier   will  be locked up automatically.

                         www.butkus.us
View original page 11Page 12 · Read text
Depth Of Field
                             6 ;li.ft,tr { E J+^r.fr l*.tu L e7
                                #)r.#*i'*   * " {"Elfr, rArf,H
                                        *tr.rlfih 2 *,,  ltrfl f/8/,n$,fr
                                       )F.tlh t.79- 2.29*,                                                                             "
                                         t|ltrE-f;E t  tt, f;g&,1., n'l
                                      fi,fi,4t;  JAJtFt*;Ert-,  lhw
                                  {i6  , n{fr,Kt  t.

     The  range  of  depth  of  field  can be obtained directly  from  the depth  of
  field  scale  at  the  focusing  knob.   As  shown  in  figure.  when  the   object
 distance is  2 meters and the diaphragm selected  is   f/8,  the range  of  depth
  of  field  wi  |  |  be  1.79 to  2.29 meters approx.
     With   focus  set   at  a  certain  distance,  the  smaller  the  aperture,  the
 Sreater the depth of  field:  with  aperture  set  at a  certain  value.  the   farther
 away  the  point  of  focus.  the  greater  the  depth  of  field.
                 \,,m    Setting The ShutterEEHflfrE, '7EE             Speed And The Diaphragm


                                            th)ttt t&## .* , &E fi it *

                                                                i  frti4t.,l*il Al &, t E fi i $"


     Set the shutter speed adjusting lever and diaphragm setting


 lever  as  indicated  by  arrow  according  to  the  photographing


 conditions.
View original page 12Page 13 · Read text
*>RE)E Multi-exposing
                                     rLfi-xud.rt. i,+8,   )+-T
                            ? ;kati lLltkln,, +,1+Xt-h e,ir*il{
                                                ,r iii X T 6t lr,lq ,,1E It,    tl.tt tLni
                            b r, +, a  fi +h)fl-T, +*.i1 fi it  Lift ,
                                              { v\ tyt)-  tKt'xh -L\t 4i fr -;Rul'
                                        lL. )+ LLLi';* &-e-it lt  , :?LAV;L
                                                       tl ? ;kW/c-*.,ia"

    To  repeat exposure on the same frame,  press  the  multi -
 exposing button  after  each exposure and  rotate  reversel-v the
 w i n d i n g c r a n k   i n t o    i t s  o r i g i n a l  p o s i t i o n  a s    i n d i c a t e d b y a r r o w .
 The  shutter  is  cocked again.  The  procedures described above
 may be repeated.
EtHt[0!ftH The Use Of Self-timer
                                     *.FE'i trr*  i 6 }.'.F A t6+Lth
                        + "  lhlltt )+414*.t1t'.gs.,A #+L
                     6LAft€r+, r{.n18- tz+rEaa
                                     ,€ l4'R l.1"
                                         (;tf;) +n,!4tte,r ,.F#t a # rh +
                        E-T6rnA , v\ ft.ifrr^ +,L1+.

    P u s h g e n t l y    t h e s e l f - t i m e r   l eve r a s in d ica te d b y a rro w.  Th e se lf- tim er

 will  run  automatically when  shutter  release button  is  pressed.  The  time

 delav is  8 -  l2  s e c .
        ( C aut io n   ) N e v e r  p u s h   t h e  se lf -time r   le ve r  in  th e  co u n te r-cl ockwise
 direetiqr  after   it   is  cocked, or  the  shutter  would be damaged.

                             www.butkus.us
View original page 13Page 14 · Read text
n4;t  Multi-exposing
                     tLfr-;KW)tn+E,t+-T
                                   9;kttf,Lltilf,-, 4,1+E,h )*+,r,*iE
                                        ,r ffi * n 6 lrl9sr,)E |i,  *.w tLn(
                       b 4 t, a ilt It,r-T,,1* i1 € tt}.
                                                       "F,
                                 6l v\ t*- r;l - CKr'xh -L Lt 4i fr -- ,X.rt1,i
                                 )v." )+ Li+ i  *  E--Lit4i ,  iLfiuiL
                     4 9 ;kn*/c* t-

  To repeat exposure on the same frame,  press  the  multi  -                           q
   ing button after each exposure and  rotate  reverselv  the
      erank into its  original  position  as  indicated by arrow.
   shutter is cocked again. The procedures described above
   h  repeated.
   0!ffH The Use Of Self-timer
                         JqE fr trrXi  6, LtF A th*Lth.
                            +.  thl*tt )itdtt*.i1)+1f,.,h )attt
                          itLhli€tt,  €Ft8  - t2+rE A al

                                   ,g ltl'R fl.
                                   ( t}f;)  tn,t*t e,}."rFut a th )h.+
                      E-n 6lE Ct, v\ ft.)fr,^ +,1.1+"

                                                                                                                     - l - h e
  ?rrl gently the self-timer lever as indicated bv  a r r o w .           s e l f - t i m e r
    tu  rutomaticallv when shutter  release  button     i s   p r e s s e d .    T h e      t i m e

      ir   t -    l 2 s e c .

  (Crution ) Never p u s h  t h e  se lf-trme r  le ve r  in  th e  co u n te r-cl( ) ckwise
         rftcr   it  is cocked, or  the shutter  would be damaged.
View original page 14Related documents and language editions


From the M. Butkus archive. Original publisher and archive notices are retained.
Check the model and edition against your equipment.
PDF verified 2026-10-10.