Film cameras
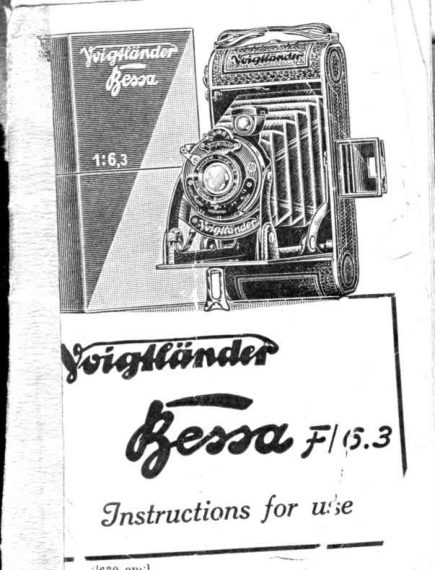
Voigtlander Bessa F6.3 User manual
User manual for Voigtlander Bessa F6.3. 38 pages in English. Read the original PDF, download or print a copy without registration.
38 pagesEnglish2.2 MB PDF
Loading your manual…Open PDF directly
Document details
- Brand
- Voigtländer
- Model / document
- Voigtlander Bessa F6.3
- Document type
- User manual
- Language
- English
- Pages
- 38
- File size
- 2.2 MB
- Category
- Film cameras
- Document date
- Not specified in catalog
Search available document text
Find a term, then jump to its page in the original PDF. Image-only pages may not be searchable; check the PDF for exact wording and diagrams.
Page 3 · Read text
Before you begin
    You are doubtless so pleased.with your
   "Ifessa" that you can hardly wait before
   exposing the first spool of film  in order
   to get good photos. You may well think
   that  these very  first exposures wiil  be                                   ('Bessa"   goocl, the few movements of the
   being so simple.  But few as they are,
   they neecl to be understood, and that
    will be the caseif you will carefully read
   through this little booklet before putting
   your  first  film  into tho camera.

Essentials
    A camora is essentially nothing more
   than a foiding  light-tight  box, carrying
   a lens on the  front,  and, at the back,
   the film on which a picture in miniature
    of the natural sceno is cast bv the lens
    (fig. 1).
View original page 3Page 5 · Read text
Film


                         IIow   the  picturo    is {ormed

Opening  (fig.2)
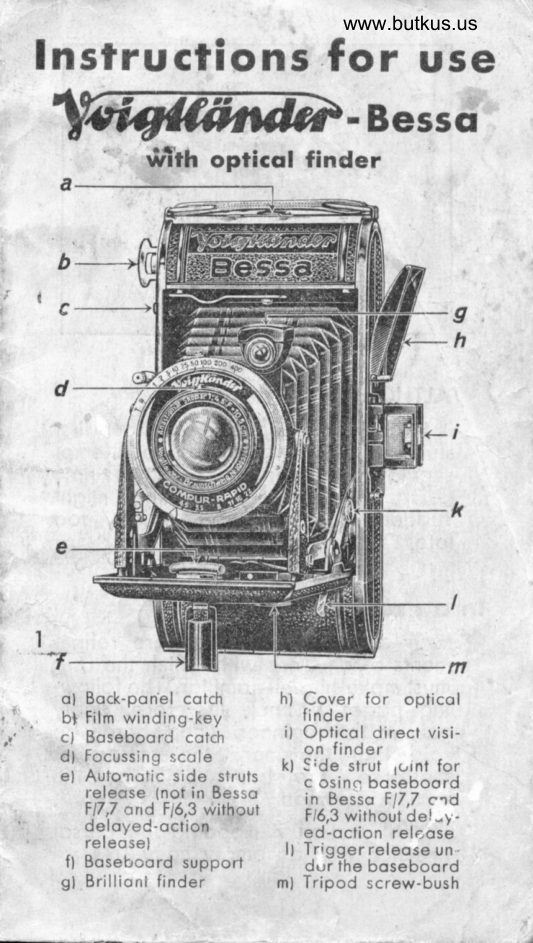
     To open tha  camera, press on the
    button 3 seen on the left-hand side. The
   baseboard5 then springs .out by  itself,
   and  is  gent{y pressed down with  the
    other hand  until  the  struts 9 distinctlv
   snap into place.
+
                        www.orphancameras.com                           I
View original page 5Page 6 · Read text
The  lens 4  (fig. 4)  is  thus  brought
     utomatically  into  the  correct  position
     y means c{  a  self - acting  leyer me-


                         <--5


                                                                      DN:ou=butkus.org,Date:cn=Mike2024.06.06signedButkus,email=mike@butkus.org,by19:54:40Mikeo=ButkusButkus-04'00'camera manuals,c=US      Mike Butkus  Digitally
                          qQ , f

                    Irig. 2.  Opening the Bessa
   chanism, and the carnera is ready for an
   exposure (fig. 4).
Three - point  Focussing   ({ig. 3)
    The  three-point system of  the  lJessa
   irnmensely simplifies the taking  of sharp
   pictures.
     0n the lens mount is a small pointer 15,
   which, by  turning  the  lens mount,  is
View original page 6Page 7 · Read text
caused to move along the scale mar.ked
 LandscapesI Groups; Portraits.  Before
making an exposure, the pointer  is set
 to the appropriate word.  In  the case
                        t'Portraittt, of "Land scape" and.                  it is pushed                            ((Groupt'as far  as  it  will  go;  for                   it  is
 set to the marked middie of the arrow.
The designations Landscapo, Group and
Portrait  are not  to be taken altogether
 literally.     ff,  for example, a {igure or a
building  is to be photographed.at a dis-
tance  of  about  20ft,   that  is  at  the
averago distance of a group, the pointer
must of course be set to "Group".  fn a
like manner,  if tho subject is a still-life
study or a dog at a distance of  7llzfit,
the  pointer  is set to  "Portrait".   With
the 31/nx?rlEins Bessa,you sboulclnever.
be nearer to  the  subjoct than 5ft;  or
7ft,  in  the case of  the  Arl+x2ll2ins
Bessa.
  \Mith the }tl+"X21ia" Bessaeverything
beyond 25 ft from the camera is obtained
sharp when the pointer is set to "Land-                    t'Group",scape".  I{  set to           the region
of sharpness extends from 23 to 10ft;


                  www.orphancameras.com
View original page 7Page 8 · Read text
anal if  set to  "Portrait",  from 8 to 5 ft.
In the case of Lhe4712"x2rlt" Bessa,these
regions of sharpness ale somewhat diffe-
          t'Landscape",rent.  At                             it  is from 33 ft
to oo (infinity);  at "Group", from nearly
30 to 13 ft,  ancl at "Portrait",  fi'om 10
to 7ft.   It'is  a good. pian to  fix  these
ranges of shalpness in tho mind in con-
ner:tion with  suitable objects. Tho  di-
stances are also engraved on the scale
abovethe three words, so that the figures
25,23,10 ancl 8 placed between the two
stops (33, 30, 13 and 10 in the case of
Lhe4rlax?tlr) may be used also for sharp
focussing when judging distances in  ft.
ff   it  is wished, for example, to obtain
sharpness more towards the foreground
or the distance, the red  pointer is set,
along the  seale, bstween "Landseape"     ttGroupttand           or between ,,Groupt' and
"Portrait".  But the mistake should not
be made of thinking that the stop pre-
vents the lens being focussed to nearer
distances than 5  or 7 feet as these are
maximum distances at which   it  is pos-
sible to take close up photos.
View original page 8Page 9 · Read text
Shutter   (fig.3)
     The  shutter   sel'ves the  purpose  of
   keeping the lens covered" and of allowing
    the  light   to act  on  the  roll-film   for a
   longet  or shorter  time  only  during  the
   exposul'e. The "Bessat' is  fitted  with a


               a                    $-              16
       F ig '  i.  Shutter, with  three-point locussing,M
    specially reliable shutter which is operated.
   as follows:
     Above  the  lens  will  be  found  the
                                              'with    black  scale 13  (fig. 3)  engraved
   the  various times.  Behind    it   is  the
    nickelled  setting  disc,  bearing  a  red
    button,  rvhich may  be readily  set with

                       www.orphancameras.com
View original page 9Page 10 · Read text
the  first finger  to the chosen mark on
the scale.
  The numbers on the scale denote rlrutn,
l/ooth antl l/rooth of a second.which for
the sake of greator cleamess are written
as whole numbers. When making an
instantaneous exposure, the red button
is  first  set against the number chosen.
On now pressing the  trigger 12  (fig.3)
or the flexible cable release screlved in
at 11, the shutter opens, and closes at
the expiry  of the fraction  of the second
for which  it has been set, the exposure
thus taking place automatically.
  The  lelter ,B on tbe scale is for use
whe:r giving short time exposures. The
leil button  is set t"o B, and the shutter
then opens as soon as the cable release
or the  trigger 12  is pressed, remaining
open until pr.essure is withdrawn.  The
exposure may be timed by  counting;
not, however, the  single numbers but
the repeated formula "one little second.",
"two  little  seconds" and so on.  Thus
 for three seconds,we repeat clearly but
without  pausing:  "one  little  second",
                                      s
View original page 10Page 11 · Read text
ttthree "t\n'o little seconds",          litile seconds,,.
 The trigger  or release is pressed at the
 "onett, and pressure relaxed at the end
 of  "three  little  secondstt. Time  expo-

       l -


            I'ig.  4.  The Bessa, ready for use
sures require the camera to be firmly
supported on a tripcd, table etc:   if the
camera is held in the hand, the pictures
will  be unsharp  or,ving to movement of
the image on the film.


                   www.orphancameras.com
View original page 11Page 12 · Read text
By  setting  the  red button Lo T,  lhe
shutter opens on pressing on the cable
releaso or the  trigger 12, and remains
open until  one or the  other is pressed
a second time.  This is the setting to be
used when  it  is necessary to keep the
shutter open for  minutes at a time, as
when taking night photographs or when
making exposuresby flashiight.

Distance Release
   Self-portraits may be taken with the
}"16.3 Bessa. When giving exposures of
'lzr, 1/60 and th6s sec, the  shutter may
be operated from a considerable distance
by an ingenious device. A piece of wire
of the shape shown at b fig 3 is inserted.
in  the small aperture under the word
"Group", and then the  shutter can be
tensioned by pressing the trigger 12 or
flexibie cable without, however, opening.
The exposure does not take place until
the r,vire is pulled out, as may be done
by aid of a black thread o{ suitable length.
The most certain plan  is first  to lay the
free end of the thread at the place where

                                                      1 1
View original page 12Page 13 · Read text
the  operator  will  be, then  to  insert
    the  wire  in  the  aperture and,  last  of
     all,  to set or tension the  shutter.  For
   success with  the distance release, it  is
    o{ course essential that  the camera be
    fixed  firmly   in  place, preferably on a
    rigid  tripod.

Stops
    On the lower edge  of  the  focussing
   scaie(Landscapes;Groups; Por.traits) will
   be seen the stop Nos. 6.3, 11 and 22,
   along which moves the  stop lever 16
     (fig. 3)  by which  the  aperture  in  the
   lens may be reduced.  In  the ordinary
   way this lever must be set at the No. 6.3,
   the lens then working at its full aperture.
         It  is oniy  for  special purposest  e. g.
   when  photographing  subjects  which
   include both  a very  close foreground
   and far distance, that the lens is stopped
   dowa, that  is  to say, the lever 16 put
    to  the No. 11, or per.haps to  22.  By
   doing this, the region over which sharp-
   ness is obtained is  extended towards
   and away from  the camera -   to  the
12
                        www.orphancameras.com
View original page 13Page 14 · Read text
obvious advantage of  the photograph'
  When  stopping  down,  however,  the
                                '(speed" is   aper"ture and therefore the
   recluced, so that a longer exposure must
   be given.  In  comparison with  the full
   aperture of 6.3, the exposure at 11 must
   be three times as long and at 22 LZ times
   as long. This is, of course, the drawback,
   but an unavoidable one, to  the use of
   the stops, and for  this reason the lens
   shoulcl be used at 6.3 as a rule'

Finders
    The -F/6.3 Bessa is  fitted  with  two
    finders.
   Direct-vision  Finder (8, Fig'a)
     The ditect-vision finder  is attachecl on
   the  left-hancl side of the camera back'
      It  consists of a frame and of a portion
   having a small aperture in it,"called the
     "sightl'. By turning up the frame on the
   metal pieces projecting from the camera
   back, it snaps into the upright  position'
   The sight likewise comes automatically
    into place  (parallel with  the frn'me) by
                                                 1 3
View original page 14Page 15 · Read text
'l
ti,re  act ion   t,1' rL sl)ring    (fig.   5).     he
col'r'ptjt  rtmottnt   o1'  sultjer:t   is  nr)w  sec'lt
l-,) so lr,c,liing tltrt,ttglt  tltt'  srnall olrening
irr  the   sigLrt  lhrtt    it   coitrcicles exactlt'
rr itlr  tht'  f t'lttttt'.  ()rvittg' 1o  tlrt'  l'act that


                  www.orphancameras.com
View original page 15Page 16 · Read text
Brilliant  Finder
  To the side of the  shutter, as shown
in fig. 4, is attached the brilliant  finder 7.
  On looking down  into   it from above,
a miniature  picture  is seen of the sub-
ject to be photographed and thus allows


         upright                   oblong
        I'ig.  6.  ?ictures  in the  brilliant   finder

of the desirecl amount of subject 6eing
inciuded.
  The cut-out placed in the upper part
of the fincler  is so devised as to ,show
the amount  of  subjoct according es an
upright or oblong picture is taken. These
differont  selections of  the  subject  a,re
illustrated  in fig. 6. For exposures made
                                             1 6
View original page 16Page 17 · Read text
oblong-w&y, the  brilliant  finder  requires
to  be  turned  through  an angle  of 900,
so that   it can  still be viewed from  above.
  The very bright  but small  picture  seen
in  the  finder  may be magnified  about


      @


      I'ig.  7.  The  Voigtlii,nder  Fiuder   Magnifier

3 tirnes by attachment  of a Yoigtlflnder
F inder }lagnifier (No.5 for tire 3r/n"xZLlt"
Bcssa,No.2 for the 4tla"x?rlz" Bessa), ob-
tainable from photographic dealers (fig. 7).
  By  this means  the amount  of  subject
 is much more  plainly  seen, and also the

                   www.orphancameras.com
View original page 17Page 18 · Read text
details  c;f the  picture.  The magnifier   is
    of  such  small  size that, when one part
     is  thrust  within  the  otlrer,   it may  be
    conveniently   carried   in    t [re waistcoat
    pocket.


               Fig.  8.  Releasiug  the  side struts

Closing  the  Camera
                         t'Bessa",     Before closing the          alu'ays take
   care to see that the shutter is closed and
    that  the  brilliant  finder  is in  its normal
    position  (for upright  pictures), othervvise
    injury may be clone rvhen closing.
                                                                                   t 7
View original page 18Page 19 · Read text
Now take the camera in the two handg
so that  the  first  and middle  fingers  &re
extended  over  the  camera  back, whilst
the  lorver edge of the body  rests on the
two  third  fingers   (fig. 8).  Gentle  pres-
sure  of  th e thumbs  on  the  two  gide


            Fig.  9.   Closiug  tho  baseboard,

struts   will  then  allow  of  these  being
released from  their  catches. so that  the
baseboard. can be folded  oyer on  to  the
camera body. In doing  this, the lens-front
and bellorryscome automatically  into place
 (fig. 9).


                    www.orphancameras.com
View original page 19Page 20 · Read text
Loading  the  Bessa
     Having  nou' become perfectly acquain-
    ted with  the mechanism, we c&n proceed
    to the  inseftion  of the  roll-film.
      Loading,  &s this  operation   is briefly
   termed, may  be done by  daylight,  as


                 l'ig.  10.  Opeuing  the film-ehamber

    the  film    it self  is  protected  against the
   harmful  action  of light by several layers
    of opaque paper.  Nevertheless  it  is of
   course u'ell not to load the film  in direct
    sunlight,  but  at eny  rate  in  the shadow
    of one's body.

                                                                                                                                                 l 9
View original page 20Page 21 · Read text
Fig.  11.  Showing   the  film-chamber


      Fig. 12.   tr'ilm winding-key


        www.orphancameras.com
View original page 21Page 22 · Read text
To open the  film  chambers, hokl the
       Bessa by  its short sid.e, so that the back
            , with  the  red  film  window  is  turned
       towards the  left  hand.  Now with  the
           first  finger  of  the  left  hand  slido the
        catch 6  (fig. 10) which  is placed under
        the  carrying  stra,p, sideways in the  cli-
        rection  of  the  affow,  whereupon the
       cover of the camera back can easily be
        turned on its hinges down into the open
        position (fig. 10).
       On the upper  film  chamber  (to  re-
        ceive the empty  spool) is  the windingrffi
       key 2  (fig. 11) with  the  flat  pin 17 by
       which  the  spool  is  turned when  the
       winding  key  is  operated. A  quarter
        turn  of  the  winding  key  to  the   left hffi
       (backwards) suffices to  bring  this  pin
       from  its normal position a  (fig. 12) into
        the  position b  in  which   it  is  invisible
       from  the  inside  of  the  film  chamber.
      The empty  spool can now be inserted.
        very  easily  (fig. 13),  only  taking  care
W     that the end of the spool with  the slot
         in   it  is put  next  to  the winding  key,
       and that both ends of the spool are put
                                                                    2l
View original page 22Page 23 · Read text
in sirnultaneously. Now give the winding
key one or two  turns  to the  right,  the
flat  pin  then  springiog   automatically
into  the  slot and connecting the  spool
with  the winding  key.


        Fig. 13.  Inserting  the empty spool
  The fresh full spool is now laid  in the
other  film  chamber  (next  to the hinge
of  the  camera  back), where   it  is held
in place by the springs 18  (fig. 11).   It
 is very important  that  the taper end of
tho  red. wrapping  paper should project
frnm  the film  chamber on the side next


                 www.orphancameras.com
View original page 23Related documents and language editions
VoigtländerPDF
Voigtlander Bessa
User manual
25 pages · EnglishRead →

VoigtländerPDF
Voigtlander Bessa F6.3
User manual
19 pages · EnglishRead →
VoigtländerPDF
Voigtlander Bessa w/optical finder one page per scan
User manual
25 pages · EnglishRead →
VoigtländerPDF
Voigtlander Bessa f/6.3 Gebrauchsanleitung
User manual
39 pages · GermanRead →

VoigtländerPDF
Voigtlander Bessa w/optical 2 pages at a time
User manual
13 pages · Not specifiedRead →
From the M. Butkus archive. Original publisher and archive notices are retained.
Check the model and edition against your equipment.
PDF verified 2026-10-10.