Lenses & filters
voigtlander BESSA L 15mm F4.5 / 25mm F4 User manual
User manual for voigtlander BESSA L 15mm F4.5 / 25mm F4. 29 pages in German, Spanish, Italian, Dutch. Read the original PDF, download or print a copy without registration.
29 pagesGerman, Spanish, Italian, Dutch1.7 MB PDF
Loading your manual…Open PDF directly
Document details
- Brand
- Voigtländer
- Model / document
- voigtlander BESSA L 15mm F4.5 / 25mm F4
- Document type
- User manual
- Language
- German, Spanish, Italian, Dutch
- Pages
- 29
- File size
- 1.7 MB
- Category
- Lenses & filters
- Document date
- Not specified in catalog
Search available document text
Find a term, then jump to its page in the original PDF. Image-only pages may not be searchable; check the PDF for exact wording and diagrams.
Page 2 · Read text
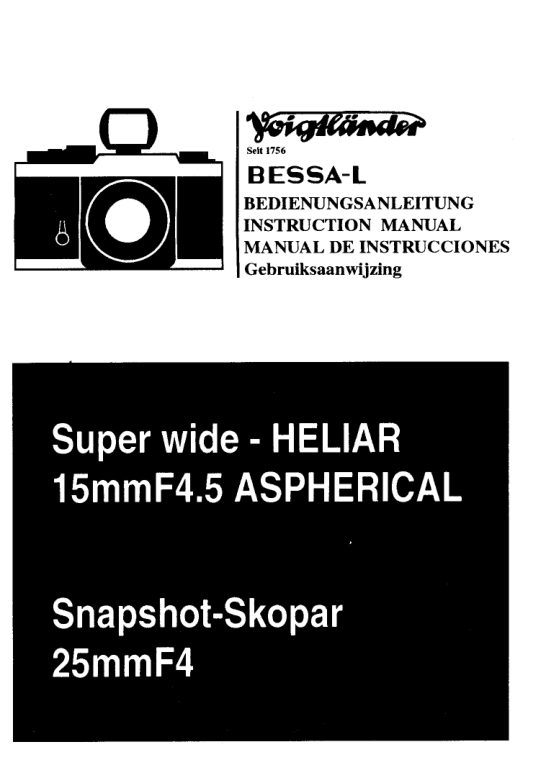
Seit 1756
BESSA-L
BEDIENUNGSANLEITUNG
INSTRUCTION MANUAL
N,TAXUAL DE INSTRUCCIONES
Gebruiksaanwijzing
Manuel d'instructions
MANUALE DI ISTRUZIONI


                                                 Germany
View original page 2Page 16 · Read text
{FG

     BEDIENUNGSANLEITUNG                                  '1
       INSTRUCTION MANUAL
   MANUAL DE INSTRUCCIONES
                                                                                     {
     MANUEL D'INSTRUCTIONS
                                                                                                 1     MANUALE DI ISTRUZIONI


      seit 1.756


O TCCUNIScHE DATEN
  NOKTON 35mm F1.2 Asphdrisch
    Brennweite:       35mm
    Blendenverhdltnis:    1:1.2
    Kleinste Blende:     22
    Linsenaufbau:      7 Gruppen, 10 Elemente
    Bildwinkel:           63"
    Blendenlamellen  :    12
    Mindestentfernung:   0.7m
   Durchmesser:      63mm
   Gewicht:            4909
     Filterd urchmesser:  52mm
   Anschluss:       VM Bajonett

O ECNNENUNG DER EINZELNEN TEILE
 1. Gegenlichtblende
 2. Blendenring
3. Entfernungsring
4. Entfernungseinstellung
 5. Tiefenschdrfenskala
6. Feststellschraube der Blenden
7. Blendeneinstellung
8. Blendenskala
9. Entf ernungsskala
10. Roter Punkt
11. VM Bajonett
View original page 16Page 17 · Read text
W                           Germany

   ;4tEs..   r.l#WS.'             +w*;  iD           I                                    "l
 O geTeSTIGEN/ABNEHMEN DES FILTERS      I
.  Abnehmen: Losen Sie die Feststellschraube und nehmen Sie
              .  die Gegenlichtblende ab.
   Befestigen: Richten Sie die Gegenlichtblende  so aus, dass Sie
                diese auf den Objektivtubus stecken konnen.
 )              Befestigen Sie nun die Blende auf dem Objektiv.
 O gETESflGEN DES FILTERS
     1 . Nehmen Sie die Gegenlichtblende (1) vom Objektiv.
   2. Schrauben Sie den Filter auf das Objektiv.
   3. Schrauben Sie die Gegenlichtblenden (1) auf das Objektiv.


                                                                    #{


                              www.butkus.us                                                  1
                                                                                                                                       1
            .-sh
View original page 17Page 19 · Read text
O nrracHrNG/DETAcHING FILTER
   To detach, unscrew Hood Lock Screw (6) and pullthe Lens
   Hood (1) forward.
   To attach, align the slit on the Lens Hood (1) to the pin on
    lens barrel and put the Hood onto the lens. (See Fig 1)
O nrracHrNc FTLTER
 1. Detach the Lens Hood (1) from the lens.
 2. Screw in the filter onto the lens.
 3. Attach the Lens Hood (1) onto the lens.
O nnrucEFtNDER couPLtNG
  .  Focusing range of this lens is oo-0.7m. However,
    rangefinder coupling range will be different depends on
    the camera body.


                             www.butkus.us
View original page 19Page 20 · Read text
O spectFtcATtoNs
  NOKTON 35mm F1.2 Asph6rique
    Distance focale:         35mm
    Ouverture maximum:        1:1.2
    Ouverture minimium:       22
    Construction optique:      10 lentilles en 7 groupes
   Angle de champ:            63'
    Lamelles de diaphragme   :   12
    Distance minimum de mise
   au point:                  O.7m
    Diamdtre de maximum:    63mm
    Poids:                   4909
    Diamdtre de filtre:       52mm
    Monture:             VM
   Couplage du t6l6mdtre: oo-0.7m (Ddpend du type de boitier)

O TOnaeNCLATURE DES PIECES
 1. Parasoleil
 2. Baue de diaphragme
 3. Bague de mise au point
 4. lndex des distances
 5. Echelle de profondeur de champ
 6. Vis de verrouillage du parasoleil
 7. lndex du diaphragme
 8. Echelle des diaphragmes
 9. Echelle des distances
10. Repdre de la baionnette
11. Monture VM


O especrFrcAcroNEs
  NOKTON 35mm F1.2 Asph6rico
    Longitud Focal:   35mm
    Relaci6n de Apertura : 1:1.2
   Apertura minima: 22
  Construcci6n:  7 grupos 10 elementos
   Angulo de Visi6n:  63'
    Hojas del Diafragma: 12
    Distancia minima: 0.7m
  Di6metro:     63mm
  Peso:            4909
   Tamafro de filtro:  52mm
  Montura:      VM
 ,  Visor:             oo a 0.7m (depende del cuerpo de c6mara)
O TIOUeNCLATURA DE LAS PARTES
 1. Parasol
 2. Anillo de apertura
 3. Anillo de enfoque
 4. fndice de Enfoque
 5. indice de profundidad de campo
 6. Tornillo de fijaci6n del parasol
 7. lndice de apertura
 8. Escala de apertura
 9. Escala de distancia
 10. indice de montura
 11. Montura VM
View original page 20Page 21 · Read text
O POUN MONTER OU DEMONTER UN FILTRE
      Pour d6monter, d6visser la vis de verrbuillage du parasoleil
       (6) et tirer le parasoleil vers I'avant (1).
      Pour attacher, aligner le trait sur le parasoleil (1) avec
        I'ergot sur I'objectif et monter le parasoleil sur celui-ci. (Voir
      figure 1)
 O NrtOruTER UN FILTRE
    1 . D6tacher le parasoleil (1) de I'objectif.
   2. Visser le filter sur I'objectif/
  3. Remettre le parasoleil (1) sur I'objectif.
 O COUPLAGE DU TELEMETRE
     La plage de mise au point va de  I' oo d 0.7m. Cependant, la
      plage de couplage du t6l6mdtre peut 6tre diff6rente
      suivant les boitiers


 O COLOCACIONY RETIRADA DEL PARASOL
.    Para quitarlo, afloje eltornillo de fijaci6n del parasol (6) y
       tire hacia afuera del parasol  (1).
     Para ponerlo, alinee la ranura del parasol (1) con el pivote
      deltubo del objetivo y sit0e el parasol sobre el objetivo.
      (Ver Fig 1)
 O colocAct6N DEL FtLTRo
  1. Retire el parasol (1) del objetivo.
  2. Enrosque elfiltro en el objetivo.
  3. Coloque el parasol (1) sobre el objetivo.
 O n.lusrE DEL vtsoR
      El rango de enfoque del objetivo es oo a 0.7m. Sin
     embargo, el aiuste del rango del visor depende del cuerpo
     de c6mara.


                              www.butkus.us
View original page 21Page 23 · Read text
-*i@1M*4:,iJffi4;ar*"t{:@frrf4+4iqqir4.)1..:itr,                                                                                                                                        .l
                        ,+


                                                       .:qilt
                                                                                              I
O Come applicare e togliere  il paraluce                            (
..   Per togliere  il paraluce, svitare la vite del paraluce (6) e sfilare
      ilparaluce  (1).
     Per applicare, allineare  il punto del paraluce (1) al perno del
      barilotto dell'obiettivo e mettere ilcopriobiettivo. (Vedi Fig 1)
O Come applicare  il filtro
  1. Per togliere  il paraluce (1) girare verso la freccia
  2. Awitare  il filtro sull'obiettivo
  3. Awitare  il paraluce (1) sull'obiettivo
O Accoppiamento con  il telemetro
   ,  La messa a fuoco minima di questo d di 0,7m.
    Comunque, I'accoppiamento con  il telemetro
     differisce dal tipo di fotocamera su cui d montato.


                              www.butkus.us
View original page 23Page 27 · Read text
NOKTON 58mm F1.4 SLn
             Bedienungsanleitu ng

 OBezeichnung der Teile


OFiltereewinde          @Blendenskala
@Entf ernungseinstel lring  @Entf ern ungs-/B lendenindex
@Entf ernungsskala       @Blendenring
@scharfentiefe-Skala


 Onnbringen eines Filters
 Filterdurchmesser 58 mm. Schrauben Sie den Filter in das Filtergewinde.
Onnbringen der Blende
 LH-58 ist als Sonderzubehor auf Wunsch erhdltlich.
 Schrauben Sie die Blende in das Filtergewinde.
 OSpezifikationen
 Voietldnder NOKTON 58mm Fl.4 SLn

 Brennweite                58mm
 Off n u ngsverh altn is                 1:1 .4
 Kleinste Blende                       to
 0ptischer Aufbau              7 Linsen in 6 Gruppen
 Blickwinkel                     40 Grad
 Blendenlamellen                   I
 Kurzeste Entfernungseinstellung  0.45m
 Makrobereich                         1 :5.8
 Max. Durchmesser             64.4mm
 Filtergro Be                 58mm
 Liinge                       47.5mm (Ai-S)
 Gewicht                       3209
 Anschlu B                        Ai-S (CPU inteer)
                            KA
 Sonderzubehor               LH-58 Blende


                             www.butkus.us
View original page 27Page 28 · Read text
NOKTON 58mm F1.4 SLr
               lnstruction Manual

 Ol.,lomenclature Of Each Part


CFilter Rine            @Aperture Scale
@Distance Ring          @Distance/Aperture  lndex
@Distance Scale        @Aperture Ring
@Depth of field Scale


 Onttachins filter
 Use Q58mm  f ilter. Screw in the  f ilter on Filter Rine O.
 OAttaching Hood
 LH-58 is separately available as optional accessory.
 Screw in the Hood on Filter Rinc O.
O S pecif icatio n s
 VoigtlAnder NOKTON 58mm Fl.4 SLn

   Focal Length      58mm
   Aperture Ratio        1 :1.4
   Smallest aperture   F16
   Lens Construction   6 groups, 7 elements
   Picture Angle         40"
   Aperture blades
   Nearest Distance    0.45m
   Macro Ratio           1 :5.8
   Diameter            664.4
    Filter Size         058
   Length             47.5mm(Ai-S)
   Weieht            320e
   Mounts              Ai-S (CPU inteerated)
                  KA
   Optional accessory Hood (LH-58)
View original page 28Related documents and language editions
From the M. Butkus archive. Original publisher and archive notices are retained.
Check the model and edition against your equipment.
PDF verified 2026-10-10.