Film cameras
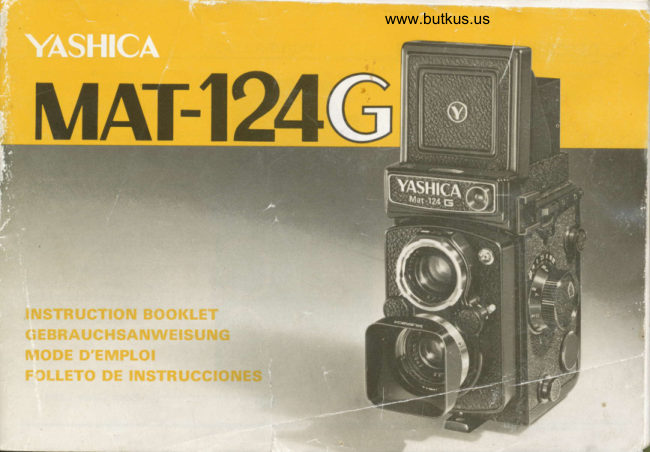
YASHICA MAT-124G User manual
User manual for YASHICA MAT-124G. 36 pages in English. Read the original PDF, download or print a copy without registration.
36 pagesEnglish7.6 MB PDF
Loading your manual…Open PDF directly
Document details
- Brand
- Yashica
- Model / document
- YASHICA MAT-124G
- Document type
- User manual
- Language
- English
- Pages
- 36
- File size
- 7.6 MB
- Category
- Film cameras
- Document date
- Not specified in catalog
Search available document text
Find a term, then jump to its page in the original PDF. Image-only pages may not be searchable; check the PDF for exact wording and diagrams.
Page 2 · Read text
BESCHREI BUNG          DESCRIPTION                DESCRIPCION


                                                                                          .E ASA-Sichtfenster   f                                               fl Fendtre indicatrice de la                 f  Indicador de la sensibilidad
   Filmempfindlichkeit                  sensibilit6 ASA                      de la oelfcula
E ASA-E instellrad            @Anneau de rdglage des              EAjustador de la sensibilidad
EOse firr Tragriemen                   sensibilit6s ASA                  ASA
@ Filmzdhlwerk                @Attache pour la courroie        E Enganche de la correa
@ Sichtfenster  f . verwendete     ECompteur d'images                  l4JContador de tomas
   F ilmtvoe            @ Fenetre de rappel du          E Indicador del tipo de la
@Sichtfenster  f. Blende u.                          f ilm employ6                                      pelf cu la cargada
  Versch lusszeit         @ Fendtre  ( indicatrice)                 EVentdnilla indicadora de la
E Stetlrad  f . Verschu lsszeiten        des ouvert u res/v    i tesse                  Abertura y la velocidad
@ F ilmtransportk urbel                d'obtu ration.                         de obtu raci6n
p Auslosersperrhebe            ECadran de cont6le de             flMando de la velocidad de
@Ausloserk nopf                             la vitesse d'obturation                    obtu rac io n
ESportrahmensucher       @ Poignee de la manivelle du       E Manivela de avance
@ Belichtu ngsmesserf enster            rebobi nage               E  I nmovi lizador del,disparador
ELichteintritt   f  .         @ Levier de blocage          @ Disparador
   Bel icht u ngsmesser               de l'obturateur                    [}Tapa del visor deportivo
E]Bt itzt icntkontak tn ippel       @Bouton du d6clencheur        @ Ventan illa del exposfmetro
                                                                                                                                                                                                                                                                                                                       I la fotocaptadora@Sucherobjektiv              @Cadre du viseur sport         @ Ventan   i
@Stellrad  f. Blendenwert        @Fen6tre indicatrice du posemdtre    @Enchufe oara  f lash
@Auf nahmeobjektiv            EOeil de la collule CdS               @Obietivo visor
@ R uckwandverriegelu ng         @Prise du  f lash                 @Mando de la abertura del
                               @Objectif de visee                         objetivo
                                           lTolCadrarl de contr6le de              EObjetivo de toma
                                   -  l'ouverture                       @Sujetador de la tapa trasera
                                   EZ ooject  if
                           @Verrou de fermeture du
                                     couvercle du dos
View original page 2Page 7 · Read text
FEATURES
Type: Twin-lens ref lex camera accepting either 120 112 exposures) or 22O 124 exposuresl
        F ilm.
Lens: YASHINON 80 mm F3.5 lens composed of 4 elements in 3 groups.
Shutter: COPAL-SV shutterwith speeds from 1 to 1/500 sec. and B; built-in self-timer; iVX
                  f lash synchronizer selector; shutter locking device.
Finder: YASHINON B0 mm F2.B viewing lens; Fresnel field lens for corner.to-corner
       brightness; 3X magnifying lens for critical focusing; eye-level sports-finder frame
       incorporated in the viewf inder hood.
Exposure meter: Built-in match-needle type CdS meter based on preselection of shutter
       speed; film speed range from ASA 25 to 400; meter switch coupled to viewfinder
      hood; operates on 1.3 V mercury battery.
Film advance: Crank-handle  f ilm advance with automatic   f ilm stop; simultaneously charges
      the shutter for the next exposure; automatic resetting exposure counter registers the
      number of exposed  f rames.
Focusing: E xtra-large k nob extends or retracts the  f ront panel to secure focus on the
        sub.iect; distance scale calibrated in both feet and meters (3.3 ft to infinity; 1 m to
        infinity).
Other features: Aperture scale from F3.5 to F32; adtustable  f ilm pressure plate usable with
      both 12 and 24 exposure load film; exposure load reminderwindow; threaded cable
       release socket; hinged back cover; bayonet-type filter.mount accepting 30 mm fil-
                 t ers.
Dimensions: 77 x 148 x 101 mm
Weight: 1,100 grams
View original page 7Page 8 · Read text
www.butkus.us
BATTERY LOADING
E Open the Battery Compartment Cover holding
    with finger and by turning  it counter-clockwise.
   This camera uses a 1.3 V mercury battery to
   power its exposure meter. Use either Mallory
   PX-138, Eveready EPX-13 or equivalent.


@ Install a 1.3 V mercury battery to power
   exposure meter, as illustrated.
View original page 8Page 9 · Read text
CORRECT EXPOSURE SETTING
 f  Turn the ASA Film Speed Setting Wheel until
    the flgure denoting the ASA rating of the film
    in use aligns with the red indicator in the ASA
    Film Speed lndicator Window.


@ Center the desired shutter speed in the Shutter
   Speed Indicator Window by turning the Shutter
  Speed Control Dial. The exposure meter
   pointer in the Expozure Indicator Window is
   coupled to the shutter mechanism and will shift
   in either direction when the shutter speed  is
    adjusted.
View original page 9Page 10 · Read text
www.butkus.us


@ The exposure meter begins to function when
   the focusing hood is set upright by lifting  it up
   gently with your  f ingertip.


o When the camera is to be left unused, fold the
  focusing hood. This will switch off the metcr
  and prevent draining of battery power.
View original page 10
Page 11 · Read text
CORRECT EXPOSURE SETTING (2}
@ Turn the Aperture Cuntrol Dial and coincide
    the vellow follower needle (coupled to the
    aperture mechanism) with the red meter
    pointer (coupled to the shutter mechanism).
    both visible in the Exposure Indicator Window.
  o The correct combination of the shutter speed
   and lens aperture can be seen in the Shutter
    Speed and Aperture Indicator Windows.


l5
View original page 11Page 12 · Read text
www.butkus.us

o When the yellow follower needle (Vl perfectly
  coincides with the meter pointer  ( l), it signif ies
  that THE CAMERA  is set for correct exposure.
  The proper combination of the shutter speed
  and aperture is shown in the Shutter Speed and
  Aperture Indicator Windows.
o lf the yellow follower needle fails to align with
  the meter pointer, alter the shutter speed
  setting by turning the Shutter Speed Control
  Dial in either direction. lf the two needles fail
  to match even when both the shutter speed and
  aperture settings are changed.  it means thal
  correct exposure cannot be obtained under the
  prevail ing   I ight condition.


                                                     www.butkus.us
View original page 12Page 14 · Read text
www.butkus.us
 FOCUSING
The camera features a magnifying lens for
critical focusing which springs up into position
when the soortsf inder   f rame section of the
Focusing Hood is pushed in slightly.


To focus, turn the Focusing Knob rvhile observing
the image of your subject produced on the
Focusing Screen. After focusing, compose your
picture.
View original page 14
Page 15 · Read text
In focus
THE CAMERA is in focus when the
 image on the Focusing Screen appears
 clear and crisp.


Out of focus
Your subject will appear blurred on
the Focusing Scrren when it  is out
of focus.
View original page 15
Page 16 · Read text
www.butkus.us
FILM LOADING
g The Back Cover will spring open when the Back
   Cover Locking Ring is turned in the direction
    of "O" (Open).
   Note: The exoosure counter resets auto-
            matically to "S" (Start) when the Back
          Cover is opened.


@ Pull out the Upper Spool Holder Knob and
   place the empty spool in the Take-Up Spool
  Chamber. Af ter the Take-up Spool is set
   properly in the camera, return the Spool Holder
   Knob to its original position.


25
View original page 16Page 17 · Read text
When loading a 120  f ilm (.|2 exposures),
 hold the back cover with both hands
and slide the Film Pressure plate with
 your thumbs until it clicks into position
 and the sign 12 EX. (in green) appears in
 the window in tne middle of the plate.
When loading a 22O f ilm 1124 exposures),
hold the back cover with both hands
and slide the Film Pressure plate with
your thumbs until  it clicks into position
and the sign 24 EX. (in red) appears in
the window in the middle of the plate.
Cautions:
When sliding the Film pressure plate
from 12 EX. to 24 EX., or vice versa,
use both hands and then check if the
plate spring is work ing properly by
depressing the plate once or twice.
Uneven film feeding and poor focusing
may result if the Film Pressure plate is
not properly positioned.

                                                                         www.butkus.us
View original page 17Page 18 · Read text
www.butkus.us


@etace the new roll of film in the lower film chamber
   while pulling out the Lower Spool Holder Knob.
  Also make sure that the Lower Spool Holder is
   returned to its original position after loading the
      f ilm.
[j Draw out the film leader gently and introduce  its
   tip straight and amply into the slot on the spindle
  of the Take-up Spool. The  f ilm may fail to advance
     if the  f ilm leader is not inserted properly into the
   slot.


@After ascertaining that the trimmed edge of the
   film leader rests f lush against the edge of the slot,
   turn the Film Wind Crank-handle gently in the
   direction of the arrow and check whether the  f ilm
     is advancing properly.
View original page 18Page 19 · Read text
EContinue winding the    f ilm u ntil the "start"
  mark on the  f ilm leader paper lines up with the
 GREEN triangular ({)  "start" mark for 12O
   film


EContinue winding the film until the "start"
  mark on the film leader paper lines up with the
 RED triangular ())  "start" mark for 22Ofilm.
View original page 19Page 20 · Read text
www.butkus.us

@ lnen, close the Back Cover and turn the Back
   Cover Locking Ring toward "C" (Close) while
   pressing the cover. (When closing the Back
   Cover, see that the lug on the body rests
   properly in the slot on the Back Cover Latch.)


Ej f ne letter "s" appears in the Exposure Counter
   during the  f ilm loading operation. After closing
   the Back Cover, wind the crand-handle until the
   figure "1"  appears in the Exposure Counter
  Window.
View original page 20
Page 21 · Read text
FILM WIND CRANK-HANDLE
[]  First, turn the Crank-handle  all the way in a
    clockwise motion (toward[).
@ Then, wind  it all the way in a counterclockwise
   motion (towardE) to charge the shutter.
  CAUTION : ln case of slow shutter speeds (1
                sec. to 1/50sec.), make sure the
                shutter mechanism completes  its
                'function before winding the film.
View original page 21Page 22 · Read text
www.butkus.us
EXPOSURE  LOAD REMINDER
WINDOW
When the back cover is closed, the exposure load
 reminder window will show "12 EX" (green) in
case of 120 film, and"24 EX" (red) incase of 22O
 f ilm, to check the exposure load of the  f ilm in use.


                                                                      www.butkus.us
View original page 22Page 23 · Read text
F|LM TYPE tNptcAToE WtNpOW
After loaded the film, turn the Film Type Indicator
as illustrated, so tnat the letters equivalent tothe  f ilm
type in use are indicated in the window.
-fr-\   . . . Reversal type color film fort-Rft.,           daylight
-D-Ai\    . . . Negative type color  f ilm forfN- L^J         daylight
({urid\                  . . . Reversal type color film for\-t         tungsten lamp

         ...Black&Whitefilmt-JR                   . . . When the film is not loaded in
            the camera, set the Indicatorm\^/             to.,EMPTY..,
View original page 23Page 24 · Read text
www.butkus.us
FILM UNLOADING
E Wtren the figure "12" aggears in the exposure
   counter window, it signifies that the full length
   of the  f ilm has been exposed. Another wind of
   the crankhandle will set the.exposure counter
   between "12" and "13" , but continue winding
   until the crank-handle turns  f reely without
    tension.


                                       exposure!  Wnen the figure "24" appears in the
   counter window, it signif ies that the full length
   of the  f ilm has been exposed. Another wind of
   the crank-handle will bring out the Omark in
   the window. btrt continue winding until the
   crankhandle turns freely without tension.
View original page 24Page 25 · Read text
[z] Open the Back Cover by turning the Back
   Cover Locking Ring in the direction of "O"
    (Openl.


Ill  Pull out the Upper Spool Holder Knob and take
   out the exposed film from the  f ilm chamber.
    Paste the seal to prevent recoiling and wrap the
         f ilm in light-proof paper.
View original page 25Page 26 · Read text
www.butkus.us

o To minimize the trouble in loading your next
     f ilm. it is advisable to take out the empty spool
  from the lower  f ilm chamber and to set it in the
  upper chamber immediately after unloading the
  exposed film.


SHUTTER LOCKING LEVER
The Shutter Locking Lever located on the base of
the Shutter Release Button offers an effective
provision against accidental tripping of the shutter.
To lock the shutter, shift the Shutter Locking
Lever and align  it with "L" (Lock).
View original page 26Related documents and language editions
From the M. Butkus archive. Original publisher and archive notices are retained.
Check the model and edition against your equipment.
PDF verified 2026-10-10.