Film cameras
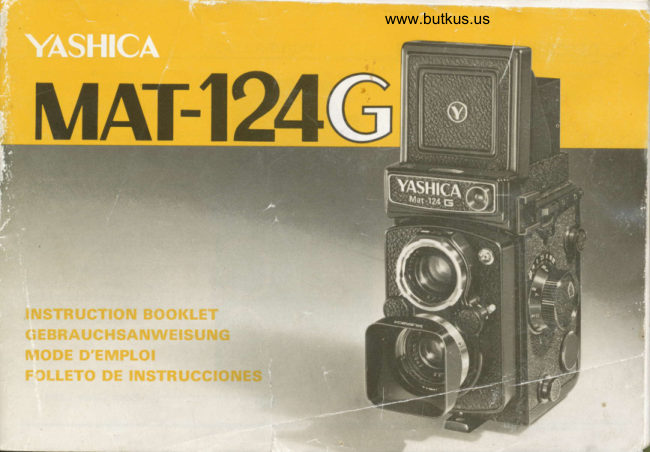
Yashica MAT-124G User manual
User manual for Yashica MAT-124G. 20 pages in English. Read the original PDF, download or print a copy without registration.
20 pagesEnglish1.9 MB PDF
Loading your manual…Open PDF directly
Document details
- Brand
- Yashica
- Model / document
- Yashica MAT-124G
- Document type
- User manual
- Language
- English
- Pages
- 20
- File size
- 1.9 MB
- Category
- Film cameras
- Document date
- Not specified in catalog
Search available document text
Find a term, then jump to its page in the original PDF. Image-only pages may not be searchable; check the PDF for exact wording and diagrams.
Page 2 · Read text
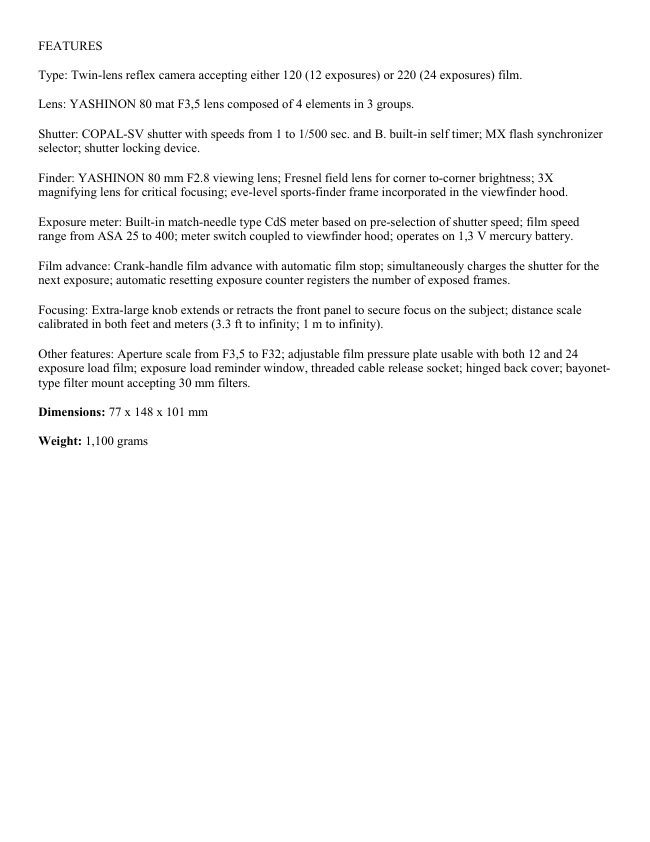
FEATURES

Type: Twin-lens reflex camera accepting either 120 (12 exposures) or 220 (24 exposures) film.

Lens: YASHINON 80 mat F3,5 lens composed of 4 elements in 3 groups.

Shutter: COPAL-SV shutter with speeds from 1 to 1/500 sec. and B. built-in self timer; MX flash synchronizer
selector; shutter locking device.

Finder: YASHINON 80 mm F2.8 viewing lens; Fresnel field lens for corner to-corner brightness; 3X
magnifying lens for critical focusing; eve-level sports-finder frame incorporated in the viewfinder hood.

Exposure meter: Built-in match-needle type CdS meter based on pre-selection of shutter speed; film speed
range from ASA 25 to 400; meter switch coupled to viewfinder hood; operates on 1,3 V mercury battery.

Film advance: Crank-handle film advance with automatic film stop; simultaneously charges the shutter for the
next exposure; automatic resetting exposure counter registers the number of exposed frames.

Focusing: Extra-large knob extends or retracts the front panel to secure focus on the subject; distance scale
calibrated in both feet and meters (3.3 ft to infinity; 1 m to infinity).

Other features: Aperture scale from F3,5 to F32; adjustable film pressure plate usable with both 12 and 24
exposure load film; exposure load reminder window, threaded cable release socket; hinged back cover; bayonet-
type filter mount accepting 30 mm filters.

Dimensions: 77 x 148 x 101 mm

Weight: 1,100 grams
View original page 2
Page 4 · Read text
BATTERY LOADING


                                                  1. Open the Battery Compartment Cover holding
                                          with finger and by turning it counter-clockwise. This
                                       camera uses a 1.3 V mercury battery to power its
                                          exposure meter. Use either Mallory PX-13B,
                                        Eveready EPX-13 or equivalent.

                                          (webmaster: see my link on mercury battery
                                           replacements )


                                                  2. Install a 1.3 V mercury battery to power the
                                          exposure meter, as illustrated.

                                     The mercury battery is no longer available. Use a
                                   Wein Air battery.
View original page 4Page 5 · Read text
www.butkus.us


CORRECT EXPOSURE SETTING (1 )


                                                   1. Turn the ASA Film Speed Setting Wheel until the
                                                figure denoting the ASA rating of the film in use aligns
                                           with the red indicator in the ASA Film Speed Indicator
                                    Window.

                                                     2. Center the desired shutter speed in the Shutter
                                       Speed Indicator Window by turning the Shutter Speed
                                            Control Dial. The exposure meter pointer in the
                                        Exposure Indicator Window is coupled to the shutter
                                      mechanism and will shift in either direction when the
                                                 shutter speed is adjusted.


                                                  1. The exposure meter begins to function when the
                                            focusing hood is set upright by lifting it W gently with
                                         your fingertip.


                                                  2. When the camera is to be left unused, fold the focusing
                                          hood. This will switch off the meter and prevent draining
                                             of battery power.
View original page 5Page 6 · Read text
CORRECT EXPOSURE SETTING (2)


                                          Turn the Aperture Control Dial and coincide the
                                             yellow follower needle (coupled to the aperture
                                         mechanism) with the red meter pointer (coupled
                                                    to the shutter mechanism), both visible in the
                                           Exposure Indicator Window.


                                                             · The correct combination of the shutter speed and
                                                  lens aperture can be seen in the Shatter Speed and
                                             Aperture Indicator Windows.


* When the yellow follower needle (Y)
perfectly coincides with the meter painter (
I ), it signifies that THE CAMERA is set
for correct exposure. The proper
combination of the shutter speed and
aperture is shown in the Shutter Speed and
Aperture Indicator Windows.

· If the yellow follower needle fails to
align with the meter pointer, alter the
shutter speed setting by turning the Shutter
Speed Control Dial in either direction. If
the two needles fail to match even when
both the shutter speed an aperture settings
are changed, it means that correct exposure
cannot be obtained under the prevailing
light condition.
View original page 6Page 7 · Read text
www.butkus.us


ASA FILM SPEED RATING

ASA rating indicates the sensitivity of the emulsion of the film and is clearly imprinted on the box or
instructions which come with the film.

ASA FILM SPEED SCALE

MAT I24G


SHUTTER SPEED


Light Condition                        Average Subject

Bright sun                              1/500 · 1/250 sec.

Cloudy bright                           1/250 · 1/125 sec.

Heavy overcast or rain                    1/60 · 1/30 sec.

Indoor                                   1/30 sec. or slower

Special conditions                      1 sec. or B


Set desired shutter speed by turning shutter speed control dial. To determine Aperture control dial and align
yellow follower needle with red meter pointer.
View original page 7
Page 8 · Read text
FOCUSING


The camera features a magnifying lens for critical
focusing which springs up into position when the
sports finder frame section of the Focusing Hood is
pushed in slightly.

 To focus, turn the Focusing Knob while observing
the image of your subject produced on the Focusing
Screen. After focusing, compose your picture.


 In focus

THE CAMERA is in focus when the
image on the Focusing Screen appears
clear and crisp.

 Out of focus Your subject will appear
blurred on the Focusing Screen when it
is out of focus.
View original page 8
Page 9 · Read text
www.butkus.us


FILM LOADING


                                                   1. The Back Cover will spring open when the Back
                                       Cover Locking Ring is turned in the direction of "O"
                                            (Open).

                                           Note: The exposure counter resets automatically to
                                          "S" (Start) when the Back Cover is opened.

                                                      2. Pull out the Upper Spool Holder Knob and
                                             place the empty spool in the Take-Up Spool
                                       Chamber. After the Take-up Spool is set properly in
                                               the camera, return the Spool Holder Knob to its
                                                  original position.
View original page 9Page 10 · Read text
3. When loading a 120 film (12
exposures), hold the back cover
with both hands and slide the
Film Pressure Plate with your
thumbs until it clicks into
position and the sign 12 EX. (in
green) appears in the window in
the middle of the plate. When
loading a 220 film (24
exposures), hold the back cover
with both hands and slide the
Film Pressure Plate with your
thumbs until it clicks into
position and the sign 24 EX. (in
red) appears in the window in the
middle of the plate.

Cautions:
When sliding the Film Pressure
Plate from 12 EX. to 24 EX., or
vice versa, use both hands and
then check if the plate spring is
working properly by depressing
the plate once or twice.

Uneven film feeding and poor
focusing may result if the Film
Pressure Plate is not properly
positioned.
View original page 10
Page 11 · Read text
www.butkus.us


[4] Place the new roll of film in the lower film
chamber while pulling out the Lower Spool
Holder Knob. Also make sure that the Lower
Spool Holder is returned to its original position
after loading the film.

 [5] Draw out the film leader gently and
introduce its tip straight and amply into the slot
on the spindle of the Take-up Spool. The film
may fail to advance if the film leader is not
inserted properly into the slot.

 [6] After ascertaining that the trimmed edge of
the film leader rests flush against the edge of the
slot, turn the Film Wind Crank-handle gently in
the direction of the arrow and check whether the
film is advancing properly.
View original page 11
Page 12 · Read text
7. Continue winding the film until the "start" mark on
the film leader paper lines up with the GREEN
triangular (<) "start" mark for 120 film.

 7b. Continue winding the film until the "start" mark
on the film leader paper lines up with the RED
triangular (   ) "start" mark for 220 film.


                                                8. Then, close the Back Cover and turn the Back Cover
                                      Locking Ring toward "C" (Close) while pressing the
                                            cover. (When closing the Back Cover, see that the lug
                                    on the body rests properly in the slot on the Back Cover
                                            Latch.)

                                                9. The letter ''S" appears in the Exposure Counter
                                         during the film loading operation. After closing the
                                   Back Cover, wind the crank-handle until the figure "1"
                                         appears in the Exposure Counter Window.
View original page 12Page 13 · Read text
www.butkus.us

FILM WIND CRANK HANDLE


1. First, turn the Crank-handle all the way in a clock
wise motion (toward [1]).

 2. Then, wind it all the way in a counter clockwise
motion (toward [2]) to charge the shutter.

CAUTION: In case of slow shutter speeds (1 sec. to
1/50sec.), make sure the shutter mechanism completes
its function before winding the film.


EXPOSURE LOAD REMINDER WINDOW


                               When the back cover is closed, the exposure load
                                         reminder window will show "12 EX" (green) in case
                                             of 120 film, and "24 EX" (red) in case of 220 film, to
                                        check the exposure load of the film in use.
View original page 13Page 14 · Read text
FILM TYPE INDICATOR WINDOW


After loaded the film, turn the Film Type Indicator as illustrated, so that the letters equivalent to the film type in
use are indicated in the window.


FILM UNLOADING


                                                  1. When the figure "12" appears in the exposure
                                            counter window, it signifies that the full length of the
                                             film has been exposed. Another wind of the crank
                                           handle will set the exposure counter between "12"
                                       and "13", but continue winding until the crank-
                                           handle turns freely without tension.

                                               1b. When the figure "24" appears in the exposure
                                            counter window, it signifies that the full length of the
                                             film has been exposed. Another wind of the crank-
                                           handle will bring out the Mark in the window, but
                                            continue winding until the crank handle turns freely
                                           without tension.
View original page 14Page 15 · Read text
www.butkus.us


2. Open the Back Cover by turning the Back
Cover Locking Ring in the direction of "O"
(Open).

 3. Pull out the Upper Spool Holder Knob and
take out the exposed film from the film
chamber. Paste the seal to prevent recoiling and
wrap the film in light-proof paper.


                                      * To minimize the trouble in loading your next film,
                                                                    it is advisable to take out the empty spool from the
                                          lower film chamber and to set it in the upper
                                       chamber immediately after unloading the exposed
                                                 film.

                              SHUTTER LOCKING LEVER

                                     The Shutter Locking Lever located on the base of the
                                              Shutter Release Button offers an effective provision
                                               against accidental tripping of the shutter. To lock the
                                                    shatter, shift the Shutter locking Lever and align it
                                           with "L" (Lock).
View original page 15Page 16 · Read text
TIPS ON BETTER PICTURE-TAKING


Color Photography:
For best results in color photography, see that your
subject' receives the light directly from the front. The
even distribution of light over the entire subject area
will assure better color balance.

Shooting Open Scenes:
When shooting Landscapes or other open scenes, the
use of a lens hood is recommended to ward off
extraneous reflected light.

Shooting Backlighted Subjects:
The CdS exposure meter built into the camera is
designed to make automatic compensation for
exposure when shooting against light, therefore, take
the exposure reading in the normal way.

In case you wish to bring out your main subject
brighter, approach your subject and set the exposure
accordingly.


USE OF FILTER


                                When shooting under blazing sunlight or
                                          photographing snow or beach scenes, the use of a
                                                          filter is recommended to assure better overall effect.

                                When using filter, make compensation for exposure
                                           according to the filter factor. (For instance, double
                                              the exposure when a Y2 filter is mounted over the
                                             taking lens.)

                                              In case the correct combination of shutter speed and
                                              aperture is 1/250 sec. and F8, turn the Aperture
                                           Control Dial and set the lens aperture to F5.6 when
                                            using a Y2 filter.
View original page 16Page 17 · Read text
www.butkus.us


FLASH EXPOSURE


When using a conventional flash gun or
electronic flash, mount it directly on the
accessory shoe or with a bracket attached to
the Tripod Socket of the camera.

Plug the PC cord of the flash unit into the
Flash Contact of the camera.

Correct exposure in flash photography is
determined by referring to the guide number
of the flash bulb or electronic flash in use.
The correct aperture is obtained by dividing
the guide number for a specific ASA film
speed rating by the camera-to-subject
distance.


Always set the Flash Synchronizer Selector to "M''
with M-class bulbs.

Switch the Flash Synchronizer Selector to "X" when
using F-class flash bulbs or electronic flash.

The guide number is clearly indicated on the outer box
or instructions which come with the flash bulbs or
electronic flash.


    Flash unit      Flash Contact    Shutter speeds

  M-class bulbs                       All speeds
            M
   F-class bulbs                      1/30 sec. or
               X
    Electronic                         slower
               X
       flash                          All speeds .
View original page 17Page 18 · Read text
SELF-TIMER


                               When using the self-timer, always see to it that the
                                           Flash Synchronizer Selector is switched to "X"
                                              position

                                                  1. Charge the shutter by winding the Crank-handle
                                       and then set the Self-Timer by shifting the lever on
                                              the bottom of the lens barrel section in the direction
                                             of the arrow.

                                                  2. The Self-Timer is activated through depression of
                                              the Shutter Release Button and trips the shutter after
                                          a delay of 6 to 15 seconds.

                               When shooting with the aid of the self-timer. it is
                                             advisable to mount the camera on a tripod or to set it
                                      on a firm surface.
                                            Caution: Avoid manipulating the Self-Timer Lever
                                          while the Flash Synchronizer Selector is set at "M"
                                                 position, since it may cause damage to the Self-Timer
                                     mechanism


B (BULB) EXPOSURE CABLE RELEASE


At ''B" (Bulb) setting, the shutter remains open over
the duration the Shutter Release Button is depressed.
This setting is used for long exposures under subdued
light conditions or in shooting fireworks, etc.

When shooting at 1/30 sec. or slower shutter speeds or
making B (bulb) exposures, it is advisable to mount
the camera on a tripod and to use a cable release to
prevent erratic movement of the camera during
exposure. To mount the cable release, screw it into the
Cable Release Socket on the Shutter Release Button.
View original page 18Page 19 · Read text
www.butkus.us


DEPTH OF FIELD


                                     The depth of field for a given aperture and camera-
                                                to-subject distance can be read off the depth-of-field
                                                scale around the Focusing Knob. By checking this
                                                   scale, you can easily determine before shooting the
                                              extent over which the objects will appear sharp and
                                                    clear.

                                When your camera is focused on a subject at a
                                              distance of 10 feet, and the lens aperture is set at
                                          F16, the range indicated by figures"16" on both sides
                                             of the distance scale Index is the extent of the depth
                                             of field. In other words, all objects from a distance of
                                           about 7 feet to 15 feet will appear sharp and clear on
                                              the film.


SPORTS FINDER


The Sports finder incorporate in the Focusing Hood
comes in handy for snapshots or when shooting fast-
moving subjects at eye-level.
To set the Sports finder for action, press the Sports
finder Frame Cover all the way in until it clicks in place.

 To close the Cover, push the Release Button on the
back of the Focusing Hood.
View original page 19Page 20 · Read text
LENS HOOD (30 mm bayonet type) Use of lens
hood is recommended for subjects in bright light, sea
or snow scenes, and to prevent unnecessary stray
light from falling on the lens.

 FILTER (30 mm bayonet type)
Better overall results can be obtained through use of
a filter when shooting sea or snow scenes, etc. under
glaring sunlight and for obtaining special effects.
Filters available for B&W film UV, ND2 Y2 02, R1,
G1, Filters available for color film 1A, BOB, 81B,
82A & 85.
View original page 20
Related documents and language editions
From the M. Butkus archive. Original publisher and archive notices are retained.
Check the model and edition against your equipment.
PDF verified 2026-10-10.