Film cameras
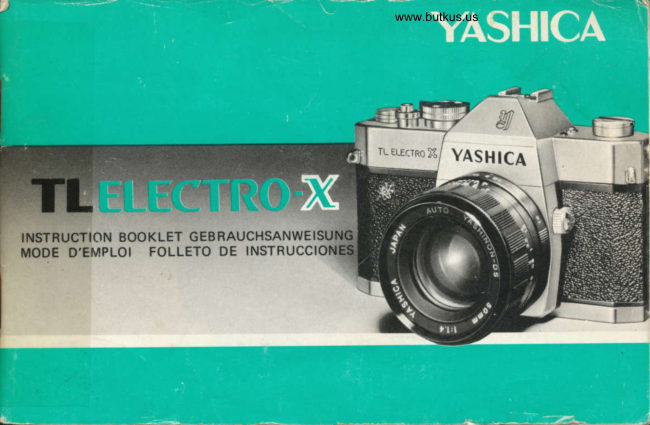
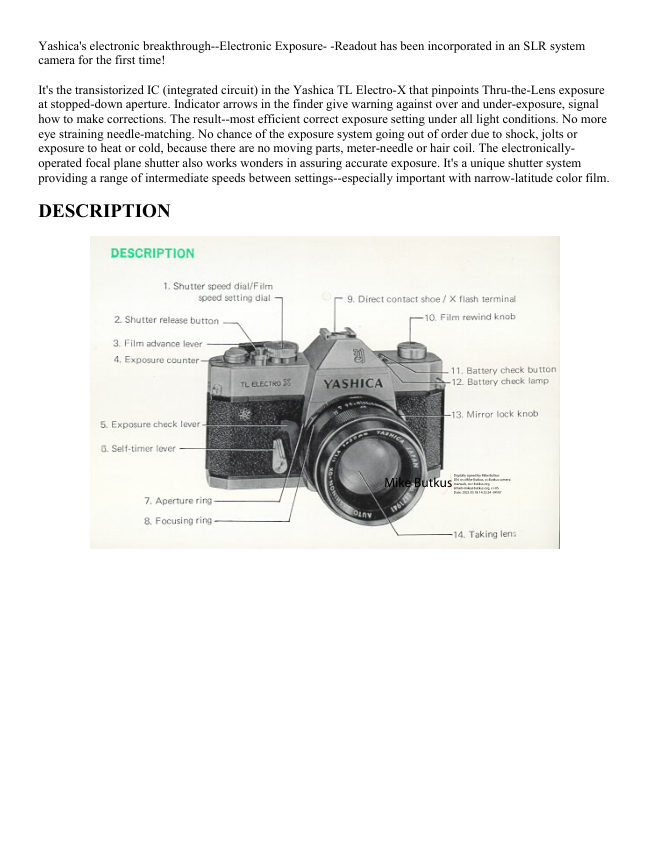
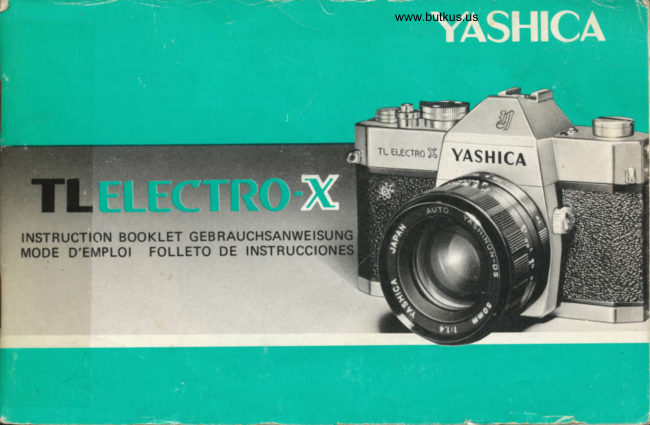
Yashica Tl Electro X User manual
User manual for Yashica Tl Electro X. 57 pages in French, Spanish. Read the original PDF, download or print a copy without registration.
57 pagesFrench, Spanish5.6 MB PDF
Loading your manual…Open PDF directly
Document details
- Brand
- Yashica
- Model / document
- Yashica Tl Electro X
- Document type
- User manual
- Language
- French, Spanish
- Pages
- 57
- File size
- 5.6 MB
- Category
- Film cameras
- Document date
- Not specified in catalog
Search available document text
Find a term, then jump to its page in the original PDF. Image-only pages may not be searchable; check the PDF for exact wording and diagrams.
Page 5 · Read text
www.butkus.us
LOADING BATTERY


  Remove the battery compartment cover b     2. Make sure that the (-) side faces inside. lf the
  y turning it in the direction of the arrow and      battery is installed in a reverse position, the
   install a 6V silver oxide battery. (Eve ready       Electronic Exposure Readout will not func-
  No. 544, Mallory PX-28 or equivalent).               tion. Close the battery compartment cover
                                                            secutelv.


                                                                                                                                                                                                      L
View original page 5Page 7 · Read text
www.butkus.us
CHECKING BATTERY
                                NOTES
                            ON SILVER OXIDE BATTERY
                                     oWhen the battery is installed incorrectly,
                                          1)The green lamp will not light when the
                                                           battery check button is depressed.
                                            2)The shutter speed will fu 1/10O0 sec. when
                                                           the shutter release button is depressed.
                                   O Do not throw used silver oxide battery into
                                                         the fire, trash cans or waste receptacles.
                                 ODo not disassemble the silver oxide battery or
                                                           leave it where children can get access to  it.
 lf the battery is weak, the Electronic Exposure
Readout will not operate correctly. Before
shooting, check the battery condition. Press the
battery check button and when the green lamp
 lights, the battery has sufficient power to ope-
rate the exposure control system. Replace the
battery when the green lamp does not light.

                                                              l
View original page 7Page 8 · Read text
Merci de faire un don de 2,50 € pour soutenir ce site via E-bay ... www.PayPal.me/butkus


Bitte spenden Sie 2,50 Euro, um diese Website über E-Bay zu unterstützen ... www.PayPal.me/butkus
View original page 8
Page 9 · Read text
BATTER IEPRU FUNG       CONTROLE DE LA PILE     PARA PROBAR LA PILA
Bei zu schwacher Batterie arbeitet   Si la pile est 6puis6e, le posem6tre  Si la pila est6 debilitada. no podrd
die elektronische BelichtungsmeB-   6lectron ique ne peut fonctionner   activar correctamente  el sistema de
einrichtung nicht einwandfrei.   correctement. Avant toute prise de  exposicion, de lectura elect16nica.
Batterieprrlf knopf  eindrricken:   vues, v6rif ier la pile. Appuyer sur le  Antes de realizar una toma, com-
wenn dann die grLine PrLiflampe  bouton "Contrdle de pile" si  la  pruebe el estado de la pila. Apriete
aufleuchtet, ist die Spannung der  lampe verte s'allume, la pile peut  su bot6n de prueba pertinente si se
Batterie noclr ausreichend. Leucht-  encore assrrrer le fonctionnement  enciende la ldmpara verde, la pila
et sie nicht merh auf, so sollte die  correct du posemetre. Remplacer la  cuenta con potencia suficiente. Si
Batterie erneuert werden.             pile si la lampe verte ne s'allume no se enciende dicha lSmpara.
                                 PaS.                             .,!.:f                     cambie la pila.
 Anmerk u ng zur Silberoxydbatterie:  Remarques concernant les piles  i  Advertencias relativas a la pila de
Wenn die Batterie verkehrtherum   l'oxyde d'argent                    oxido de plata:
eingesetzt           wird,               Ouand la pile est plac6e a     Si la pila estdmal colocada:  'l .Leuchtet die grtine Lampe nicht      l'envers,                                1. La l6mpara verde no se enciende
   auf , wenn der Batterie-PrLif knopf   i. La lampe verte ne s'allume pas si    cuando se aorieta el boton de
   gedrrickt wird.                                                          | 'o n .appuie sur le  bouton     orueDa.
2. Die  Versch lusszeit  betrdgt     "Cbntrdle de oile".                   2. Cuando se aprieta el disparador,
  1/1000 Sek.wenn der Auslose-    2. La vitesse est d'  1/1 000 de     la velocidad del obturador ser5
  knopf betbtigt wird.                 seconde quand on d6clenche.        de 111,000 seg..
Verbrauchte Silberoxydbatterien   Ne pas jeter les piles usag6es dans   No tire nunca una pila usada al
nicht ins Feuer werfen oder herum-    le  feu,  elles  risqueraient    fuego, puesto que puede ex-
liegen lassen, wo sie Kindern in die     d'exploser.                               plotar.
Hdnde fallen konnten.          Ne pas d6monter les piles a   No la desarme, ni la deje al  '
                                        l'oxyde d'argent, ni les laisser d la     alcance de los nin6s.
                                        port6e des enfants.,   '

                                                                               ---   -     ci;-l*"-*i-r!id           -;*- ' -'iifi3ffih^         .^-
View original page 9Page 10 · Read text
www.butkus.us
   LOADING FILM


                                                                   -;:.t
      Pull out the back cover lock                        2. Pull out the  f ilm rewind knob, place the film
      cover will pop open.                                  cassette into the film chamber and replace the
    The exposure counter will oe  au tomatically       rewind knob to its original position. Insert the
       set at S (start) mark.                                film leader into one of the slots of the take-uo
                                                                   spool.


NOTE:
Always Ioad the  f ilm under a shade or in subdued light, never in direct sunliqht
View original page 10Page 11 · Read text
FI LMEIN LEG EN            MISE EN PLACE DU FILM    PARA CARGAR LA PELICULA
 1. Beim Ziehen an der seitlichen    1. Tirer le levier de blocage du dos    1. Tire hacia afuera de la palanca
   RLlckwand auf; dabei stellt sich     et celui-ci s'ouvrira. Le compteur    del seguro de la tapa trasera y
  das Filmzdhlwerk automatisch    se met automatiquement a S     6sta se abririi por si misma. El
   auf S(Start).                             (d6part).                       contador de exposiciones se
2. Rrickspulknopf herausziehen und  2.Tirer le bouton de r6embodinage,     colocard automdticamente en la
  neue Kassette einlegen, dann    mettre la cartouche de f ilm dans    marca S (comienzo).
  Rrickspulknopf wieder ein-   son logement et remettre  le   2. Levante le bot6n del enrollam-
   drrlcken. Filmanfang in einen der    bouton de rebobinage dans sa     iento inverso; coloque el carrete
  Schlitze der Aufwickelspule    position  initiale. Introduire   de la pelicula en el hueco
   einfrihren.                         l'amorce du film dans une des     correspondiente; baje el boton
                                          fentes de la bobine r6ceptrice.       mencionado V meta el comienzo
                                               de la pel icula en una de las
                                                                                  ranuras del carrete arrollador.
ANMERKUNG:               REMAROUET                  NOTA:
Filme immer im Schatten oder  Toujours charger l'appareil a  Coloque siempre la pelicula en un
geddmpften Licht einlegen, nie in  l'ombre ou en lumidre faible, jamais   sitio oscuro o sombreado, nunca
direktem Sonnenlicht.               en plein soleil.                        bajo luz solar directa.
View original page 11Page 12 · Read text
www.butkus.us


Advance the  f ilm, making sure the sprocket     4. Wind the film advance lever and make blank
teeth properly engage the perforations of the      exposures until the figure "1" appears in the
f ilm. CIose the back cover.                         exposure counter window. You're now ready
                                                         for the iirst exposure.
View original page 12Page 13 · Read text
3. Film transportieren, dabei darauf   3. Faire avancer le film, en s'assu-   3. Avance la pelicula, asegurdndose
      achten, daB die Zahne derTrans-     rant que les dents d'entrainement   de que los dientes del rodillo
      portspule richtig in die Film-    accrochent bien les perforations    encajan en las perforaciones de la
      perf orat io n  e ing re if en.   du  f ilm. Refermer le dos, le    misma. Cierre la tapa trasera.
      Rtickdeckel dann wieder sch    compteur est sur le repdre s
        lieBen, bis er einrastet.                  (ddpart).
    4. Film transportieren und aue   4. Armer et d6clencher jusqu'd ce   4. Enrolle la palanca de avance de la
                                                                                                    pel icula hasta que- aparezca la                          f osen, bis die Zahl "1"  im    que le compteur aff iche le chiffre
                                                                                                                               del      Ziihlwerk erscheint. Die Kamera       1 ,  tout est alors prdt pour     cifra "l"  en la ventanilla
                                                                                         con o cual yaI       ist jetzt fertig fiir die erste Auf -     prendre la premirirre vue.             contador de tomas,
     nahme                                                           puede tomar su primera foto.

'l


 I
I                                                                                                                                                   r0
View original page 13Page 15 · Read text
E INSTELLEN DER FILM.  REGLAGE DE SENSIBILITE  AJUSTE DE LA SENSIBILI-
 EMPF IN DLICH KE IT        DU FIDM              DAD DE LA PELICULA
 1. Einstellring am Rdndel hoch-   1. Soulever la bague de r6glage de    '1. Levante el anillo del regulador de
   ziehen.                                      sensibilit6.                               sensibilidad.
 2. ASA/D  I N -Empfindtichkeit im  2.Tourner la bague de 169lage pour  2.Haga coincidir el n0mero cor-
   Fenster sichtbar gegenr-iber der    amener le repdre de sensibi lit6 en     respondiente a la sensibilidad deI  Dreiecksmarkeeindrehen.              face du triangle.                    la pelicula con la marca trian-
D ie ASA/D   I N -Zah I  gibt  die  La designation ASA/DlN indique le    gular dando vueltas al mencio-
 Lichtempf indlich keit des benutzten  degr6 de sensibilit6 du film, elle est    nado regu lador.
 Filmes an und ist auf der Film-  clairement indiqu6e sur la boite ou  El grado ASA/DlN representa la
packung angegeben.               les instructions accompagnant  le  fotosensibilidad de la emulsi6n de
                                                                                       f ilm.                             la pelicula, y  lo lleva indicado
                                                                        claramente en su caj ita o en la hoja
                                                            de instrucciones.
E mpf ind   I ichkeitstabelle              Tableau de Vitesse du Film          Tabla de sensibilidades ASA/DtN


                                                                                                                                              t2
                                                                                                                          -,;offi'" :f.f          ,,;rd
View original page 15Page 16 · Read text
www.butkus.us
        {_+     E r
                                           \


      O Preselmtion of Shutter Speed                o Preselection of Aperture
                                                                                                            De-           In bright light, preselect the shutter speed by     ln subdued light, preselect the aperture.
          turning the shutter speed dial. Depress the      press the exposure check lever and turn the
          exposure check lever and turn the aperture      shutter speed dial to obtain correct exposure.
             ring to obtain the correct exposure.
                                        O  I n  either operation, correct exposure  is
                                                                             assu red.


t3
View original page 16Page 17 · Read text
EINSTEL LEN DER VER -   RECLAGE DU TEMPS DE  AJUSTE DE LA EXPOSICION
  SCHLURZEIT               POSE                                           tl Preseleci6n de la velocidad del         I
                                                                                                                                                                                                                                                                                                                                                                                                                                   i   o Vorwahl der VerschluBzeit              j Pr6s6lection de  la   vitesse    obturador con luz potente, se
   Bei guten Lichtverh6ltnissen  wdhle    d'obturation. En forte lumidre,     establece previamente la velo-
  man die VerschluBzeit vor. Dann    pr6-r6gler la vitesse en faisant     cidad de obturaci6n; se aprieta  el
   driicke man den Belichtungs-    tourner le cadran des vitesses.     d ispositivo  verif icador de
   meBschalter und justiere mit dem   Appuyer sur le levier de contr6le    exposici6n y se gira luego el
   Blendenring nach.                     d'exposition et tourner la bague     regulador de abertura hasta que
     j Vorwahl der BlendengroBe        de diaphragme pour obtenir une   se consiga una exposici6n
   Bei schlechterem Licht wiihle man    expostioton correcte.                   perfecta.
                                                                               Preselecci6n de la abertura: Si la   dagegen die Blende vor, driicke den   l  Pr6s6lection du diaphragme. En    j
   BelichtungsmeBschalter und drehe   lumiere att6nu6e, p16-169ler     luz es d6bil, se establece previ-
   den VerschluBzeitenknopf auf die    l'ouverture. Appuyer sur le levier    amente la abertura. Se aprieta el
   zugeordnete Zeit.                     d'exposition et tourner le cadran     d ispositivo  verif icador de
    I In beiden Fiillen erhelt man so die   des vitesses pour obtenir une    exposici6n y se gira luego  el
   korrekte Belichtung.                   exposition correcte.                                     r egulador de velocidades de
                                                I Dans un cas comme dans l'autre,    obturaci6n y se gira luego  el
                         on obtiendra u ne ex position    regulador de velocidades de
                                             correcte.                       obturaci6n para lograr una
                                                                                exposici6n perfecta.
                                                                                              I En cualquier caso. se lagrard una
tl                                                                               exposici6n correcta.


                                                                                                                                                  t4
View original page 17Page 18 · Read text
www.butkus.us

ELECTRONIC SHUTTER SYSTEM
The electronic shutter'system provides inter-
mediate speed range at in-between setting.
The shutter speed dial has click-stops at each
setting between 1/1000 sec. and 1/30 sec..
When taking pictures either of fast moving
subjects or in bright sunlight, it may be
easier and better to preselect the shutter
speed. Then, obtain correct exposure by
turning the aperture ring. On the other hand,
in the slowershutter speed range between
                                                secs.)1/30 sec. and - index mark (approx. 2
there are no click-stops. When taking pictures
in dim light, preset the lens opening. Then,
obtain correct exposure by turning the
shutter speed dial.


t5
View original page 18Page 20 · Read text
www.butkus.us
                  YASHI(   Theposureredcofrectrons.exposure warning arrows indicate ex-
                                                    Sight through the tinder, keeping the exposure
                                                check lever depressed. One of the red UNDER or
                                 OVER exposure warning arrows appears in the
                                                        lower part of the  f inder.
                                                    ln the preselection of shutter speed, rotate the
                                                      aperture ring for correction of exposure setting.
                                And in preselection of aperture, adjust the
                                                          shutter speed dial.
                                                                                                                                                                  I n either case, correct exposure  is obtained when
                                                          the arrows go out.


                  G.-'

         Over-exposu re       U nder-exPosu re


t7
View original page 20Page 21 · Read text
Die rotaufleuchtenden Warnlamp-  Les  f liches rouges indiquent les  Lamparas de advertencia para la
chen zeigen Belichtungskorrekturen  corrections d'exposition d faire.      expocis6n
an.                              Regarder par le viseur tout en  Mire a trav6s del visor y mantenga
Durch den Sucher blicken und  continuant d appuyer sur le levier  el  d ispositivo  verif icador de
gleichzeitig den  Belichtungs-  de contr6le d'exposition. Une des  exposici6n apretado: En la parte
messchalter heru nterdrlicken. Einer     f ldches rouges (Surexposition ou   infenor del visor aparecerd una de
der roten UNDER oder OVER   sous-exposition)  apparait d la partie  las  f lechas rojas de advertencia
Warnpfeile erscheint im unteren  inf6rieure du viseur. Si l'on a  UNDER (sub-exposici6n) o  la
Teil des Suchers. Bei der Vorwahl  d6term in6  i  l'avance la  vitesse OVER (sobre-exposicion). En  la
der VerschluBzeit, den Blendenring  d'obturation, tourner la bague du  preselecci6n de velocidad del
zur  K orrektur der  Belichtung  diaphragme pour corriger l'exposi-  obturador, gire el regulador de
drehen. Bei der Blenden-Vorwahl   tion. Dans le cas de la or6s6lection  abertura, hasta corregir la exposi-
den VerschluBzeitenknopf anpass-  du diaphragme, tourner le cadran  cici6n. En la  preselecci6n de
en. In beiden Fiillen wird die  des vitesses.                         abertura. ajuste el regulador de
richtige Belichtung erreicht wenn  Dans les 2 cas, l'exposition correcte  velocidades de obturaci6n. En
die Zeichen nicht mehr auf leu-   sera obtenue lors de l'extinction des  ambos casos, se obtiene la exposi-
chten.                                                                         f ldches.                       ci6n correcta a I desaparener  la
                                                                                                                                                                              f lecha.


                                                                                                                                              t8
View original page 21Page 22 · Read text
www.butkus.us
  OVER-EXPOSU R E              UNDER-EXPOSU R E
   Turn the aperture ring or the shutter speed dial   Turn the aperture ring or the shutter speed dial
     in the direction of the arrow in the viewfinder     in the direction of the arrow in the viewfinder
    until the left exposure warning arrow goes out.     until the right exposure warning arrow goes out.
       lf the arrow fails to turn off . use an ND f ilter.           lf the arrow fails to turn off, use a larger
                                                      aperture or a slower shutter speed. Or the use of
                                                a flash unit is recommended. When using a slow
                                                          shutter speed under 1160 sec., the use of a tripod
                                                                                      is advised.


                  Light conditions        Measuring          Shutter Speeds
           & Subiects              Procedures      & Apertures
               Fair: Fast moving         Preselection of     l/1ooo, 1/500, tl25o
               subjects                  shutter speed        sec.
            Hazy: Moving subjects   Preselection of                                                  Il25O & 1/125 sec.                                       shutter speed
                                         Preselection of             Overcast: Rainy                                                    1/60 & 1/3O sec.                                       shutter speed
             Indoors: Dim light        Preselection of     Select large aperture                                         aperture
              Special cases                          "8" setting


r9
View original page 22Page 23 · Read text
UeeneCLIcHTUNG             SUREXPOSITION                soBRE-EXPOSTCTON
Den Blendenring oder den Versch-  Tourner, soit la bague du dia-  Gire el regulador de aberturas o el
luBzeitenring in Richtung des Pfeils  phragme, soit le cadran des vitesses  regulador de velocidades de obtu-
im Sucher soweit drehen bis der  dans le sens de la f ldche visible dans  raci6n en el sentido oue indica la
I in k e  B elichtu ngs-Warnpf  eil   le viseur, jusqu'd ce gue cette  f ldche  flecha que aparece en el visor, hasta
ausgeht. Wenn der Pfeil nicht er-   (gauche) s'6teigne. Si elle ne s'6teint  que la flecha de advertencia de la
lischt. einen ND-Filter verwenden.   pas, utiliser un filtre ND.          izquierda desaparezca. Si  no
                                                                            desaparece, use un f iltro de ND.

UNTERBELICHTUNG            SOUS.EXPOSITION              SUB-EXPOSICION
                                                                                     dia-  Gire el regulador de aberturas o elDen Blendenring oder den Ver-  Tourner. soit la bague de
schluBzeitenring in Richtung des  phragme, soit le cadran des vitesses  regulador de velocidades de obtu-
Pfeils im Sucher soweit drehen bis  dans le sens de la  f ldche visible dans  raci6n en el sentido de la flecha que
der rechte Belichtungs-Warnpfeil    le viseur, jusqu'A ce que cette fldche  aparece en el visor, hasta que
                                                                                                                                                                                                                 f lecha de advertenciaausgeht. Wenn der Pfeil nicht er-   "droite" s'6teigne. Si elle ne s'dteint   desaparezea  la
                                                                 grande  de la izquerda. Si no sucede asi, uselischt, eine grossere B lende oder  pas, utiliser une plus
ldngere VerschluBzeit  einstellen.  ouverture ou une vitesse plus faible.  una abertura mayor o una velocidad
Die Verwendung von Blitzlicht ist   L'utilisation d'un flash est recom-  inferior de abturaci6n. O mejor
ratsam. Bei einer VerschluBzeit von  mandtie. Aux  vitesses lentes  ouede usar un    f lash. Cuando
ldnger als 1/60 Sek. ist es empfeh-   (inf6rieures a 1 /60 s.) il est conseil16  fotografia con una velocidad de
lenswert ein Stativ zu verwenden.   d'utiliser un pied.                  obturaci6n lenta inferior a 1/60,
                                                                       conviene usar un tripode.


                                                                                                                              20
View original page 23Page 24 · Read text
www.butkus.us
 FOCUSIT{G


           www.butkus.us
Look through the finder and turn the focusing
ring until the image on the focusing screen
appears clear and crisp.


                                                                         Out of tocus
View original page 24Page 25 · Read text
ENTFERNUNGSEINSTEL. MISE AU POINT       ENFOOUE
LUNG                             Regarder dans le viseur et tourner la Mire a trav6s del visor y gire el
Durch den Sucher blicken und den bague de mise au point jusqu'd ce mando de enfoque hasta que apa-
Entfernungseinstel lring soweit dre- que l'image soit claire et nette.     rezca perfectamente nftida y clara
hen bis das Sucherbild klar und                                            la imagen.
scharf erscheint.

Gut eingestellt                    bonne mise au point                enfocada
Schlecht fokussiert                  mauvaise mise au point.              desenfocada


                                                                                                                   22
View original page 25Page 28 · Read text
www.butkus.us


Fold out the crank-handle on the  f ilm rewind     3. Open the back cover and take out the film
knob and turn it in the direction of the arrow.        cassette.
A slight resistance will be felt when the film
pulls off the takeup spool, but continue
winding the crank-handle until you feel the
film pulling away from the slot of the take-up
sooo  l.
View original page 28
Page 30 · Read text
www.butkus.us
            FEATURES OF TL ELECTRO.X

         Lens: Auto Yashinon SOmmf/1.4; stops down to f/16
        Shutter: Electronically-operated focal plane shutter with speeds from B, SLOW (about
             2 seconds) to 1/1000 sec.; intermediate shutter speed setting optional;
                         self-timer plus FP-X sync.
Exposure Control: Thru-theLens CdS light measuring system; Electronic Exposure Readout
                     (exposure warning arrows suggest exposure corrections)  : ASA range 25-800;
                 a 6V silver oxide battery is used to power the exposure control system and
                       electric-operated  focal plane shutter.
     Viewfinder: Reflex viewfinder with microprism focusing spot, ground-glass collar for
                 depth of field analysis; focusing from 0.5 meter ('1.75 feet) to infinity;
                    exposure warning lamps visible in the viewfinder
  Film Transport: Ratchet-type, single-stroke film advance lever; automatic resetting exposure
                      cou nter
  Other Features: Battery checker, Mirror lock, Directcontact shoe, Multi-slot take-up spool for
                     easy and fast loading
      Lens Shade: 57mm slip-on type
          Filters: 55mm screw-in type
     Dimensions: 151 x 96 x 96.4mm
       Weight: 1050 grs:
                                                                                                                               f /2-O are also available.                Models with  f 11.7 and  f /1.9
View original page 30Related documents and language editions
From the M. Butkus archive. Original publisher and archive notices are retained.
Check the model and edition against your equipment.
PDF verified 2026-10-10.