Film cameras
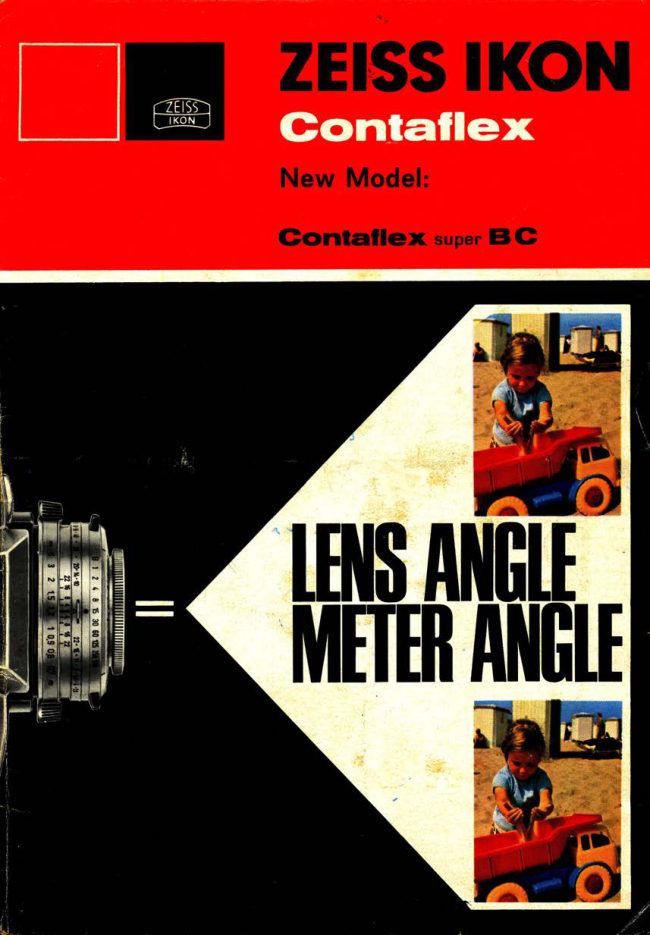
Zeiss Ikon Contaflex Super BC User manual
User manual for Zeiss Ikon Contaflex Super BC. 21 pages in English. Read the original PDF, download or print a copy without registration.
21 pagesEnglish6.8 MB PDF

Loading your manual…Open PDF directly
Document details
- Brand
- Zeiss Ikon
- Model / document
- Zeiss Ikon Contaflex Super BC
- Document type
- User manual
- Language
- English
- Pages
- 21
- File size
- 6.8 MB
- Category
- Film cameras
- Document date
- Not specified in catalog
Search available document text
Find a term, then jump to its page in the original PDF. Image-only pages may not be searchable; check the PDF for exact wording and diagrams.
Page 3 · Read text
-5'       T
  Guide to operational Parts
 I  Film speed scale (DlN and ASA)
 2  Fitm speed setting mark 3 Exposure atJiustment device X
 4  Lid for inseruion of exposure meter battery                             ;
 5  Distance scale
 6  Flash guide number scale for ZEISS TESSARf/2.8, 50 rnm 11 t   lens
 7  De;"rh of field scale with distance-setting mark                     ,
 8 Shu;tar speed scale with setting grips                                                              i
 9  Intercfiangeabte lens locking Oevice
1 0 Shutter speed settlng mark
1 1 InterchangeableZEISSTESSARt12.8,50 mm lens
1 2 On-olf key for exposure automation. Also serves to s€t
  '   lens aperture and automatic flash exposure device, in con-
    junction with setting griP 36
13 Aperture scale (manual),for use when automatic exposure
    control is disengaged
14 Distance setting griPs
15 Button for setting film reminder dial
16 Retractable rewind lever                                  .---,1^r*
17 Film remilrder dial
18 Film plane indicator
19 Exposure meter indicator with lens sto[- values and rerd
   warning zones
20 Flash contact
21 AccessorY shoe
22 Rapid film transport and shutter cocking lever
23 shutter release button with screw-thread for cable relea;e
 24 Frame counter dial
    Parts numbers 25-42 apply to the illustrationson the rear
    cover
 25 Locking device used, in conjunction with ring 27' forpr:t-
     ting the film sPeed
    This also serves the purpose of setting the exposure ad-
    justment device, e.g. under back-lighting
 26 be$ing mark for exposure adjustment device, 'e'g' uncer
    backlighting
 27 Film sPeed setting ring

 4
                           www.orphancameras.com
View original page 3Page 6 · Read text
28 Viewlinder eYePlece  '  .
29 Light-excluding slide v
30 Battery testing keY
31 Eyelets for carrYing straP'
32 Guide fork for film cassette
33 Film cassette
34 Film-rewind setting mark
35 Tripod sodcet
36 Grip for setting lens aperture and flash guide numbers, in
   conjunction with keY 12
37 Setting lever for delayed action device V
38 Sproc*et wheels, which engage in the film perforation
39 Flash guide number scale for ZEISS PRO-TESSAR35 mm
   lens
m Take-up spool, with  slit and fastening device for start of
   film
41 Flash guide number settlng mark (red line) for use with the
   ZEISSPRO-TESSAR35 mm wide-angle lens               >"
42 Gamera bad< locking device

                                                                    :

Loading and unloading the Camera
Before loading the camera, turn the rapid film transport lever-
22 until it comes to a stop. Then llip up the two bolts of the
locking device 42, rotate them in mutuaiiy opposite directions,
and remove the camera back.
 Inserting the fllm
(Do iioi perform this operation in direct sunlight!)
 Insert the beginning of the film in the  slit of the take-up
spool 40, which has been rennoveclirom the camera' Hook the
2nd or 3rd perforation hole on the s5recialfastening device'
wind the film twice around the spool, ancj ircrc it tight' Now
 insert the take-up spool and the film cassette into the iamera
 in such a manner that the film perforation engages in both
 the sprocket wheels 38.
 Replace the camera back from above in such a way that half
 of the film width remains visible. Then push the camera back
home, and lock it.                                                                                           -4
                                                    r^
                                                                            \ q
                                                                            \
                               i*r
View original page 6Page 7 · Read text
- " ^        I


lllustration1

lmportant: Do not forget the film speed setting (lllustr. 1)
The speed of the film, as indicated on the film package in
DIN or ASA, is of decivise importance. Move the locking de-
vice 25 in the direction of the arrow until it comes to a stop,
and set the ring 27 in such a manner that the film speed set-
ting mark 2 coincides with the appropriate value on the film
speed.

Frame counter setting and film transport conirol
Set the white mark on the black milled rin.c cf the frame coun-
ter dial 24 Ihree units ahead of the actu;-rlframe number of
the film being used. For 2O and 36 exposure film lengths there
are special red marks provided.
Pull out the retractable rewind lever 16 and turn  it in the di-
rection of the arrow until a resistance is felt. This serves to
retighten the film on its spool in the cassette. Next alternately
opeiate the shutter release 23 and the film transport lever 22
two times, so that the white mark now coincides with the to-
tal frame number of the film in question. In doing this, th6
rewind lever should be seen to rotate in a direction opposite
to the arrow, to indicate that the film  is being transportcd
through the camera correctly.
The frame counter always indicates tbe-riUfiber  of frames
which remain to be exposed. After ihe final exposure (i.e. after
number 1 on the frame aounter) do not operate the film trans-
port  f ever_22z'",trn, but rewind the film.
flemoving  the film
Flip up the left-handbolt of the camera back locking device42,
and set  it to "R". Pull out lhe rewind lever 16 and turn  it in
the direction of the arrow until a light resistance is felt (the
film wiii now release itse!f from the take-up spool). Only now

6
                           www.orphancameras.com
View original page 7Page 8 · Read text
should both camera-back bolts be opened. Remove the ca'
mera back and take out the film cassette.
Always keep the fifm channel and the take-up spool clean!
Film reminder dial
This serves merely as a memory aid. lt is set by means of the
button 15.
The symbols on the film reminder dial have the following
meanings:
      black and white film, colour negative film (neg.), colour
      reversal film -   flash, colour reversal film -   daylight'
      colour reversal film -   artificial light, infra-red film (lR).

Taking the Photograph
Focusing (lllustr.2 and 3)
Look through the viewfinder and adjust the hand-grips 14 until
the split image visible in the centre of the viewing screen
forms one integrated image or, in the case of subject matter

lllustration 2                       lllustration3
Split image focusing           Focusingthroughfine focusing
                            screen ring
ffifi|fl
View original page 8Page 9 · Read text
which containsno distinct lines, focus through the fine focus-                                                 appro-                                        The                                               its                                       is at                    the image            ring until;;g;";"                                       .sharpest'                                                                         5'                                                   scale                                          distance                                        ihe                                           off                       be read              can thenpriate distance
against the setting mark 7'
The black ring on the viewfinder eyepiece 28 can be screwed
;;i,  i";;iJ      certain accessories (e.s. eye-shierd)to be at-
tached.

Lens aPerture and dePth of field
The photographic lens renders only a limited zone in front of
and behind tfre Oistance which has been set as sharp' This
 zone of sharpness, or "depth of field"' becomes larger the
 f u r t h e r t h e I e n s i s s t o p p e d . d o w n . l t s l i m i t a t i o n s | o r t h e i n d i -
vidual lens apertut"'-Jitingt  are indicated by the depth of
 field scale 7.
 Examole (see illustr' 4): Lens focused on 10 feet'
 Depth of iietO at f/8 extends from 7 to 20 feet'
 Remember:
                                          -- limited depth of field        Large aperture (ll2.e1
          smill  apertute  itlzz't = extensive depth of field
 For specific photographic tasks which might call for  it' the
 exact'valuescan be found in the table on the front cover'


             VlllustrationrV

                                   ,l      2g 10

           Ao"o,norrierol
                        -


                            www.orphancameras.com
View original page 9Page 10 · Read text
r
 Setting the shutter speed
 Rotate the ring 8 by means of its two grips until the required
 shutter speed fies opposite the shutter speed setting mart tO.
 The selected speed value will also be visible in the  lower
 right hand corner of the viewfinder.
 The shutter speed to be selected is dependent on the lighting
 conditionsas well as on the rate of movement of the suulect
 matter.The faster such motion, the shorter must the exposure
 time be. The figures on the scale g represent fractions of a
 second (e.9. 60 means 1/60thsec., etc.).
When using the "B" setting, the shutter remains open for as
 long as the shutter release button 23 remains depressed.
 Automatic exposure control (lllustr. 5 and 6)
 First the key 12 ("A,, stands for ',automatic,,)must click into
 position opposite the setting mark 10. select the shutter
speed, but do not use intermediatesettings! (The ,,8,, setting
can not be used in conjunction with the automatic exposure
control)' Look through the viewfinder and aim the camera at
the subject. lf the exposure meter needle (to the right of the
image area) is in the green zone, then there is suffiiient light-be
for making an exposure -  and a picture may therefore
taken.
The lens aperture,which sets itself automatically,can be read
off, both in the viewfinder and on the scale 19 on the camera
body.
lf the lens stop indicator shourd rie in one of the two red mar-
ginal zones, then a correct exposure is not possible under
the existent lighting conditions with the shutter speed which
has been chosen. In such a case alter the shutter speed (it

lllustration5
View original page 10Page 11 · Read text
Red warning zone

                           Setting mark for use with  I x 30 B
                        monocular tele attachment

                           Exposui'e meter needle

                         Aperture scale

                      Red warning zone

                           Shutter speed


lllustration6

can be controlled through the viewfinder) until the indicator
moves to then green zone
When the lighting conditions are not sufficient for the opera-
tion of automatic exposure control, it will not be possible tc
make an exposure. The indicator will remain in the red zone'
no matter how the shutter speed is adjusted' (The solution in
this situation is the use of flash, see page 14).
On releasingthe shutter the exposure meter needle is locked
in position.
Should  it be desired to use a specific lens aperture, this
can be done even when the automatic exposure control is in
operation by rotating the shutter speed ring 8 until the ex-
posure meter needle lies on the required aperture value' But
only full shutter speed settings, which click into position, may
be used.

 Releasing the shutter
 Expose the film by depressing the shutter release button 23
 gently and steadily -  and not jerkily. At the moment of ex-
 posure the viewing image will disappear. lt only reappears
when the rapid film transport and shutter cocking lever 22 is
 activated. With longer exposure times, from 1/30th sec', we
 would recommend the use of a tripod.

 1 0                            www.orphancameras.com
View original page 11Page 12 · Read text
The exposure Meter
The light is directed at a CdS photo-resistancecell, which is
situated in the camera viewfinder. This arrangement enables
an exact measurementof only that light whicn will reach the
film through the lens to be made. The result is a very exact
exposure assessment, no matter what focal length lens is
being used.
The exposure meter conforms to agreed standard specifica-
tions, and yields a correct exposure under normal conditions.
In the case of landscapes with large areas of sky, and es-
pecially when shooting against the light, the exposure can
be adjusted accordingly by opening the lens aperture by an
extra stop. Such an adjustment should also be made in the
case of photographing subjects of low contrast on colour -
reversal film, e.g. when shooting under an overcast sky. The
necessaryaperture correction is achieved through the special
eXposuf(;adjustrnentdevice. Use the grip 25 to rotate the ring
bearing the cloud symbol, positioning the latter opposite the
setting rnark 26,:and holding  it there while making the ex-
posure, (illustr. 7). This adjustment is indicated both through
the viewfinder and also on the camera by the needle position
going back by one stop value on the aperture scales. On being
released,the ring automaticallysprings back to the sun sym-
bol. The "2" included with the cloud symbol indicates that
the exposure adjustment in question corresponds to a filter
factor of 2x. lt an adjustment of less than one stop is to be
made, the ring must be held at an intermediateposition.
When using the delayed action device, or when shooting from


lllustration7


                                                      1 1
View original page 12Page 13 · Read text
a tripod, while taking meter readings from the external indi-
cator 19, it would be possible for light to reach the highly
sensitive CdS cell through the viewfinder eyepiece, as this
would not be shielded by the eye. ln such cases the eyepiece
should be closed through the lightexcludingslide 29.
The "Mallory PX 13" type battery, which is inserted into the
camera for operation of the exposure meter, has a life under
normal conditions of use of about two years' Nonetheless,to
avoid unnecessary battery drainage, the battery should be
switched off when the camera is not  in use by setting the
shutter onto "manual" or onto automatic flash operation. To
be assured of consistent current supply, the battery should be
protected from extreme temperatures (below -10"  C).  lf this
should not be possible,then the "Mallory PX 625" type battery
should be used.
Testing and changing the batterY
Operate the film transport lever, and hold the camera tc the
 light in such a way that the exposure meter needle lies
roughly in the centre of the green zone. Then depress the
battery testing key 30 briefly. lf the needle goes back by more
than one stop within 1 Lo 2 seconds, the battery should be
changed.
The battery is reached by raising the lid 4. When inserting a
new battery, care should be taken that the positive pole lies
on the lower side, for only in this position is  it possible to
 close the lid 4 again.
New batteries can be obtained from photographic dealers.

Manual operafion
 Disengaging the auto-control (Fig. 8)
 Depress key 12 and at the same time turn the aperture scale
 13 (marked "manuell") to the setting mark 10 by means of grip
 36. By setting the shutter to "manuell" it is possible to select
 the shutter-speedand aperture settings according to choice:
 either independentlyof the exposure meter or in accordance
 with its readings.
 In this way the exposure can be corrected -   preferably by
 varying the aperture setting in either direction -  to a greater
 extent than can be achieved with the  dr-rllweather/backlight
 corrector.

 12                       www.orphancameras.com
View original page 13
Page 14 · Read text
Fr


                                                                        lllu stra tio n 8

 Example:
 Close-up readings with high brightness-contrasts.Hgld the
 cam( ra (with the auto-control engaged) close up to the sub-
 ject irvhilsttaking care not to cast a shadow upon it. Read off
 the aperture indicated (here the external meter window will
 prove most useful) and set it by means of the aperture setting
 ring marked "manuell". Then take the picture from the des-
 ired position.
 When the camera is set to a manually-selectedaperture, the
 exposure meter is disconnected (the pointer remains within
 the red sector).This is a built-in precaution to avoid the possi-
 bility of erroneous readings. So long as the pointer is visible
 within the green sector, you can be certain that the automatic
 exposure control is in operation.


Using the delayed action release
 Tension the shutter by operating the film transport lever 22,
 and then set the lever 37 to  ,'V,,. On pressing the shutter
 release button some ten seconds pass before the exposure
 is automaticallymade. During this time the lever 37 returns to
 its normal position. Time exposures (shutter setting ,'B,,) are
 not possible with the delayed action device.

                                                       1 3
View original page 14Page 15 · Read text
The use of filters
When using filters, the filter factor of the filter in question is
generally taken into considerationquite automaticallyin vielr
 of the positioning of the exposure meter cell behind the lens.
 In the case of the more dense colour filters it is advisable to
 use an additional factor of 2x, and this is done by using the
 exposure adjustment device 3 to set that factor, instead of the
 setting mark 2, opposite the appropriate DIN or ASA value on
the scale 1.
The 2x and 4x setting marks further serve the purpose of giv-
 ing a fuller exposure than that which is indicated by the ex-
posure meter.

Photography with the 8 x 30 B tele monocutar
attachment
When the 8 x 30 B tele monocular is attached, the lens is
automaticallyoperating at a smaller and fixed aperture value.
The exposure meter must thus be used to select an appro-
priate shutter speed for the lighting conditions in question.
The shutter speed scale 8 is adjusted so that, while the ca-
mera is being aimed at the subject, the exposure meter needle
comes to  lie opposite the triangular mark near the aperture
f 5.6. (See also illustr. 6). Further details on the use of the tele
monocular attachment are to be found in the special instruc-
tion booklet for this unit.

Flash photography
The cord-free ZEISS IKONIKOBLITZcan be fixed directly on to
the flash contact 20.
Other flash units can be attached either to the accessory shoe
21 or, through a flash bracket, to the tripod socket 35. The
synchronising cable is then attached to the contact 20.
Set the guide number which corresponds to the type of flash
 light and the speed of film being used. This can be found on
the package or  in the instruction sheet of the light source
 being used.
The CONTAFLEXsuper BC has X-synchronisation.

 1 4                       www.orphancameras.com
View original page 15
Page 16 · Read text
lllustration 9


Automatic flash exposure
The automatic flash exposure device works basically with all
shutter speeds. The choice of shutter speed is unlimited in the
case of electronic flash, and does not in any way affect the
guide number. Flash bulbs shr:uld be used with the shutter set
to 1/30thsec (marked in yellow). Using the key 12 and the grip
36, position the appropriate flash guide number on the scale
6 opposite the setting mark 10 '-  when the standard ZEISS
TESSARf 2.8 50 mm lens is being used (illustr. 9).
When using the ZEISS PRO-TESSAR35 mm wide angle lens
with flash, use the guide number scale 39. The setting is made
to the red setting mark 41.
The switch from "A" to guide numbers is most easily made
with the camera shutter tensioned and the lens set to a dis-
tance of about 3 metres.
lf the exact guide number for the flash beipg used is not
included on the flash scale, then the guide number value
which is closest to it should be set. lntermediatesettingswhich
do not click into position must not be used.

                                                      1 5
View original page 16Page 17 · Read text
The following guide numbers can be set:
On the black scale (50 mm focal length) for the standard ZEISS
TESSARf 2.8 50 mm lens:
(Correspondingguide nurnbersfor distancesettingsin feet.)
80 68 56 48 40 s4 28 24 2A
260  22o 180   rls  130    t to   g0    rB  65
17l4 rz l0
 5s 45  BB 32
On the red scale (35 mm focal length) for the ZEISS PRO-
TESSAR35 mm wide angle lens:
40 34 28 24 20 1t l4 r2 l0
130  lro  90   ?a  65   sb  45   sB  g2


For the sake of better clarity, those guide numbers repro-
duced here in small figures are represented merely by dots
on both scales.
Look through the viewfinder,focus the'lens on the subject by
means of the split-image rangefinder,and release the shutter.
 lf the subject matter has some depth, focus somewhere half-
way along this zone. The lens aperture for correct exposure
 is set automaticallythrough the distance setting.
 In order to prevent incorrect flash exposures, the distance
 setting is automatically locked when  it becomes either too
 great or too small for the guide number in question.
 Flash exposures with the ZEISS PRO-TESSAR85 mm and the
 ZEISSPRO-TESSAR115 mm telephoto lenses must be made in
 the conventionalmanner, without automatic control.

 1 6                       www.orphancameras.com
View original page 17
Page 19 · Read text
Accessories
                                          C  Adapter ring for use of the S 67 filters with the
  PRO-TESSAR35 and 85 mm                     20.1643
  Lens hood (elastic)for PRO-TESSAB35 and 85 mm,
  0 s 6 0                                      20.0716
  Lens hood for PRO-TESS.A"fi115 mm, @ S 67         20.0714
  Leather container for lens hood, @ S 67             23.2003
  Leather case-fur 1 PRO-TESSARand 1 filter         23.1001
  Leather iase for 2 PRO-TESSARS,2 filters and lens
  hr,ds                                        23.1201
  Case for ZEISS monocular tele attachment          23.7812
   l-ens bag for 3 PRO-TESSARS,1 interchangeable
  magazine, 3 filters or 3 supplementary lenses        23.0202
  Universalcase for camera, with carrying strap,
  and also 3 PRO-TESSARS,monocular tele attachment,
  interchangeablemagazines,filters, supplementary
  lenses and lens hoods                            3.0206
                                                   \
     I nterchangeablemagazines                     20.0302
  Container for 1 magazine                        23.7855
II   lontainer for 2 magazines                       23.0201    'ipod        extension                              20.0203I
II
  Copyingequlpment                                                                                                                                                      ,l
  Table copying unit                              20.1850
   Lighting set-up                                     20.1852
  REPROPHOTuniversal coPYing unit                 20.1853

  Copying and photomicrography accessories                                                          ti
  Angle telescope                                       20.161,a
  Adapter ring for microscope attachment             20.1620
  Microscope attachmenthead                     20.1616
  Cable release with locking device                     20.0281

                                                         1 9                               www.orphancameras.com                              . ,
                                                            ***;ir--13$;.              .g,&-
View original page 19Page 21 · Read text
" \ ' L                      i - t        ' - , ,       -
                                                                      'h+- l
    Manufatturet's    number
    Engraver;lin the lower part of the ho:tsingof every CONTAFLEX
    super BC there is a manufacturer'snumber'(a figure, preceded
    by a serial letter,].The lens, too, haq a number. lt is very ad-
    visable to make a note of both these nurnbers so that, in the
    case of loss, a positive seArch or claim can be made. ln the
    event,cftoss of the front componentof the convertibleTESSAB    '
    reps it is also important to be able to quote the lens numbe4.
                                                                                                                     I
   Gare of the CONTAFLFX super BC                               i
    Before insertinga.'iim, thoroughly clean the film channel,the
    spool area ancJthe ins:-le of thu camera back with a soft hair
     l^:'tsh (important: Co not ciepress the film cover:late  wiittr
    force, a,.uthis coulC cause {amage te the mechanism).lf nie-
    cessary, the lens may be caretuirl r'viped with a soft linen
    cloth which has been thoroughly wash: j. Before cioing this,
   remove all dust with a fine hair brush
   We reserve the righi to make alteraticrtrsin i,re interest of tech+
    nical progress.
      lri aldditiori to your photographic dealer, the photcrgraphric '
    aclvlsory service of the ZEISS IKON-VOIGTLANDEHVertriE:bs-
    gesellschaffm.b.H.,witl qladly sr"rpplyadvice and itrformation
   on all phototraphic Problsms.
   Address: Fotobeld(uIrg der ZEISS IKON-VOIGTLANDERVer-
    triebsgesellschaftm.b.H,,7 Stuttgart,Postfach540,W. Germanry.

    Z,EISS IKON
  VOIGTLANDER


                               www.orphancameras.comMNffiff
View original page 21Related documents and language editions


From the M. Butkus archive. Original publisher and archive notices are retained.
Check the model and edition against your equipment.
PDF verified 2026-10-10.