Film cameras
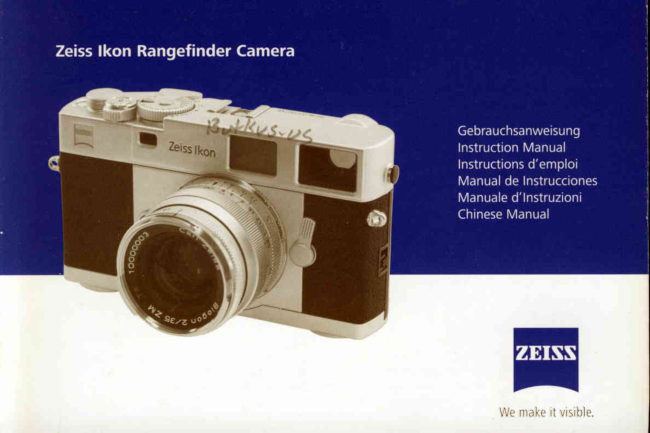
Zeiss Ikon ZM Rangefinder User manual
User manual for Zeiss Ikon ZM Rangefinder. 28 pages in English. Read the original PDF, download or print a copy without registration.
28 pagesEnglish1.6 MB PDF
Loading your manual…Open PDF directly
Document details
- Brand
- Zeiss Ikon
- Model / document
- Zeiss Ikon ZM Rangefinder
- Document type
- User manual
- Language
- English
- Pages
- 28
- File size
- 1.6 MB
- Category
- Film cameras
- Document date
- Not specified in catalog
Search available document text
Find a term, then jump to its page in the original PDF. Image-only pages may not be searchable; check the PDF for exact wording and diagrams.
Page 3 · Read text
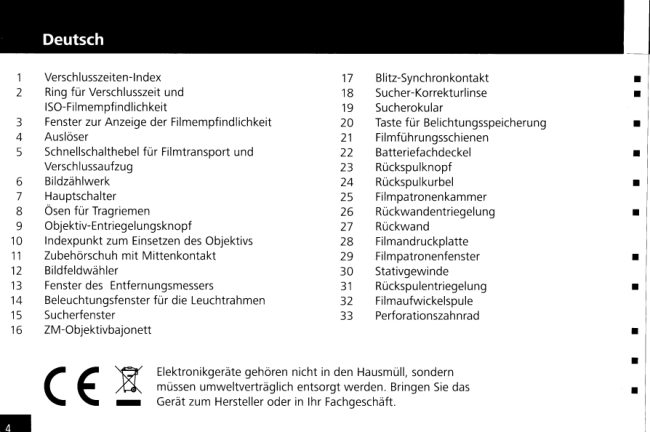
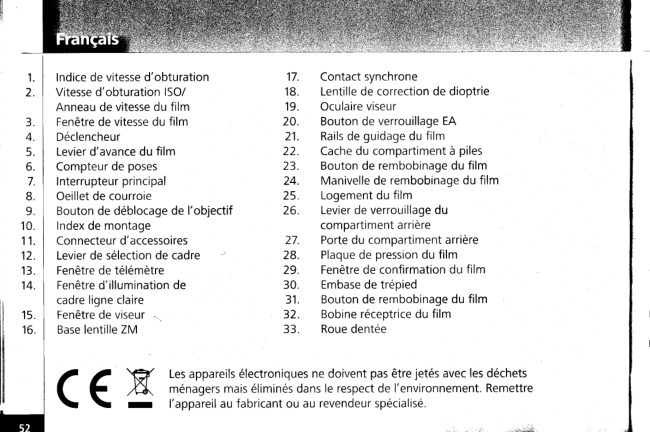
1    ShutterSpeed Index      1                                                          1 1
 2    Shutter Speed/          2                                                          1 2
     ISO FilmSpeedRing      3
 3    Film SpeedWindow       4
 4    Shutter ReleaseButton    5
 5    Film Advance Lever
 6    Film Counter
 7   Main Switch
 B   Neck Strap Eyelet
 9    Lens ReleaseButton
                       B1 0   Mount Index
1 1   AccessoryShoe
1 2   Frame SelectorLever     9
1 3   RangefinderWindow                          1 0
1 4    Bright-lineFrame
      llluminationWindow
1 5   ViewfinderWindow
1 6   ZM-LensMount


                             www.orphancameras.com
View original page 3Page 4 · Read text
\€/    Electronicdevicesdo not belongin the householdwastebut mustbe        a    a
                 t    F    /CX1  disposedof in an environmentallyfriendlymanner.Takethe deviceto
                 \         \        r      the manufactureror to yourspecialiststore.


E
View original page 4Page 5 · Read text
Donot useanyorganicsolventlikebenzineor alcoholto wipe the camerabody.
     Donot leavethe camerain a placeof high humidityand hightemperature.In particula;do not leavethe
 ;'il   I   cameraKeeptheincamerayourcar.awayfrom chemicals(adhesives,cleansingagentsetc.).Storethe camerain a ventilated
l*     placewithoutcaseor pouch.
 lll:' *l r   Thiscamerais not waterproof.Do not usethe camerain heavyrain,do not exposeit to splashingwater.
      Shock,impactor otherabnormalconditionscancausethe camerato malfunction.
      Neverattemptto wipe dust or dirt from the lensor the camerafinderwindowswith your fingers.Alwaysii'*I! r
      usea blowerto blow the dust away,or wipe the surfacegentlywith a lensbrushor a soft cloth.
l'    especiallyCheckthebeforecameratakingand makeimportantsomepicturestrial exposureswhen you take picturesaftera long periodof storage,
     Takecarenot to exposethe camerato suddenchangesin temperaturewhichwill causecondensation
       insidethe body.Keepthe camerain a bag or casefor a whileto adjustthe temperatureslowly.
      At temperaturesbelow0 'C the performanceof the batteryis reduced.When usingthe camerain a cold
      placepreparesparebatteriesand keepthem in a warm place.
     Wipeoff the cameraafter usingit in areassubjectedto saltspray,dust,sand,chemicalsor water splash.
     Closethe camerabodywith a capand keepit awayfrom directsunlightduringstorage.


                              www.orphancameras.com
                                                                    *k.,       .-  deisEerdr#S&E&,*                       e&l&M6d6                     ;"-    ---    .i:gslMriil:tu                 -  *d!d-                       :Cru'l:ra,.           -d56&i-;,:                                    d i
View original page 5Page 7 · Read text
To mount the lens,match the blue mark on the camera body
with the blue mark on the lens barrel,then insertthe lens in the
camerabody and turn the lens clockwiseuntil it lockswith an
audibleclick


To removethe lensfrom the camera body, pressthe LensRelease
Button(9) and turn the lens all the way counterclockwise,then
lift it straightout of the mount.


                          www.orphancameras.com
View original page 7Page 8 · Read text
Turn the BatteryChamber Lid (22) counterclockwiseusing a coin or
        a suitablescrewdriverblade.


    2.   One CR-1i3Lithium battery or two LR44type alkalineor two SR44
        type silverbatteriesmay be used to power the camera.
   3    Placethe batteriesso that both positivesides(+) point towards the
        bottom of the battery chamber.
   4    Turn the BatteryChamber Lid (22) clockwiseuntil it is firmly closed.                 b:g


E
View original page 8Page 9 · Read text
1  Turnthe Main Switch (7) to the ON position.
L .   Wind the FilmAdvance Lever(5)3   Setthe ShutterSpeed Ring (2) to any positionexcept the "B"  EE
    (bulb)position.
LAi .   Pressthe ShutterReleaseButton (a) halfway while looking through
    the ViewfinderEyepiece(19).
        r    lf you can see one or two LEDslit or blinkingon the left hand
        side of the Viewfinder,then the battery condition is satisfactory.
         I    lf both "2000" and "1" LEDsare blinkingslowly,then the    @@
        batteriesare running out of power. Preparea new set of
        batteries.
        r    lf no LEDis lit, then the batteriesneed to be replacedor have
      been loaded incorrectly.
        r  The LEDswill remain on for about B sec. after you stop
       pressingthe ShutterReleaseButton (4).

    Note: In order to avoid battery consumption, turn the Main
    Switch to the oFF position while the camera is not in use.


                             www.orphancameras.com
View original page 9Page 10 · Read text
To open the Back Door (27), slide the Back Door Lock Button (26)
     following the directionof the blue arrow, first to the front side of
     the carnera,then upward.
    When the Back Door is opened,the FilmCounter(6) will
     automaticallyresetto "S".
2 .   Unfold and lift the Film Rewind Crank (24), then pull the Film
     Rewind Knob (23).3    Insertthe film cartridgeinto the FilmCartridgeChamber(25) so ffiffi
      that the protrudingend of the film cartridgefacesdownward.
     Protectthe film cartridgeagainstdirect sunlight.
4 .   Rotatethe Film RewindCrankslowlywhile pushingdown the Film
    Rewind Knob lightlyuntil the film lockson the film rewind fork at
     the inner side of the Film RewindKnob (23)
5     Insertthe film leaderinto the groovesof the FilmTake-upspool
     (32) and place it so that the spool teeth engage the film edge
     perforations.
6 .   Checkthat the film perforationsare properlyengagedwith the
     teeth of the Film sprocketwheel (33) and that the film slides
      s m o o t h l ya l o n gt h e F i l mG u i d eR a i l s( 2 1 ) w h i l et u r n i n gt h e F i l m        D O O O D D D D O D
    AdvanceLever(5) lightlyin order to advancethe film.

     Caution: Do not touch the shutter curtains !                    D D O D O D O O O D O O ! @ o
View original page 10Page 11 · Read text
Gentlyclosethe Back Door (27) and push it until it lockswith an
    audibleclick.
X   Tensethe film by turning the Film Rewind crank QQ gently in
    the directionof the arrow until increasedresistanceis noticeable.
   Thenreturnthe crank to its originalrest position.
   Advancethe film a couple of frames by depressingthe Shutter
    ReleaseButton (4 a few times and operatingthe FilmAdvance
    Lever(5) until the FilmCounter(6) indicates" j".Make surethat
    the FilmRewind Knob (23) rotateseach time the film is advanced,
    whichwill tell you that the film is advancingproperly.

    Note: when advancing the film, wind the Film Advance
    Lever (5) slowly and securely until the film  is fully
    transported to the next frame.


                              www.orphancameras.com
View original page 11Page 12 · Read text
The film speed is indicatedon the outsideof the film package,on the
         film cartridgeor in the film instructions.
   2 .   To set the film speed:while lifting the Film Speed Ring (2), turn it until
        the arrow indicatoron the inner ring points to the correspondingfilm
       speed (ASA/ ISO)value which can be seen through the Film Speed
      Window (3).

        Caution: Make sure to set film speed exactly at a notch position,
        not in between, otherwise proper shutter speeds will not be
       shown in the Viewfinder (19).


       Throughthe Film ConfirmationWindow (29), you can check the type of
        the film, the quantityyou can shoot, and the ISOspeed of the film.


Ir
View original page 12Page 13 · Read text
Aperture Priority Mode (auto exposure mode "AE")
     In AperturePriority(AE) mode, the camerawill automatically                                                         ESSi!",\'   ^1.\u v  \  \,    selectthe proper shutter speed basedon the lens aperturevalue
    and the brightnessof the subject.                                       A ' 9 9 '                                                                                                         ( ) 0 r
   You may selectthe lens aperturevalue with considerationof
    the film speed,the requireddepth-of-field,the brightnessof the
    subject,motion of the subject . . .

   Recommendedaperturevalue with ISO 1 00/21" film under typical
    situationsas shown in the list.
    (Shutterspeed correspondsfrom 1/2000 to B sec.)                        Condition               Apertu(Fvalue)re
                                                                                                     At night,for handheld       full speed
1  Turnthe Main Switch (7) to the ON position                                       shooting
2   set the shutter speed Ring to align the "A" mark to the shutter           Whenyouwantshallow     fullspeed
   S p e e dI n d e x( 1 ) .                                                                        depth-offield
3   Turnthe aperturering on the lens to the desiredaperturevalue.             lndoorsin normalconditionsF 2 - F 4
4  Advancethe film and pressthe ShutterReleaseButton (a) halfway,         0utdoorson a cloudyday     F A  F8
    while lookingthrough the Viewfinder(19)                                     Outdoorson a fineday     F 8 - F 1 1
        r   ln the finder,the LEDdisplaywill indicatethe measured                Seasidein midsummer    F 1 1- u p
       shutterspeed.                                                               Mountainareawith snow   F ' l 1- u p
        r    lf the "2000" LEDblinksfast, this means out of range due to
       over exposure.Turn the aperturering on the lensto a higher
        setting,
                             www.orphancameras.com
View original page 13Page 14 · Read text
I    lf the "1" LEDlits,the shutterwill be releasedat the
       speedof 1 sec.to 8 sec.
         r    lf the LEDof ""1"blinksfast,the imagein the camera
          is too darkfor reliablemeasurement.Turnthe aperture
         ringon the lensto a lowersetting.
         r  The LEDwill remainon for about8 sec.afteryou stop
        pressingthe ShutterReleaseButton(4).lf the LED
       goesoff whilecomposingyour shot,then pressthe
        ShutterReleaseButtonagain(halfway)to reactivate
        the meteringindicator.
        r  The LEDdisplayis switchedoff as longas the film is
        not advanced.                                                   Example:Shutter will be releasedat 1/125 sec
5 .   Pressthe ShutterReleaseButton(4) gentlyto releasethe
     shutter.
View original page 14Page 15 · Read text
Exposuremetering by measurementof subjectbrightnessis basedon the
assumptionof a subject with average reflectance.When the nature of the
subjectdeviatesconsiderablyfrom this normal situation,compensation                                               (JA'?;i                                                                                                                                                     - o gof the measuredexposurebecomesnecessary.For example:when large                                       '                                                                                                                                                            t o                                                                                                                                      r ( ^    )partsof the subjectare very bright, a (+) compensationis required;when                   ro02    \/         n^
largeparts of the subject are dominated by dark tones, a (-) compen-sationis requiredfor a correctlyexposedimage. Especiallywhen using         S-* *&
positiveslidefilm the technicallycorrectexposureis not necessarilythe
bestexposureaccordingto the taste of the photographer.Therefore,this         Example:Compensateby -1 step
camerais equippedwith an exposurecompensationmode.

With help of the exposurecompensationmode you can use a different
exposurevalue than the one that aperturepriorityhas determined
a utomatically.
You can change the value to either brighter ((+) compensation)or darker
((-) compensation).
The amount you can compensatefor is +/-2 steps,by 1/3 step increments.
Setthe " A" indicatoron the ShutterSpeed Ring (2) to the desiredvalue of
compensation.
When the exposurecompensationmode is active,the indicatorLEDof
the compensatedshutter speed will blink slowly.

                            www.orphancameras.com
View original page 15Page 16 · Read text
With all kinds of subjectswhere bright parts and dark parts are not
     mixed and homogenouslydistributedbut clearlyseparated,the result
      of exposuremeteringwill depend on the image composition.For
     example:when a wide angle lens is used,a bright sky will contribute
     a lot to the metering resultwhen the horizon is in the lower part of                     +@
     the frame.This will probablylead to an underexposureof the main
      subject.When, however,the camera looks downward and the horizon
       is closeto the upper edge of the frame, the bright sky will contribute
     lessto the exposuremetering.

     Therefore,the camera is equippedwith an AE lock function as a
     convenientway to make exposuremetering independentof image
     composition.
    Use the AE lock function with apertureprioritymode or exposure
     compensationmode The exposurevalue will be stored at the
    moment when the AE Lock Button (20) is released,and also the LED
     indicationin the finder will be locked.

1   Wind up the film and pressthe ShutterReleaseButton (a) halfway
    and checkthe LEDindicatorin the finder.
L1  .   You may as well pressand hold the AE Lock Button (20) to switch on
     the meteringand the exposuredisplayin the finder.
View original page 16Page 17 · Read text
Directthe camerato a part of the subjectwith averagebrightness.Keepin mindthat the metering
    sensitivttyis highestin the centerof the frame.Excludebrightlightsourcesor largebrightpartsof the
    subjectfrom this area.lf necessary,go closerto the mainsubject.
   Releasethe AE LockButton(20)when the LEDindicatesthe desiredexposurevalue.
       r LEDthat indicateslockedvaluewill startblinkingslowly.
        I  Lockedexposurevalueand its indicationin the finderwill be keptfor about20 sec.afteryou take
       yourfingeroff the AE LockButton.(Exposurevaluewill be changeddependingon the lightvalue
       whilethe AE LockButtonis pressed).
EI   Createyour compositionand releasethe shutter.
        I  Thelockedexposurevaluewill be keptfor about20 sec.aftershutterrelease,and you can shoot
       with the sameexposurevaluewithin 20 sec.
        I Whenyou changethe exposurecompensationvaluewhileAE is locked,the exposurevaluewill be
       adjustedon the basisof the compensationvalue.
       r    lf you turn the apertureringof the lenswhileAE lockis on, the exposurevaluewill be changed.
       r  TheAE lockmodeis automaticallyswitchedoff after20 sec.when the shutterwas not released.
       But pressingthe ShutterReleaseButton(4) halfwaykeepsthe AE lockmodeon for a longtime.
       Thisenablesa sequenceof manyshotswith a lockedexposurevalue,evenif the time between
      subsequentexposuresis longerthan 20 sec.

   ToreleaseAE lock,pressthe AE LockButtonaqain.


                             www.orphancameras.com
View original page 17Page 18 · Read text
ManualExposure
         In the manualexposuremode any desiredcombinationof aperture
        valueand exposuretime may be selected,while the metered exposure
        time is just displayedin the finder.

               r  Indicationson the ShutterSpeed Ring (2)
            "2000" means 1/2000 sec.
                   " ' l" m e a n s 1 s e c .
                   " 8 " m e a n sb u l b
               r  With brighterand/or fast moving subjects,it is recommendedto
          use higher shutter speeds.

            t .   Turn the Main Switch (7) to the ON position.
   2.   Set the ShutterSpeedRing (2) to the desiredshutter speed setting.
  3    Adjust your focus and pressthe Shutter ReleaseButton (  ) in halfway
        while looking through the ViewfinderEyepiece(19)
              r You will see two LED indicatorsin the finder.
         One indicatesthe manuallyselectedshutter speed.
         A secondblinkingone indicatesthe meteredshutter speed.                                             5
                                                                               II


                                                                               I


                                                                               I

                                                                               II


                                                                               I


                                                                                                  l
E-Atll
View original page 18Page 19 · Read text
Turneitherthe apertureringon the lensand/orthe Shutter
SpeedRing(2)to alignthe two LEDsuntiltheyconverge.
 r Whenthe blinkingLEDconvergeswith the otherlit
   indicator,and thus only one LEDis lit in the finder,it
   meansyou haveselectedthe meteredexposurevalue.
 r  Youcan,of course,set a differentapertureand shutter
   speedon purposeto achievespecialeffects.
 r  Fastblinkingof the LEDof "2000" when the Shutter
   SpeedRingis setto 2000 indicates"out of rangedue to
   overexposure".Turnthe apertureringon the lensto a
   highersetting.
 I  Fastblinkingof the LEDof "1" when the ShutterSpeed
   Ringis setto 1 indicates"out of rangedue to under
   exposure".Turnthe aperturering on the lensto a lower
    setting.
 r TheLEDwill remainon for about8 secondsafteryou
   stop pressingthe ShutterReleaseButton(4) or stop
   turningthe ShutterSpeedRing(2).
Createyourcompositionand releasethe shutter.


                            www.orphancameras.com
View original page 19Page 20 · Read text
Yourcamerachangesthe finderframelinesautomaticallydependingon the attachedlenstype.
Youcan alsohavea previewof other frame linesbeforedecidingfor anotherlensby turningthe Frame
SelectorLever(12).


                                                                                                                            -.
View original page 20Page 21 · Read text
Focusing1
     Foraccuratefocusingwith subjectssuchas a groupof
     people,a "doubleimage"Viewfinder(19)with a central
     focuszonewill ensurethat sharpimagesare easily
     recorded.
    Toachievethis,simplyturn and adjustthe lensuntilthe
     doubleimageconvergesto a singleone.

     Focusing2
     Foraccuratefocusingof architecturalor technical
     subjectswith verticallines,usethe "Splitimage"
     focusingoption.To achievethis,simplyturn and adjust
     the lensso that the linesjoin together.

     Note: When focusing, make sure to put your eye
       in the middle of the Vievufinder.
I
                              www.orphancameras.comt
View original page 21Page 22 · Read text
Hold the camerain the palm of the left hand so as to turn the lens
focusingring easilywith your left hand.
Hold the camera body steadyand placeyour right index finger
lightlyon the ShutterReleaseButton (4).
Pressyour left elbow lightlyagainstyour body and then look
through the ViewfinderEyepiece(19)to steadythe cameraagainst
your face.Then relaxyour right arm holding the camera.

Note: with  slower shutter speed,  it is recommended  to use
a tripod and lor cable release to avoid blurring.
View original page 22
Page 23 · Read text
1  When the roll of film ends, the advanceleverwill no longer
    advancesmoothly.Checkthe Film Counter (6) display.lf the Film
    Countershows that all the frames of the loaded film have been
L').   exposed,Pressthe thenFilm Rewindthe filmButtonneedsto(31)onbe rewound.the bottom of the camera.
 1   Unfoldthe Film Rewind Crank Qa) and turn it in the directionof
    the a rrow.
A   When the winding tension eases,the film is completelywound
     into the cartridgeand it is ready to be removed.
5  Open the Back Door (27), pull out the Film Rewind Knob (23) and
    removethe film cartridge.
R   Takecare to protect the film cartridgeagainstdirect sunlight
    while you remove it.

    Note:  lf the film reaches the end of the roll during film
    advance, the Film Advance Lever (5) will lock. Rewind
    the entire roll, then complete the movement of the Film
    Advance Lever after removing the cartridge.


                              www.orphancameras.com
View original page 23Related documents and language editions
From the M. Butkus archive. Original publisher and archive notices are retained.
Check the model and edition against your equipment.
PDF verified 2026-10-10.