Film cameras
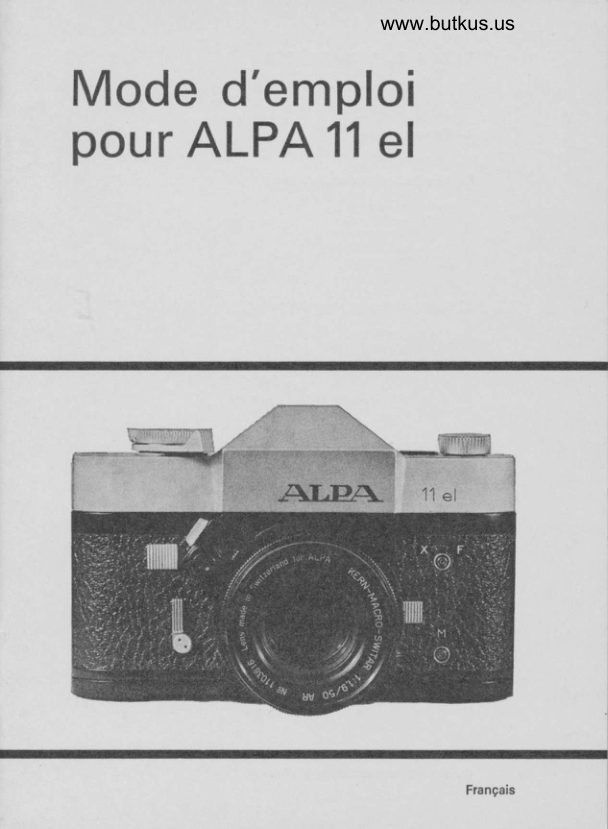
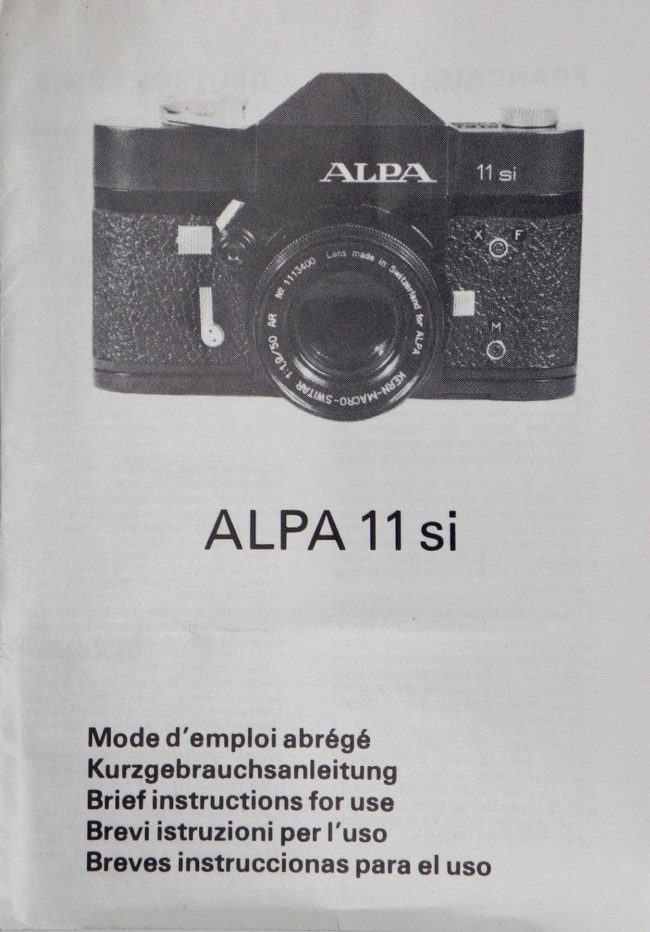
Alpa Reflex 11 el / Alpa 11si User manual
User manual for Alpa Reflex 11 el / Alpa 11si. 16 pages in English. Read the original PDF, download or print a copy without registration.
16 pagesEnglish2.9 MB PDF

Loading your manual…Open PDF directly
Document details
- Brand
- Alpa
- Model / document
- Alpa Reflex 11 el / Alpa 11si
- Document type
- User manual
- Language
- English
- Pages
- 16
- File size
- 2.9 MB
- Category
- Film cameras
- Document date
- Not specified in catalog
Search available document text
Find a term, then jump to its page in the original PDF. Image-only pages may not be searchable; check the PDF for exact wording and diagrams.
Page 4 · Read text
Instructions
   for use of the
  ALPA11el


Poor results or even damages are often    Replacing the delicate galvanometerwith
caused by ignorance of the equipment.   quivering needle, this shockproof meter
We strongly recommend that you study    gives you  easier, faster, more sensitive
these instructions carefully, so as to get   and  far more  precise exposures-up  to
the best results with your ALPA.           1/1 Oth of  an  f/stop   -  and eliminates
Most of the instructions apply also to the    most meter repairs.
ALPA 11s, with exception of the sections   The ALPA body  is a light-weight, com-
         about  release lock,  selftimer,   pact die-cast of great strength and long-
           mirror lock, and M  synchro-    lasting rigidity. The ALPA 11  el has a
          nization.                      pentaprism for eyelevel viewing, and an
The ALPA 11 el and the unlimited ALPA    instant-return mirror which  reacts even
system of photography are the results of        if the shutter release is kept depressed.
more than 30 years of researchand devel-   Any  slight vibration accompanying the
opment to meet the evergrowing demands    return occurs only  after the exposure is
of the creative photographer, as well as   completed, and cannot affect the sharp-
of scientific and industrial photography.   ness of the picture. A film-type reminder
                                                       is on the back of the camera (F,tiq. 12).
                                                      All controls are easily accessible and can
                                       be operated even if wearing gloves.
                                      Every feature has been planned for fool-
                                          proof operation.


A . G E N E R A L D E S C R I P T I O N


The Swiss ALPA 11 el is a 35 mm single-   B. EXTERNAT CONTROLS
lens reflex camera (24x36  mm, 18x24
mm or 17x 2 2 . 5 mm) w i t h  t h r o u g h - t h e -
lens light matching meter. The precise,
shockproofsolid state electronic circuit    1) Winding  the film
has six transistors.a yellow light for over
and a red light for under exposure,visible
both below the groundglass and on top   The winding lever A  (fig. 1) cocks the
of the ALPA.                                  shutter, advances the film, and counts the


                                                                                                                                 - * i g -  ' i - k : r i i l - -
View original page 4Page 5 · Read text
The speed may be set whether or not the
                                                    shutter is tensioned. The range of speeds,
                                             evenly spaced, is the standard: B, 1 , 1 /2,
                                                   1 / 4 , 1 / 8 , 1 / 1 5 , 1 / 3 O , 1 / 6 0 , 1 / 1 2 5 , 1 / 2 5 0 ,
                                                  1/500, 1/1OOOsec. B may be locked for T
                                                  time exposure. To keep the shutter open,
                                                    the refeaselock V (tig.2) must be moved
                                                           to its in nermost position.

                                                   Setting B allows you to make time exposu-
                                                   res of any length, the shutter staying open
                                                as long as the release button  is pressed
                                                                                     ( D, fig. 2). A cable release with locking
                                               screw  is very usefu I  f or lo ng exposures,
                                           and when the equipment is on a tripod.
                                           The release button should also be locked
                                                              in position B with shutter open, if any
                                                   special shutter is used instead of the focal-
                                                   p la ne sh utter of the camera.
                                                   lmportant:  when long shutter speeds are
                                                used, for example 1 sec, with automatic-
                                             diaphragm  lenses, either  the  shutter
                                                 release must remain pressed throughout
                                                    the exposure, or the automatic diaphragm
                                             must be discon nected.
                                           The speed 1 /60  sec  is marked in  red
                                            because it is the fastest speed which will
                                                synchro nize with  electronic f lash;  if any
                                                      faster speed is used only part of the frame
                                                               will be exposed.
       Fis.1                                 The shutter speed is, of course, chosen to
                                                 take into account any movement of the
                                                     subject. Factors to be considered include
                                                    the  speed, distance, and  direction  of
                                         movement of the subjecti the focal length
                                                           of the lens used is also important, as is the
                                          way the camera is being supported. For
      exposures.The short travel of only 160o   maximum sharpness,use as short a speed
      and operation of the three separate f unc-    as possible.
       tions give a slight resistance.lf the lever
         is not wound  fully to  its stop the shutter
       release is blocked. Remember, therefore,
        to move the lever f ully round (but without
       forcing it).


                                                         3) The  shutter  release
        2)  Setting  the  shutter  speeds


      To set the shutter speed turn ring P (fig. 1)    The release button D  (ta1.2) is situated
        to the required speed, shown by the red    o n the   f ro n t  of the camera. The  f inger
        line of the transparentdisc, without going   squeezes tFe  button  while  the thumb
       past the black sector (do  not   f orce  it).    pressesagainst the other side of the ALPA.

  2
                               www.orphancameras.com
\
View original page 5Page 6 · Read text
'#


Ftg. 2


This arrangementminimizesrisk of camera   very short focal lengths for example).To
shake. The thread in the release button   do this, simply slide down knurled lever E
takesa standardcable release.Lenseswith     (fig. 2).
automatic diaphragm have  their own    Double or multipleexposuresare made as
releasebuttons which in turn depressthat    follows: after the first exposure press the
of the camera.When taking a rapidsucces-   shutter releasewhile winding (to tension
sion of  pictures, if  this button  is not    the shutter without winding the film), let
released before winding, the  film  will    the shutterreleasego f irst,then the winding
not be advanced,and the last exposure   lever, raise the mirror by means of E, and
made will be spoiled by another,partially  make the secondexposure.Do not forgetto
fogged becausethe mirror will not have   move E back again afterwardsto lower
returned.                                 the mirrorfor viewing.
The shutter lock V  (f ig. 2) in its inside
position blocks the shutter releasewhile
light readingsare made. lf a cable release
is fitted the lock is not effective.
Note: if the releasebutton is pressedvery    4l The self-timer
slowly the mirror may flip up before the
actual exposure is made. This does not
affectpicture quality.                  The ALPA 11 el has a self-timer(R, fig 2).
It is sometimeusefulto be able to lock the    This delayed-action release can be set
mirror in its raised position (when using   accordingto the length of delay required.
View original page 6
Page 7 · Read text
F i s . 3                                           Fig. 4
                                              2,5
                                               5
                                                 -7,5
                                              1 2 , 5


lf the lever is moved fully round the delay   synchronizationsockets(fig. 2).The upper
is abou t 1 8 secs; if moved o n ly 90" the    contact XF is for electronicf lash at speeds
delay is about 6 secs.                   up to 1/AO sec; a shorter speed than this
First wind the shutter, then the lever R.     will give only a partiallyexposed frame.
The delayed action is started by pressing   This contact can also be used for special
the shutter releasebutton. lf you wish to    short-peakf lashbulbs, but if theseare used
be in the picture, you have time to take   the manufacturer'sinstructions must be
u p position.                             followed carefullyas this kind of bulb is
lmportant: when usingthe self-timerwith    really disigned f or between- lens sh utters.
automatic-diaphragm lenses, the  lens   The lower M contact is for use with f lash-
must be used pre-set or the picture will   bu lbs  specially made  for  focal-plane
be taken at f u ll apertureon ly. lf the self-    shutters; their long peak allows short
timer is used with the shutter set at B,   sh u tter speeds.
the exposure time will be 3 secs. This
known exposurecan be very usefu I u nder
poor  light  conditions or  with  small
a pertu res.
The smooth release of the self-timer is
usefuI also if you have no cable release.
Use a fast speed in such circumstancesfor
photographing  in   difficult  conditions
without risk of camera shake.        C . F R A M I N G A N D
 lf the self-timer has been set but is then not                                 F O C U S I N Grequired,it can be disengagedby shutter
lock V and then keepingbutton D pressed
while lever R is allowed to return to  its
origin a I position.
                                             1) Framing

5) Flash synchronization
                                   The image of the screen is reinvertedand
The ALPA has two  standard co-axial   measuresexactly 2 3 x 3 5 m m ,  i . e . % m m


                          www.orphancameras.com
View original page 7Page 8 · Read text
less on each side than the 24x36 mm    the middle of the screen.Choose a definite
   frame.This matches the window of slide    detail in the subject and focus the lens
   mounts,so that there is no cut-off in pro-    untilthe image of the line acrossthe range-
   jection. The image on the screen of the    finder is in perfect alignment; the subject
  ALPA  half  frame  cameras measures   rs now sharply focused (figs.3 and 4).
   exactfy 18x24 mm or 17x22.5 mm.       The clear ring helps you to  identify the
  The screen image  is magnified, to  give    object you  are focusing on.  In photo-
   life-size with  the  standard 50 mm    micrography the aerial image is focused
   lens, and even with  small diaphragm   and  it is necessary to see it clearly at the
   openings the entire image is bright into   same time as one of the lines -  that is,
   the corners - most useful for composition,    with o u t p a ra lla x(fig .  ).
   focus, depth-of-f ield.                    Both  semi-circular prisms  will  appear
  An optional0.Tx eyepiecereducesmagnifi-    uniformly bright under normal conditions.
   cation. so that persons with deep-set eyes   Under certain circumstances(smallerlens
   or wearers of glasses can see the entire    apertures, close-up photography) one of
   field. Even with small f/stops, telephoto   the semi-circularprisms may appear to be
   lensesand bellows or tubes, etc.           shaded. In this case you can align your
  The viewfinder has a rotatable bayonet-    image between the other, bright prism of
  mounted rubber eyeshield cup  which    the split-imageand the clear glass ring.
  excludesextraneouslight, and which can   The scales indicated bv the cross are usefu I
  be replacedby a magnifieror a right-angle    for comparison (figs.3 and 4), especially
   viewfinder.                             an photomacro- and micrography.
  People with eyesight needing correction
  can fit special lensesinto a mount fixed in
   the eyepiece. The powers available are:
   -4,  -3,  -2,  -1,  +1,  +2,  +3, and +4
   diopters.                                       b) by microprism

                                          Microprismsare actualtya large number of
                                            small rangefinderswhich show clearlv the
                                            smallest mistake in focusing; as long as
                                              the focus  is wrong  the image is very
                                                 blurred. As soon as the focus  is correci
                                             the image snaps into clarity.
   2) Focusing  on the screen

  The ALPA   't 1  el has a screen which
  combines a split-image rangefinder with
  a circularzone of microprisms.The lens is
  focused by means of the ring which turns    3)  Focusing  by distance  scale
  the lens in its helical mount. Sharpnessis
  controlledover all the screen bv means of
  one of the systemsmentioned below.                                      AIIALPA lensesare calibratedfor distance.
                                                                         It  is thus possible to  select a  certain
                                           distance.by using the scale (for example
                                      qhen using f lash). Estimatingthe distance
  a) by rangefinder                              gf the subject,it is set on the scale,taking
                                                  into account the depth  of  field. This
                                      method is useful when  it is impossibleto
  The groundglass screen has a  built-in    focus, either when there is no time (as at
  rangefinder formed by a  pair of  prisms    a sporting event) or if it is too dark (when
  which appear as a pair of semi-circlesin    using flash etc.).


..             ,r -.- .:-;luiale*L    .,-..;;-*"
View original page 8Page 11 · Read text
2l  Rewinding  the exposed  film


                               When the  f rame cou nter shows 1 9  or
                                      35  exposures (according to  the  film
                                          loaded), wind to the next frame carefully
                                                to avoid tearingthe perforationsor pulling
                                          the film from its cassettealtogether- this
                                 wou ld make rewinding impossible.When
                                             definite resistanceto winding-on is felt
                                          the film is used up and is rewound after
                                        pressing the  rewind  release knob O
                                                (fig.6) which disengagesthe sprockets.
                                                                      It is not necessaryto keep your finger on
                                               this button. Pull out the rewind crank F
                                                 (tig.2) and turn in the direction of the
                                       arrgw (fig. 10). The film will offer a slight
                                         pullagainst the rewind,until suddenlyfhe
                                       crank beginsto turn freely.The cameracan
                                        then be opened and the cassetteremoved.
                                    Take care not to press the rewind knob
                                       except when rewinding. lf pressed by
                                       mistakeduring exposureof a film, advanceFis.10                                          the  film one frame to  re-engage the
                                          sprockets.


F i g .1 1

                            E . A L P A  L E N S E S


                                             1) Ghanging the lens


                                   To change the lens, press the button O
                                                 (fig.2) and turn the lens to  the  left.
                                         Positionthe new lens so as to line up the
                                      two red dots, push it gently into the body,
                                   and turn to the right until it clicks into
                                            position.


                         www.orphancameras.com
View original page 11Page 12 · Read text
2) ALPA lenses


ALPA have chosen an  incomparable  The transistorizedcircuit receives informa-
range of lenses from the best manufac-    tion from two Cds cells which measurethe
turers  -   Kern,  Kinoptik,  Angenieux,     light coming through the lens, while a
Schneider,Toomar and Zeiss.                 third cell compensatesfor any stray light
Each lens is individually factory-tested by    enteringthe systemthrough the viewfinder.
ALPA to very rigorous standards. Focal   The electronic circuit lights the lamps:
lengthsavailablerange from 24 to 600 mm,    yellow indicatesoverexposure,red under-
and their bayonet mounts have remained   exposure.When both lamps are lit at once,
standardizedfor more than 20 years.        exposure is correct. The two cells integrate
Among this selection of lenses are two    readings from  the screen, with  center
designswhich are exclusiveto ALPA - the    weighting,to give highly accurateexposure
famous Kern Macro-Switar f 1.9/50 mm    control.
(the standard lens of the ALPA), and the
KinoptikAPOCHROMATS.


                                                 2)  Methods   of  use


                                  Two methods are possible

                                               a) The shutter speed is set, depending on
                                           the subject (fig. 1). Remember to set the
F . E X P O S U R E R E A D I N G S       film sp e e d wh e n ch a n g in g films (fi g.6) .
                                      Lock the shutter releaseby sliding lever V
                                        towards the lens. Press the shutter release
                                           (D) to allow the meter and diaphragm to
                                         operate. While keeping pressure on the
                                         release turn the aperture ring  until the
                                     lamps visible in the viewfinder and in the
                                        accessory clip are both  lit.
                                                                               lf the subject is in focus, just slide back the
1) Basic principles                        lock V and take the picture.
                                         Note: in its outermost position the lock V
                                  makesthe meter inoperativebut allows the
                                             shutter to be released (useful for repeated
                                     exposuresof an identical subject).
                                                 In the center position the meter ope-
Themeter system has a very wide range of    rates  at  half  pressure on  the  shutter
sensitivity(1.6 - 400,000 asb). Current is    release,which also operates the automatic
supplied by one Mallory PX 28 battery   diaphragm, and the shutter is releasedat
(Eveready544).                                      full pressure.
View original page 12Page 13 · Read text
In the innermostposition, next to the lens,   When reading the meter in the accessory
    both the shutter and the meter are blocked.    clip.   it  is good  practice to cover the
    This last position allows the shutter to be    viewfinder with the hand or a lenscap.
    kept open after it has been released:open     In other circumstance,to keep out un-
    the shutter at B setting. and slide the lock   wanted  light when working  in intense
   toward the lens.The shutter is closed again    illumination,the small sliding cover for the
    after the exposure simply by sliding the    meter-window, on top of the camera, may
    lock back again.                           b e clo se d (G, fig . 1 2 ).
    Note:   if the releasebutton is kept depres-
   sed with the lock as just described,while    the shutteris tensioned,the blind staysopen                                          IIr     fully at shutter settings between 1/30th
   and B, and partiallyso at all other settings.                                            {

    b) The aperture is first set, according to
    requireddepth of field. Choosethe opening.
    block the shutter with V, then press the    4)  Direct  meter  readings
    releaseand find the correct time by turning
    the soeed dial. Slide back the lock. check
    the focus, and take the picture.
    Note: remember the cells are very sensitive
   and that to get both lamps lit at once may    Film speeds     Range of shutter speeds
    require the diaphragm to be set at an   ASA        DIN      fastest       slowest
    intermediatestoo value. The shutter can
    be releasedif one of the lamps is not fully
       lit: at some light levels the system is so      3        (6)    1 /60    1   second
    sensitivethat it may be difficult to get both      6(ASA)  (e)    1/',t25  1    D
                                                   (12)      lit.      The                    in            error                such                     case will                                 not exceed                                                              1/250                                                                          1         )                                     12         'l                       'l                                                                                                                                                                      'l                                                                                   ( 1 5 )         to                     of                                                         I                                          2                                           5                  an f -stop                                                                                               r>      /5                                                            /5OO   1              /1 Oth
                                     50      (18)   1/10OO 1         )
                                    100      (21)   1/1OOO 1/2   D
                                    .2OO      (24)   1/1OOO 1/4   D
                                     400       (27)    1 /1 0 0 0 1/8   D
                                     800       (30)    1 / 1 O O 0 1 / 1 5  D
                                        1600       (33)    1/1000  1/3o    )
                                   3200      (36)    1 / 1 0 0 0 1 / 6 0  >
                                    6400      (3e)    1 /1 0 0 0 1/125 ,>
    3) lmportant  note

                                                                                       lf the speed required is outside the scale
   Another point to remember is that, like    registered by  the system  it  is easy to
    the human eye, the cells have to get used    estimate   it  because ASA  ratings . are
    to darkness and are "blinded" by very    directly  proportional  to  shutter speeds
    intense light, so  that they continue to    and  f stops (except for a few maximum
    register it for a short time. Therefore when    apertureson certain lenses).
    passing from a very bright subject to a dark    For example, if an exposureof 1/1000 sec
    one, allow the meter to  rest for a few      is required with a 25 ASA film a direct
   seconds. lntentional over-  or  under-    reading will not be obtained - the fastest
   exposure is, of course, always possible.     speed for this film  is 1/500 sec.  lf the
   The eye should be kept as close as possible   correct stop at 1 /500 sec was, say, f 5.6,
    to the eyepiece during exposure readings   the shutter speed is halved to 1/1ooo,
    (especiallyif wearing glasses),to minimize   therefore the aperture must be doubled,
    the effects of stray reflections entering the        t o f 4 .
    viewfinder. lt  is well compensated for by   Sometimes 1 sec on the speed dial is not
    the third cell but this compensationmight    long enough: in this case the film setting
   be insufficient in extreme circumstances.     can be alteredinsteadofthe shutter speed.

1 0                          www.orphancameras.com
                                                                                                                            -d'1
View original page 13Page 14 · Read text
Fig.12                                      Fig. 1 3


For example,with a 25 ASA film, if the   The ALPA does not requ ire a  battery
shutteris set to 1 sec without the meter    test because its design makes it u n neces-
lightscoming on together, alter the film    sary. Either the battery is good a nd the
speedsetting until the lights do come on   system functionS,or the power is too low
together.lf this happensat, say, 100 ASA,   and the lampsw i l l n o t  l i g h t .
thisis two stops above that of thb film, so
onejust gives two stops (- Q,x the time),
thatis 4 secs in this case.


5) Checking  the  battery
                            G. GENERAT
                      RECOMMENDATIONSRemovethe cameraback (no film inside!).
Takeoff the lid of the batteryhousing,and
insertthe new battery (Mallory PX-28 or
Eveready544) with the +  sign   f acing   The ALPA is well known f or its strengthand
outside(fig. 1 3), and replacethe lid. lf the    robustness, as proved by  its use o n
lampsdo not light check that the battery  numerous expeditions in  all kinds of
has been put  in  correctly  ( +  to  the   extreme climates.At the same time one
outside),and change it round if need be.   must rememberthat it is a precisioninstru-
                                      ment, and should be used with care if  it
                                                      is to give the best possible service.This
                                         applies equally to  its lenses and acces-
                                       so nes.
                                      Please pay  special attention  to  the
                                         following points:
                                         1 )  Protectthe ALPA from dust, sand, and
                                        high humidity. In the tropics it should be
                                         kept in a sealed co ntainer with a bag of
                                              silicagel.In winter, if  it becomes coated
                                          with mist on coming in out of the cold,
                                     do not try to wipe  it dry but simply wait
                                                 until the moisturedisappearsby itself.

                                                                       1 1
View original page 14Page 15 · Read text
2) Clean the film channel and pressure-
   plate occasionallywith a piece of lint-free
   clot h.
   3) Never oil the mechanism.The shutter
    will work for many tens of thousands of
   exposureswithout lu brication.
   4) Never try to dismantlethe ALPA your-                                                                                            I
    self. This requires not only expert know-
   ledge but also specialtools. Your guarantee                                                      ;
   becomes void  if the ALPA  is serviced by
   any unauthorizedperson.                                                                                                                                                                                                                                     l
    5)   lf you are so unlucky as to drop the                                                                                                                                          I
   camera into the sea, it must be thoroughly                                                                                                                                        I
   rinsed in several changes of fresh water
   before being dried. lt must then be sent
   without delay to an authorized dealer or
    to the factory.
    6)   lf yourcamerais lostorstolen advisethe
   factory at once of the serial numbers of
   body and lens.We stronglyrecommendthat
   you insure your ALPA equipment.
    7) When insertinga {ilm, either a new one
    or one reloaded by yourself, check that
   the lips of the cassetteare not too tight, and
    that the film comes out easily.
      It is a good idea also to check that there are
   no loose velvet threads hanging from the
    cassette; these can easily become trapped
    in the film window and make shadows on
     all your pictures.


                                                J:iI


12                                                                                                          i
                             www.orphancameras.com
                                 .   ., :::i.,:,:1.;,,.1.1'r.{i1fu};,;. >-,,ql;g,l,hi                              *,,,  .,,.    .r'rrriB*,Salb,,: &
View original page 15Related documents and language editions


From the M. Butkus archive. Original publisher and archive notices are retained.
Check the model and edition against your equipment.
PDF verified 2026-10-10.