Film cameras
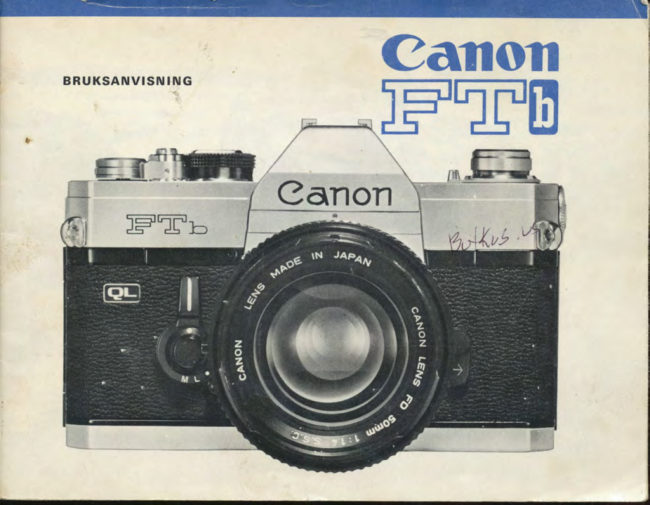
Canon FTb User manual
User manual for Canon FTb. 49 pages in English. Read the original PDF, download or print a copy without registration.
49 pagesEnglish4.7 MB PDF

Loading your manual…Open PDF directly
Document details
- Brand
- Canon
- Model / document
- Canon FTb
- Document type
- User manual
- Language
- English
- Pages
- 49
- File size
- 4.7 MB
- Category
- Film cameras
- Document date
- Not specified in catalog
Search available document text
Find a term, then jump to its page in the original PDF. Image-only pages may not be searchable; check the PDF for exact wording and diagrams.
Page 3 · Read text
We are highly gratified that you have selectedthe
Canon FTb-a wise choice that promisesyou many
delightfulyears of photographicexperiences.Canon
is recognizedthe world over as the foremost pioneer
in the developmentof photographicequipment of
the highestquality and performance. Whetheryour
FTb is for the home, laboratory,or for traveling,make
the most of your opportunities!

BeforeUsing.. .
Please read this instruction booklet carefully, and
master the manipulationsof the variousparts of the
FTb completely. Once throughlyversed in the cor-
rect handlingof this camera, you can use the Canon
FTb to the fullest extent of its capabilities.


                           www.orphancameras.com
View original page 3Page 6 · Read text
tollowTheseSimpleStepsfor
NormalPhotography


,l
 I     t o a O t h e  f i l m w i t h  t h e Q L m e c h a n i s m .


2  Set the AsA f itm speed.

3  wind the fitm advancelever.


  t
{   Re mov e   t h e    l e n s  c a p .

6
View original page 6Page 7 · Read text
q*l   5 Look through the viewfinderand focus.
          Determine the exposure by adjusting the shutter speed
            dial and the preset aperture ring.5 1 6 6


             I  Composethe picture.


              I  Press the shutter reteasebutton gentty.
  www.orphancameras.com
View original page 7Page 8 · Read text
Technicall|ata
 I  Type : 35mm single-lens ref lex camera with focal plane shutter,  Picture size , 24 x 36mm.
 r  Interchangeable Lenses:  Canon FD series lenses with full aperture signal lever.
 r  Standard Lens: Canon FD 55mm F 1.2, FD 5Omm F 1.4, FD SOmm F 1.8.
 I  Viewfinder: Eye-levelusing pentagonalprism. Angle Finder A, Magnifier 5, DioptricAdjustment
LensEs can be attached,
 r  Focusing Screen:  Using Fresnel lens and microprism screen rangefinder.  With metering
beam-splitting condsnser.
 r  Fiefd-of-View: 94% of actual picture area.  0.85x with standard 50mm lens at infinity.
 r  Viewfinder Information:  Meter needle and aperture needle, red signal indicating outside lower
side of meter coupling range, meter index for stopped-down rnetering and battery check use,
and coupling range limit marks.
 r  DioptricAdjustment Lenses: Standard -1.2  diopter.  Interchangeablewith +1.5, O, -2.5,
and -4.
 r  Mirror:  Shockless quick return system.  Mirror can be fixed in upward position.  Aperture is
manually operated when mirror is fixed in upward position.
 r  Lens Mount:  Bayonet type FD mount.  FL and R series of lenses mountable.
 I  Coupling Function of Lenses: FD lenses; full aperture metering, coupled with automatic dia-
phragm. FL lenses;  stopped-down metering, coupled with  automatic diaphragm. R lenses;
stopped-down metering, manually operated diaphragm.
 r  Shutter:  Focal plane shutterwith speeds from 1/1000 to 1sec. and B.  Multiple series.
Equiinterval index. X contact at " 60 ".  Shutter release button can be locked.
 r  Self-Timer:  Built-in.  Activate with shutter release button.  Approx. 10sec. time  lag.  Self.
timer lever is used in common as stopped-down functioning lever.
 r  Film Speed Scale: ASA 25-2OOO.
 I  Exposure Meter:  Built in.  Using CdS photocell. Coupled to shutter speeds, film speeds and
f/stop. Match needle type full aperture measuring mechanism. Central area metering system,
measures L2%  ol picture area.  Stopped-downmetering possible. Fixed dot type metering,
View original page 8
Page 9 · Read text
using stopped'downfunctioning lever. Locking of lever possible. Poweredby one 1.3v M2O
(#625)mercurybattery. Batterycheckerbuilt in.
          Meter CouplingRange: With ASA lOO fitm, EV 2.5  ltlt.2at  t/4 sec.t-Ev 18 (f/r6 ! -E1_oo19reat 1/1OOOsec.!.
 r  uftra'fowllluminationMetering: Metering possiblebetweenAsA loo  film EV lo   lt/22  at
ll2sec.l and EV-3.5  lf /1.2 at 15 sec.twith use of CanonBooster.
 r  FlashSynchronization: FP and X contact. Automatictime tag adjustingtype. Flash socket
on front side of body. Two exclusivecontacts on accessoryshoe.
 r Canon             Tuning ICATI System: Aperture control by rechargingpower level signal and         .Auto
distancesignal..Properapertureobtainedby meter matching needrclyitim  through co-nnection
9! Qlon  speedlite133D, FtashAdapterand prescribedFDsomm F1.4, FDSohm F1.8, orFD35mmF2lenses.
r SynchronizingRange: FP class; 1/1000-f/l25 sec 1/30 sec.or under. Speedtite;1,/60sec.
or under. I{, MF class; 1/3Osec.or under.
r  Film Loadlng: By openingbackcover. Acceptsany standard35mm film roll in cartridge. eLmechanismfor quick loadingof film.
r  Film AdvanceLEver: Singleoperation174'.  short-strokewindingpossible.
r  Film Rewinding: Performedby rewindbutton and crank.
r DoubleExposure: Possibleby operatingfilm rewindbutton and crank.
I FrameCounter: Self.resettingtype activatedby openingbackcover.
r  Size:, l44x93x43mm l5p(" x 3%',xt%,,|.
r Weight: 75Og(1.46lbs.Fbody onty.
                                                                                             Subict to dt nlionr.


                           www.orphancameras.com
View original page 9Page 10 · Read text
MercuryBatteryloadingandGhecking

The built-in exposure meter of the Canon FTb functions
only when the mercury battery is properly loaded.
I  Insert a coin into the groove of the battery compartment
 I  cover and turn it to the left to remove.
lf Face the central contact (O)  of the mercury battery
4  inwardsand insert.
   Replacethe cover by turning it to the right.{r,
r  Before inserting, wipe the battery poles clean of finger-
prints or stains with a dry cloth.  Otherwise, the meter
may not function due to imperfect contact, and dirty poles
may cause corrosionand damage the contact points of the
camera.
r A 1.3v M20  lt625l mercury battery should be used-
equivalent to Mallory PX-625, Eveready EPX-625.
 r  Be sure to insert the battery in the correct direction by
referring to the diagram on the compartment cover. Other-
wise, the cover cannot be properlyscrewedin.
 r When the camera is not to be properly used for a long
period, remove the mercury battery and keep the camera
 in a dry place.
View original page 10Page 11 · Read text
Battery  Gheck
                Check the power level of the mercury battery after loading
                               it.
                                      I  Set the film speed scale at ASA 100 and the shutter
                                      I  speeddial at " lOOO".  For setting the film speed, lift
                 up the outer ring of the shutter speed dial and turn. See
                page 19.
                                r A correct check cannot be made if other settings are
                  used.
                   7  Turn the meter switch, on the outer side of the film
                   L  rewind crank,to the " C " index.
                                       lf the meter needleinside the viewfinder swings to the                   ?
              U  meter index, the battery has sufficient power.   lf the
                  needle stays below the meter index, voltage is insufficient
                 and the battery must be replaced.
                                      I When removingyour finger from the meter switch, it will
                   adtomaticallyreturn to the  " OFF " index from " C ".
                               r  Life of the battery in normal use is approximatelyone
                     year.


    S u f f ic ie n t
    In su ff ic ie n t
( M u s t b e re p la ce)www.orphancameras.comd
View original page 11Page 12 · Read text
FilmWinding
The film advance lever winds the film, cocksthe shutter,
and preparesthe aperture and mirror for the next shutter
releaseall in one motion.
   Turn the film advancelever until it stops. The film willI I  be advancedone frame and the shutter cocked. The
frame counter is simultaneouslyadvanced to the next
number.
,) When the shutter release button is pressed, the mirror
L  flips up, the diaphragmsimultaneouslycloses down to
the preset f/stop and the shutter operates.  After the
shutter is operated,the advancelever can be wound for the
next frame.
 r Be sure to set the shutter lock lever at "A".
 r Windingmay be done by moving the lever with several
short strokes.
 r  After loading the film, make another wind, becausethe
first winding may not be complete.
 r The shutter will not function when pressing the shutter
release button unless winding is completed.  In such a
case,check the windingonce more.
View original page 12
Page 13 · Read text
-ll    Frame Gounter
      E a c h w i n d i n g w i l l a d v a n c e t h e n u m b e r o f  t h e f r a m e c o u n t e r ,
                  i n d i c a t i n g  t h e n u m b e r o f p i c t u r e s  t a k e n . w h e n   t h e b a c k
        c o v e r    i s  o p e n e d ,   t h e  c o u n t e r  a u t o m a t i c a l l y  r e t u r n s   t o
        s t a r t i n g p o s i t i o n
     Safety Device for Shutter
     w h e n    t h e  s h u t t e r    l o c k   l e v e r a r o u n d  t h e  s h u t t e r  r e l e a s e
       b u t t o n   i s  t u r n e d  t o  " L "  p o s i t i o n ,  t h e  s h u t t e r   i s   l o c k e d
       a n d w i l l n o t m o v e .  T h i s d e v i c e m a y  b e u s e d w h e n   t h e
      camera is carried in a wound condition.
     Attaching the Gable Release
       Optional Canon Release can be attached  to the FTb by
        s c r e w i n g i t  i n t o  t h e  t h r e a d e d h o l e  i n  t h e c e n t e r o f  t h e s h u t -
        ter release button.  The use of a cable release is recom-
     mended when photographing with extended time exposure
       or slow shutter speeds, and for copy work.
      Even   if  the  shutter  lock  lever  is  at   ,, L "  position, the
       s h u t t e r w i l l o p e r a t e b y u s i n g t h e r e l e a s e .


www.orphancameras.com
View original page 13Page 14 · Read text
ShutterandApertureAdjustment
Exposuresare adjustedby the shutter and aperture. The
shutter conti-olsthe exposure time and the aperture con'
trols the amount of incoming light. The Canon FTb uses
a match needlemeter, a very simple method of obtaining
proper exposures.
Shutter Speed Dial
Adjust the shutter speed by turning the shutter speed dial
to the desiredindex number. The index on the dial shows
the denominatorsof 1/1OOOsec., 1/5OOsec., etc.
 r The shutter speed dial does not revolve between indexes
"  l O O O " a n d " 8 " .
 r Be sure to set the index at a position where the click'
stop catches. In case of " B " index,adjust it to the white
dot just belowthe " B " index.
 I   " B " indicatesbulb exposure,and is used when making
exposures of more than one second. When the shutter
speeddial is set at " 8", the shutter remainsopen as long
as the shutter releasebutton is pressed.
r When time exposure is necessary to make an exposure
over an extended time, first set the shutter speed dial at
" B ".  Keep the shutter release button pressed, and turn
the time lock lever to  " L ".  The shutter remains open
even if the finger is removed from the button. When the
lever is returned to "A", the shutter closes.
r Time exposure is also possible by using the lockable
 l 4
View original page 14
Page 15 · Read text
cable release.
                                   r   lt is possibleto perform a long-time exposure measure-
                  ment by attaching the optionalCanon Booster,the auxilia-
Pre set                        ry meter for measuringsubjectsunder dim light.Aperture         Ring                                                                                          ' '                                                                              ' '                                         I The                          60                                 index is used for synchronizing an electronic
                      flash unit such as Canon Speedlite.  lt is equivalentto
                    a very short exposuretime duringthe flash of the flash unit.
                Aperture
                                         fncoming light and depth-of-field are adjusted by turning
                      the preset aperture ring to the desired f/stop.
                                  r As the f/stop number gets larger,the amount of light
                    reachingthe f ilm plane becomescorrespondinglyless. For
                  each f/stop up, the light is reduced one-half.  Accordingly,
                 when the aperture is increasedby one f/stop, the exposure
                           is doubled, and when it  is increased by two f/stops the
                  exposureis quadrupled.
                                  r Certain lenses,however,have no relation to the bright-
                  ness halved betweenthe maximum and the next f/stops on
                     the preset aperture ring.
                                        I The ratio between the aperture and the amount of ex.
                    posure,using f /2 as the basis, is as follows:

                        f/stop  :
                                         t . 2   t . 4  1 . 8 2 2 . 8 3 . 5  4  5 . 6   8       t l    1 6   2 2
                  ExposureRatio:
                     3   2  1.25 1 L/2 r/3  L/4 L/8 r/16 L/32 L/64 L/r28

             www.orphancameras.com                                  1 5
View original page 15Page 16 · Read text
r The preset aperture ring can also be set between two
f /sto ps.

Presetting  of Aperture
In the case of the FD or FL lens, the field'of-viewcan always
be seen through the viewfinder at f ull apertureopeningeven
after the f/stop has been set with the preset aperture ring.
Set the desired f/stop on the preset aperture ring to the
index. The diaphragmwill close down to the preset f/stop
only for the instant that the shutter is released. Except
for that instant, the diaphragmremainsfully open.

Manual  Gontrol  of Aperture
   By lockingthe stopped down functioninglever and turn'1
 I  ing the preset aperture ring, the diaphragm can be
closeddown to any f/stop and the depth of field at the time
of shutter release can be checked. When the lever lock is
reset to  its original position,the diaphragm again returns
to maximumopening.
 r The aperture is manually stopped down also when per'
forming close-upphotographyand macrophotography.
 rl When an accessoryis used between the lens and the
L  camera body, turn the automatic/manual aperture lever
of the lens counterclockwiseall the way before mounting
the lens. This locks the lever and the diaphragm can be
opened or closedby turning the preset aperture ring. For
releasingthe lever,turn it clockwise.
                                                                                      Automatic,/Manual
                                                                                          Aperture Lever

 1 6
View original page 16Page 17 · Read text
Manual Control of Aperture
                                 By pressing the stopped down functioning  lever and                                   1
                                                                       I   turning the preset aperture ring, the diaphragm can be
                                 closed down  to any f/stop  and the depth  of field  at the
                                  time  of shutter release can be checked. When the lever is
                                   reset to  its original position, the diaphragm again returns
                                                                      t o m a x i m u m o p e n i n g .
                                                           r  The aperture is manually stopped down also when per-
                                  forming close-up photography and macrophotography.
                                                                              I n c a s e o f C a n o n F D L e n s 5 O m m F 1 . 8 , t u r n  t h e a u t o -
                                   1b   matic aperture  lever of the  lens counterclockwise  all
F D 5 0 m m F 1 . 8                     the way and set the manual lock lever at  " L" position be-
                                    fore mounting the lens.  This manual lock lever locks the
                                automatic aperture lever and the diaphragm can be opened
                                      or closed by turning the preset aperture ring. For releasing
                                   the lever, return the manual lock lever to the original posi-
                                      tion (white dot).
                                With the use of this lock, photography using manually oper-
                                 ated aperture can also be perf ormed on Canon single lens
                                                          r e f l e x c a m e r a s l i k e F X b e s i d e s t h e T L b , F T b , F T Q L a n d F - 1 .
                                 But do not use  it together with Canonflex R, RP, RM and
                           R 2000.


           M a n u a l   L o c k  L e v e r
    Automatic/Manual
    Aperture Lever

                    www.orphancameras.com
View original page 17Page 18 · Read text
UsingBuilt-in[xposureMeter

Canon FTb provides the most accurate  light measurement
possible with  its unique TTL (Through-The'Lens) system.
The built-in exposure meter, which is of match needle type,
is coupled to the ASA film speed scale, shutter speed dial
and preset aperture ring.
The CdS photocell of the exposure meter is placed in the
closest position to the beam-splitting condenser lens.  The
central  area  metering  system  enables accurate meas-
urement of the main subiect even in counterlight.
The rectangular frame  in the  viewfinder represents the
light measurement area of the CdS photocell.  Place the
main subject within  this frame and measure the  intensity
of light so as to obtain the proper exposure.
 I  The correction of the full aperture opening of the lens is
performed  automatically.   Therefore, the  operation does
not change regardless of the speed of the lens used.  An
FL lens can be used only with stopped'down metering.
 r Due  to  the  characteristics  of  the CdS photocell, the
movement of the meter needle may occasionally become
slack, owing to changes in the degree of light.
 I  Metering at "B"  on the shutter speed dial is not possible
with the built-in exposure meter, because " B "  is used for
long exposures over one second.
 I  Always use  a  lens hood when  shooting against the
ligh t.
 l 8
View original page 18
Page 19 · Read text
r When not using the camera, set the meter switch at
          " OFF" or attach the lens cap so as to preventunnecessary
     consumptionof the mercurybattery.
      Film Speed Setting
      Set the ASA film speed scale to the speedof the film being
      used. Film speedsare normallyshownon the f ilm box cover
     and/ or explanatorysheet.
       Lift'and turn the  f ilm speed set ring around the shutter
     speed dial.   lf the film is ASA 10O, for example, make the
      correct setting by showing" lOO " in the small window.
          r The followingfilm speedsmay be used:
            _ _(32)(40)_ _ (64)(80) _ (125)060)  (2s0)(320) (500)(640)-'.eoo    ASA  25     50     100     200      40ci  :";
    D I N   1 5     1 8       2 L       2 4       2 7       3 0                 (16)(17)  (ls)(20)   (22)(23)   (25)(26)   (28)(2e)
          (1000)(12s0)  (2000)
              1600
                 33
             (31)(32)     (34)
      Figuresin parenthesesrepresentintermediatefilm speeds.
          r When "25"  appearsin the small window, this is as far
     as the film speed setting ring will turn to the teft. The
      white dot at the right.turn extremity readsASA 2OOO.


www.orphancameras.com
View original page 19Page 20 · Read text
ExposureSettings
Full Aperture Metering
Full aperture metering can be performed with an FD lens
which has an aperture signal lever and pin.
   Set the meter switch at " ON "I I
7  Set the shutter speed dial at the desired speed.L
   Face the camera towards the subject, look into the view'?
t   finder, and check the position of the meter needle and
aperture needle.
 r The meter needle is coupled to the film and shutter
speeds, and moves vertically according to the brightness
of the subject. The aperture needle, with a round circle,
is coupledto the preset aperture ring of the FD lens.
.lI  Turn the  preset aperture ring and align the aperture   needlewith the meter needle.
 r The green mark (circlel on the preset aperture ring is for
Servo EE Finder with Canon F-l use only.
 r  In the case of f/stop  priority, turn the shutter speed
dial and align the meter needle with the aperture needle.
Be sure to set the shutter speed dial at the click-stopped
positions.
      lf the aperture needle does not align with the meter5U needle by turning the preset aperture ring,   it means
that the shutter speed is not properly set.  In this case,
20
View original page 20Page 21 · Read text
align the two needlesby turning the shutter speed dial.
                                                             r The moving range .of the aperture needle inside the         Aperture Needle
                                     viewfinderchanges according to the lens speed. Thus, it
                                                 will not always move vertically the full length of the view-
                                         finder. Changethe shutter speedwhen the apertureneedle
                                  cannot be alignedwith the meter needle.
                             When the shutter is set on.the high speed side, the                                                            f,                                        v  meter needle moves downward. When it  is set at a
                                   slowerspeed,the needlemoves upward. When the shutter
                                                is set at a slow speed outside the meter couplingrange,the
                                  meter needleswingsall the way up and the red signal ap-
                                  pearsat the bottom of the viewfinder,and metering is not
                                    possible even if the f/stop  is changed. When the red
                                      signal appears and metering cannot be performed, use
                                  high-speed film or the optional Canon Booster. Referto
                                                         " Coupfing Rangeof Built-in ExposureMeter " on page24.
                                                             r Select a faster shutter speed when the meter needle
                                 swingsall the way up, and a slower speed when it swings
                                                 all the way down.
                                                             r Since the shutter speed dial cannot be set at the inter-
                                 mediate positions,the shutter speed priority method is re-
                            commendedwhen exposureaccuracyis a crucialfactor.
       f-,':J       lrffi)t|                \xtrr7':---'             j,                      [
            R e d S i g n a l l
Outside the Coupling Range)
                         www.orphancameras.com
                                                                                        :,'r:r!;",            r,.ffi};,..-.i::
View original page 21Page 22 · Read text
Stopped-Down Metering
W h e n u s i n g a  l e n s h a v i n g n o  f u l l a p e r t u r e m e t e r i n g s i g n a l
such as FL lenses, metering should be performed by stop-
ping down the lens. Stopped-down metering  is performed
by push ing down the stopped'down  f unctioning lever.
The stopped-down  f unctioning lever can be  f ixed for con-
tinuous light measurement by pressing it towards the lens
after setting the lever lock at  " L "  position.   With  the
fixing of the lever, shooting subjects with different  light in'
tensities or telephoto lenses can be conveniently f undled.
By returning the lock to the white dot position, the meter-
ing lever will return to its original position.
1  Set the meter switch at  " ON ".
 l
,)  Set the shutter speed dial at the desired speed.
L
   Face the camera towards the subject, look into the view-?
U    f inde r, and press the stopped-down f unctioning lever all
t h e w a y u n t i l   i t  s t o p s .  T h e a p e r t u r e n e e d l e w i l l p o i n t  t o
t h e    l o w e r c o u p l i n g  l i m i t m a r k a n d o n l y  t h e m e t e r n e e d l e
re ma rns.
.tt  Turn  the  preset aperture  ring and make  the  meter
   needle stop within the meter index in the viewfinder.
 I  In the case of f/stop  priority, adjustments can be made
w i t h  t h e s h u t t e r s p e e d d i a l .
View original page 22
Page 23 · Read text
q    lf the meter needle is pointing above the meter index
                                                                l'  and cannot be matched  by closing the preset aperture
                                  ring and metering cannot be performed,  turn  the shutter
                          speed dial to the faster side.  lf the meter needle is pointing
                           below the meter index and cannot be matched by opening
                               the preset aperture ring, turn the shutterspeed dial to the
                            slower side.  when the red signal appears, use high-speed
                                   film  or the Canon Booster.
                                                   r  Full aperture metering  is rather recommended  with  the
                       FD lenses, because the FD lenses have a full aperture signal
                             so as to fully compensate the built-in exposure meter.

                    How to  " Average"   Exposures
                    When measuringa subject with greaily different dark and
                             bright parts, take two measurements,one each of the dark@                       and bright parts. Then obtain the average value and set  M e t e r  N e e d l e
                            the f/stop or shutter speed accordingly.  Meter Index


                 www.orphancameras.com
View original page 23Page 25 · Read text
t|iewingandFocusing
                             Gomposition
                                   The exact picture image to be photogra phed can be seen
                                     on the  f ocusing screen of the viewf inder without any paral-
                                               lax.  This enables you to determine the exact composition
                                                 of your scene bef ore pressing the shutter release button.

                             Focusing
                                   The center circular section of the viewfinder  is a micro-
                                       prism screen rangef inder made u p of microscopic prisms
                                                  for fast and precise focusing.
                                      While looking through the viewfinder, revolve the focusing
                                               ring.    lt  is  in focus when  the image  in the rangefinder
                                  becomes sh arp and clear.
                                                                                    t  An optical curve may sometimes be visible in the lower
                                            part of the viewfinder according to the angle of the incom-
                                           ing light.  This is a reflection of the beam-splitting mirror
                                   added onto the condenser lens in the TTL  light measure-
                                    ment system.


Out of Focus               In Focus

                         www.orphancameras.com
View original page 25Related documents and language editions



From the M. Butkus archive. Original publisher and archive notices are retained.
Check the model and edition against your equipment.
PDF verified 2026-10-10.