Camera accessories
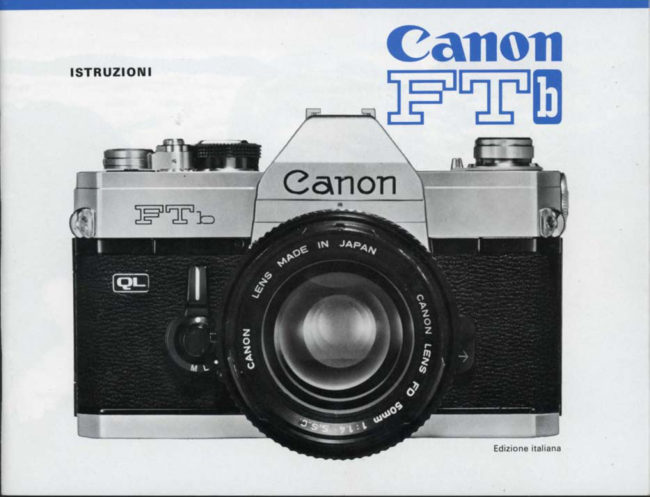
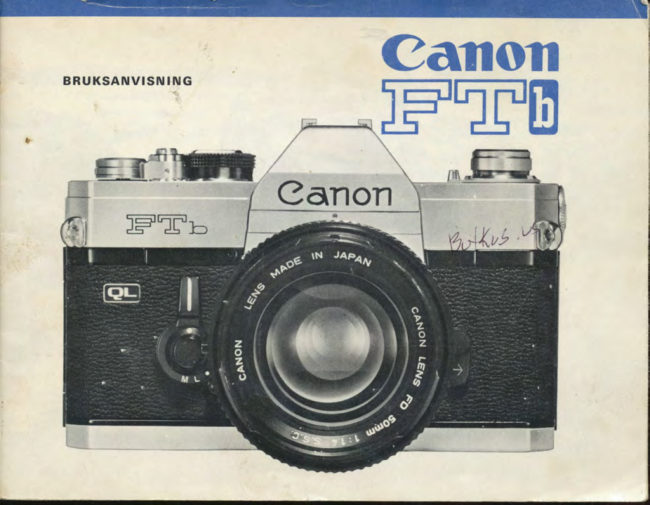
Canon FTb with black self timer switch User manual
User manual for Canon FTb with black self timer switch. 49 pages in English. Read the original PDF, download or print a copy without registration.
49 pagesEnglish15.7 MB PDF

Loading your manual…Open PDF directly
Document details
- Brand
- Canon
- Model / document
- Canon FTb with black self timer switch
- Document type
- User manual
- Language
- English
- Pages
- 49
- File size
- 15.7 MB
- Category
- Camera accessories
- Document date
- Not specified in catalog
Search available document text
Find a term, then jump to its page in the original PDF. Image-only pages may not be searchable; check the PDF for exact wording and diagrams.
Page 2 · Read text
We are highly gratlfied that you have selected the
Canon FTb-a wise choice that promises you many
delightful years of photographic experiences. Canon
 is recognized the world over.as the foremost pioneer
in the development of photographic equipment of
the highest quality and performance. Whether your
FTb is for the home, laboratory, or for traveling,make
the most of your opportunities    !

Before Using ..  .
Please read this instruction booklet carefully, and
master the manipulation of the various parts of the
FTb completely. When thoroughly versed in the
correct handling of this camera, you can use the
Canon FTb to the fullest extent of its capabilities.
View original page 2
Page 7 · Read text
Follow These Simple Steps
         for
l{ormal Photography

1  f-oua the film with the QL mechanism.


2 ,"a an" ASA film speed.
3 *,no the film advance tever.


4 *"rou" the lens cap.

6
View original page 7Page 8 · Read text
www.butkus.us


                                   5  Look through the viewfinder and focus.
                                               Determine the exposure by adjusting the shutter speed
                                   6  dial and the preset aperture ring.


 ol/                        7 aornoor" the picture.
  ..


       .:&:.&
   &

t                                                  Press the shutter release button gently.


                    www.buktus.us
View original page 8Page 9 · Read text
dswls$sw*qivl$+s
ffi*?F'"  Technical llata
           35mm single-lens reflex camera with focal plane shutter. Picture size; 24x36mm.et;rqril     r Type:
                                 FD series lenses with full aperture signal lever.$i   r  Interchangeable Lenses: Canon      r Standard Lens : Canon lens FD 55mm f/1.2 S.S.C., FD Somm f/l.4 S,S.C., FD SOmm f/l.8 S.C.
      r Viewfinder: Eye-level using pentagonal prism. Angle Finders A2 and B, Magnif ier S, Dioptric
     Adjustment Lenses can be attached.
      r  Focusing Screen: Using Fresnel lens and microprism screen rangefinder. With metering
      beam-splitting condenser.
         Field-of-View : 94% of actual picture area. 0.85X with standard 5omm lens at infinity.}ii   r      r  Viewfinder Information :  Meter needle and aperture needle, shutter speed indicator, red signal],,:     indicating outsidelowerside of meter coupling range, meter index for stopped-down metering and
      battery check, and coupling range limit marks.
      r  Dioptric Adjustment Lenses: Standard --1.2 diopter. Interchangeable with 1-3, +2, + 1.5,
    + 1, +0.5, 0,               and *4.                 -0.5, quick-2, -3return system. Mirror can be fixed in upward position.       I  Mirror: Shockless
      r Lens Mount: Canon breech-lock FD mount. FL and R series of lenses mountable.
      r Coupling Function of Lenses: FD lenses: full aperture metering, coupled with automatic dia-
    phragm. FL lenses: stopped-down metering, coupled with automatic diaphragm. R lenses:
     stopped-down metering, manually operated diaphragm.
      r Shutter: Focal plane shutter with speeds from U1O00 to 1 sec. and B.  Multiple series.
      Equiinterval index. X contact at " 60 ".  Shutter release button can be locked.
      r  Self-Timer: Built-in, Activate with shutter release button. Approx. lOsec. time lag. Self-
     timer lever is used in common as stopped-down functioning lever.
      r  Fifm Speed Scale: ASA 25-2OOO.
       I  Exposure Meter: Built.in. Using CdSphotocell, Coupled to shutter speeds, film speeds and
      flstop. Match needle type full aperture measuring mechanism. Central area metering system,
     measures L2% of picture area. Stopped-down metering possible. Fixed dot type metering,
View original page 9Page 10 · Read text
www.butkus.us

 using stopped-down lever. Lockable. powered by one 1.35V MZO lt625i mercury battery. Battery     # checker built.in.
   Exposure r                                                                                                                                                                                                                                                                                                                                                                 '       1g (f/16            Metercoupling Range: with ASA loofitm, EV 2.5 lt/1.2atL/4sec.l-EV-- -'at   1/1000         sec.). I  Ultra-low              lllumination                       Me_tering:                                              possibte                                 Metering                                                between                                                ASA IOO film EV lO lt/22 at 1/2see.l        and           EV- 3.5 (t/L.z                             at LS sec.)                                       with use                                                      of canon                                                              Booster.
 r  Flash Synchronization: FP and X contact. Automatic time lag adjusting type. Flash socketon front side of body. Two exclusive contacts on accessory
 r canon Auto Tuning (cATl system: Aperture ,control -byshoe.recharging power level signal antl
distance signal. .Proper aperture obtained Ly meter matchini neeoteiyEtem through connection
9f-c^a1ol          Speedlite l'33D, Flash Coupler Az/Bz and prescribedFDsomm t/L.4S.S.C.,FDSommf/l.8 s.c., FD 35mm t/3.s s.c. or FD 35mm f/2 s.s.c.'renses.r  Synchronizing             Range:                      FP class;                               r/1ooo-t/tis                                                     iec,, L/30 sec. or unJer. Speedlite  ; L/6osec"      or under. M,            MF class;                            1/30 sec.                                           or under.r  Film Loading:                By                    opening                            back                                cover. Accepts any standard 35mm film roll in cartridge. eLmechanism             for quick                      loading                                of                                     film.
r  Fifm Advance Lever: Single operation !74'.  Short-stroke winding possible.r  Film Rewinding: performed by rewind button and crank.
r  Double Exposure: possible by operating film rewind button and crank.I  Frame counter: self-resgtting type activated by opening back cover.r  Size :  144 x 93 x 43mm lE%" x3%,' x !%,,1.
r weight: 75og lllb' lo'% ozs')-body only.                    subject to change withoutnotice.

                                                    "Spectra Coating" and "Super Spectra Coating"
                                                         shall be abbreviated as ,.S.C.,' and ,,S.S.C.', res-
                                                               pectively.
View original page 10Page 11 · Read text
lv|ercury Battery Loading and Checking

The built.in exposure meter of the Canon FTb functions
 only when the mercury battery is properly loaded'
 I  To remove the cover of the battery compartment, insert I a coin into the groove of the cover and turn it to
the left.
   Face the central contact (O) of the mercury batteryJ& inwards and insert.
   Replace the cover by turning it to the rightQ
                                                  from r,r  Before inserting, wipe off the fingerprints or stains
the battery poles with a dry cloth. Otherwise, the meter
 may not  f unction due to imperfect contact, and dirty poles
 may cause corrosion and damage the contact points of the
 camera.
                                                   used r A 1.35V M2O lt625l mercury battery should be
 equivalent to,the Mallory PX'625 and Eveready EPX'625'
 r Be sure to insert the battery in the correct direction by
 referring to the diagram on the compartment cover. Other'
 wise, the cover cannot be properly screwed'in.
 r   lf the camera will not be used for an extended length of
time, the battery should be taken out of the battery
 compartment to prevent possible damage to the terminals
 from batterY corrosion.

 10
View original page 11Page 12 · Read text
www.butkus.us
                 Battery Gheck
                  Check the power level of the meicury battery after loading
                                    it.
                         I  Set the film speed scale at ASA lOO and the shutter                          !  speed dial at " l.OO0 ".  For setting the film speed,  lift
                   up the outer ring of the shutter speed dial and turn. (See
                  page 19.)
                         I   lt cannot be checked correctly if other settings are used.
                         I  Turn the meter switch, on the outer side of the film          E rewind crank, to the " C " index.
                     {    lf the meter needle inside the viewfinder swings to the            u meter index, the battery has sufficient power, lf the
                     needle stays below the meter index, voltage is insufficient
                   and the battery must be replaced.
                     r When removing your finger from the meter switch, it will
                      automatically return to the " OFF " index from ,,C ".
                     r The battery in normal use lasts approximately one year.


     Suff ic ienl
               I nsufficient
(Must be replaced)
View original page 12Page 13 · Read text
Film Winding
The film advance lever winds the film, cocks the shutter,
and prepares the aperture and mirror for the next shutter
release all in one motion.
I  Turn the film advance lever until it stops. The film will I be advanced one frame and the shutter cocked. The
frame counter is simultaneously advanced to the next
number.
1 When the shutter release button is pressed, the mirror4 flips up, the diaphragm simultaneously closes down to
the preset f/stop and the shutter is released. After the
shutter is released, the advance lever can be wound for
the next frame.
r Be sure to set the shutter lock lever at "A".
r Winding may be done by moving the lever with several
short strokes,
r After loading the film, wind it once more, because
the first winding may not be complete.
 r The shutter will not function when pressing the shutter
release button unless winding is completed. In such a
case, check the winding once more.


                                                                                                      www.buktus.us
View original page 13Page 14 · Read text
www.butkus.us
Frame Counter
Each winding will advance the number of the frame counter,
 indicating the number of pictures taken. When the back
cover is opened, the counter automatically returns to
 the starting position " S ".
Safety Device for Shutter
When the shutter lock lever around the shutter release
 button is turned to the " L" position. the shutter is locked
and will not move. This device may be used when a loaded
camera is being carried around.
Attaching the Cable Release
The optional Canon Release can be attached to the FTb by
screwing it into the threaded hole in the center of the shut-
ter release button. The use of a cable release is recom-
mended when photographing with extended time exposure
or slow shutter speeds, and for copy work.
Even if the shutter lock lever is at the " L " position, the
shutter will operate by using the release.


                                                                    l3
View original page 14Page 15 · Read text
Shutter and Aperture Adjustment
Exposures are adjusted by the shutter and aperture. The
shutter controls the exposure time and the aperture con'
trols the amount of incoming light. The Canon FTb uses
a match needle meter, a very simple method of obtaining
proper exposures.
Shutter Speed Dial
Adjust the shutter speed by turning the shutter speed dial
to the desired index number. The index on the dial shows
the denominators of 1/1000 sec., 1/500 sec., etc.
r The shutter speed dial does not revolve between indexes
" 1O0O" and "8".
r Be sure to set the index at a position where the click-
stop catches. In case of the " B " index, adjust it to the
white dot just below  it.
a " B " indicates bulb exposure, and is used when making
exoosures of more than one second. When the shutter
speed dial is set at " B ", the shutter remains open as long
as the shutter release button is pressed.
r When time exposure is necessary to make an exposure
over an extended time, first set the shutter speed dial at
" 8 ".  Keep the shutter release button pressed, and turn
the time lock lever to " L". The shutter remains open
even if the finger is removed from the button. When the
lever is returned to "A", the shutter closes.
r Time exposure is also possible by using the lockable
t4
View original page 15
Page 16 · Read text
www.butkus.us
                                            cable release.
                                           r  lt is possible to perform a long-time exposure measure-
                                  ment by attaching the optional Canon Booster, the auxilia.
                                     ry meter for measuring subjects under dim light.
                                                   I The " 60 " index is used for synchronizing an electronic
                      ,     "A" Mark             flash unit such as Canon Speedlite.  lt is equivalent to
          Aperture (For EE               a very short exposure time during the flash of the flash unit.           Scale PhotograPhY)                                       With this camera, the shutter speed can be conf irmed at thePreset
Aperture Ring                            bottom left of the viewfinder.                              ing Pin to
                          Flash-Auto Ring AzlBz Aperture
                                     Incoming light and depth.of-field are adjusted by turning
                                    the preset aperture ring to the desired f/stop.
                                          r As an increase in the magnitude of an f/stop number
                                               is inversely related to the size of the aperture, less light
                                       reaches the film plane the larger the f/stop number. With
                                  each increase in an f/stop number, the aperture size is
                                         halved, so that, for example, if the aperture ring is ad-
                            EE Lock Pin    justed to the next higher f/stop number, the aperture is
                                    reduced by one-fourth.
                                          r Certain lenses, however, have no relation to the bright.
                                       ness halved between the maximum and the next f/stops on
                                        the preset aperture ring.
                                          r The ratio between the aperture and the amount of ex.
                                         posure, usingf /2 as the basis, is as follows:
                                     r.2 L.4 1.8 2 2.8 3.5 4 5.6 8    11   16   22
                                       Exposure Ratio:
                       3 2 L.25 L L/2 L/3 r/4 L/8 t/t6 Ll32U64 L/t28
                                                                                                               l5
View original page 16Page 17 · Read text
r The preset aperture ring can also be set between two
f/stops.
Presetting Aperture
In the case of the FD or FL lens, the  f ield'of-view can always
be seen through the viewfinder at a full aperture opening
even after the f/stop has been set with the preset aperture
ring. Set the desired f/stop on the preset aperture ring
to the index. The diaphragm will close down to the preset
                                                      released.f/stop .only for the instant that the shutter is
Except for that instant, the diaphragm remains fully open'                                                            FD 50mm f/l.4 S.S.C.
Manual Gontrol of Aperture
I  gV pressing down or locking the stopped-down lever and I  turning the preset aperture ring, the diaphragm can be
closed down to any f/stop and the depth-of-field at the time
of shutter release can be checked. When the lever is re-
turned to its original position, the diaphragm again returns
to its maximum opening.
r The aperture is manually stopped-down also when per-
forming close-up photography and macrophotography.
I  When an accesso;y is used between the lens and theh camera body, turn the automatic/manual aperture lever
of the lens counterclockwise  all the way before mounting
the lens. This locks the lever and the diaphragm can be
opened or closed by turning the preset aperture ring. For
releasing the lever, turn it clockwise.                                                            Automatic/ Man ual
                                                                                              Aperture Lever
l6
View original page 17Page 18 · Read text
www.butkus.us
                     ?  In the case of the lens which has a                                                   t'  lock lever, turn the automatic aperturemanualleverapertureof the
                               lens counterclockwise  all the way and set the manual
                                    aperture lock lever at the " L " position before mounting the
                                    lens. This manual aperture lock lever locks the automatic
                                    aperture lever and the diaphragm can be opened or closed
                                    by turning the preset aperture ring. For rereasing the rever,
                                      return the manual aperture lock lever to the original position
                                   (white dot).
                               With the use of this lock, photography using a manually
FD 35mm f/3.S S.C.                 operated aperture can also be performed on other canon's
                                      single-lens reflex camei'as such as the F.l, EF, AE-1 and
                                    TX.
                     n  When using the lens attached reversely to the                                           I  photo coupler for duplicating photography,macrophotog-macro-
                                  raphy, etc., set the automatic aperture lever of the lens in
                              the position for manual operation, attach the hood of the
                               macrophoto coupler to the mounting section of the lens,
                              and turn the breech.lock mount ring until  it locks.


                  anual Aperture Lock Lever
       Automatic/Ma nual
       Aperture Lever
View original page 18Page 19 · Read text
Using Built-in Exposure Meter
  The Canon FTb provides the rnost accurate light measure-
  ment possible with its unique TTL (Through-The-Lens)
  system. The built-in exposure meter, which is of the
  matching needle type, is coupled to the ASA film speed
  scale, shutter speed dial and preset aperture ring.
 The CdS photocell of the exposure meter is placed in the
  closest position to the beam-splitting condenser lens. The
  central area metering system enables accurate measure'
  ment of the main subject even against the light.
 The rectangular frame in the viewfinder represents the
  light measurement area of the CdS photocell. Place the
  main subject within this frame and measure the intensity
  of light so as to obtain the proper exposure.
  r The correction of the full aperture opening of the lens is
  performed automatically. Therefore, the operation does
  not change regardless of the speed of the lens used. An
  FL lens can be used only with stopped-down metering.
  r Due to the characteristics of the CdS photocell, the
  movement of the meter needle may occasionally become
  slack, owing to changes in the degree of light.
  r Metering at "8" on the shutter speed dial isnot possible
  with the built-in exposure meter, because " B " is used for
  exposures longer than one second.                                                                                                ut
  r Always use a lens hood when shooting against the
   light.

   18


j-{+-
View original page 19Page 20 · Read text
www.butkus.us
 r When not using the camera, set the meter switch at
 " OFF " or attach the lens cap so as to prevent llnnecessary
 consumption of the mercury battery.
 Film Speed Setting
 Set the ASA film speed scale to the speed of the film being
 used. Film speeds are normally shown on the film box cover
 and/or explanatory sheet.
 Lift and turn the film speed set ring around the shutter
speed dial.  lf the film is ASA 100, for example, make the
correct setting by showing ,, 1O0 " in the small window.
 r The following  f ilm speeds may be used:
                               (64) (80),            _ _(32) (40) _                                  ^ _(125)                              (160) (250) (320) (s00) (640)-booASA 25   50    100 .  204 ;'.  +od--.".-DIN 15          18               21                     24                                            30                           27                (16) (17)                                                                               (28) (2s)                              (19) (20)                                               (22) (23)                                                               (25) (26)      oooo) (12s0) (2000)         .   1600
            33         (31) (32)      (34)
Figures in parentheses represent intermediate film speeds.
 I When " 25" appears in the small window, it means the
film speed setting ring will not turn any further to ihe teft.
The dot at the right-turn limit reads ASA 200O.
View original page 20Page 21 · Read text
[xposure Settings
Full Aperture Metering
Full aperture metering can be performed with an FD lens
which has an aperture signal lever and pin.
I  Set the meter switch at " ON ". I
t  Set the shutter speed dial at the desired speed.L
Q Face the camera towards the subject, look into the view-rf finder, and check the position of the meter needle and
aDerture needle.
r The meter needle is coupled to the film and shutter
speeds, and moves vertically according to the brightness
of the subject. The aperture needle, with a round circle,
is coupled to the preset aperture ring of the FD lens.
I  Turn the preset aperture ring and align the apertureI  needle with the meter needle,
r The "A" mark on the preset aperture ring is for the AE
cameras or the Servo EE Finder used with the F-1 only.
 r  In case of f/stop priority, turn the shutter speed dial and
align the meter needle with the aperture needle. Be sure
to set the shutter speed dial at a click stop position.
     lf the aperture needle does not align with the meter5u needle by turning the preset aperture ring, it means
that the shutter speed is not properly set. In this case,

 20
View original page 21Page 23 · Read text
Stopped-Down Metering
When using a lens having no full aperture metering signal
such as the FL lenses, metering should be performed by
stopping down the lens. Stopped-down metering is per-
formed by pushing down the stopped-down  lever.
The stopped-down lever can be fixed for continuous light
measurement by pressing it towards the lens after setting
the lever lock at the " L " position. With the fixing of the
lever, shooting subjects with different light intensity or
tetephoto lenses can be conveniently handled. By return-
ing the lock to the white dot position, the metering lever
will return to its original position.
I  Set the meter switch at " ON ". I
lf  Set the shutter speed dial at the desired speed.L
{  Face the camera towards the subject, look into the view'u finder, and press the stopped-down lever all the way un-
til it stops. The aperture needle will point to the lower
coupling limit mark and only the meter needle remains.
I  Turn the preset aperture ring and make the metert  needle stop within the meter index in the viewfinder.
r  ln the case of f/stop priority, adjustments can be made
with the shutter speed dial.
View original page 23Page 24 · Read text
www.butkus.us
                                          f,, lf the meter needle is pointing above the meter index               U and cannot be matched by closing the preset aperture
                                    ring and, consequently, metering cannot be performed, turn
                              the shutter speed dial to the faster side.  lf the meter nee.
                                  dle is pointing below the meter index and cannot be match-
                        ed by opening the preset aperture ring, turn the shutter
                             speed dial to the slower side. When the red signal appears,
                             use high-speed film or the Canon Booster.
                                r  Full aperture metering is recommended with the FD
                               lenses, because the FD lenses have a full aperture signal
                              so as to fully compensate the built.in exposure meter.
                                r The center of the meter index shows the correct exposure,
                        and it moves over a range equivalent to one half ol onet/l---^-_l
t(@)lt->a)                              stop.
                    How to "Average" Exposures     Meter Ne€dle
     Meter lndex             When measuring a subject with dark and bright parts, mark-
                               edly contrasting, take two measurements, one each of the
                             dark and bright parts. Then obtain the average value and
                              set the f/stop or shutter speed accordingly.
View original page 24Page 26 · Read text
www.butkus.us
                                Viewing and tocusing
                                       Gomposition
                                         The exact picture image to be photographed can be seen
                                          on the focusing screen of the viewf inder without any paral-
                                              lax. This enables you to determine the exact composition
                                                        of your scene before pressing the shutter release button.
                                       Focusing
                                      The center circular section of the viewfinder is a micro-
                                             prism screen rangefinder made up of microscopic prisms
                                                         for fast and precise focusing.
                                               While looking through the viewfinder, revolve the focusing
                                              ring. lt is in focus when the image in the rangefinder
                                           becomes sharp and clear.
                                                  r An optical curve may sometimes be visible in the lower
                                                part of the viewfinder according to the angle of the incom-
                                                    ing light. This is a reflection of the beam-splitting mirror
                                            added onto the condenser lens in the TTL light measure-
                                          ment system.
I
t


          Out of Focus              ln Focus
View original page 26Page 27 · Read text
Dioptric Adjustment Lenses
Dioptric adjustment lenses are available as optional attach-
ments. When a dioptric adjustment lens is attached to theviewfinder eyepiece, those who are far'or near'sighted can      @iltake pictures without glasses. Ten different lenses, when  ffi
fastened to the viewfinder, of * 3, +2, + 1.5, + 1, +0.5,
0, -0.5, -2, -3 and -4  diopters are available.Angle Finders A2 and B            @il                  ffitCanon Angle Finders A2 and B can be attached to the
eyepiece for copying, macrophotography and photomicrog-
raphy. You will see the right and left sides of the image
in reverse with the Angle Finder A2, and uprighi with
the Angle Finder B.
Magnifier S
The Canon Magnifier S can be attached to the viewfinder
eyepiece of the FTb, with the separately available adapter
which magnif ies the rangefinder section for accurate focus-
ing. Because it can be sprung up and clamped, the entire
field-of-view can easily be viewed after focusing.
View original page 27
Related documents and language editions


From the M. Butkus archive. Original publisher and archive notices are retained.
Check the model and edition against your equipment.
PDF verified 2026-10-10.