Film cameras
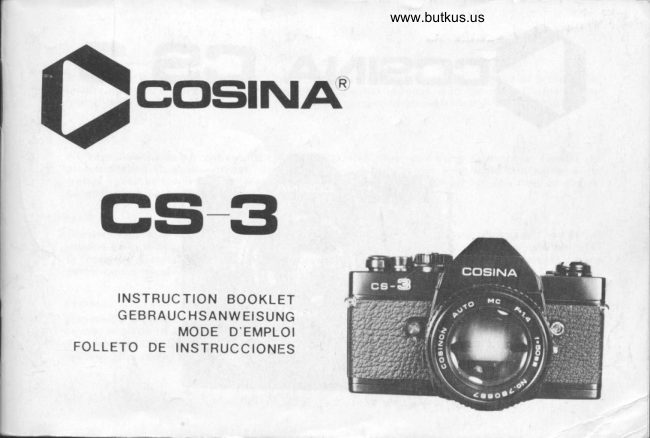
COSINA CS-3 User manual
User manual for COSINA CS-3. 19 pages in French, Spanish. Read the original PDF, download or print a copy without registration.
19 pagesFrench, Spanish4.1 MB PDF
Loading your manual…Open PDF directly
Document details
- Brand
- Cosina
- Model / document
- COSINA CS-3
- Document type
- User manual
- Language
- French, Spanish
- Pages
- 19
- File size
- 4.1 MB
- Category
- Film cameras
- Document date
- Not specified in catalog
Search available document text
Find a term, then jump to its page in the original PDF. Image-only pages may not be searchable; check the PDF for exact wording and diagrams.
Page 1 · Read text
www.butkus.us
  )cosllv^NIv
 cs-3

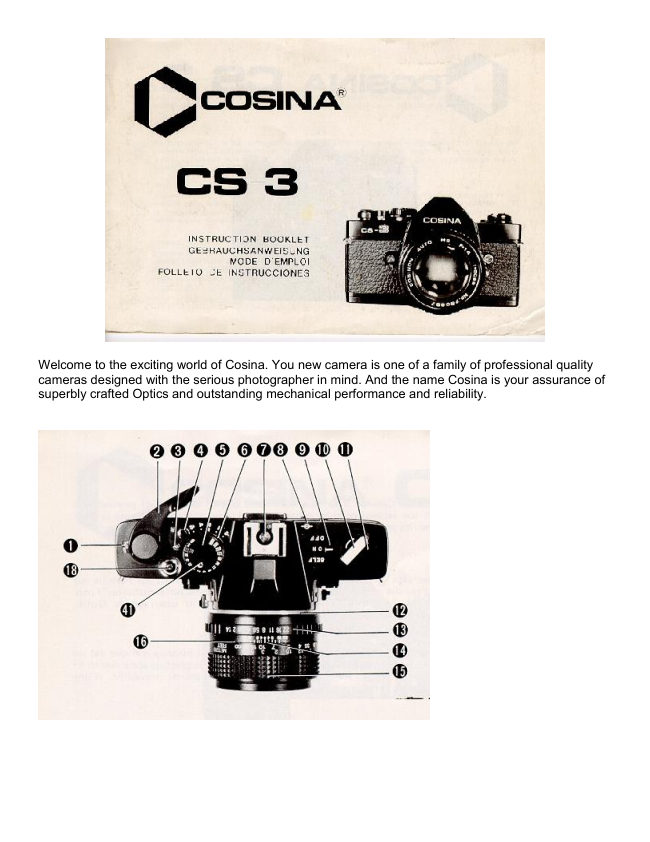
        INSTRUCTION BOOKLET
          G EBRAUC HSANW ETSUNG
            MODE D'EMPLOI
   FOLLETO DE INSTRUCCIONES
View original page 1Page 3 · Read text
www.butkus.us


                   F;N(;I-ISII
          Welcome to the exciting world of Cosina. You new camera is one of a family of professional
       (E)  quality cameras designed with the serious photographer in mind. And the rrame Cosina is your
            assurance of superbly crafted optics and outstanding mechanical performance and reliability.

                     l'l.t fs( H
          Wir begruflen Sie in der aufregenden Welt der COSINA. lhre neue Kamera gehort zur Familie der
  @  grafenprofessionellen'entwickeltOualitdtskameras,wurde. Der Markennamedie unter BerucksichtigungCOSINA ist lhrederGewahrfurAnsprr.ichetiberragendeernsthaf terOptik,Foto-
            hervorragende Technik uncl Zuverldssigkeit.

                                 IJ R ANC: AI S
            Bienvenue dans le monde passionnant de Cosina.Votre nouvel appareil photographique est un
           modele de la famille des appareils de qualit6 professionelle, concu pour le photographe averti. Et  @   le nom de Cosina est pour vous l'assurance d'une optique superbement travaillee, d'une
                                                                                                                                                                                                                                                                                                                                  i nsu rpassable.
I           performance m6can ique remarquable, et d'u ne robustesse
                     t:s t,AN()1.
            Bienvenido  al mundo emocionante de la Su nueva c6mara pertenece a una familia de c6maras de
            calidad profe'sional que han sido disefradas pensando en el fotografo serio.
       Y el nombre COSINA es su garant[a de optica espl6ndidamente fabricada y de funcionamientole     mecanico destacado y de precision.

h
View original page 3Page 8 · Read text
www.butkus.usPOWER SUPPLY                            @
Your CS-3 is powered by two, 1.5 volt silver
oxide batteries (Eveready 5-76, Mallory MS 76,
G 13 or equivalent).
Battery installation
1. Open the battery compartment by un-
   screwing the battery compartment cover
    (38) with a coin.
2. Insert the batteries with the t*n      sides   F) facing you. (Fig.l)       N€ct.
3. Replace the cover and tighten  it  f irmly.
Testing batteries
Test the batteries for sufficient power levels by     FILM LOADINGtaking the following procedure:
1. Wind the advance lever (2) if previously not      Your CS-3 accepts 35mm, Black & White or
   wound.                                          Color film standard cassettes.
2. Turn the main switch lever (9) to "ON"       To load the camera:
    position.                                                              1 . Press the release button to clear the camera3. Depress the release button (18) slightly and           mechanism.
   look into the viewf inder Q7l. One of       2. Fold out and lift up on the film rewind
   sixteen LED dots for metering visible in the          crank (10) to open the camera back. (Fig.2)   viewfinder will illuminate if there is suf-       3. Insert the film cassette in the film chamber    ficient power. (See Fig.5) lf batteries are             (33), then push down the film rewind knob
   below the operational voltage of the camera            (11) and turn it slightly to lock the cassette
   system, replace them with a fresh set.                     in place.
NOTE: Turn back the main switch lever to       4. Pull film leader across the film aperture (34)"OFF" position when you are not taking         and insert the end of leader into one of the
pictu res.                                                          slots in the  f ilm take-up spool. (Fig.3)
View original page 8Page 10 · Read text
@5.  With the  f ilm rewind crank in the folded out    SETTINGwww.butkus.usFILM SPEED
         position, rewind the film slightly to remove                                                     For properly exposed photographs, your CS-3's       any slack in the film cassette. Recheck to                                                       automatic exposure control system must be set       see that the film remains secured to the                                                    for the correct ASA (or DIN    for DIN        take-up spool and that  it is properly aligned                                                            equivalent, refer to the DIN/ASA conversion        with the sprocket (29). Fold down rewind       chart (40), located on the back of your camera)
         crank.                                                   rating of  f ilm you are using.      6.  Close the back cover (32) until you hear an
        audible click, which indicates that the cover      To set the film speed:
            is locked in the closed position. Advance the      1. Push down the tip of the index pole (3).
       film by alternately winding the advance      2. Rotate the collar until the ASA rating for
         lever and pressing the shutter release button         your  f ilm alignes with the index line. (Fig.4)
         until the number "1" appears in the film      3. Remove your finger from the tip to lock the
        counter window (1). As the advance lever is           setting in place.
       wound, the film rewind knob should rotate,      4. lnsert tab from the end of film box in the
        indicating that the film  is advancing                        f ilm reminder clip, and that reminds you the
         properly.                                           type of  f ilm you are using.


            Fis2                     Fis 3                                Fis.4
View original page 10Page 11 · Read text
FOCUSING THE CAMERA                         @
Your CS-3's focusing screen includes a central
horizontal split-image rangefinder, which  is
surrounded by a microprism collar. (Fig.S)
To focus accurately:
1. Center the split-image rangefinder on your
   key subject and turn the focusing ring (15)
    until the upper and lower portions of your                                          Fig.5
    subject become one, clear vertical image.
2. The microprism collar will a) appear frag-
   mented when image is entirely out of focus,
   b) appear collar shimmering but viewable     SELECTING LENS APERTURE
  when image is nearly in focus and c) display      The aperture setting determines the near and   a sharp clear of your subject when it is in        far areas in which items other than your key   focus. lt is especially useful when there are       subject will remain acceptably sharp. This
   no pronounced vertical subject elements on       "zone of focus" is refered to as depth of field.   which to center the horizontal split-image       Your lens features a depth of field scale (16),
    rangefi nder.                                 which allows you to select the zone of focus3. The entire focusing screen may be used for      which will appear in the final photograph.   both focus and composition of your photo-          (F ig.6)
   graph.In as much as the human eye tends to      Under normal lighting conditions, selecting a
   ignore mirror differences in sharpness, the        farger aperture opening (eg: F2.8 or F4) will
   horizontal split-image rangef inder and/or       allow you to keep your key subject in sharp
   the microprism collar should always be used        focus while eliminating distracting elements in
   for critical focus.                                the foreground or background of your photo-
                                                    graph. (Fig.7) Under same conditions, selecting
                                     a smaller aperture opening (eg: Fl 1 or F16)
                                                               will allow you to maintain sharp focus on both
                                                        near and distant objects. (Fig.8)
View original page 11Page 12 · Read text
www.butkus.us                           EXPOSURE COMPENSATION
                                         Certain scenes, where the sun is behind the
                                            subject or the background is very bright (such
                                               as snow or sand) will cause a foreground subject
                                           to be underexposed. Sometimes, this silhouette
                                              effect can be very desirable, but usually, you
                      Fig.6           want your subject to be properly exposed.
                                     Under such conditions, set the exposure com'
                                       pensation dial l'l7l to "t'1" or "+2" with
                                             pressing the tip of the pole (3) to compensate
                                         the exposure of your subject. (Fig.9)  lf , on the
                                         other hand, the back ground of your subject  is
                                         dark or colored in black, set the dial to "-1" or
                                      "-2" markings.
                                 Memory system:
                                 The exposure compensation can also be madeFig T                 Fis.8                                          with the memory system.
                                       1. Compose and focus your subject.
                                     2. Be close to the subject, so close as no
                                                 backlight visible in viewf inder.
                                     3. Press the release button slightly.
                                     4. Press the memorv button (22l. and step back
                                                 to the original position.
                                     5. Compose your subject again and depress the
                                                     release button all way down to activate the
                                                    shutter.
                            NOTE: The memory can be cancelled by
                                             pressing the memory button once again. The
                                 memory remains as long as the release button is
          Fis.9                                slightly pressed. lt also remains for the period
                                           of the power holding time (approx. 7 seconds).
View original page 12Page 13 · Read text
TIME EXPOSURE                      SELFTIMER           @
When making time exposure photographs, your      The selftimer delays the tripping of the shutter
camera should always be tripod-mounted and      mechanism for approximately 10 seconds,
used with a locking cable release.                     allowing you to include yourself in the photo-
For the time exposure of over 8 seconds  in       graph when desired.
duration:                                   To activate the selftimer:
1. Align "8" setting on the shutter speed dial       1. Fix your camera on a tripod.
   with the index.                              2. Advance the film and compose the scene.
2. Advance the film and press in on tip of      3. Put the eyepiece cap on the eyepiece. The
   cable release to open the shutter.                      eyepiece cap can be inserted into the acces-
3. After the desired exposure time in second           sory shoe when not being used.
   has elapsed, release the cable release lock to      4. Turn the main switch lever to "SELF"
    close the shutter.                                          position. (Fig.1 1 )
                                             5. Press the shutter release button and position
                                                        yourself in the photograph area within 10
                                                    seconds. At the same time the selftimer
                                                lamp (24) starts flickering. (Fig.10) You will
                                                          notice that the shutter will activate within 2
                                            or 3 seconds as the flickering interval
                                                   becomes shorter.
                                            6. Turn back the main switch lever for the
                                                       next normal shots.


                                          Fig.10                           Fis.11                 10
View original page 13Page 15 · Read text
,,=\
POWER HOLDING TIME                       removing your eye from the eyepiece Q7l, if V
With both automatic and manual exposure       you depress the release button half way downcontrol modes, the power for metering remains        so that the LEDs in viewfinder illuminate. The
on  f or approximately 7 seconds af ter you       LEDs fails when the pilot lamp illuminates.                                        For more details, refer to the instructionsremove your finger from the release button to
make other operations be controlled easily. lf         attached to the unit.
you want to extend the power holding time,
press the release button again before 7 seconds
have passed.
(For memory, refer to EXPOSURE COM-
PENSATION)                          INTERCHANGING LENSES
                                    Any wide-angle or telephoto interchangeable
                                                lens with K type bayonet mount can be
                                                mounted on your CS-3 camera body.
                                          To take off the lens:
FLASH PHOTOGRAPHY                       1. Push the mount unlock button (26).
The CS-3 is synchronized for "X" flash photo-       2. Hold the camera and lens body steadily, and
graphy, using either the hot shoe (7) or "X"            rotate the lens body counterclockwise.
sync PC outlet (21). With either connection,       3. Rotating approximately 65 degrees you will
the shutter speed dial should be set at the red            note that the lens becomes   f ree.
"X" marking except the case as follows:            To mount the lens:
A special connector of the Cosina strobe flash        1. Join the red index marks on both camera
unit, made exclusively for CS-3, enables you to          and lens.
take flash photographies without setting the       2. Rotate the lens clockwise until  it snaps.shutter speed dial knob to "X" position when
the unit is inserted in the hot shoe. When the
pilot lamp of the unit illuminates, indicating
that it is ready to flash, the shutter speed of
camera is automatically set to 1/60 of a second
to synchronize with flash. You will notice the
moment that the pilot lamp illuminates without
                                                                                                12
View original page 15Page 16 · Read text
l^                                                   www.butkus.usi €) REMOVING FILM                   CARING FOR YOUR CAMERA
      When you have finished exposing the last frame           1 . Never force any camera operation. Consult
       in your film cassette n2, 20, 24 and 36-          this instruction manual  if any questions
       exposure settings are coded in red on your  f ilm           occur.
        counter dial), remove the cassette'                 2. Remove batteries when storing camera.                                                              Batteries can leak as they age, causing
      To rewind the film:                                 damage to your camera. Always inspect the
       1. Push in the film rewind button (4). (Fig.12)           batteries for signs of leakage before  in-
      2. Fold out the  f ilm rewind crank and turn in            stalling them in your camera.
            direction of arrow.                           3. Keep the lens cap on when not taking       3. When the crank turns   f reely (without          photographs. The cap protects your lens
           tension or "drag"), pull up on the crank to                           f rom dust or dirt particles.
         open the camera back. The  f ilm counter will      4. Clean your camera's interior. Periodically
           automatically reset to zero.                      remove any dust or film particles from the
      4. Remove the exposed cassette for processing.          film chamber, rear lens element, take-up
            Insert a fresh roll of  f ilm while the camera          spool area or film pressure plate with an air
         back is still open, or close the camera for          blower. Inspect the film pressure plate for
            storage.                                         accumulated deposits from film backing,
     NOTE: Do not load or unload Your film        and clean with lens cleaner and tissure  if
       under direct sunlight.                                              req u  i red.
                                                  5. Keep your camera and film away from
                                                               direct sunlight or heat. Never store your
                                                    camera or film on the rear window deck,
                                                         glove compartment or other hot areas in
                                                            your car.
                                                  6. Protect your camera from moisture. Do not
                                                              store your camera in a moisture-retaining
                                                            enclosure or environment. In area of high
                                                          humidity, extra care should be taken to
                                                                insure that your camera is kept in a com-
                                                                    paratively cool, dry location.
                                                 Do not touch the shutter curtain.  13                     Fig.12                       7.
View original page 16Page 17 · Read text
PHOTOGRAPHING WITH                        @
AUTO-WINDE R
 Your CS-3 is designed to be coupled with
 Cosina Auto-winder which enables you to take
approximately 2 frames per second at the
maximum shutter speed. The auto-winder is
powered by 4 pcs. of readily available AA size
alkaline battery.
To photograph with the winder:
1. Couple the winder with the camera body.             www.butkus.us
    (Fis.13)                                                                         Fis.132. Tighten the screw. (Fig.14)
3. Set the switch to "ON" position. The
   winder advances the film, if previously not
   wound.
4.  Set the exposure and focus.
5.  Depress the release button fully to activate
   the shutter. The winder will immediately
    start advancing the  f ilm. At this moment  if
  you release your finger from the release
   button, only a single shot is made. lf you
   keep depressing it, continuous shots at a
    rate of 2 frames per second can be made.                                          Fis.14
6. When you have finished exposing the last
   frame in your film cassette, take procedure
   as described in "REMOVING FlLM". You
   need not remove the winder from camera
   body when removing film.
NOTE: Set the switch at "OFF" position when
the winder is not in use.
                                                                                                14
View original page 17Page 19 · Read text
@
n     Rear Cover:           Removable hinge type. r    Dimensions:          136.5 x 83.5 x-St mm. '    Weight;              530 gm.
       Attachable accessories: Cosina Auto-winder, Cosina Auto-strobe flash.


    l

li
View original page 19Related documents and language editions
From the M. Butkus archive. Original publisher and archive notices are retained.
Check the model and edition against your equipment.
PDF verified 2026-10-10.