Sewing machines
Elna S, T, A, ZZ, P, Junior, & Industrial Service — Service manual
Service manual for Elna S, T, A, ZZ, P, Junior, & Industrial Service. 85 pages in English. Read the original PDF, download or print a copy without registration.
85 pagesEnglish5.6 MB PDF
Loading your manual…Open PDF directly
Document details
- Brand
- Elna
- Model / document
- Elna S, T, A, ZZ, P, Junior, & Industrial Service
- Document type
- Service manual
- Language
- English
- Pages
- 85
- File size
- 5.6 MB
- Category
- Sewing machines
- Document date
- Not specified in catalog
Search available document text
Find a term, then jump to its page in the original PDF. Image-only pages may not be searchable; check the PDF for exact wording and diagrams.
Page 1 · Read text
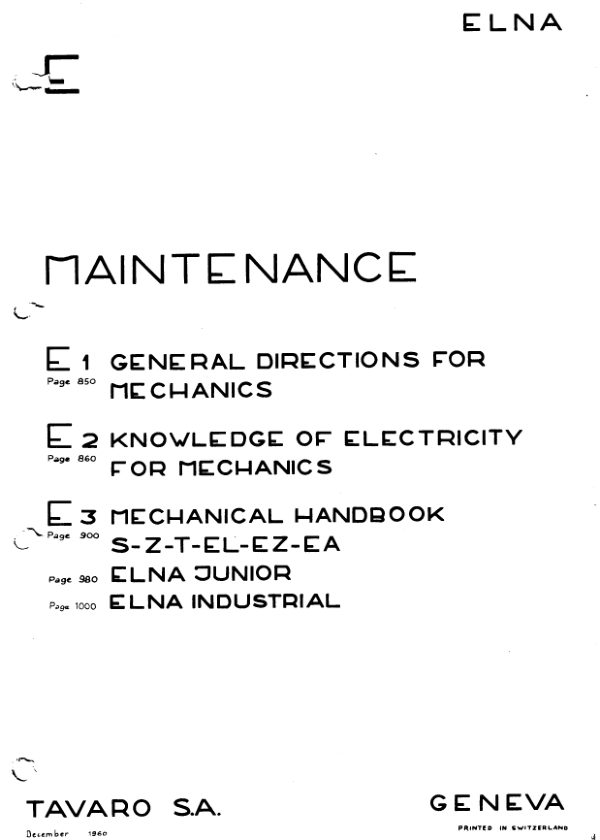
ELNA


 MAINTENANCE


  E1 GENERAL DIRECTIONS FOR
   Page 850 MECHANICS

  Ea KNOWLEDGE OF ELECTRICITY
   Page 860 FOR MECHANICS

   § 3 MECHANICAL HANDBOOK
El Page 200 S-Z-T-EL-EZ-EA
   Page 980 ELNA JUNIOR
   Page 1000 ELNA INDUSTRIAL


                   GENEVA TAVARO S.A.
   December   '06.                                                                 PRINtEO IN SWITZERLAND
View original page 1Page 2 · Read text
ELNA


       CENERAL DIRECTIONS
               FOR MECHANICS


TAVARO S.A.               GENEVA
 AvOUST 1960                                                                  PRINtED IN SWITZERLAND
View original page 2Page 3 · Read text
- 850 -


 GENERAL DIRECTIONS FOR MECHANICS


 This manual has been compiled for the use of the technical
 personnel that takes care of the after-sales and repair
 service for our EINA sewing machines. It is mainly intended
to be of

                 practical and useful help

 to the ELNA mechanic in his daily work.

 The perfect maintenance of our ELN sewing machines requires
   a general basic training as a mechanic. We are today repre-
 sented in more than 100 countries, where well-trained chief
 mechanics and mechanics are available, who can be considered
 experts In repairing our machines. A basic training of new
 mechanics can thus be given under very favourable conditions.

 We have therefore refrained from publishing complete in-
 structions for assembling our different models, but have pre-
 ferred only to work out

                Instructions for Maintenance.

                                        concerning as-
send inn taid requistent oUr detailus types de machines,but
 do not eliminate the need for a general basic knowledge and
an introductory training by a chief mechanic. The ELNA tool
 kit and the spare parts catalogue are the mechanics' most
important equipment. All the spare parts are faithfully re-
 produced in the catalogue, in their exact position and with
 their design numbers.

We have taken care to illustrate the instructions for main-
 tenance as completely as possible. All the parts are shown
 as they have to be built into the machine. The text is as
 short as possible. We have confined ourselves to mentioning
 in a logical sequence how the spare parts for ELNA sewing
machines are to be assembled and more detailed information
 is only given for details that do not strike the eye. To
dismantle the machines, simply proceed in the opposite sense.
 Certain repairs, on which the perfect functioning of the
 machine particularly depends, are dealt with separateLy at
 the end of the instructions for each model.
View original page 3Page 4 · Read text
- 851


 We recommend that you follow the prescribed sequence when
assembling the machine. This makes it possible for you to
 assemble or dismantle all the parts in the easiest way and
 in a minimum of time. This is particularly important

       when removing only a limited number of parts

 for repair purposes. The different parts are logically
grouped, according to their purpose and aim. If not more
 parts than absolutely necessary are removed, time is saved
 and repair costs lowered.

When assembling and regulating the ELNA sewing machines, it
 is indispensable for you to be in possession of the appro-
 priate tools and necessary gauges.
View original page 4Page 5 · Read text
852


Special Hints


Every mechanic must be in a position, after a quick examina-
tion of the machine, tosay with certainty, whether the ma-
 chine is working properly or, if necessary, what repair is
needed. The way how to proceed is explained in detail in our
manual "Introduction to Minor Repairs"

Often a mechanic is asked to call on customers and finds
that the ELNA is working perfectly and that the complaint is
only due to non-observation of a certain passage of the in-
struction booklet. Therefore, if the defect is not obvious,
the customer should be asked to operate the machine and then
watch, to see


  - whether a correct needle (system and size) is used and
  whether it is properly inserted,

  - whether the upper and lower threads are correctly chosen
  and threaded,

  - whether the different adjustments have been made properly,

  whether the thread tensions are set at the correct values.
View original page 5
Page 6 · Read text
• 85.


By proceeding in this manner, it is in most cases possible
 to find out whether the customer's complaint was justified
 or not. Every mechanic must know that it is often of se-
rious consequence, if a customer has to send her machine
 in for repair. If this should happen repeatedly, the ELNA's
 reputation will surely suffer. Difficulties that are due to
 a customer's insufficient knowledge should therefore serve
 to instruct her further and better. In cases of genuine com-
 plaints, it goes without saying that they have to be remedied

      with the greatest possible care and reliability.

 Before taking any work in hand, make sure that the work bench
 is absolutely clean so that no dust or filings get into the
 machine and provoke disorders in the course of assembly.

 The parts of the machine, especially those which are painted,
 chromium-plated or nickel-plated, must under all circum-
 stances be handled very carefully.

 The parts have to be assembled in such a manner, that the
 entire mechanism turns as freely as its function requires.
 Therefore, after fitting every moving part, check to see
 whether it turns freely. If hard spots are noticed, you must
 find out what they are due to, without exception. They are
then to be remedied.


Greasing the Machine


 For lubricating the machine Multifak No. 2 grease Caltex Oil
Co.) is used. If Multifak No. 2 is not available, "BRB" 1
 grease (Vacuum Oil Company) will also be suitable.


 Oiling the Machine


To oil the machine,"Arctic Oil Light", , supplied by the
Vacuum Oil Co., should be used. If it is not available, the
 following other brands can be used:

 1. S/V White Oil 309; suppliers: Vacuum Oil Co.

 2. Caltex Home Lubricant; suppliers: Caltex 011 Co.

3. Capella Oil AA; suppliers: Caltex 0il Co.

 4. Sphinxoline; suppliers: M.L. Paris
View original page 6Page 7 · Read text
- 854 -


 Self-lubricating bearings must not come into contact with
 kerosene or any other detergents but only with oil. Be par-
 ticularly careful when cleaning with kerosene. Before as-
sembling the machine, the bearings should be soaked in oil
again. (Exception: the bobbin winder - it must never be
oiled).

With the exception of the thumb screw No. 711'137 (for the
 fixation of the foot) of the cloth presser bar and the
 threaded holes on the cover of the free arm and the base
 plate of the flat bed models (for the fixation of special
accessories) which have English threads, the metric system
is used for all the screws and threaded holes.


 Sewing Samples after a Repair Job


 Before giving the machine back to a customer, every mechanic
 should make sure that the machine is in perfect running
 order. Only after a sample has been sewn to your full satis-
 faction with the repaired machine, is it to be considered
 as properly repaired. The following samples should be sewn:

a. On all Models:

    1. Thread the machine with darning thread and darn a hole
       on ordinary material.

       2. Sew a few straight seams forwards and backwards with
       ordinary sewing thread.

    3. Try the particular job the customer complained about.

   4. Check the bobbin winder.


b. On Zig Zag Machines:

   5. Sew a satin stitch at widths "2" and "4".

   6. Make a buttonhole.


c. On Supermatic Machines:

   7. Turkish Hemstitch with Elna-disc 101 at widths "2"
       and "4" on single and double material.

    8. Sew pattern No. 107.

   9. Make a buttonhole with the buttonhole disc, provided
       the machine is equipped with it, otherwise with Elna-
      disc 03.
View original page 7Page 8 · Read text
- 855


d. On Automatic Machines:

    10. Sew a scallop stitch (Elna-disc 05) at widths "2"
       and "4"

    11. Make a buttonhole with Elna-disc 03.


Important!


 Due to the fact that we are continuously improving our ELNA
 sewing machines, certain alterations are bound to occur from
 time to time. They are brought to our sales organizations'
attention in our "Technical Information Bulletins"; which are
 published periodically. Please always make a note of these
alterations.

 Every mechanic is to a great extent and decisively responsible
 for a good customer service. Let us not forget that the ELNA's
 good name depends first and foremost on a

                   Perfect Customer Service.

 We must therefore endeavour to execute the jobs we are en-
 trusted with very exactly and conscienciously. A job that
is well done also gives us greater satisfaction. The instruc-
 tions that follow are intended to help you to reach this ob-
 jective.
View original page 8Page 9 · Read text
ELNA
      Ez


      KNOWLEDGE OF
        ELECTRICITY FOR MECHANICS


                          GENEVATAVARO S.A.
View original page 9Page 10 · Read text
- 860 -


GENERAL EXPLANATIONS


Below you will find a few indications that deal with the main-
tenance of, the repairs to and changing the voltage of the
various motors

1. TAVARO motors nos 500 890 and 500 958 with adjustable rheostat:
   These were used, starting with machine number 183'640, for our
   first ELNA and are divided into groups that have been given
  Roman numerals I to VII.

   Since the motors no. 500 890 are equipped with ball bearings,
   their armature cannot be replaced. The armatures for the mo-
   tors no. 500'958, however, have self-lubricating bearings and
   are interchangeable.

2. TAVARO motors no. 500 970 with adjustable rheostat : These
   motors were used on our first ELNA, beginning with machine
   number 338'000, and are divided into groups A to E. The arma-
   tures for these motors are easily interchangeable, as they
   also have self-lubricating bearings.

3. TAVARO motors for our 1952, 1958 and 1959 models, with free
  arm or flat bed, namely

  a. Transforma          Zig Zag         Supermatic   (1952
        (Plana)        (Plana Zig Zag)   (Plana Supermatic) models)

  b. ELNA ELNA Zig Zag    ELNA Automatic 1958 and 1959
                                                    models

   For the standard voltages from 110 to 250 volts, these motors
  can be used both with alternating as well as direct current.
   They are divided into five groups A to E. For the Group C
  motors, however, the upper voltage limit of 160 volts is only
   valid for alternating current, 42 cycles.

   The electrical part of the motors for our 1952 models and for
   our 1958 and 1959 models is identical. These motors merely
   differ in respect of the motor support and the position of
   the condenser.

   The motors for our flat bed models have no resistance and no
  contactor, since these parts are located in the foot control.

   For our free arm models with knee control, we moreover supply
  special motors for the voltages 32, 24 and 20 volts, which
   are designated by the groups F, G and H, respectively.

  In order to be able to distinguish the motors, the insulation
   for the short lead to the inductor coils has been given dif-
   ferent colours (see tables below). The respective armatures
   can easily be replaced.
View original page 10Page 11 · Read text
- 861 -


MAINTENANCE


When cleaning or otherwise attending to a machine, the motor
 should also be checked as follows

A. Brushes


   Check the wear of the carbon brushes and, if necessary, re-
    place them. Make sure that the brush springs are not out of
    shape. On the first ELNA, excessive lubrication may cause the
    oil to run along the light wire into the motor. In such cases
   it is recommended to hold the carbon brushes over a flame, in
   order to burn the oil.


B. Commutator


   In order to avoid excessive wear of the brushes, the surface
    of the commutator must be very smooth. If the commutator should
    be a bit worn, it must be polished with a special "Arkansas"
    stone. Never use emery-cloth for this.

    For cleaning the commutators, "Servisol" must be used. Simply
    dampen the felt at the end of the cleaning stick with it and
    then press the felt slightly against the commutator with the
    motor running. With the piece of leather fastened to the other
    end of the cleaning stick the "Servisol-film" is then dried
    and the commutator polished.

    It may sometimes occur, in a few rare instances, that the com-
    mutator of a motor 500 890 or 500 958 is grey (not merely
    dirty). It is then not enough to clean it with "Servisol". • In
    such cases only, the glass fibre brush may be used for clean-
    ing the commutator, followed by the above "Servisol" cleaning.


 C. Self-Lubricating Bearings


    The bearing felts of the self-lubricating bearings are to be
    moistened with a few drops of oil.


REPAIRS


Motor defects are most frequently to be attributed to damage to
 the armature or inductor coils. These consist of a prescribed
 number of loops of a very fine wire, insulated with a thin layer
 of enamel. If, for any reason whatsoever, an overload of electric
View original page 11Page 12 · Read text
- 862 -


 current passes through the coils, the wire becomes overheated
 and the enamel layer cracks. The wire loops then come into con-
 tact with each other, thus producing short-circuits, which may
 considerably modify the resistance of the coils. This may even
 result in the wire melting, whereby the current is interrupted.
 A short-circuit can also be caused by defective insulating ma-
terial.


 A. Checking the Motor in the Machine


    If the machine no longer attains the prescribed number of
   r.p.m, it is often possible to determine a defective motor
   by holding the flywheel back by hand. If you feel that the
   motor is dead at certain positions, when one or two positions
    of the contactor are in play, the defect is generally to be
    attributed to a short-circuited or interrupted armature, pro-
   vided, of course, that no fault has been found in the mechani-
    cal part of the machine beforehand.


 B. Checking the Motor with the Test Lamp


    The test lamp described in the TIB no. 11 will enable you to
    determine interruptions in the coils of the motor or any short-
   circuits with the mass of the motor. This test is to be car-
   ried out as follows

   1. With Motor Fitted

       Check between points A and K of the motor (see drawing
       page 865), but in doing so, make sure that all the blades
       of the contactor are connected with the knee lever. If the
       bulb of the test lamp does not light up, the electric
       circuit of the motor has been interrupted at a certain
       point that still has to be determined. For this purpose
       the motor casing of the first ELNA or the motors of our
      1952, 1958 and 1959 models must be removed from the machine.

   2. With Motor Removed

       a. Place one contact pin at point A and touch the points B,
         C, Detc., in turn, with the other contact pin, until
          the bulb no longer lights up. The interruption will be
          found between the last point where the bulb lights up
          and the first point where it remains out.

       b. Check for a possible short-circuit with the mass. For
          this purpose one contact pin is to be placed on the
          iron part of the armature (M) and the other contact
          pin at points A, B, C etc. During this test the bulb
View original page 12Page 13 · Read text
- 863 -


         should not light up. If it does, the motor is short-
        circuited with the mass, 1.. a wire with defective
         insulation has come in contact with the metal part of
         the motor. By removing the carbon brushes, it is then
         possible, using the test lamp, to find out whether the
         short-circuit is in the armature or the inductor.


C. Control of the Inductor Coils by Means of the Ohmmeter


   If it should not have been possible to determine an inter-
   ruption or short-circuit with the mass on a defective motor
   by using the test lamp, the armature and the inductor coils
   are to be checked by means of the Ohmmeter.

   1. Armature

       a. Mark one of the sectors of the commutator, and starting
         at this point measure the ohmic resistance between every
         two consecutive contact plates. The resistances observed
         should correspond to the following tables.

      b. If the resistances thus measured are normal, measure the
         resistance of the entire armature between the brushes by
         touching the brush carriers with the contact pins, turn-
         ing the armatures slowly by hand. The deviations measured
         should not exceed 15 % of the normal resistance.


   2. Inductor Coils

      Measure the Ohmic resistance of the inductor coils between
     the two leads. The values measured correspond to the indi-
      cations contained in our tables.


  If, when testing the armature as described under "a", or when
   checking the inductor coils, it is found that one or more of
  the resistances measured are nil, or are considerably below
   the figures given in our tables, this means that the coil or
   the respective coils are short-circuited. If the resistance
   measured is considerably higher, the respective coil or coils
  are ruptured.


D. Intermittent Break-Downs and Irregular Speeds

   It may occur that the speed of a motor varies after it has
   been in use for some time. It may also change abruptly for
   no apparent reason. This can be caused by a temporary short-
   circuit in one of the inductor coils or in the armature, pro-
   vided no cause for this can be found in the mechanical part.
   Such short-circuits are very hard to find out with the Ohm-
   meter. In these rare instances, it is best to look for the
   cause of the defect by first changing the armature; if this
   does not help, the inductor coils must be changed one after
   the other.
View original page 13Page 14 · Read text
CHANGING THE VOLTAGE


The following tables may be consulted for changing the
voltage. They show which parts have to be exchanged. The
 armatures can be used for various motor groups (example :
armature no. 722'101 for our 1952, 1958 and i959 models
 can be used for groups A and B). This also holds good for
the rheostat, which in the two above-mentioned cases has
a resistance of 126 and is marked in yellow. In such
 cases it is only necessary to replace the inductor coils
 or the complete inductor for changing the voltage.


 TESTING THE MOTORS


For testing the motor of a first ELNA, the motor pinion
 should be replaced by a turbine 12°002. To test a motor
 for our 1952, 1958 and 1959 models, a turbine 12°023
 should be fitted in place of the friction wheel.

After the motor being tested has been allowed to run for
 five minutes at the nominal voltage of its group, it should
attain at least the following speed

        TAVARO motors 500 890 )
                    5001958500^970 , 6000 x.p.m.


        TAVARO motors

        TAVAROand 1959deto 5952, 1958 3 6500 г. P.m.
View original page 14Page 22 · Read text
901


                      INTRODUCTION


 This chapter is intended as a memory-aid for the technical staff.


 Nevertheless, we can but recommend to all who have to do with these questions:


               TO STOP AND THINK FIRST AND TO ACT AFTERWARDS:


 The opposite only very seldom leads to good results.


 In other words, one should always try to IOCALIZE the defect, keeping in mind

 that very often it is the customer who is to blame for it, or even the

 instructress.


 It is in fact useless to "repair" the machine, if the customer persists in

 using it the wrong way. In many cases, it is preferable to ask the customer to

 sit down at her machine and to show her a better way of using it. This avoids

 unpleasant call-backs.


 As a general rule, no machine should be brought to the workshop before an

 instructress or even a salesman has localized the defect. This enables the

 specialist to intervene efficiently.


 Only in quite exceptional cases, is the machine dismantled completely such

 es for: repainting the casings, cleaning a machine gummed up by the use of

 an inadequate oil, etc.


 As a rule, repairs will be of a rather local nature, i.e. Elnagraph,

 mechanism of needle bar and thread take-up lever or rotary hook, on the other

 hand, motor and sewing light or also cloth feed and thread tensions.


 As a consequence, it is in such cases often only necessary to dismantle

partially, which generally amounts almost to nothing, if one knows how to

 tackle the problem properly. The purpose of this guide is precisely to explain

 this in a general way.


 On the other hand, please remember that the sequence of assembly corresponds

 in principle, to the reverse dismantling sequence.
View original page 22Page 23 · Read text
902


The dismantling operations are numbered with light figures and those for

reassembling with dark figures.


For adjustments which refer to the various models of our machines, the

followine abbreviations nave been used:


                             = supermatic

                         = Zig Zag             Z
             T    Transforma
                EL @STANIA

                       EZ = EINA Zig Zag

                      EA = EINA Automatic


Practical experience was shown that it is preferable to check all adjustments

of the machine after a repair, instead of confining oneself to those, which

one considers to be necessary.


                        no nover mows


The following examples are not Introduced to replace the portion of the

instruction book entitled "Minor Disorders and Remedies", but rather to

complement it.


October 1959                                                  Printed In
                                                           Switzerland
View original page 23Page 24 · Read text
ELIMINATION OF MINOR DISORDERS


     MACHINE SLOW                   CHECK:

                                         Tension of machine and electricity supply

                                         Commutator and carbon brushes

                                         Free running

Printed in    Switzerland                                    01ling. Bad 011

                                    Hard points

                                       Swelling of old nylon gears

                                      Rotary hook - cleanliness

                                       Contactor - contact on all blades

                                         Driving belt too tight

                                         Slipping of friotion wheel


     MACHINE TOO FAST             CHECK:

                                       Tension or machine and
                                       electricity supply

                                        Contactor: disconnect last
                                     (one before last) blade by
                                          changing position of Phillips
                                         screw on contact lever


          October 1959

      MACHINE STARTS TO RUN       CHECK:
       TOO LATE AND VERY FAST       Rheostat, by testing the motor with the
                                         bobbin winder in action

                                         Possible hard point

                                         Slippage of the coupling
                               "When sewing heavy or stiff material, 1t 18
                                          more important than ever to start the
                                          machine with the thread take-up descending


      MOTOR RUNS IRREGULARLY      CHECK:

                                          The motor only starts to run in certain
                                      angular positions:

                                          The armature is probably shorted

                                          Hard point in the Elnagraph: (adjust play
                                           or Elnagraph pinion)

         Repairs                                   Whether coupling slips

                                                                903
View original page 24Page 26 · Read text
ELIMINATION OF MINOR DISORDERS


       IRREGULAR STITCHING          CHECK:
       LEFT OUT STITCHES             Tension devices (dirty)

                                           Needle (badly placed, not pushed up
                                            completely, bent)

Printed  Switzerland                                   Needle clamp

                                        Nagdie clearance

                                           Height of needle bar


       DEFECTIVE CLOTH FEED         CHECK:

                                            Needle plate (wrongly placed)

                                           Height of feed dog

                                            Feed dog (dirty)

                                            In case of circular cloth feed, check
                                           whether the lifter blade is not slightly
                                         TwISTed

                                            In exceptional cases, it is possible that
                                            exaggerated thread tensions cause a
                                        defective cloth feed

      VERY FINE MATERIALS            Try to decenter the needle to the left or
                                            to the right

      BUTTONHOLE DISC                 Bent needle


       Outobe   NEEDLE BREAKAGE               CHECK:
       a. when sewing forwards       Badly set tensions

                                          Customer pulls the work

                                        Knotted thread

                                          Thread caught in the hook

                                            Lower tension badly threaded

                                           Upper guard ring displaced

                                            Needle twisted while pulling up the thread

       b. when sewing backwards     Stitch too long la seam finished off with
                                             short stitches holds better)

                                        Speed badly adapted

                                            Reversing of oloth feed while the machine
                                             is running

       c. while darning                Work 1s moved too abruptly

                                          Tensions too strong

       d. during embroidery           Badly controlled movement of the hoop

         Repairs                                       Automatic cloth feed

                                            Pastening of the Elna-dise           905
View original page 26Page 44 · Read text
SWITCH PLATE - CONNECTIONSS-Z-T


Printed in    Switzerland    Rheostat


      Motor


      Condenser


                  October 1959


        Rheostat


      Motor


       Condenser


             Repairs
View original page 44Page 45 · Read text
SWITCH PLATE - CONNECTIONS EL-EZ-EA


Printed in    Switzerland


         Rheostat
           Motor
              Condenser


          June 1960


      Motor


       Condenser
           Condenser

                            Motor


         Repairs
View original page 45Related documents and language editions
ElnaPDF
Elna 1952 Supermatic & Transforma Parts List
Parts list
37 pages · EnglishRead →
ElnaPDF
Elna Supermatic & Transforma Service
Service manual
34 pages · EnglishRead →
ElnaPDF
Elna Supermatic & Transforma Temporary Service
Service manual
20 pages · EnglishRead →
ElnaPDF
Elna 1968 Supermatic, Transforma, Automatic, ZZ, Plana, & Junior Parts List
Parts list
33 pages · English, French, German, SpanishRead →
From the ISMACS International. Original publisher and archive notices are retained.
Check the model and edition against your equipment.
PDF verified 2026-10-11.