Sewing machines
Elna Supermatic & Transforma Service — Service manual
Service manual for Elna Supermatic & Transforma Service. 34 pages in English. Read the original PDF, download or print a copy without registration.
34 pagesEnglish17.2 MB PDF
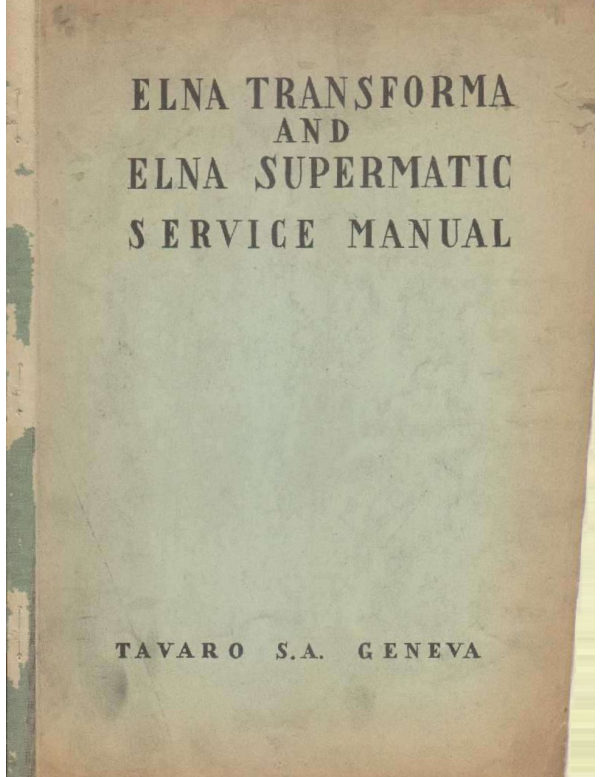
Loading your manual…Open PDF directly
Document details
- Brand
- Elna
- Model / document
- Elna Supermatic & Transforma Service
- Document type
- Service manual
- Language
- English
- Pages
- 34
- File size
- 17.2 MB
- Category
- Sewing machines
- Document date
- Not specified in catalog
Search available document text
Find a term, then jump to its page in the original PDF. Image-only pages may not be searchable; check the PDF for exact wording and diagrams.
Page 1 · Read text
ELNA TRANSFORMA
     AND
 ELNA SUPERMATIC
 SERVICE MANUAL


TAVARO S.A. GENEVA
View original page 1Page 2 · Read text
1. TIMING OF FEED DOG (FIG. 1 - 2)


    When feed dog is correctly timed, it mast not move the material
    while the needle is in the material. If this requirement is not
   met, proceed as follows:

   1. Remove needle, presser foot, needle plate and the two Phillips
      screws that hold the free arm cover

   2. Remove the free arm cover.

    3. Remove oil hole screw (1) on top of feed gear (2) and remove
       also feed gear ring (3). Lift feed cam rod (4) so that it
       comes off simultaneously from the feed gear (2) and tappet
      lever (5).


           FIG. I             6


    4. Turn flywheel towards you until needle is at lowest position.

    5. Lift feed gear off axle (6). Next make sure that bearing
       washer (7) is placed on axle with lip over inside edge. When
       placing feed gear (8), make certain that the round hole (9)
       on the top of gear faces one tooth to the left in relation to
       the center of the feed dog pinion (10).
View original page 2Page 3 · Read text
FIG. 2


    6. Replace feed cam rod (4) by placing both of its ends simulta-
      neously on their corresponding counterparts. (Do not use force!)

   7. Replace feed gear ring (3), oil hole screw (2) and free arm
      cover, then replace also needle plate, presser foot and needle.


2. CENTERING OF NEEDLE BAR (for "Transforma", Fig. 3)

  When needle bar is correctly centered, the needle clearance and
    centering gauge No. 607801 (when looked at from front) must be
   exactly in the center of the stitch hole in the needle plate. If
   this requirement is not met, proceed as follows

    1. Remove needle and presser foot.

   2. Insert and fasten needle clearance and centering gauge
       No. 607801 (1) (or straight needle of size 90 or 100).

   3. Lower presser foot lever and swing open front cover (thread
       take-up lever must be in a raised position).

   4. Loosen stop screw No. 714034 (2) at the right of the head
       portion of upper casing (about 2 inches below the lamp grid).

    5. Turn flywheel slowly towards you until needle bar is in its
       lowest position.

   6. By turning the black cradle spring screw No. 711081 (3) (inside
       of head; close at lower needle bar bearing) clockwise or counter
View original page 3Page 4 · Read text
clockwise, adjust the needle bar so that the gauge (or needle),
       when looked at from front, is exactly in the center of the hole
        in the needle plate.


                  FIG. 3


   7. Tighten the stop screw No. 714034 (2) after this adjustment.

   8. Remove gauge, close front cover and replace presser foot and
     needle.


3. CENTERING OF NEEDLE BAR POR STITCH WIDTH "4" (for "Supermatic"Fig.4)


   When needle bar is correctly centered for stitch width "4" the
   distance between a needle No. 110 and left end of oblong stitch
   hole in needle plate (when needle bar is at its extreme left posi-
   tion) must be equal to the distance between needle and right end
View original page 4Page 5 · Read text
of stitch hole (when needle bar ig at its extreme right position).
If this requirement is not met, proceed as follows

 1. Remove needle and presser foot.

2. Install disc "03" (1) in ELNAGRAPH.

3. Insert and fasten a needle No. 110 (2)

 4. Set stitch width knob (3) at "4" and centering wheel (4) at
    center position.

 5. Lower presser foot lever, swing open front cover (thread take-
   up lever must be in a raised position), then loosen black cradle
   spring screw No. 711081 (5) (inside of head; close at lower
    needle bar bearing) to such an extent that the cradle No. 711056
    (6) at its extreme left position does not hit the head of the
   screw (5).

  8


       (2

                    3
              FIG. 4


6. Turn flywheel toward you until needle No. 110 reaches its
   lowest positions at the left and the right, and check whether
  the distances between needle and the ends of the hole in needle
   plate are equal on both sides. If these distances are not equal
   on both sides, loosen black screw (7) on top of cradle lever
View original page 5Page 6 · Read text
No. 716290 (8) and adjust by means of small bright cradle
       lever stud (9).

    7. Tighten black set screw (7) after this adjustment.

    8. Remove needle No. 110, insert and fasten a straight needle
       No. 60. This needle must pass through the hole in the needle
       plate without touching the rear edge when deflected to the
       left and to the right.

   9. Make machine run, then screw in black cradle spring screw
       No. 711081 (5) until slight clicking noise can be heard. At
       this moment, turn back this screw about 3/4 of a turn until
      clicking disappears.

   10. Tighten the stop screw No. 714034 at the right of the head
       portion of upper casing (about 2 inches below lamp grid).

   11. Close front cover, remove needle No. 60, then replace presser
      foot and needle.


4. ADJUSTMENT OF CENTERING WHEEL (for "Supermatic", Pig. 5)


   If adjustment of centering wheel is correct, a needle No.110 mast
   be in the middle of the oblong stitch hole in needle plate (when
   looked at from front) when centering wheel is set at center posi-
  tion and stitch width knob is set at "O". If this requirement is
  not met, proceed as follows:

    1. Remove needle and presser foot.

    2. Install disc "03" (1) in ELNAGRAPH.

   3. Insert and fasten a needle size 110 (2).

    4. Set stitch width knob (3) at "O*.

    5. Turn centering wheel (4) to extreme left position.

    6. Turn flywheel towards you until needle reaches its lowest po-
      sition at the left.

   7. Check distance between needle and the left end of hole in
       needle plate.

    8. Turn centering wheel to extreme right (5).

    9. Check distance between needle and the right end of hole in
       needle plate.

   10. Compare whether both of above distances are equal.

      If this is not the case, proceed as follows:
View original page 6Page 7 · Read text
6


 11. Unscrew black hexagonal screw (6) in centering lever (7) (right
     above centering wheel) by means of an end wrench (6 millimeters)

 12. Adjust by means of bright centering lever stud (8) (in centering
     lever) until both aforementioned distances have become equal.

 13. Tighten black set screw (6) after this adjustment.


    2

          (3               4            FIG.5


14. Remove needle No. 110, insert and fasten a straight needle
    No. 60. This needle must pass through the hole in the needle
    plate without touching the rear edge of this hole when the
     centering wheel is moved to the left and to the right.

15. Remove needle No. 60 and replace presser foot and needle.
View original page 7Page 8 · Read text
5. ADJUSTMENT OF CLEARANCE BETWEEN NEEDLE AND SHUTTLE HOOK (Fig. 6)


   When clearance between gauge No. 607801 (or needle) and point of
   shuttle hook is correct, the gauge (or needle) must just clear or
  barely touch the point of the shuttle hook (for this test, center-

  lot, wheel must be in center position and stitch width knob at

   If this is not the case, proceed as follows:

   1. Remove needle, presser foot and needle plate.

  2. Lower presser foot lever and swing open front cover (thread
      take-up lever must be in a raised position).

  3. Set stitch width knob at "O" and centering wheel at center
      position.

      THIS INSTRUCTION (No. 3) IS NOT APPLICABLE FOR THE
      ELNA "TRANSFORMA"

   4. Insert and fasten needle clearance gauge No. 607801 (1) (or
      a straight needle of size 90 or 100).

              2


                    FIG. 6


                                            POINT OF SHUTTLE HOOK


                                          CLEARANCE GAUGE
                                         No 607801
View original page 8Page 9 · Read text
8


  5. Turn flywheel slowly toward you until point of shuttle hook is
     exactly behind the center of the gauge (needle).

   6. Loosen large black screw (2) (right below bright tension re-
      lease pin No. 711082).

   7. Insert screw driver into bright positioning bolt (3) (located
      at right of needle bar and at same height as aforementioned
      black set screw) and turn positioning bolt until gauge (or
      needle) just clears, or barely touches, the point of the shuttle
     hook. (See arrows.)

   8. Tighten black set screw after this adjustment (2).

  9. Close front cover, remove gauge and replace needle, needle
      plate and presser foot.


6. TIMING OF SHUTTLE HOOK IN RELATION TO NEEDLE BAR (Pig. 7, 8, 9)


  If timing of shuttle hook in relation to needle bar is correct,
   the point of the shuttle hook must be behind the center of the
   gauge No. 607801 (or needle) after the needle bar has risen
    .089 inches (2,25 millimeters) from its lowest position (for this
   test, centering wheel must be in center position and stitch width
   knob at "O" on SUPERMATIC).

   If this requirement is not met, adjust as follows:

  1. Remove needle, presser foot, needle plate and feed dog. Snap
      back shuttle cover.

   2. Lift out upper guard ring after removing both cylindrical
     fastening screws which hold upper guard ring to lower guard
      ring (do not loosen the two screws with conical heads which
      are located inside of both cylindrical fastening screws).

   3. Lift out lower guard ring (1).


                  FIG. 7
View original page 9Page 10 · Read text
9


    This is possible only in one particuler position of the lower
    guard ring in relation to the shuttle hook. Turn flywheel
    slowly toward you until the opening between shuttle point and
    rear end of shuttle hook faces the left. With a finger, turn
    lower guard ring inside of shuttle hook until the straight
    edge of the lower guard ring is farthest away from you and
    the left end of this straight edge is just in line with the
    rear end of the opening in the shuttle hook. Pull out lower
    guard ring toward the left.

 4. Loosen slightly the three black conical screws (2) at the
    bottom of the shuttle hook (3) until shuttle hook can be
     turned with slight friction (do not remove oil. hole screw
    (4) in center of shuttle hook!).


                                POINT OF SHUTTLE HOOK


                                              CLEARANCE
                                               GAUGE N° 607801

           2   FIG.8


 5. Insert and fasten needle clearance gauge No. 607801 (5).

 6. Set stitch width knob at "O" and centering wheel in center
   position.

    THIS INSTRUCTION (No. 6) IS NOT APPLICABLE FOR THE
    EINA "TRANSFORMA"

7. Lower presser foot lever and swing open front cover (thread
    take-up lever must be in a raised position).
View original page 10Page 11 · Read text
10


  8. Turn flywheel slowly towards you until needle bar reaches its
     lowest position.

  9. With a slide caliper measure distance between upper end of
     needle clamp and lower face of lower needle bar bearing
    (x, fig. 9).


                      FIG. 9


                                          POINT OF SHUTTLE HOOK


                                                      CLEARANCE
                                           GAUGE N° 607801


     Read this measurement (x, fig.9), thensubtract 2,25 milli-
     meters (.089 inches) from the above reading and adjust slide
    caliper to new reading (x - 2,25 mm, or x - .089").

10. Place one Jaw of slide caliper on upper end of needle clamp,
     then turn flywheel slowly towards you until other jaw of
     caliper touches lower face of lower needle bar bearing. Stop
     turning flywheel.

11. With fingers turn shuttle hook slowly counter-clockwise until
     point of shuttle hook is just at the center of the needle
     clearance gauge No.607801.

12. Before tightening the three black conical screws (1) at the
     bottom of shuttle hook (2), recheck as follows

     a) Turn flywheel glowly towards you, while holding jaws of
       slide caliper (showing the new reading) against needle bar,
        until both jaws are again lodged firmly (without play)
        between upper end of needle clamp and lower face of lower
        needle bar bearing.
View original page 11Page 12 · Read text
11


       b) If point of shuttle hook is timed correctly, it must, at
          this moment be at the center of the gauge No. 607801.If
          this is not the case, bring point of shuttle hook to center
          of gauge and recheck again.

   13. After the correct timing has been obtained, do not tighten the
       three black conical screws (2) at the bottom of the shuttle
       hook (3) completely at one time, but tighten each screw only
       gradually Until all three screws are finally tightened com-
      pletely.

  14. Remove gauge, close front cover, replace lower guard ring,
       upper guard ring, feed dog and needle plate, then replace also
       presser foot and needle.


7. ADJUSTMENT OF NEEDLE BAR HEIGHT (Pig. 10)


   The needle bar height is correctly adjusted, when the point of
   the shuttle hook (1) just touches the lower end of the gauge
   No. 607800 (2) while passing below this gauge (for this test,
   centering wheel must be in center position and stitch width knob
  at "0").

   If this is not the case, adjust as follows:


     3

                 5


                 2

                      FIG. 10
View original page 12Page 13 · Read text
12


   1. Remove needle, presser foot and needle plate, then insert
      needle bar height gauge No. 607800 (2).

   2. Set stitch width knob at "0" and the centering wheel to center
       position.

      THIS INSTRUCTION (No. 2) IS NOT APPLICABLE FOR THE
       DINA "TRANSFORMA",


   3. Dork Ejibeetjusttowendstouchesyengentlyand thecheckathether.flat at the Poortonbottom ofshuttlethe
     gauge (2).

   4. If needle bar is set too high, proceed as follows :

      a) Lower presser foot lever and swing open front cover (thread
         take-up lever must be in a raised position).

      b) Turn flywheel slowly towards you until point of shuttle
         hook (1) is just below the needle bar height gauge (2).

      c) Loosen cylindrical screw (3) in needle bar link pin (4) and
         lower the needle bar (5) until gauge rests upon point of
        shuttle hook.

      d) Tighten cylindrical screw (3) after adjustment.

      e) Remove gauge (2) and close front cover. Replace needle plate,
         presser foot and needle,

   5. If needle bar is set too low, a conforming procedure for ad-
       Justing the height by means of the same gauge has to be followed.

   6. Replace needle plate, presser foot and needle.

   7. It is essential after the above adjustment to check also the
      clearance between needles and point of shuttle hook when using
      the double needle clamp (to prevent skip stitching and needle
       breaking).


8. ADJUSTMENT OF NEEDIE CLEARANCE WHEN USING DOUBLE NEEDIE CLAMP (PIG.11)


   If the clearance between the two gauges No. 607801 (2) (or needles)
   and point of shuttle hook is correct, the point of the shuttle hook
            should just clear or barely touch each of the two gauges (or
  needles). For this test, the centering wheel must be in center
   position and the stitch width knob at "0" (on the "Supermatic").
   If the above requirement is not met, adjust as follows

   1. Remove presser foot and needle plate.
View original page 13Page 14 · Read text
13


  2. Remove single needle clamp and attach double needle clamp (1)
     in its place.

  3. Insert and fasten two needle clearance gauges No. 607801 (2)
     (or two needles Nos 90 or 100) in double needle clamp.


                                         POINT OF SHUTTLE HOOK.

            2


              C


                                   GAUGES 607801
                FIG. I


4. Lower the presser foot lever and swing open front cover
    (thread take-up lever must be in a raised position).

5. Set stitch width lever at "O* and centering wheel at center
   position.

    THIS INSTRUCTION (No. 5) IS NOT APPLICABLE FOR THE
   EINA "TRANSFORMA"

 6. Turn flywheel slowly towards you until point of shuttle hook
       is just opposite the first (right) needle gauge. Check cleg-
    rance between point of shuttle hook and gauge.

 7. Turn flywheel slowly towards you until point of shuttle hook
View original page 14Page 15 · Read text
14

         is just opposite the second (left) gauge. Check clearance
       between point of shuttle hook and gauge.

    8. If clearances are not equal for both gauges, proceed as follows:

       Loosen black screw (3) of needle bar link pin (4) in such a
       manner that the needle bar (5) is still held in position by
       friction (to prevent dropping of the needle bar), then turn
       needle bar clockwise or counter-clockwise (see arrows) (as re-
       quired) until clearances at both gauges are equal.

    9. Tighten screw (3) in needle bar link pin (4) after this ad-
       justment.

   10. Remove gauges (2) and double needle clamp (1). Close front
       cover. Replace single needle clamp, needle, needle plate and
       presser foot.


9. ADJUSTMENT OF CLOTH PRESSER BAR (Pig. 12)


   If the cloth presser bar (1) is correctly adjusted, the gauge
   No. 541361 (2) (or the presser foot) must be in line with
   (parallel with) the slots in the needle plate (3). If this re-
   quirement is not met, proceed as follows :


                          FIG. 12
                  2
                      3
View original page 15Page 16 · Read text
15


   1. Remove needle and presser foot, then fasten presser bar ad-
       justing gauge No. 541361 (2) to cloth presser bar (1).

    2. Lower presser foot lever until gauge rests upon needle plate (3)

    3. Open front cover (thread take-up lever must be in a raised po-
      sition).

    4. Check if gauge lines up with slots in needle plate.

    5. If gauge does not line up with slots, loosen slightly black
       set screw (4) with allen wrench 2 millimeters (5) in presser
       bar guide (6) (on top of cloth presser bar) (1), then turn
       gauge with cloth presser bar to the left or right (as re-
       quired) until gauge lines up with slots in needle plate (3).

    6. Tighten black set screw (4) after this adjustment.

    7. Remove gauge (2) and close front cover. Replace needle and
       presser foot.


10. CENTFRING OF FEED DOG (Pig. 13)


    If feed dog (1) is correctly centered, its teeth bars must be in
    line with (parallel to) the slots in the needle plate and must
    clear both sides of each needle plate slot. If this is not the
   case, adjust as follows:

    1. Remove needle, presser foot and needle plate.

    2. Set stitch length regulating lever at "O".

    3. Turn flywheel slowly towards you until feed dog is in highest
       position.

    4. Loosen the two black fastening screws (2) which hold the feed
      dog (1).

    5. Place feed dog centering gauge No. 70226 (3) in place of needle
       plate. Feed dog will thereby be lined up automatically.

    6. Tighten the two black feed dog screws (2) after this adjust-
       ment, remove gauge (3), and replace needle plate.

    7. Set stitch length regulating lever at "4 forward" (longest
       stitch) and check, while machine runs, whether or not feed
       dog hits needle plate. Follow same procedure for reverse se-
       wing by setting stitch length regulating lever at "4 backward"

    8. If feed dog hits needle plate (clicking noige when machine runs),
       remove needle plate, then loosen black feed dog screws slightly
       and move feed dog slightly forward or backward (as required) un-
       til feed dog clears needle plate.
View original page 16Page 17 · Read text
16


        Recheck with feed dog centering gauge No. 70226 (3) to see
        whether feed dog is still lined up. Readjust if necessary.


                   3


                              FIG. 13
                (2


     9. Remove gauge, then replace needle plate, presser foot and
      needle.


11. ADJUSTING HEIGHT OF FEED DOG (Pig. 14)


    The height of the feed dog is correctly adjusted when the tips of
    the teeth, at the highest position of the feed dog, are about
    1/32 above the needle plate. If this is not the case, adjustas
  follows

   1. Remove needle, presser foot, needle plate and free arm cover.

    2. Replace needle plate.

    3. Loosen black nut (1) on lifter skid screw (2) by using an end
      wrench (7 millimeters).

        4. a) Turn flywheel towards you until feed dog reaches its highest
         position. Next, turn the (eccentric) lifter skid screw (2)
          with end wrench until tips of feed dog teeth (3) are about
          1/32" above needle plate (4).
View original page 17Page 18 · Read text
17


                                                            0,8 ÷ 1 millimeter
                                                   (about 1/32"


                                 (4
      2                    FIG. 14


       b) If feed dog height gauge No. 607829 is available, place
          this gauge on needle plate, then turn flywheel slowly towards
          you until feed dog is in its highest position and check the
          height of the feed dog teeth in relation to the recessed
          portions on both sides of the gauge.

          If adjusted correctly, the tips of the feed dog teeth must
         either touch or interfere with the recess "0.8" and must
         not touch or interfere with recess "1.0".

         If above requirement is not met, adjust feed dog with
          (eccentric) lifter skid screw (2) (as explained in Para-
          graph a).

    5. Tighten black nut (1) by using two end wrenches simultaneously
       on black nut and lifter skid screw.

   6. Remove needle plate and replace free arm cover. Replace needle
       plate, presser foot and needle.


12. ADJUSTMENT OF STITCH LENGTH (for "Transforma", Pig.15)


   When the stitch length is correctly adjusted, a piece of paper of
   medium thickness or a piece of cloth placed beneath the presser
    foot should not move when the machine is run with the stitch length
   lever set at "O", or at the most, it should only move very alightly
   forward.

    To adjust (equalize) stitch length for both directions of sewing,
    proceed as follows:

   1. Attach presser foot to cloth presser bar and insert needle.
View original page 18Page 19 · Read text
18
    2. Place a piece of paper of medium thickness or a piece of cloth
       underneath presser foot and lower presser foot lever.

    3. Set stitch length regulating lever (1) exactly at the "O po-
       sition on the stitch length scale (2).


                    FIG.15
  4

      Transforma
2


   4. Run the machine and check whether the piece of paper or the pie-
      ce of cloth are not moved or only advanced very slightly, in
       which case the stitch length is correctly adjusted.

   5. If this is not the case, adjust the stitch length as follows:

       a) Run the machine and move the stitch width lever (1) to the
          left or to the right as the case may be, until the piece of
          paper or the piece of cloth no longer move.

       b) Note the exact position of the mark on the stitch length le-
         ver in relation to the "O" position on the stitch length
          scale (2).

       c) Loosen and remove the two black fastening screws (3) (Phill-
          ips screws) of the Transforma cover (4) and remove also
          Transforma cover.

       a) Loosen set screw (5) No. 504312 in the left lower portion of
          the stitch length regulating lever (1), about two turns.

       e) Loosen set screw (6) No. 504310 and move the stitch length
          lever (1) to the left or to the right as the case may be for
          the distance measured under b) and, after having placed the
         Transforma cover temporarily on the machine, make sure that
          the mark on the stitch length lever is exactly opposite the
          "OH position marked on the stitch length scale. The feed con-
View original page 19Page 20 · Read text
19


          trol shaft (7) must not turn during this adjustment.

          Care must also be taken during this adjustment that the
          stitch length regulating lever (1) does not touch either of
          both sides of the slot (8) in the Transforma cover in which
         it moves.

   6. Remove the Transforma cover and tighten the aforementioned set
       screw (6) No. 504310 firmly.

    7. Tighten the set screw (5) No. 504312 in the lower left portion
       of the stitch length regulating lever (1).

    8. Replace Transforma cover and tighten it by means of the two
       black Phillips screws (3).

   9. Check by making the machine run for ten seconds, that a piece
       of paper of medium thickness or a piece of cloth placed be-
       neath the presser foot do not move or at the most move very
       slightly forward, when the stitch length lever is set at po-
      sition"O".


13. ADJUSTMENT OF STITCH LENGTH (for Supermatic, Fig. 16).


   When the stitch length is correctly adjusted, a piece of paper of
    medium thickness or a piece of cloth placed beneath the presser
   foot must not move when the machine runs, or at the most only ad-
    vance very slightly, with the stitch length lever set at position
   "O" of the stitch length scale.

    To adjust (equalize) the stitch length, proceed as follows:


    1. Attach presser foot to cloth presser bar and insert needle.

   2. Place a piece of paper of medium thickness or a piece of cloth
       beneath presser foot and lower presser foot lever.

   3. Set stitch length regulating lever exactly at position "O" of
       the stitch length scale.

    4. Run the machine and check whether the piece of paper or the
      piece of cloth are not moved or only advanced very slightly,
       in which case the stitch length is correctly adjusted.

   5. If this is not the case, adjust the stitch length as follows


       a) Loosen black set screw (1) (Pig.16) in the feed control le-
          ver (2), which can be reached with a screw driver through
          a hole in front of the upper casing (about 14" below the
          lower end of the stitch length scale).
View original page 20Related documents and language editions
ElnaPDF
Elna 1952 Supermatic & Transforma Parts List
Parts list
37 pages · EnglishRead →
ElnaPDF
Elna S, T, A, ZZ, P, Junior, & Industrial Service
Service manual
85 pages · EnglishRead →
ElnaPDF
Elna Supermatic & Transforma Temporary Service
Service manual
20 pages · EnglishRead →
ElnaPDF
Elna 1968 Supermatic, Transforma, Automatic, ZZ, Plana, & Junior Parts List
Parts list
33 pages · English, French, German, SpanishRead →
From the ISMACS International. Original publisher and archive notices are retained.
Check the model and edition against your equipment.
PDF verified 2026-10-11.