Film & darkroom
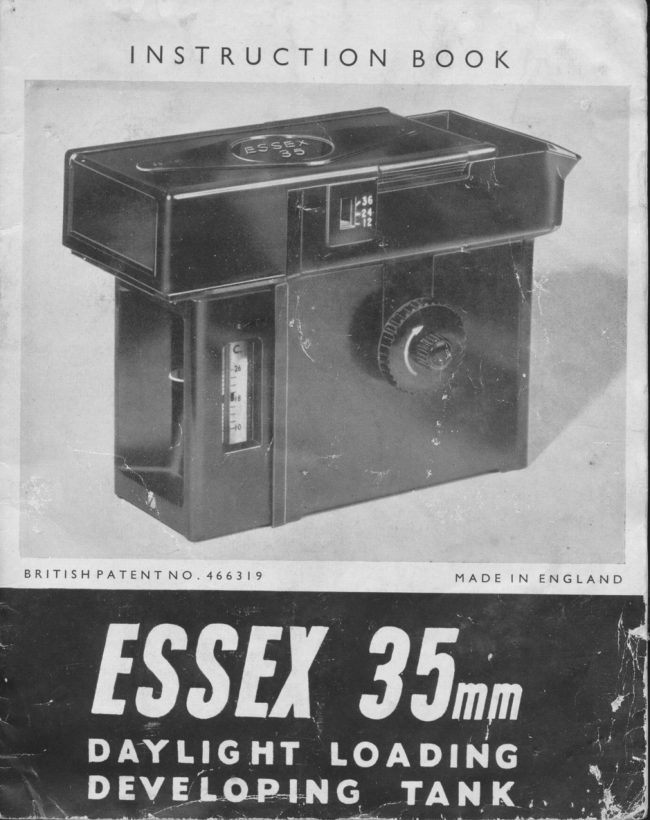
ESSEX 35mm Daylight loading developing tank User manual
User manual for ESSEX 35mm Daylight loading developing tank. 22 pages in English. Read the original PDF, download or print a copy without registration.
22 pagesEnglish5.9 MB PDF
Loading your manual…Open PDF directly
Document details
- Brand
- Essex
- Model / document
- ESSEX 35mm Daylight loading developing tank
- Document type
- User manual
- Language
- English
- Pages
- 22
- File size
- 5.9 MB
- Category
- Film & darkroom
- Document date
- Not specified in catalog
Search available document text
Find a term, then jump to its page in the original PDF. Image-only pages may not be searchable; check the PDF for exact wording and diagrams.
Page 5 · Read text
(b) TRtMMING THE
                                   FILM TO LENGTH
                                            Take the hlm template
                                                    (part No. 13 in Fig. l) and
                                                place it on the under or
                                              emulsion side of the film
                                          tongue engaging the two
                                             prongs of the template  in
                                                 the last pair of perforations
                                                protruding frcm the cas-
                                          sette. Then cut off that
                                          part of the film tongue
                                            which extends beyond ihe
                                               tem plate. See Fig. 3-
                                                cut a fraction shorter than
                                                 the template.
www.butkus.us


                      Fig. 3.
 (c) TRIMMING THE
FILM TO SHAPE
  Now remove the tem-
 plate from the film and
 replace again on the under-
 side of the film, but this
time with the film between
the two jaws at the narrow
end of the template (see
 fig. 4). Then, using a pen- knife trim the film tongue
to exactly the same con-
tours as the template on
both sides. Care must be
taken to see that the full
width corners of the film
are rounded and not square.
                            Fig. 4.


                                                                                                                                                     I
View original page 5Page 7 · Read text
The Spiral Film Drum is first placed in position. lt is impossible to put
              it in the wrong way round because one bearing is wide and the other narrow
        and the slots in which they ride are wide and narrow accordingly
         The Winding Knob is then put in position using its Locking Screw to
         secure it.  The celluloid washershould be next the tank body and the rubber
        washer next the Winding Knob. The locking screw should be tightened up
        so as to prevent light-leakage but not so tight as to make it difficult to wind
        the Film Drum.
           Before inserting the Film Guide it will be found convenienr to lift the
         Film strap (Part2 in Fig. l) from the bottom of the developing chamber and
                                                                                                                                                                                                                                                                                                                                                                                                                                            ')        keep it from falling back by resting the Film Buckle (part I in Fig. l) in the
 {          light trappint groove at that end of the tanl< opposite to the casserte chamber.
        The Film Guide must then be placed in position as shown in Fig. 6.
       Always check that it is in position. lt is as easy (or difficult) ro remember
         this as it is to remember to remove the lens cap from the camera before
       making an exposure but the consequences are more serious because 36
        exposures may be spoilt instead of one.
 ;          Next, slide the sliding end of the cassette chamber in the direction
fi        indicated by the arrow in Fig.6. The cassette chamber is then ready to
         take the cassette. Insert the cassette and push the sliding wall back as shown
         in Fig. 7.


t
 If't]

I
ti*i
View original page 7Page 9 · Read text
ATTACHTNG THE FILM
         The film is now ready to be hooked through the Film Buckle. The end
          of the film when properly prepared has an open loop at the end (see Fig.5).
       The centre prong of the film buckle should be passed through this loop as
       shown in Fig.9. The film cannot possibly slip if squarely attached in this way.
         The winding knob should now be turned very cautiously in the direction
         indicated by the arrow engraved upon it until about one inch only of the
            fu ll width of  fi lm emerges from the cassette. This enables a ch:ck to be made
         that the film is running truly down the film guide channeland that it is arching
        across its width so that the centre is up and the edges down. Not more
$      thanrisk ofanfogginginch shouldthe firstbeexposedwound frame.out of theSubsequentcassette operationsas otherwisemusttherebe carriedis the
  I      out with the lid firmly in position.
e

                                 Note
           Since the film will onlyfeed intothespiralfilm drum at the beginningof the
                                                                       spiral near the centre
                                                                        of the drum, it follows
                                                            that the distance be-
                                               tween the centre of
                                              the drum and the
                                                       shoulder of the film
                                                                         is critical. The strap
                                      and buckle control
                                                    part of that length
                                                         but the trimmed film
                                                 tongue controls the
                                                       rest. Hence the im-
                                                          portance of the tem-
                                                 plate and  correct
                                                        trimmingand creasing.
                                                              Fig. 9.
View original page 9Page 10 · Read text
DEVETOPING THE FILM

   Owing to the fact that the Essex Tank only uses a small volume of developer,
an accurate control of the temperature of the solutions is essential and two
methrds of procedure are given. (For recommended developers, fixers and
time and temperature tables, see pages l7 and 19.)

              METHOD A
   The film is loaded into a dry tank and the processing solutions are sub-'
sequently poured in.

             METHOD B
   The tank is filled with the necessary amount of developing solution-7 ozs.
(200 ccs.)-and the film is wound directly into the developer.                                                 ,

   Each method has its advantages and disadvantages. Method A allows the
film to be wound slowly and carefully into the developing chamber.' lts
progress can be felt by the changing resistance of the winding knob and the
cutting operation can be carried out at leisure. Further,  if the worst comes
to the worst, and the film jams or gives the feeling of having slipped out of
the grooves (very unlikely if all instructions have been properly carried out
though, on occasion, an old stiff film which has been difficult in the camera
may give trouble) operations can be suspended and the lid opened in a
darkroom.
   The disadvantage of Method A lies in less accurate temperature control.     {
ln cold weather there may be a drop in the temperature of the solutions
when they are poured into the cold tank body. With Method B, if the
built-in thermometer shows that the temperature of the developer  is too low,the solution can be poured out and warmed up again. The disadvantage   t
of Method B is that should the user experience any loading trouble there  is
the possibility of uneven develop;nent.
                                           t0
View original page 10Page 11 · Read text
RECOMMENDATTON AS TO METHOD
             For the first few films use Method A. When confidence has been gained
        and the 'feel ' of the tank controls obtained,. a change can be made to
        Method B with its more accurate temperature control.

                  METHOD A
           Having attached the end of the film as previously described the lid of
         the tank is placed firmly in position and the film is then wound on to the
           spiral film drum. The approximate number
        of exposures wound on is shown by the
          position of the indicator mark on the film
         guide arm (Fig. l0).r
                       Fig. l0 (right)
                         l. Film guide arm.
                 2. Number of 24x 36mm
                   frames wound on.

                       Fig.  | | (below)
                         l. Knife Handle.

                                   When the  desired
                                              number of frames has
                                                         been wound on the film
                                                                                                                 is cut without, of cou rse,
                                                         having to take off the
                                                                   lid. This operation  is
                                                shown in Fig. ll.   lt  is
                                                         important to hold the
                                                                               lid of the tank firmly in
                                                             position and to press
                                              the knife handle up
                                                   smartly as far as it
                                                                            will go.


                www.butkus.us
View original page 11Page 13 · Read text
,  Springs are provided to prevent the lid of the tank coming off when it
             is emptied but they should never be relied upon solely'

      DEVELOPING
           After pouri.ng offthe wetting bath, pour in 7 ozs. (200 ccs.) of developing
         solution (Fig. l2 again applies), gently rotating the film at the same time'
       Once the developer is in contact with the film the film drum should never
        be allowed to remain stationary but should be gently rotated throughout the
          entire developingtime. 'Gentle' rotation can be defined as half a revolution
        every two seconds.
           .  The temperatures of both the wetting bath and the developer should be
                  before they are poured into the tanl< and the built-in thermometer$      checked
 I      used only to note any subsequent rise or fall.
            After development has continued for the correct time (see tables P. l7)
        pour off the developer (Fig. 13 again). Do not forget to keep the drum
         turning so that all the developer is poured away.
          Then give the film a brief wash with two or three changes of plain water
         using only 7 ozs. (200 ccs.) each time. Rotate the drum continuously during
        washing which should not take longer than about one minute.

       FIXING
  ir,l           Prepare 7 ozs. (200 ccs.) of fixing solution (see p. l9-20) and pour into the
          tank, following exactly the same procedure as when developing. The rotation
          of the film drum should also be the same. After five minutes of continuous
                                                         a brief                                                                      off and                                                            to mal<e                                                  tank                                               the                                    the lid of                                take                    be                               safe to                     will                         itfl,t       rotation                                                                           appearance.                                                               milky                                                have                                                   a white,                                     probably                                                                    still                     of                      the          inspection                                                  lt will                         film.
         Continue the rotation for twice the time that  it takes for this milky aPPearance
         to disappear completely. Towards the end of this Process it is not necessarf*-      to rotate the drum continuously. lt will be sufficient to rotate it inter-
          mittently provided that care is taken to see that it is not always the same
           half of the drum that is left standing in the fixing solution.
 il        Now remove the lid, the film guide and the cassette. fl
 t,d                                                        l3
 fl
View original page 13Page 14 · Read text
WASHING
    The developing chamber should be almost filled with water ana emptied
 out again at least five times, the film drum being rotated all the time. care
 should be taken at all times to see that no liquid goes down the knife slot.
 Then remove the drum fronr the developing chamber and place it in a basin
  under gently i'unning water for half an hour.  lt should be placed on its side
 so that air bells do not form. lf running water is not available at least ten
 changes of fresh water should be used, allowing the film to remain for at
  least three minutes in each change.
                                                               {
             METHOD B                                                     Tltt
    The only difference between Method A and Method B relates to the pouring
 in'of the developer, all subsequent operations being the same.

 DEVELOPING
    After the film has been properly attached to the Film strap but before
  :it is wound on ro the drum, put the lid of the tank on (see that the guide
 is in place !) and pour in the developer. No preriminary wetting bath  is
 'used because air bubbles are very unlikely to form as the film is wound down
 ,into the developer already in the chamber.
   When using Method B it is most important to perform the cutting operation
 smartly since at no time during development must the film drum be left
stationary. The solution only covers the lower half of the drum and if
 ,rotation is stopped uneven development will result.
 RINSING, FIXING AND WASHING                        q
    Follow the procedure as given for Method A.                                                                                             $
,REMOVING AND DRYING THE FILM                c
   When the washing process is complete, a film clip should be attached to
the outer end of the film.  lt can then be drawn off the spiral film drum as                                                ii|lil
                                            14                                                      f't

                                                                                                                                                                                                                                                                                                                                                                                I1
View original page 14Page 15 · Read text
shown in Fig. 14. lt is a good practice to add a few drops of Johnson 326
Wetting Agent to the final wash water as this makes the formation of 'tear
drops' (and subsequent white marks) less likely when the film is drying.
   After the film has been removed from the tank it should be hung uP to
dry in a dust-free atmosphere. A clip should be attached to the lower end
of the film to              it curling up as it dries.
              _prevent
WASHING AND DRYING THE ESSEX TANK
    All parts of the tank should be thoroughly washed and dried before they
are put away. The body should be turned upside down when left to dry.
lf a second film is to be developed immediately  all loose drops of water should
be shaken offthe film drum and the strap should be wiped as dry as possible.
While a film can be wound on to a wet drum it is most essential to see that

                                      Fig. 14
View original page 15Page 18 · Read text
SPECIAL INSTRUGTTONS
 AGFA, LETTZ AND CONTAX CASSETTES

AGFA CAMERA CASSETTES
   The locating peg must be placed with its conical end facing outwxrds.
The end of the film is attached to the cllp on the tension band in the
 normal manner, but the film must be drawn very cautiously by the band into
the film guide and not more than five perforations on each side should be
 pulled from the cassette. The film is not attached to a core in the Karat
cassette so that it is not necessary to use the cutting knife.

LE|TZ-AGFA CASSETTE (MODEL D)
   The film is wound into the tank in the manner described above, no
 modifications being necessary.

LEITZ DOUBLE-CASE CASSETTE
   Films in the Leitz double-case cassette cannot be loaded into the Essex
35 in daylight. A darkroom must be used on all occasions. After opening
the cassette the latter is treated as if it were a cartridte, except for the use
of a darkroom. When placing the cassette in the loading chamber, it  is
essential that the lip of the former lies horizontal, and that the peg on the
outer casing lies correctly in the depression provided on the guiding ring
of the sliding holder.  lf this is not done, rhe tank lid cannot be put on and
the film cannot be wound properly on to the spiral.
CONTAX CASSETTES
   Only the feed cassette can be used and it is necessary to wind the film
back into it in the camera. The tanl< cannot be loaded in daylight and a
darkroom is necessary. After opening the cassette in the darkroom it  is
loaded into the tank and the film wound off just as with an ordinary cartridge.
The cassette opening must be horizontal and the peg on the outer casing in
the depression provided in the guiding ring of the sliding holder, or else the
tank lid will not shut and the film will not wind off correctly.
CONTAX DAYLIGHT SPOOLS
   The spool must be rewound in the camera. ln the darkroom the paper
leader strip is detached from the film, the spool placed in the cartridge holder,
and the film wound off as usual. The final paper strip is also detached from
the end of the film before developing.                                                                                                                                                                                                                                                                 i
                                           t8

                                                                                                               i
View original page 18Page 21 · Read text
SUPPLEMENTARY INSTRUCTIONS FOR ESSEX
M.K.I I DEYEIOPING TANK FOR TEICA TYPE B
      AND STANDARD CASSETTES
    These instructions are to be read in conjunction
    with the ESSEX Tank instruction booklet and
    figures referred to will be found in that booklet
   The ESSEX Mk. ll is the same in all respects as the standard ESSEX Tank
except that in addition to accepting the usual film makers'cassettes, it will
accept and lock and unlock the LEICA Type B cassette. Apart from the
locking and unlocking of the cassette, all other operations are the same as in
the case of the standard ESSEX Tank. lt will not lock and unlock Contax
cassettes. In the case of these cassettes procedure is the same as in the case
of the standard tank (see page l8).
       REWINDING THE FILM IN THE CAMERA
   As in the case of the standard cassette, the tongue of the film should be
left protruding (see figure 2).  lt can then be trimmed and prepared correctly
(see figures 3, 4 and 5).
   INSERTING THE CASSETTE IN THE MK. II CASSETTE
                 CHAM BER
   The slotted actuating ring inside the cassette chamber should first be
turned  till it is in the position shown below.                                                                                                .,                                                                                              ',,,*"-:.
               SLOTTED R,ING


                  U NLOCKING ERACKET
   Then insert the LEICA Type B cassette so that the unlocking spring
rivetted to the side of the cassette beds in the centre slot in the bottom of
the cassette chamber and projects underneoth the unlocking bracket beneath
the actuating ring. When the cassette chamber is slid into the closed position
(see figure 7) this bracket automatically unlocks the cassette and thus allows
the actuating ring to open the cassette.
View original page 21Page 22 · Read text
OPENING THE CASSETTE
     This must and can only be done when the lid of the tank'is in position.
When the film tongue has been prepared as mentioned above and attached
 to the film buckle (see figure 9), the lid is placed in position.  lt will then be
found that the unlocking knob on the lid of the Mk. ll can in certain positions
be pressed right home as shown below.

                                                                                                                                                          i,.'\


 NOR,MAL POSITION WHEN   PRESSED HOME ENGAGING
R,EMOVING OR REPIACIN6 LID     ACTUATI NG RI NG.
   When it is pressed right home it is engaging the actuating ring and the
cassette can be opened by rotating the knob os for os itwill go in the direction
indicated by the arrow on its face.
   The film can then be wound on to the spiral film drum as instructed on
page 9 of the instruction booklet.
             SHUTTING THE CASSETTE
        lf it is not desired to develop the whole film, the rotating knob is turned
cs for os itwill go in the " shut " direction indicated by the arrow on its face.
The film is then cut by the built-in knife (see figure ll).  When the portion
of the film wound into the drum and cut has been developed, the lid can be
removed and the balance of the film will be intact in the cassette which has
been shut and locked and therefore cannot fog. About a quarter of an inch
will be protruding so that the film can be drawn out of the cassette and trimmed
for re-insert,ion in the camera.
    Even if the whole of the film is developed  it is still wise to lock the cassette
by means of the locking knob on the tank lid because that operation auto-
matically brings the actuating ring back into the right position in the cassette
chamber for loading the next full cassette. (Potent opplied for.)

,OHNSONS OF HENDON LTD.        NEVILLE BROvvN & CO. LTD.
HENDON LONDON ENGLAND.        NEWMAN ST. LONDON W.I.
View original page 22Related documents and language editions
GafPDF
GAF Film Developing Tank
User manual
11 pages · EnglishRead →
JohnsonPDF
Johnson J-20 Developing Tank Developing J-20 film (assuming meaning 120 film)
User manual
17 pages · EnglishRead →
Various brandsPDF
Johnson's 35mm Film Developing Tank
User manual
13 pages · EnglishRead →
YankeePDF
Yankee Film Developing Tank
User manual
7 pages · EnglishRead →
From the M. Butkus archive. Original publisher and archive notices are retained.
Check the model and edition against your equipment.
PDF verified 2026-10-10.