Film cameras
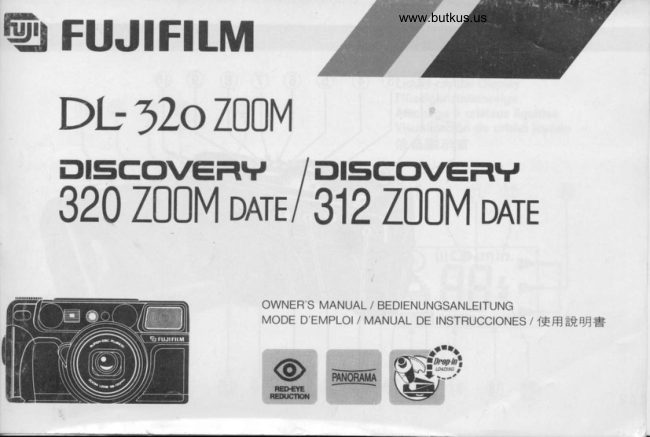
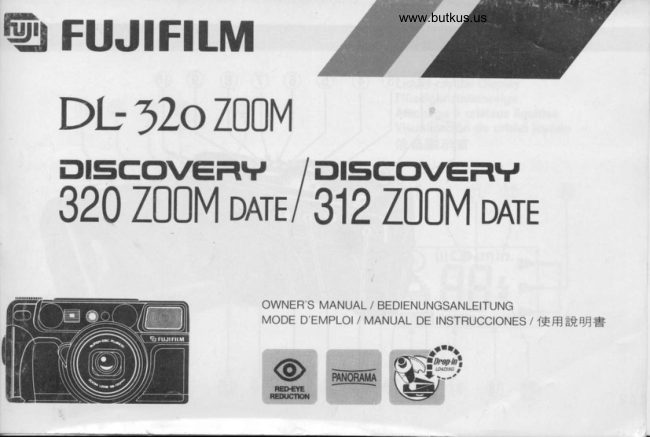
Fujifilm DL-320 Zoom Fujifilm Discovery 320 zoom User manual
User manual for Fujifilm DL-320 Zoom Fujifilm Discovery 320 zoom. 29 pages in German, Spanish. Read the original PDF, download or print a copy without registration.
29 pagesGerman, Spanish3.8 MB PDF
Loading your manual…Open PDF directly
Document details
- Brand
- Fujifilm
- Model / document
- Fujifilm DL-320 Zoom Fujifilm Discovery 320 zoom
- Document type
- User manual
- Language
- German, Spanish
- Pages
- 29
- File size
- 3.8 MB
- Category
- Film cameras
- Document date
- Not specified in catalog
Search available document text
Find a term, then jump to its page in the original PDF. Image-only pages may not be searchable; check the PDF for exact wording and diagrams.
Page 2 · Read text
El'! FUJIFITM
  Db52oZ00M
   Drs;covEFlY TaiScoveFlv
                 DATE   320200M      I 312700M onrr


                                  OWNER'S MANUAL  / BEDIENUNGSANLEITUNG
                               MODEffiffiffiD'EMPLOI  / MANUAL DE INSTRUCCIONES / 1EH;38,E=
View original page 2Page 4 · Read text
Liquid-crystal Display
Fliissigkristallanzeige
Afftchage  i cristaux liquides
Visualizaci6n de cristal liquido
;tffiffimE'


                        r^-1                 .1,./                                 t/
View original page 4Page 10 · Read text
Using the interval timer                                11 . The date on which you loaded the film in the Camera faultq possible causes,                        camera can be displayed.                                            mzo
 and remedies                                23     12. The formats in which you took your pictures   a Print faulls, possible causes, and remedies     2525       can be displayed.
Camera care and cautions                 -   26     13. Power switch/exposure mode/landscape
 Specifications                                27       mode selection dial.

SPECIAL FEATURES                   NAMES OF PARTS
 o A fully automatic 35 mm compacl zoom camera   @ Shutter Release
  1. Super EBC coated lens with motorized zoom  @ Power Switch/Exposure Mode/Landscape
    (38-120 mm).                             Mode Dial
 2. Automatic drop-in film loading and prewinding.   @ LCD (Exposure Counter/Shooting Mode Signs)
 3. Switchable to panorama mode (interlocked   @ Shooting Mode Button
    with panoramic  finder) in mid-roll.        @ Film-loading Date Disptay Button (for the
 4. Dates printable on both standard and pano-        dating model only)
   rama format pictures.              @ Date Mode Button (for the dating modet only)
 5. Five exposure modes.             @ Date Setting Button (for the dating model only)
 6. Provision for taking distant landscapes (night  @ Date Selecting Button (for the dating model
    scenes).                                                    only)
 7. Built-in self-timer capable of 3-frame rapid-  @ Date Display Window (for the dating model
   sequence shots.                                           only)
 8. Provision for remote control operation.       @ Autofocus Windows
 9. Provision for continuous shooting.        @ Battery Compartment Cover
10. Buift-in interval timer (16 steps from 10 sec-  @ Strap Lug
   onds to 60 minutes).               @ Self-timer/Remote Control Lamp
                        @ Finder Window
View original page 10Page 12 · Read text
3. Check the battery Fig. 3)                        o Each time you change the battery, always resetlf the Battery Sign (er) appears in the LCD, the       the date (or time).
battery is loaded correctly.o Before taking pictures, always make sure the       1. Pdnting the date (or time) and changing the                      mzol-aI
  Battery Sign (er)appears in the LCD.                arrangement  ol the date (Fig. 4)
.lf the battery power is low, the Battery Sign (r-r;                                                                                     I"...'  in the LCD will switch to the Battery Low Sign          Year     Month     Day
  (cr)  to tell you the battery needs changing.  lf
 you keep on shooting, the Battery Low Sign         Month     Div      Year
  (c-r) will soon start blinking and you won't be                                                 Day     uohtn     Year
  able to release the shutter.                                                                             J
r The battery can be changed even if there is film         Day      Hour     Minute
  in the camera.
.Always          reset the date after changing the battery          _ t_
  (see page 12 on how to correct the date) (for the
  dating model only).                                          * "M" stands for month (not printed on the pic-
o lf you are going on a trip or are planning to take          ture) (Fig. 4-A)
  lots of pictures, take a spare battery along with   @ Date Mode Button
 you just in case you might need  it.                  Press in the Button @ to change the order of the
  This is especially true  if you are travelling abroad      year, month, and day. The order will change as
  because in some countries you may not be able    shown above. The date showing in the Date
  to obtain the type of battery you need.                Display Window is the date that will be printed in
                                                     the bottom right of your picture. lf you don't want
                                                  dates on your pictures, bring out the Dating UnitPRINTING DATES ON YOUR PICTURES                                                           Off Sign (------)  in the Date Disptay Window.
DL320 ZOOM has no function that print the date.
View original page 12Page 13 · Read text
www.butkus.us
        2. Correcting the date (or time) (Fig. 5)                   interlocked with the numbers for the hour and-I       x PRINT Sign (not printed on the picture) (Fig.        minute.
                                                                                                                           picture,                                                                                                             is                                                                                    released                                                                                                           to take your                                                                         the shutter                                                                            . When           s-A)
                                                                                                                                                       will                                                                            Window                                                                                Date Display                                                                                 the                                                                   the "PRINT"                                                                           sign in           Date Selecting ButtonozUJ   @
                                                                                                                                                                j                        blink for about two seconds to tell you the date    @ Date Setting Button        ,.
     Make the number you want to change blink by      has been printed on  it.
       pressing in the Button @, then bring out the     o lf you press in the Date Setting Button and hold  it
      number you want by pressing in the Button @.            there, the numbers  will run through rapidly.
     To set the Dating Unit Clock to the correct time,     o lf any of the date numbers is blinking, the date
          first set the time then make the colon (:) blink by,*;      will not be printed on your picture.
        pressing in the Button @.                            o lf a bright-colored background is included in the
       Next, press in the Button @ the instant the time      bottom right of your picture, the date will not
      announcement  signals zero second, then, press in      show up clearly.
       the Button @ once more to bring out the "PRINT"
        sign (-) in the Date Display Window.                                            ATTACHING THE STRAP (Fig.6)       o You can print dates on both standard and
        panorama format pictures.                     Pass the looped end of the Strap through the
      .Your camera's quartz dating unit will function as     camera's Strap Lug, then pass the other end of the
       an auto-calendar up through the year 2024. The     Strap through the loop and pull it firmly.
        dates (or time) are represented by the following
        numbers:                             LOADING THE FILM (Fis.7)         Year   : 93-24(1993-2024)
         Month : 1-12                          Use 35 mm DX roll film (film marked DX on the film
        Day    : 1 -31                           box and cartridge).
         Hour  : O-23                               x Number of Exposures (Fig. 7-A)
           Minute : 00-59                              x DX Code (Fig. 7-B)
       o The numbers for the year, month, and day are       x Film Speed (F:g. 7-C)
View original page 13Page 14 · Read text
1. Open the camera back (Fig. 8)                        short or too long, adjust  it so that the film tip falls
Push the Camera Back Lock toward the arrow.        within the camera's Film Tip Mark before loading
The Camera Back will open iust enough to drop        the film into the camera. To adjust, just wind it inthe film in smoothly and surely.                         or oull  it out.                                                                                                                                                             mzotra-
o ll you use film with no DX code, the camera will
  set itself to ISO 100.                                     4. Close the camera back
o lt is recommended to use Fujicolor Super G ACE    As soon as you close the Camera Back, the
  400.                                             Exposure Counter will run through rapidly and the
o Do not open the Camera Back all the way.              film will prewind itself up to the very end. (lf the film
o Be sure to use your film before the expiration        is a 24-exposure roll, it will prewind itself in about
  date printed on the film box.                     20 seconds.) The Exposure Counter will show the
                                            number of exposures that can be taken with your
2. Insert the film (Fig. 9)                                             film.
(lf the film leader is curled, just ignore  it.)              o The Film Confirmation Window will show the
Hold the film cartridge with the protruding end up       type of film that is loaded in the camera, as well
as shown and insert it about halfway into the Film     as its speed and the number of exposures   it
Chamber.                                                    contains.
                                                o Open the Camera Back all the way only when
3. Drop lhe film in alllhe way (Fig. 10)                you want to clean the camera interior.
  r.Film Tip Mark (Fig. 10-A)
. Press the film lightly with your finger and it will   A WORD ON 35 mm FULL-SIZE AND PANO-
  drop smoothly down into place, guided by the   RAMA FORMAT PICTURES
  Camera Back.
o Make sure the film tip falls within the Film Tip     o Your camera can be switched to the panorama
  Mark (green lines in the far end of the film track)     mode and back to the standard 35 mm full-size
  and gently drop in the cartridge.                 mode in the middle of a roll.
.lf the length of film protruding the cartridge is too     o Panorama format pictures measure about 13x36
View original page 14Page 15 · Read text
www.butkus.us
     mm on the film and the prints are finished in the      4. 35 mm full-size covering area (Fig. 14)
           horizontally long panorama type.                  x Parallax Correction Marks (Fig. 1a-A)
                                                               In the standard 35 mm mode, you'll get in yourIaJozlrl       1. Swilching to the panorama mode (Fig. 11)           picture everything you see within the Finder frame.
      To switch the camera to the panorama mode, just     But  if you are shooting your subject from about 1.2
       push the Panorama Mode Switch to the left so that     meters or nearer, you'll get in your picture only the
              it uncovers the letter "P".                           area falling within the Parallax Correction Marks.
         2. Panorama mode covering area (Fig. 12)
     When you switch the cariera to th1 panorama'i';  ' TAKING PICTURES
       mode, the Finder will also switch to a panoramlc      1. Turn on the power (Fig. 15)
          finder, and you'll get in your picture everything you   To turn it on, set the Power Switch/Exposure
       see within the finder frame. When composing your    Mode/Landscape Mode Dial to AUTO so that the
         picture, however, always leave a slight margin on      letters "AUTO" come opposite the Setting Mark (-).
        the top and bottom of the framing area.            The Lens will move forward, the Lens Cover will
        o lf you are shooting your subject from 2 meters    open and the camera will set itself to the auto-
         or closer in the panorama mode, the top side of     matic-flash mode.
         the framing area may not register on the film
        even though  it is seen in the Finder. Be sure to                                               2.Zoom the lens (Fig. 16)
         leave a slight margin on the top side of the    To zoom to telephoto, move the Zoom Lever to the
          framing area.                                                                                 right. To zoom to wideangle, move the Zoom Lever
                                                                        to the left. The size of the Finder image will change
          3. Switching to the standard 35 mm mode (Fig. 13)     with the movement of the Lens.
       To switch back to the standard 35 mm mode, push      . Do not block the Lens or apply pressure to  it
       the Panorama Mode Switch to the right so that  it      while  it is zooming.
        covers the letter "P".                                       r lf the camera is switched on and ready for
View original page 15Page 16 · Read text
shooting but is left idle for five minutes, the Lens       Lampface.
   will automatically move back into the body, the  LCD signs will turn off, and the power will switch      6. Press the shutter release about halfway down                 mzotr
   off (unless you are shooting in the interval timer        (Fis.20)                                                                                                                                                                                            U'-  mode). To reset the camera for shooting, set the        lf the Autofocus Lamp (green lamp next to the
  Power Switch to OFF, then turn on the power     Finder Eyepiece) turns on, the Lens has completed
  again.                                                   focusing. But  if you are too close to the subject, the
                                                  Autofocus Lamp will blink to warn you to move
 3. Adjust the finder to your eyesight (Fig. 17)          back.
Move the Diopter Adjuster until the image in the
 Finder appears sharp.                                    7. Take your pic,ture
                                                    Press the Shutter Release gently all the way down.
 4. Hold the camera  still (Fig. 18)                As soon as the shutter trips, the film will auto-
When taking pictures, hold the camera still with      matically advance into position for the next shot.
both hands.                                         o When you press the Shutter Release about
To shoot with the camera held vertically, position       halfway down, do  it slowly and genfly.
the Flash side up.                                          r The Autofocus Lamp will blink if you are too
. Do not hold the Lens Barrel when you compose       close to your subject. lf it blinks, check the
 your picture and press down the Shutter      camera-to-subject distance once again. Be
  Release.                                                   careful, however, because the Autofocus Lamp
                                                                    will turn on but the Lens will not focus on the
5. Aim fhe autofocus spot at your subject (Fig. 19)       subject if you bring the camera closer than about
Aim the camera so that some part of your subject      50 cm from the camera lens.
fills the Autofocus Spot completely.                   o The shooting distance is 0.69 m -oo at  f = 120 mm
  * Autofocus Spot (Fig. 19-A)                              (0.9 m-- at other focal lengths).
. Keep your fingers and camera strap away from     o The shutter won't trip while the Flash is charging.
 the lens front, Autofocus Windows, and Flash     o Though rarely, the Lens may not be able to focu!
View original page 16Page 18 · Read text
load will immediately wind itself back into its        II. ADVANCED TECHNIQUES
   cartridge and the Exposure Counter will blink
   continuously (see page 24).                   USING THE AUTOFOCUS LOCK I  Unfoading the film in mid-roll (Fag.24l                   1. This is the picture you want but..... (Fig. ZZ)                                 1llzora-
With the tip of a ball-point pen or something      the Autofocus Spot is off your subject.  lt means the
similar, press in the Mid-roll Rewind Button. Wait     Lens is not focused on your subject.
 until the Exposure Counter shows the "E" sign and
the camera motor comes to a halt, then takO the      2. Move the camera slightly and..... (Fig. 28)
film out.                                           aim the Autofocus Spot so that  it covers some part
                                                  of your subject, then press the Shutter Release
3. Picture formal display (Fig.25)                    about halfway down (to lock the focus) and make
The formats in which you took your pictures will be     sure the Autofocus Lamp (focusing completed
displayed in the LCD.                                       signal) has turned on.
o Do not use anything with too sharp a point to
  press in the Mid-roll Rewind Button.                     3. While pressing the shutter release aboul hall-
o Check the picture lormat display before loading      way down..... (Fig. 27)
  the next film. (lf the next film has been loaded, the    move the camera back to its original position,
  information for the preceding film will be erased.)     recompose your picture, then take it by pressing
                                                     the Shutter Release all the way down.
I Opening the camera back all the way (Fig.26)      o The illustration shows the Finder's picture field in
  tCamera Back Release Lever (Fig.26-A)            the standard mode. lf you are shooting in the
Release the Camera Back by pushing the Camera      panorama mode, you can use the Autofocus
Back Release Lever gently inward (see illustration)      Lock in the same way.
then pullthe Camera Back allthe way outward. To     o The Autofocus Lock can be used as many times
close the Camera Back, just press  it against the      as necessary before releasing the shutter.
camera body.
View original page 18Page 19 · Read text
www.butkus.us
                                                                                 pictures                                                                     ordinary                 EXPOSURE MODE AND     Taking            THEIa    SELECTING                                                                                flash                                                          mode in low light (Fig.30)                                                                              1. Automatic             MODE     LANDSCAPE
      A word on the Power Switch/Exposure Mode/      flash activation. lf the light is low, the Flash willozI!      I                                                        Set the Exposure Mode Dial to AUTO for automatic        Landscape Mode Dial (Fig.29)                     automatically fire when you press down the
       This dial allows you to turn on and off the camera      Shutter Release.
       and, at the same time, select the exposure mode      After shooting, you can take your next autoflash
                                                                                                                                                   in     you want very easily. You can also select the      picture as soon as the blinking Flash Sign ( f   )
       landscape mode with this Dial.                         the LCD turns off.
          * Red-eye reducing mode (Fig.29-A)            *,'"  '
        xAutomatic flash mode (Fig.z9-B)                                   ll you want your subject's eyes to look nalural in
          * Power off (Fig.29-C)                          dim light
         x Landscape mode (Fig.29-D)                            2. Red-eye reducing mode (Fig. 31)
         x Fill-in flash mode (Fig.29-E)                         Set the Exposure Mode Dial to @ to shoot in the
         x Night portrait mode (Fig.29-D                   red-eye reducing mode. The Red-eye Reducing
          x Flash off mode (Fig.z9-G)                  Lamp will turn on for about one second, after
                                                       which the Flash will automatically  fire to take your
        I  Ellective llash range                                       picture.
     The effective range of your built-in flash will differ
       with the speed of the film you are using and the      I A word on red-eye effecl
        lens focal length as shown below.               When you photograph a person's face in dim light
       (Using color negative lilm; distance in meters)           with Flash, the eyes will sometimes turn out red in
                                                                 the picture. This is because the light from the Flash                             rso100   rso 200   tso 400  rso1m0                                                                 enters the person's eyes and is rellected back into
         38 mm wideangle    0.9-4.0   0.9-5.6   0.9-8.0  0.9-16.0      the camera lens. To reduce the chances of getting
                                                          red-eye pictures, observe the following rules:
         120 mm teleohoto   0.69-2.6  0.69-3.6  0.69-5.2  0.69-10.4   @ Take your picture with the camera set to the
View original page 19Page 20 · Read text
red-eye reducing mode.                                                       shake.        your   Ask              subject                               strare                       to                                  at                               the camera. @                                                         Also,                                                        the shutter                                                                                          will be                                                                         slow                                                                         be                                                                     so                                                                                                                                                         tell                                                                                      sure to    Bring         the            camera                 up                     as @                           close                             as possible to                                                    your subject                                                                      to remain                                                                                                             until                                                                                                                           still                                                                                     the                                                                                                     shutter                                                                                                                                              trips.    your          subject.
 o The Autofocus Lamp (next to the Finder Eye-     Taking non-llash pictures
   piece) will turn on the moment the Red-eye       5. Flash off mode (Fig. 34)
  Reducing Lamp turns on then turn off the instant     To shoot in the Flash off mode, set the Exposure  the      Flash                fires. Be sure                            hold                          to                                  the camera  still    Mode Dial to €)  . You can take pictures with   while         the Autofocus                 Lamp                                   on.                                    is                                                  ambient light only.
 Taking backlighted pictures of subjects against a     Taking distant landscapes
 window or in the shadow of a tree                       6. l-andscape mode (Fig.35)
 3. Fill-in ftash mode (Fig.32)                     To shoot in the landscape mode, set the Exposure
 To shoot in the fill-in flash mode, set the Exposure    Mode Dial to A   . The Lens will focus on distant
                                                         subjects. This mode is useful for taking land- Mode Dial to *
                                                   scapes, distant scenes through a window pane,
Taking porlraits against a night backlight            and distant night scenes.
a. Night portrait mode (Fig.3t)                              . To take stage scenes and indoor sports events
To shoot in the night portrait mode, set the        that are beyond reach of the camera's built-in
Exposure Mode Dial to g*      .                                 flash, shoot with the flash turned off (flash off
.In the night portrait mode, the Red-eye Reducing        mode).
 Lamp will turn on for about one second to      o lf you are taking pictures in the flash off mode,
  reduce the red-eye effect when the Shutter       mount the camera on a tripod, if possible.
  Release is pressed down, after which the Flash      o After shooting in the Landscape Mode, switch  it
  will fire to take your picture.                              off with the Exposure Mode Dial. lf you take
o When shooting  in the night portrait mode, always        near-distance shots with the camera set to A     ,
 mount the camera on a tripod to prevent camera        the picture may turn out unsharp.
View original page 20Page 21 · Read text
www.butkus.us
     USING THE SELF-TIMER                              trip to take your picture. The extra shots you                                                                    inputted will be taken at 3-6 second intervals.
          1. Set the self-timer (Fig.36)
                           press in the Shooting Mode    TAKING REMOTE CONTROL PICTURESILJozttJ    To set the self-timer,
        Button to bring out in the LCD the Selttimer Sign     o lf the Remote Controller  is not included with your
         ( O ) and the number ol picture you want to take       camera, you'll have to buy it separately.
        with the Self-timer (up to three shots).                     I Names ol parts (Fig.38)
                                                              * Remote Controller (Fig.38-A)
         2. Start the Self-timer (Fig.37)                            * Shutter Operating Button (Fig.38-B)
     To start it, press down the Shufter Release. Thdi"'    x Transmitter (Fig.38-C)
      Lens will automatically focus on the part of your
        subject that is covered by the Finder's Autofocus       1. Take out the remote controller (Fig.39)
        Spot.                                                  x Remote Controller Holder (Fig.39-A)
       o When you start the Self-timer, do not stand in     To take  it out of its holder, just slide  it out. To insert
          front of the camera.  lf you do, you will either           it into its holder, slide  it in until it stops with a click.
        throw the Lens out of focus or the picture may be
         underexposed.                                              2. Set the camera lo remote control (Fig.4O)
       o The Self-timer has to be reset each time you take     Press in the Shooting Mode Button to bring out the
        a oicture.                                     Remote Control Sign ( ((o) in the LCD. Now, you
       o To switch off the Self-timer, turn off the Self-timer     can take picture with the Remote Controller.
        Sign ( O ) by pressing in the Shooting Mode       . Even if the camera is set to remote control, the
         Button a second time.                                   shufter can be released by pushing down the
                                                                   Shutter Release.
         3. Wait 10 seconds
     As soon as the Self-timer  starts, the Self-timer       3. Take your remole control picture (Fig. 41)
      Lamp will turn on and glow lor seven seconds,    Aim the Autofocus Spot at your subject and
       then blink for three seconds, then the shutter will    compose your picture. Face the Remote Control
View original page 21Page 22 · Read text
Transmitter toward the camera and press down       runs out, you can always ask your dealer to
the Shutter Operating Button. The Self-timer/        replace it for you.Remote Control Lamp will blink lor about two                                                                                                                                                                        mzot-
seconds                                                                lhe                                                                                            (Fig.43)                                                                  remote controller                                                                I  Carrying        then the shufter will trip to take your                                                                                                                          @-picture.                                                   Just                                                    pass the                                                         camera                                                                           strap through                                                                                the groove
                                                (marked by the arrow in the illustration) on the
4. Eflective range (Fig. +Z)                        Remote Controller Holder and carry  it together with
The etfective range of the Remote Controller  is      the camera.
about five meters when held directly in front of the
camera, and up to about 3.5 meters when aimed at    coNTtNUOUS SHOOTTNG
the camera ala2O" angle from all sides  (|eft, right,                                                                1. Set the continuous-shooting mode (Fig.44)above and below).
                                                    Press in the Shooting Mode Button to bring out theo After taking your picture, switch the camera off                                                   Continuous-shooting Sign ( EUt ) in the LCb.  the remote control mode with the Shooting Mode
  Button.                                                   2. Press down the shutter release
. Take your picture within five minutes after setting     While you press down the Shutter Release and
  the camera to the remote control mode.             hold it there, the shufter will trip continuously at
o For best results, mount the camera on a tripod       intervals of about 2 seconds.
 when taking remote control pictures.               Each time the shutter trips, the Autofocus unit will
o Be careful when taking against-the-light pictures      function to focus the Lens on the subject so be
  because the Remote Controller may not function      sure to continue to aim the camera at your subject
    if direct light enters the camera's Remote Control     while you hold the Shutter Release in depressed
  Sensor. You may have to use the Self-timer in      position.
 such cases.                                                   . After shooting, switch off the continuous shoot-
o The battery for the Remote Controller will last       ing mode.
 about three years (as tested according to      . When you take pictures with flash, the shooting
  Fujifilm's battery testing procedure).  lf the battery         interval will be slightly longer.
View original page 22Page 23 · Read text
www.butkus.us     USING THE INTERVAL TIMER                    the next shot, and when " 1 "IL                                                              shutter will trip automatically at(sec.)theturnsset interval.off, the
                      Mode Button several times     o Mount the camera on a tripod.ozUJ     Press1. Selectin thethe Shootinginterval (sec./min.) (Fig.45,46)           Pictures are tiaken by repeating this operation.         until the Interval Timer Sign lNIl appears in the     o The Interval Timer Sign rNrr will blink while the
         left bottom of the LCD, hold the Button in de-         interval timer is operating.
       pressed position and operate the Zoom Lever. The      . To switch off the interval timer mode in mid-roll,
       shooting intervals (sec./min.) that can be set will       press in the Shooting Mode Button.
      be displayed in the Exposure Counter section of      . The interval limer mode will automatically switch
       the LCD (T for increasing and W for decreasing).   ,.'.       off when the last frame is exPosed.
       o The intervals that can be set are 10 sec., 20 sec',     o Zooming is not possible while the interval timer is
       30 sec., 40 sec., 50 sec., 1 min., 2 min., 3 min., 4        operating.
           min., 5 min., 10 min., 20 min., 30 min.,40 min., 50    oThe Power Switch/Exposure Mode/Landscape
          min. and 60 min.                         Mode Dial can also be operated while the
                                                                             interval timer is operating. The picture is taken in
         2. Sel the interval timer (Fig.47)                        the mode that is set when the shutter trips.
         After selecting the interval, remove your finger from     o lf the shooting interval is set to 1 minute or
       the Button. The display of the interval (sec./min.)        longer, the Lens will automatically move back
         will turn off and the Interval Timer Sign lNrr will         into the body after the shutter is released.
       stop blinking and glow. The camera is now set to     o lf the interval timer mode is switched  off, the
       the interval timer mode.                            zooming position of the Lens will return to that
                                                        which was set when the intervaltimer mode was
         3. The shutter will tdp automatically at the set         set.
            interval                                        o lf there is no film in the camera, the interval timer
            lf you press down the Shutter Release, the timer     mode will be automatically switched off after the
          will start after the shutter is released. The sec./min.        shutter has tripped ten times.
        display in the LCD will count down the time before
View original page 23Page 24 · Read text
CAMERA FAULTS, POSSIBLE CAUSES, AND"HEM'EbIES
          Faults                    Possible Causes                   Remedies             Page'  1. The shutter won't @ The battery Low Sign (cr)  is @ Change the battery with a     10                                 mzotra-
      trip.                           blinking.                    new one.
            @ The battery is not loaded @ Reload the battery correcfly.       10
                                   correctly.
            @ The Power Switch is off and @ First, set the Power Switch/      14                    the Lens is in retracted     Exposure Mode Dial to OFF,
                                 Position.                         then set it to a shooting posi-
                                                                   tion so that the Lens moves
                                                              out into shooting position.
            @ The Exposure Counter is @ Open the Camera Back, un-     16
                         showing the "E" sign.             load the film, the insert a new
                                                                                                        roll.
View original page 24Page 25 · Read text
www.butkus.us
E                  Faults                    Possible Causes                   Remedies            Pagec2
          2. The Exposure Count-   o A partly used roll of film was  o First, turn on the camera by      16JozIJJ         er blinks and the film    unloaded without winding  it    setting the Power Switch/
        winds back into its    back into its cartridge.          Exposure Mode Dial to a
         cartridge the mo-                                      shooting position. Then, unload
         ment  it is loaded.                               the battery, made sure the
                                                            Exposure Counter in the LCD
                                                                       turns off and insert the battery
                                                          once more.
       3. The film wound back   o While taking pictures or while  oWhen there is film in  the      16
          into its cartridge in    the film was prewinding, you   camera, never open   the
          the middle of the roll.     either ooened and closed the   Camera Back or meddle  with
                           Camera Back or meddled with    the Camera Back Lock.
                                  the Camera Back Lock.
       4. The film has been  o The film is incorrectly loaded.     . Reload the film correctly.             13
       loaded and  the
       Camera Back has
         been closed, but the
        Exposure Counter
         does not count.
View original page 25Page 26 · Read text
PRINT FAULTS, POSSIBLE CAUSES, AND REMEDIES
          Faulls                    Possible Causes                   Remedies            Page                 mzor
  The picture looks @ You didn't aim the Autofocus @ Make sure the Autofocus Spot      15, 17        @I
    luzzy.                    Spot correctly.                     is overlapping some part of
                                                            your subject, or use the Auto-
                                                focus Lock to take your
                                                                            picture.
            @ The Lens is not clean.   @ Keep the Lens clean at all     26                                                                  -i      times.
             @ You jiggled the camera when @ When taking pictures, hold      15
                         you pressed down the Shutter    the camera still with both
                               Release.                       hands and press the Shutter
                                                           Release gently down.
            @ You took your night portrait @ When taking night portraits,      19
                             without mounting the camera     always mount the camera on
                        on a tripod.                     a tripod.
            @ You took your near-distance @ Set the exposure mode/land-      18
                          shot with the camera set to    scape mode selecting dial to
                            the landscape mode ( A   ).        another position and shoot.
View original page 26Page 27 · Read text
www.butkus.us
                  F*ults                    Poscible Gaueee                Remedbe            PageTa
                                                                                                                                 10                                                        prcture                                                              against                                                                                           against-the-light                                                             your                            You                                        took your        2. The                               @ Take               picture looks @
                                                                          pictures                                                   was                                         (Your                                                                             with                                                                              the camera set             dark.                                                  subject                                             light                              theJozIJJ
                               standing indoors against a      to the fill-in flash mode.
                                window, etc.).
               @ Your subject was beyond @ Take your flash pictures with-      18
                                 reach of the camera's built-in      in the built-in flash's effective
                                             flash.                               range.
            3. The date does not @ The dating unit was switched @ Before taking your picture, set     11
      show up in  the       off. The Dating Unit Off Sign     the date and make sure it is
             picture, or  it does not     (------)  was showing in the    showing in the Dating Unit
        show up very clearly      Dating Unit LCD.                 LCD.
              (for the dating model @ A white, yellow, orange or @ Compose your picture so that     12
              only).                  other bright-colored back-        it does not include anything
                              ground was included in the     bright in the bottom right
                                   bottom of your picture.           where the date will be printed.

                                                                        dust, and moisture.    CAMERA CARE AND CAUTIONS                                                               3. Remove soil and dust from the lens glass,
         1. Your camera is a precision instrument which        autofocus windows, and finder window with an
          requires careful handling. Do not wet  it, drop  it         air blower and by wiping lightly with a piece of
        on the floor, or subject  it to any other type of          soft, lint-free cloth.  lf that is not enough, wipe off
          strong shock.                                              gently with Fuji Lens Cleaning Paper moistened
        2. ll you are not using your camera for a long           slightly with Fuji Lens Cleaning Fluid. Never use
             interval, keep it where  it will be safe from heat,         solvents. such as alcohol and benzine. to clean
View original page 27Related documents and language editions
From the M. Butkus archive. Original publisher and archive notices are retained.
Check the model and edition against your equipment.
PDF verified 2026-10-10.