Sewing machines
Gritzner German-Style Transverse Shuttle — Ward Brothers — User manual
User manual for Gritzner German-Style Transverse Shuttle — Ward Brothers. 18 pages in English. Read the original PDF, download or print a copy without registration.
18 pagesEnglish9.8 MB PDF
Loading your manual…Open PDF directly
Document details
- Brand
- Gritzner
- Model / document
- Gritzner German-Style Transverse Shuttle — Ward Brothers
- Document type
- User manual
- Language
- English
- Pages
- 18
- File size
- 9.8 MB
- Category
- Sewing machines
- Document date
- Not specified in catalog
Search available document text
Find a term, then jump to its page in the original PDF. Image-only pages may not be searchable; check the PDF for exact wording and diagrams.
Page 1 · Read text
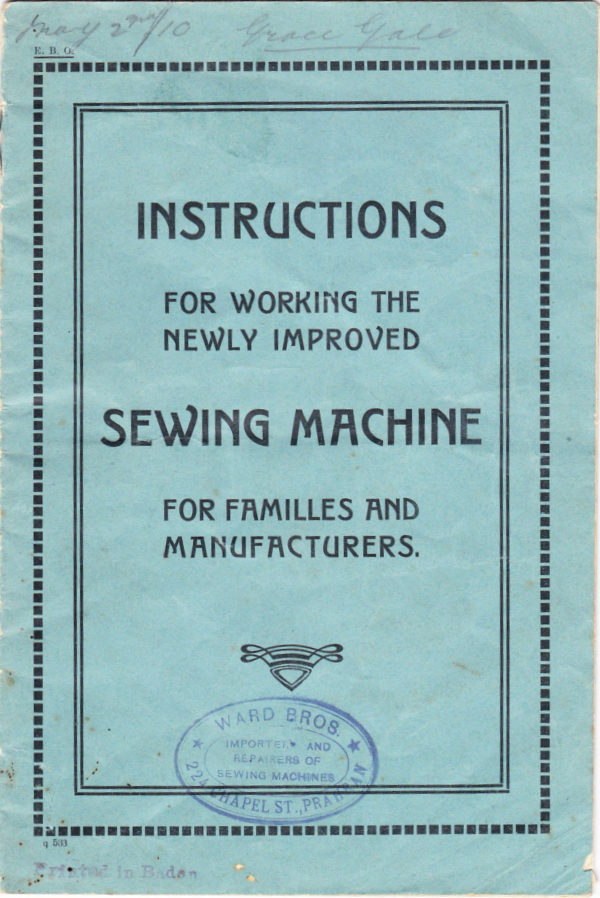
nay 2


    INSTRUCTIONS


        FOR WORKING THE
       NEWLY IMPROVED

   SEWING MACHINE


        FOR FAMILLES AND
        MANUFACTURERS.


            WARDBROS.
                         IMPORTER AND                    *                             REPAIRERS OF
                          SEWING MACHINES

                     A PEL ST.,PR


           n Baden
View original page 1Page 2 · Read text
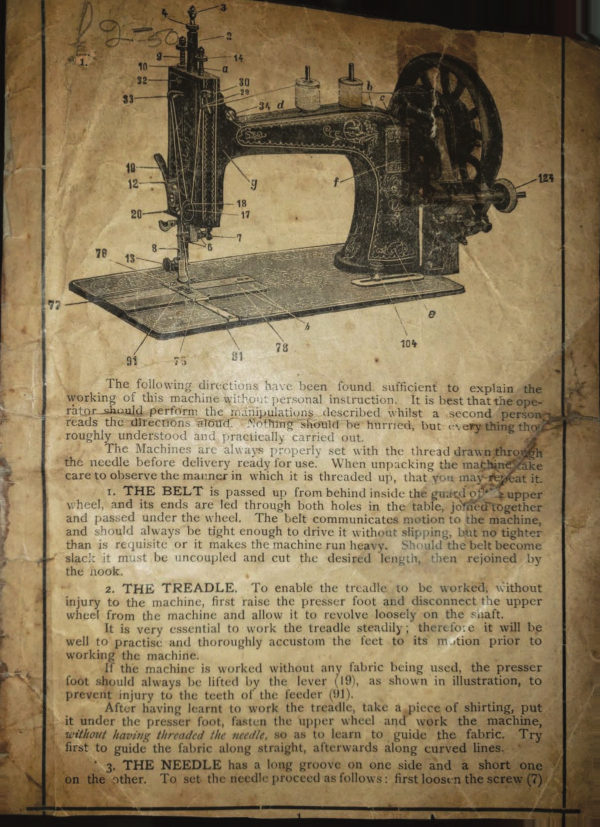
The Improved Sewing Machine.


      76


77
                                                  104


                      directions have been found sufficient to explain the
 working of this machine without personal instruction.  It is best that the ope-
  rator should perform the manipulations described whilst a second person reads
  the directions aloud.         should be hurried, but everything thoroughly
  understood and practically carried out.
      The machines are always properly set with the thread drawn
  the needle before delivery ready for use. When unpacking the machine take
  care to observe the manner in which it is threaded up, that you may repeat it,

                                                           joined together
  and passed under the wheel. The belt communicates motion to the machine,

  thanand shouldis requisitealwaysor beit makestight enoughthe machineto driverunit without should the belt become
  slack it must be uncoupled and cut the desired length, then rejoined by
  the hook.
         2. THE TREADLE. To enable the treadle to be worked, without injury
  to the machine,               presser foot and disconnect the upper wheel
  from the machine and allow it to revolve loosely on the shaft.
       Mans verv essential to work the treadle steadily; therefore it will be well
   to practise and thoroughly accustom the feet to its motion prior to working
  the machue.
           If the machine is worked without any fabric being used, the presser
   foot should always be lifted by the lever (19), as shown in illustration, to
  preventAfterinjuryhavingto thelearntteeth ofto theworkfeederthe treadle,(91).
           the presser foot, fasten          take a pieceworkof shining,the machine
   authou D00220               needle..
        first to guide the fabric along straight, afterwards along curved lines.
         3. THE NEEDLE has a long groove on one side and a short one on the
       To set the needle proceed               first loosen the screw (7) that


 p 359
View original page 2Page 3 · Read text
The Improved Sewing Machine

          it, and raise the needlebar (2) to its
                                  which is to be held (with its long

 hand, place the needle point down through the hole in the throat plate (75);
 hold it fast while you turn the wheel gently towards you, until the needle
 bar (2) moves downward so that the needle is guided into the groove under
             hold the thread with the thumb and first finger
                                                   thus bringing the eye
 of the needle           with the surface of thethroat plate (75),turn
                                                (a distinct line engraved in
                                               rests level or fully
             plate; then screw up tight.
 the tront of the ofneedlean bar, near its toObserveFor linenthatandthesilkneedlethe gaugepasses downmarl
 exactly in the middle of the throat plate hole and that its long
                    ve seu 100      eruler
                 or it will not enter the loop freely, and the thread will be
thro i the loop e tetton doent
shuttle will then occasionally    the londstitchesstil he willsolarebe dropped.aro perist
most important to set the needle correctiv.
      The condition and movement of the needle should be examined daily,
and if the point be blunt or rough, is should be replaced by
machine will never sew satisfactorily with a needlethat is not sharp
       If the eve of the needle should be rough and cut the thread,
                                             is very important always to suit the
thread to the needle. i. e to choose a thread whichcompletely fills the groove
                   is passes through the fabric. The lower thread should be
 somewhat finer than the upper thread.
       4. TO WIND A BOBBIN.Throw the upper wheel out of gear. - Place
                winder with thenotched end to the right,
                         The left hand spindle draws back to admit
 i thi the Pinde in the on thi The n t hah
ọf the pins on the top of the machine, pass the thoua through the sit on the
       the end of theknife blade     under and between
dises (2). then through the slit on the left (3), from thence behind the knife
blade down to the                          to outwards through the small
nole in thelright hand brass flange and fastenthe thread by squeezing it
between the flange and the spindle; then wind up all the slackthread by
turning the reel on the pin
     The catch in front of the winder now has to be raised against the
bobbin and the India rubber ring must be allowed to touch the flywheel,
whichisdone by pressing on the little knob at 4 in front of the winder.
      All is now ready for winding and the machine may be set gently in
motion. As soon as the bobbin is full the winder will cease to work.
     Take care that the thread be always evenly and tightly wound on the
bobbin, until it is full. Very much dependsaponthe
nannin thread. Do not pass knots in the thread. I roperadvisablevisadintototwindtha
 several bobbins together to avoid constant interruption of the work
    To adjust the winder: If the winder throwsout of gear before the
bobbin is full the little                       catch should be screwed
down slightly,  and if the bobbin overfills without being thrown out of gear
 this screw should be screwed up, a very little is sufficient.
     The same directions apply to the Winder of the Saxonia Machine, only
instead of pressing against button 4, press firmly against the little knob at
t.h e
cogwheel in connection with the toothed inside rim of the flvwheel.
View original page 3Page 4 · Read text
The Improved Sewing Machine.


WARD CROS IMPORTERS AND *
  REPAIRERS OF
 SEWING MACHINES,
View original page 4
Page 5 · Read text
The Improved Sewing Machine.

          5. TO THREAD THE NEEDLE.
  thread on one of the pins.           Place the reel containing the upper
  of the face plate, under and Thencebetweenpass it throughonthetheeyeletfront29ofat thethe faceside
                  upwards; to the eye in thecheck lever (33), through
    and through the hole in the needle clamp, and lastly from you through the
  eve or the               four inches of thread should be drawn through
  the eye of the needle.
         6. NEW SELF THREADING SHUTTLE. Method of threading. Hold the
   shuttle in the left hand, point downwards and with the flat side facing you,
                                                                with
  insertthe threada bobbincomingat theoffpointthe bobbinend andfrompressthethebackotherto theendleft;intoleadits place,the thread
  behindinto thethenotchpointin ofthethespringspringb; a, and then across the flat side of the shuttle
 and pass it intothe notch of thethenspringdrawoutside.it tight towardsNow thetheshuttleshuttlewillpoint,be
  redo v TOr use, the thread coming off under the spring on the left side
  of the shuttle.


      To regulate the Tension.    This is done by turning the small screw F
  to the left for a slacker orto the right for a tighter tension. A special small
 screw driver is provided for thispurpose. When an even tension is once
 obtained it will seldomrequire alteration.                                         After threading     shuttle,
  the tension Dv drawing the thread towards the blunt end; if it draws tightly
 awithoutlooserbreaking,tension. itTois obtainright formoreor                                    goods oflessfirmtension,texture;tightenthin, softorslackengoods requirethe screw c which acts upon the flat spring b.


       7. TO REMOVE THE SHUTTLE. Bring the Needle bar to its lowest
 position, pull out the sliding plate No. 77 slowly and the shuttle will rise out
of the race.

       8. THE LENGTH OF STITCH. After each stitch the feeder (91) draws
the fabric forward the length of a stitch. At the base of the arm
found a thumb screw (104). To lengthen the stitch, this thumb screw must
be loosened slightly and moved                   movement will
shorten the stitch. Having obtained the right stitch tighten the thumb screw.
View original page 5Page 6 · Read text
The Improved Sewing Machine.

       9. REGULATION OF THE THREAD LEVER is seldom necessary, it is
done by a screw spindle in the top of the needle bar           the nut                 that the thread breaks or makes loops,loosen
 of the regulating                 or raise it by turning and so vary the
 lift of thread, matil the fault is remedied, then re-tighten the nat s
       10. THE PRESSER BAR serves to guide the fabrics to be sewn tightly
 on the needle plate and the feeder.
                                Thick and hard fabries require a stron the
pressureDressure of thepresserlarge barscrewthan(9)thinbehindtheand softneedlematerial.bar to the right,to
diminish the pressure turn this screw to the left.
                                                     the shuttle as                   After having threaded the needleand
 abovethe pointdescribedto the rightproceedhand,as leavingfollows:aboutPlacethreethe shuttleincheswithinof threadits carrier,projecting,with
 then draw           inches of the upper             the eye of the
 needle, and with the left hand hold its end loosely; turn
        you, until the needle moves down and up again to its highest point,
 this will bring the shuttle thread up through the hole in
 then gently draw the needle thread, and the shuttle thread will appear;
 aplate,pin, laydrawthethetwoendthreadsof theto shuttlethe left threadacross thethroughfeed points;the holeplace the fabric
  eneath the needle, lowerthe presser foot       and commence to sew.
 To obtain a faultless lock stitch, see to it that
  tension12.ofTHEthe upperTENSIONor needleis alwaysthreadproperlyshall invariablyregulated, whichbe as strongmeans thatas thatthe
  of the shuttle thread. A perfect stitch shows the same appearance on the
  upper and the lower sides as below.


                               thread is obtained by turning the thumb
      The tension of the he fare plate.  Take hold of the thread just above
  screwthe needle(14) andon thedrawtopit ofdownwardsthe     from the spool, and continue    turn the
                                                   For thin, soft
  humb screw until the thread draws tightly without breaking
  goods, Afterthe samea fewrulestitchesappliesareforformedthe needlestopasandforexaminethe shuttlethem.tension.


                                                   straight thread upon the lower surfathe
         Should there tre loops, pro chi light othe tension of the needle thread.
   asthreadabove,lies turnstraightthe uponthumbthe upper surface as below, turn the thumb screw from you
    to loosen the tension of the needle thread.


                          sewing lies in so adjusting,the tension of the
       The secret of perfect
    needlement ofthread,either thatmay beit regulatedequals theastensionbefore ofdescribed.the shuttle
                      with the work care should be taken neither to draw nor
          In proceeding is tread breal the needle.
       When                            across seams, the upper wheel
    should be cautiously turned by hand, or the needle will break or
View original page 6Page 7 · Read text
The Improved Sewing Machine.

                                                              raise the
   lesser- foot1000by1 which means the ten me el be di honested into mate tib
 and draw the fabric withthe left hand from the left side upwards about
three inches; then cut both threads.
        If in removing the work the lower thread breaks, take out the shuttle,
 draw out some thread and proceed again as above described.
        It may be advantageoushere to describe the manner in which the
 stitches are produced by this machine:
                 passing through the fabric leads part of the upper thread
below the needle plate. In rising, it forms a small loop in the thread which
 is caught and spreadby the point of the shuttlepassing the needle. This
Lop bythroughtroughwhichwhitethe thelowerloudthreadtiredisiscarriedartie bormationby the shuttle,otle is thet staten.
      TO CLEAN AND OIL THE MACHINE. If youconstantly use the
machine,it should be cleaned twice a dav and well oiled. Before oiling,
raise the presser foot, remove the shuttle,and having oiled, run the machme
rapidly d Mlnute..then wipe off all superfluous oil with a piece of rag. Be
sure, that every part is clean, before commencing to sew.
     There arenine small holes made for oiling,one in the front of the
face plate near the needle bar (2), three on the top
end of the shaft andone near the spool pin, two at the base of the arm (near
the trade mark) and three near the throat plate(75). To oil the crank which
works the shuttle: turn the machine slowlyuntil the small end of the crank
appears in sight throughthe long slot in        where the thumb screw
         altering the stitch acts,       A little oil must be put upon
the needle bar (2), also at the back of the shuttle carrier, and a very™
the joint of the check lever (33). The spooler spindle must be oiled, also the
point of the bobbin when                face of the shuttle
öiled at least once a day. The parts of the stand to be oiled are: the hand-
wheel hub; both ends of the pitman and each end of the treadle.
        If the machine runs hard while in use, some place requires oiling.
zineit ruininhard,placeafter sandingaran rapidly,ille for somewipetime,.time, use the parole the es ben-
      Dern 0l. which should always be used. To make sure of procuring
 good oil, buy it where you bought the machine
                                                      the machine will
wear but slightly, and the principal parts should last a life time.
      But it is possible that some of the small parts in the course of years
will wear out   ne manuracturers turnish, through their agents. interchan
geable parts which may be set in by the owner, the construction of the
machine being very simple.
     But if the owner cannot put the machine in order, he should unscrew
it from the table and send it to the agents with all the fittings together with
a statement of the difficulty experienced.
View original page 7Page 8 · Read text
The Improved Sewing Machine.

  Advice for keeping the machine ingood running order.
           machine is thoroughly tested before being sent out. Should one
be found      sew          cause will probablyarise from an improper
use        therefore recommended       attempt anyalteration   the
 machine, before being assured that the needle is properly set and the tension
regulated.
            Should the lower thread break:
       1. The tension in the shuttle may be too great, or
       2. There may be a sharp edge in the throat plate, or there is
       3. A rough edge on the shuttle.

  Should the upper thread break, the reason may be that:
       1. The tension is too tight, or
       2. The needle is too fine for the thread, or
       3. The long groove of the needle is not placed facing the operator or
            it is set too high or too low, or
       4. The needle does not pass centrally through the hole in the throat-
         plate, so that it touches, or
      5. The throat                         In changing the throat plate
        care shout he takeintaken thatthatafterafter havinhaving       1u uowii.. it will be
         freely passed by the needle and that the needle in passing down
       does not touch the shuttle. To ascertain this, press the needle
       when down,  gently with thescrewdrivertowards the shuttle. If
              t then sligthly touches the shuttle the position is right
              Observe that in using a thick needle for linen or other coarse
        thread, the throat-plate with the large hole should be used, and the
          needle be set a sixteenth of an inch lower than usual
      6. The eye of the needle is sharp or the point blunt. The former is
        very probable if you find the needle unthreaded.
      7. The feeder does not move the fabric regularly, its free action being
        hindered by dirt, pieces of thread, or want of oil.

Should there be skipped or long stitehes at intervals, the
                  reason may be that:
      1. The needle is set too high or too low, or
       2. The needle has become bent away from the shuttle, or
       3. The long groove of the needle is not placed facing the operator, or
      4. The needle is too fine, or
     5. Themachine has an irregular action in consequence of dirt or
       want of oil.
                   in spite of the above drop stitches appear in starched good
      wash the goods or rub the surrace, where   is To De sew  with
        hard white soap. Curd soap is best.

                  WARD EROS
                              IMPORTE" AND                             *
                                       REPAIRERS OF


                            E CHAPEL ST, PRANS
View original page 8Page 9 · Read text
The Improved Sewing Machine.


 The following table indicates the sizes of the thread
   and needles which should be used together.

         In giving orders for needles, always specify the size required.
  Size of                                       Size of Cotton, Thread             Class of Work to be Sewn.  Needle                                        or Silk.

             Very fine Muslins, Cambries Linen ete.,   9 (00)                     Tucking and Stitching.                150 to 300 Cotton.

                        Calicoes, Linen, ulnen shirting.
   10 (0)                        Lucking, Lemming and
                                           30 10 3 30k troit.

   11 (1)     Shins, Silks
                                                    21 00 20 69 C0 10st.        alia at dare on done a cons,

  12 (1⅓)            Goods,10045,heavyheavy sits, Slices, icht Yog lon                                                 20 10 30 silk tovist.

  13 (2)
                                            16 10 24 9 la tost.

 14 (2½)                                      O to 21 Cotto

  15 (3)                                                           • to b0 thread. v
           Bags, coarse Cloths, heavy Goods of any            otton or Sily, coars

 16 (3½)                                           5 to 35 Thread, seldon           Very heavy Goodsis wantea.where a strong Thread     equired in family sewing

    Use only needles which bear the numberon their top end and buy
needles only in the shop where the machine has been purchased.
View original page 9Page 10 · Read text
The Improved Sewing Machine.

      Directions for using the attachments.
     The attachments should not be used before thorough proficiency in
ordinary sewing with the machine has been acquired. The various fittings
for other work are so carefully described and accurately depicted in the
following pages, that learners will experience no difficulty in the use of them.

           THE BRAIDER.


     THE BRAIDER is a presser foot which has a slot in front of the needle
         It is to be attached to the presser bar. A wooden spool upon which
 the braid is evenly wound is placed upon one of the pins. The end of
 the braid is passed through the eyelet, then through the slot in the braider
and drawn back, so that it lies right under the needle.It is only necessary
 to guide the fabric properly to sew down the braid for my previour des
 signed pattern.
                                        IMPORTE: *
                                           REPAIRERS OF
                                        SEWING MACHINES
                                                 IT PRA
                         3A CHAPELS
View original page 10Page 11 · Read text
The Improved Sewing Machine.

         THE HEMMER.


    THE HEMMER. To make a narrow hem: Attach the hemmer to the
presser bar: lift the presser foot, commence the hem by folding it at the
end, attach a thread to it with a needle,draw the thread and the fabric into
the hemer (or pass the edge of the fabric into the hemmer
thread), lower the presser foot, and commence to sew; guide the edge of the
fabric with the right hand taking care that the fabric entirely fills the mouth
of the hemmer. If the edge unfolds out of the hemmer, guide the fabric to the
right; if it folds too much into the hemmer, guide it to the left.
     To make a broad hem: Use the wide adjustable Hemmer as shown in
diagram, fold the fabric thedesired breadth (including the plait) and pass
it through the hemmer in the same way.
     To make a broad hem with a thicker fabric, use the ordinary presser
foot, fold the fabric twice to the desired breadth bringing the inner side
under the presser foot.
View original page 11Page 12 · Read text
The Improved Sewing Machine.

       THE FELLSEAMER.


    THE FELL SEAM FOOT ist attached and used similarly to the foregoing
       To make a fell seam, join the two edges of the fabric by a seam
about three eighths of an inch from the edge, then open out the seam, turn
one into the hemmer to turn the feli.


                    BROS             WARD
                * IMPORTEREPAIRERS OF
                          SEWING MACHINES
View original page 12Page 13 · Read text
The Improved Sewing Machine.


       THE ADJUSTABLE HEMMER.


    THE ADJUSTABLE HEMMER for hemming towels, napkins, tablecloths
and other coarse fabrics enables the operator to make hems of various widths.
Adjust the hemmer to fold the desired width of hem, fix it firmly to the
machine with the thumb screw, then turn down the edge of the fabric one
fold only, and pass it into the hemmer with a double fold to complete the
       If the sewing is not on the edge of the hem,loosen the screw and
move the hemmer a little to the right or left, until it is in the right position.
View original page 13Page 14 · Read text
The Improved Sewing Machine.

     THE ADJUSTABLE BINDER.


    THE ADJUSTABLE BINDER serves for binding cloths, hats, shoes,
mantles ete., and is used with the ordinary presser foot. Adjust the binder
 to the desired width of binding, fix it firmly to the machine with the thumb
screw; place the edgesof the binding under the clips and its end over the
 feed points; then place the fabric between the clips, and guide it against the
         If the sewing is not on the edge of the binding,loosen the screw,
and move the bindera little to the right or lert,until it is in the right
 position; the under clip may be adjusted to fold the binding wider on the
under than on the upper side of the fabric.


                  NARD EROS
                             IMPORTER
                               REPAIRED.
                                 SEWING MACHINES

                   224 CHAPS
View original page 14Page 15 · Read text
The Improved Sewing Machine.

       THE QUILTING GUIDE.


    THE QUILTING GUIDE.
make a straight line           Attach the guide as shown by the engraving,
 upon it; then adjust theupongaugethe armfabricto thewithrequiredchalk ordistanceby creasing,for theandnextstitchline
of stitching, and guide the fabric with the line alreadysewn directly under
the gauge arm. This second line serves in like manner as a guide for the
third and so on.
View original page 15Page 16 · Read text
The Improved Sewing Machine.

      THE STRAIGHT GUIDE.


                            WARD
                                                                              IMPORTE


                                                                                                    SEWING MACHINES,
                                                A CHAPEL ST, PRASAN


    THE STRAIGHT GUIDE is fastened to the plate by a thumb screw if a
seam is to be made parallel to an edge. The straight edge of this guide is
fixed so far from the needle that the stitching is formed the desired distance
from the edge of the fabric. This guide also serves to sew frills and borders,
also to sew in a straight line and at an equal distance from other seams.
 It saves the trouble of drawing lines.
    THE SMALL PRESSER FOOT OR EDGE STITCHER.
 serves for sewing rows of stitching running close along the edge.
kind of apparatus as the ordinary sewing foot, only one of the small prongs
on the right hand side is left out, whereby the edge of the cloth can be
seen while sewing.    It can also be used with advantage for sewing very
narrow rows of stitching, running along the edge, for which purpose the
guide also should be used.
View original page 16Page 17 · Read text
The Improved Sewing Machine.

  The following extras are supplied with each
           improved Family Machine:
   10 Needles                                         1 Smal presser foot
    6 Bobbins for shuttle            1 Straight guide
    1 Fell seamer                                1 Screw for straight guide
     1 Adjustable Binder             1 Braider
     1 Adjustable Hemmer            1 Screw driver
     1 Quilter                                 1 Throat plate with large hole
    1 Hemmer                    1 Oil can
    1 Presser foot                                 1 Instruction book
    1 Wide Hemmer


  Accessories given with each Saxonia Machine:
   6 Needles                                1 Quilter
   4 Bobbins                                1 Straight guide with screw
   1 Presser foot                                 1 Throat plate with large hole
   1 Fell seamer                                 1 Screw driver
   1 Braider                               1 Oil can
   1 Small presser foot              1 Instruction book

The machine possesses the following advantages:
        Wheel nickelplated.
         Feet nickelplated.
        Automatic bobbin winder, reliable and regular in its working.
       The most simple loose wheel apparatus.
        Inch measure on table.
        Casters on stand.
        Opening tension discs.
       Choice wood work.
          Indestructible cog wheels.
        Extra size driving wheel.
        Shuttle lever.
       Improved shuttle etc. etc.
View original page 17Related documents and language editions
From the ISMACS International. Original publisher and archive notices are retained.
Check the model and edition against your equipment.
PDF verified 2026-10-11.