Film cameras
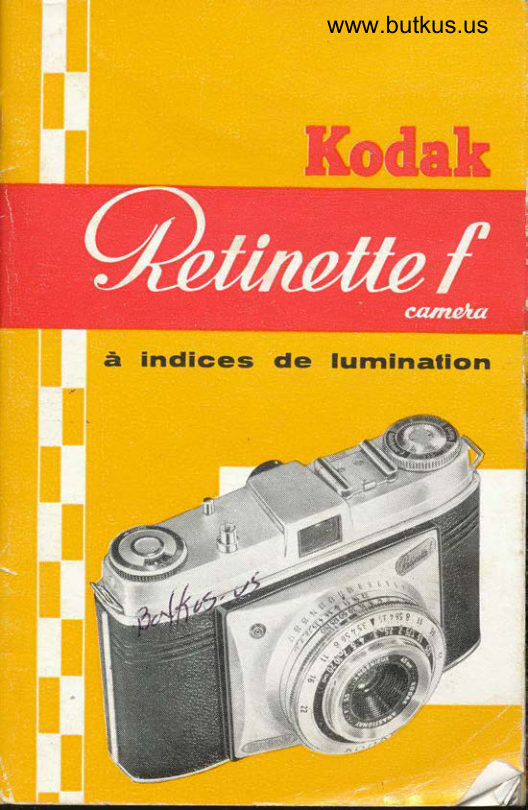
Kodak Retinette Booklet (different models) Product booklet
Product booklet for Kodak Retinette Booklet (different models). 67 pages in English. Read the original PDF, download or print a copy without registration.
67 pagesEnglish4.9 MB PDF
Loading your manual…Open PDF directly
Document details
- Brand
- Kodak
- Model / document
- Kodak Retinette Booklet (different models)
- Document type
- Product booklet
- Language
- English
- Pages
- 67
- File size
- 4.9 MB
- Category
- Film cameras
- Document date
- Not specified in catalog
Search available document text
Find a term, then jump to its page in the original PDF. Image-only pages may not be searchable; check the PDF for exact wording and diagrams.
Page 4 · Read text
www.butkus.us
              TTIE RETII{ETTES

  The Retinettes are miniature cameras producing a negative
       |                (24 x 36 mm.) on 35 mm. film. A single load      -in. x l$ in.   of film in a standard cassette will take up to 36 exposures.
  The film can be loaded and unloaded in daylight. The
   Retinettes are snapshot cameras for all general photography,
   espgcially candid action and other life subjects.
    The Retinettes owe their mechanical qualities to the fact
   that. they use the same die-cast body unit and transport
   mechanism as their more expensive sijter, the Retina series
   of cameras. The body has a hinged-on back, the lock of which
    is covered by a protecting safety latch to prevent accidental
   opening of the camera. The body itself is of rigid (bellowless)
   construction, the lens and shutter unit being mounted on the
   front panel.
    The Retinette film track is specially designed to keep the
   film really flat without risk of scratching the emulsion. The
   film is wound on by a transport lever, which with one full
   swing advances the film to the next frame, and also moves the
   film counter and re-tensions the shutter. That system
   provides an efficient double exposure lock, which can,
   however, be circumvented by special deliberate procedures.
  The film lock, which arrests the film after each frame, can
   also be released.for advancing the film without exposing
    it (e.g., when reloading a part-iy-used film).
    The viewfinder in the latest models of all Retinettes is a
   large bright line-frame reflecting eye-level finder, showing
  the image almost in natural size. Previous models of the
   Retinettes have an optical direct vision finder, showingthe
  image about three-quarters natural size. The finder is
  placed centrally above the lens, thus avoiding lateral
   parallax errors.
    The Schneider Reomar lens f 3.5 built into the Retinette,
   Retinette landlA,(F2.8 in the Retinette lB, ll and llB) isa
  3-element triplet with a focal length of lf  in. (45 rr.),
  covering an angle of 5l'. lt has a front cell focusing mount-4 which can be focused down to 3{ ft. Definition and colour
View original page 4Page 5 · Read text
EARLY RETINETTE CONTROLS

                                ru--
                                                                                   -T0
                                  T4-                                       1-- 88                                   sl0

                                                                                                    t4
                                              --------  t2

                                  s2                          ----------                                    T5 --
                                                             l/l -

Lens: Ll, lens; L4, aperture
speed index. Focusing: Fl,       s13 _
focusing mount; F2, dis-      tl--iitance scale. Shutter.' 52,
shutter release; 54, shutter      (ospeed scale; 56, light value
control; S8, shutter speed
ring; 59, flash socket;
Sl0, cable release socket
(in release button); S 13,
self-timer lever. V iewfi nder :
Vl, viewfinder; V2, finder
eyepiece. Film ond trons-
port: Tl,  rapid winding
lever; T4, film counter; T5,
film counter setting wheel;
T6, film indicator (in re-
                  rewind       Ig      knob);wind           T7,
knob; T8,                                                Il ---'--u          reversing                   button;
T9, film release. Body: 83,
back lock; 87, tripod bush;
88, accessory shoe.
Iop:Top view. Upper cente:
Front view. Lower centre:
Bottom view. Bottom.' Rear
view of upper part of
camera.
View original page 5Page 7 · Read text
RETINETTE  I, II, AND IIB CONTROLS
 Focusing.' Fl,   f ront  cell
 focusing mount  ( l) or focus-
 ing knob (connected to              llltllrlirl
front lens mount on models
 ll, llB); F2, distance scale;              ililti
 F3, depth of field scale or
automatic depth of  field
 indicator. Shutter: 52, re-
 lease button; 55, light value
scale; 56, light value setting
lever; SB shutter speed
setting ring; 59,  flash
socket; Sl0, cable release
socket (in release button);
S f 3, self-timer lever. Ex-
posure meter (llB only; E2,
meter cell E5, light value                                                               $0
scale on meter setting ring;
E6, film speed setting; EI,
meter needle; E8, setting           rnril-pointer. Viewfinder: Vl,
finder window; Y2, eye-                       -E_---BEpiece. Film ond transport:
                         lever;    rapid           wind ingT  I ,
T4,                           film    rt--+l         counter;                T5,    film
counter setting button: T6,
film indicator; T7, rewind
knob; T8, reversing button;
T9,  fi lm release button.                                          -s6
Body.' 83, back lock; 87,
tripod bush; B8, accessory
shoe; B I I, eyelets for carry-
ing strap. Speciol feotures.'                                                     _tl               window     illuminating2,,               =                    TAlU ---- II                                                                   _83                       Top:          frame.for    finder
General view of  the      Il -                                        :87Retinette llB against a I in.
scale grid. Upper centre:      i4 - -+@umuni'njf,{f    re----5 mmxfu+ --T7
                                llB.Top    view         of Retinette
Lower        centre.'             Front view                           of t,-_JF-                       --'ir
Retinette  llB. The Retinette
ll is identical, but without
the exposure meter and
meter controls.) Bottorn;
Front view of the Reeinette
t.
View original page 7Page 8 · Read text
www.butkus.us

   correction are very good. The optimum performance  is
   reached at f 6.3. A depth of field indicator ti fitted.
  The Retinette Models
   o RETINETTE  | (195^8) follows the general description on page 4,
    b.eing fitted. ryltft a lf, in. (45 mm.) R=eomar f3.5 lehs, Compur-F,apid    shutter with light values, and line-irame find6r.
     RETINETTE lA (1959) is similar to the Retinette I but with 4-speed
   vero shutter, l/30-l/250 sec. and B. As this model is substantialli the
   same as the model l, it has not been referred to separately.
   o RETINETTE  ll (1958) is similar to the model l, but has a lf; in. (45
   mm.) Reomar  f 2.8 lens, automatic depth of field indicator and a fiim
   counter built into the body itself (insiead of being mounted on top).
    r RETINETTE llB (1958) has the same features as the Retinette  ll, but
    in addition is fitted with a built-in photo-electric exposure meter.
     RETINETTE llA (1959) is similar to the model llB but with pronto-
   mat shutt-er giving_fully automatic exposure setting. Handling is the
   same as for the llB, except for shutter speed an-d aperture where
    special instructions apply. See Prontomat p. l2 and Retinette llA
   Exposure Meter, p.59.
     RETINETTE lB 1959 follows the general description of the Retinette
   on p. 4. lt has a built-in photo-electric exposure meter which is coupled
    _to lhe aperture setting. The shutter is the Pronto LK speeded fiom    l/15 to l/500 sec., B, line frame finder and f2.8 Reomar lens.
   o RETIN.ETTE.(1954)  is similar, but fitted with a simple eye-level optical
    finder. The earliest models of 1954 did not incorporaie a light-value'scale
   on the shutter.
   a PRE-!954 MODELS. Between 1942 and 1952 some cameras of the
   Retina family were made with bellows, pressed-metal  (instead of die-
    clst) body, slow lenses of f 4.5 or f 6.3, and three to eight-ipeed shutters.
   These were also called Retinette.
     Models marked a are no longer in production but may still be avail-
   able in some countries.

  Coated Lenses
    The Reomar lenses of the Retinette cameras are coated. Coating,
   or, as it is sometimes called, blooming, consists of the application of a
   microscopically fine film of magnesium fluoride on the lens surfaces
   which considerably reduces the light reflection at glass and air surfaces
    in the lens. This results in a more brilliant negative, especially in the
   shadow regions where the tones are most subdued and so brilliance and
A contrast are most needed. The fact that a lens has been coated can beU recognized by observing in the lens reflections of, let us say, a lamp,
View original page 8Page 9 · Read text
which               ?ppear distinctly coloured, as a rule rather deep brue with a          tinge of red.
     The Care of Lenses
         The treatment and care of lenses is important. on account of its
         chemical composition,  h'€1, quality optical'grass is susceptible to the
          Influence ot moisture, and for this reason never touch the glass with the
          fingers. Since complete protection is impossibre, clean thE lens surface
          occasionally with a clean, soft chamois liather. Grease, rain spots, etc.,
        may be removed with a pad of cotton-wool moistened in ethei. Neithei$         glass nor the coating  filrir will be affected by this treatment.
      Lens Hood
         The lens hood is a tube, as a rule made from metal, ptaced over the
          front of the lens to protect it from light coming from oulside the actual
         picture area. There                                      .is no picture wtricn cou-ld not be improved in           clar.ity.and brilliancy.by the use of a tens hood. The wider thd aperture
           of the lens the more important  is the use of the lens hood. wheri stront
           light coming .froT- objects outside the actual picture area strikes thE
           lens,  it, considerably reduces the brilliance of dhe picture. This applies
         not only to photographs taken against the light-when the lens'liood
         besgme_s indispensable-but also to sunshine in general.
        The Retinette models use-a c.lip-on lens hood-which grips the rens
       mount by means of spring cheeki.
     The Shutter
       THE COMPUR-RAPID shutters of the Retinettes carry speeds of
        1,,12, l14, 118, l/15, l/30, 1160, tltZS, tIZSO and t/500'sec.andaB
          setting for time exposures. These speeds are marked ai whole numbers
        thus l/2sec. is marked as 2, l/125-sec. as t25, and so on.
         To set the shutter-speed,  rotatg__the milled ring to bring the required
        speed opposite the index mark. The shutter spled scalS rotated with
        the s.peed setting ring. For some of the speedi the right varue setting
       may have to be re-adjusted (see page l0).'
       THE EARLIER COMPUR-RAPID shutter (without light varues) is
         lgt by tu.rning the.milled ring so.as tobring the red dot6n it oppoiite        the required speed. The speeds themselves are marked in the same way.
         LIGHT VALUEs. The shutter also carries a scale of numbers engraved
          in red on the same ring as the shutter speed scale and on moders'll and
          llB on the same ring as the aperture stale. These numbers run from
      2 to l8 and represent light.ialues for correct exposure. Each right
        value represents a range of shutter speed-aperture'combinations, Eut
            is           .covered by.a single setting. The latdst exposure meters are now also
          -calibrated in light values; the reading can dhus be transferred directly         to the shutter.
View original page 9Page 10 · Read text
www.butkus.us

     To set the light value on the Retinette and Retinette l, push back
    the sickle-shaped lever behind the light value scale on the shutter rim
   and move it sideways to set the red dot to the required light value.
    Note, however, that only settings from 3| to l8 are possible in spite of
    the fact that the scale shows figures down to 2. On the Retinette  ll and
     llB the light values are engraved on the same ring which carries the
     lever and are set opposite a red arrow head on the shutter speed ring.
     You can now choose any shutter speed or aperture without changing
    the exposure.  lf you alter the shutter speed, the aperture will auto-
     maticall)r set itself to the correct value, or if you change the aperture,
    the shutter speed adjusts itself automatically to keep the effective
    exposure constant.
    To change the shutter-aperture combination just move the speed
    setting ring until the index mark points to the required apefture or
    shutter speed respectively. Keep the aperture lever pressed against
    the speed setting ring to avoid changing the light value setting. Inci-
     dentally, intermediate light values can also be set, e.g., 5{, 6{, etc., for
     really accurate work.
     The shutter may be used in the conventional way too; in this case the
    shutter speed has to be adjusted first and then the aperture.
    FOR TIME EXPOSURES on either type of Compur-RaPid  shutter set
    the index of the milled ring to B (:  brief time). On releasing, the shutter
    will remain open :rs long as the release button is pressed down and
     closes as soon as the pressure on the release is removed.
     The green figures on the exposure scale are for calculating time
    exposures. With the shutter speed ring set to B, and the light value
     scale to one of the lower values up to 6, the green figures indicate the
    length in seconds of the exposure required and which stoP to use.  lf,
     for example, the light value is set to 3 any of the following combinations
   may be used: 4 sec. at f 5.6; 8 sec. at f 8; 15 sec. at f ll; or 30 sec. at
      f 16. In that case, re-set the aperture by means of the light value lever,    and expose for the required number of seconds.
      For such time exposures the camera must be mounted on a firm
    support such as a tripod.
         It is safest to release the shutter with the help of a cable release to
    avoid shaking the camera. This release screws into the bush in the
    centre of the body release of the camera.
      For long time exposures-where the shutter is to remain open for
    longer thin you can conyeniently keep the release depressed-use a
     cab-le release with a lock. To make the exposure set the shutter to B,  '   and press the cable release plunger with the locking plate lifted. The
    shutier will now remain open until the locking plate is depressed. On
    cable releases with locking screws, tighten tlre screw on pressing the
    plunger and undo the screw to close the shutter.
    THE DELAYED ACTION RELEASE for self-portraits built into the
l0  Compur-Rapid (with or without light value scale) is brought into action

                                                                        4
                                                                                                                                                                                                                           I

                                                                                                                                                                                                                                                                                                                                                                                                                                                                                                                                                                                                                                                                                                             i
View original page 10Page 11 · Read text
THE LIGHT VALUE SHUTTER


          t5 30 60t25250500
      f5 f+13 tzn tc g I765432
                                                   22 t6 1 g 6.6 /. 3.b

The Compur-Rapid shutter of the Retinettes has a light value scale and coupled
aperture and speed settings. All the aperture-shutter speed combinations obiain-
1bl9 at a given.!tgt'tl v.alge setting correspond to the same exposure. On theRetinette  ll and llB the light value scale is on the top of the shutrer (left) together
with the shutter speed settings. The aperture settings are underneath tlie sliutter.
On the Retinette and Retinette.l  the. aperture-speed combinations are paired off
opposite e.ach other, and the light value scale is at the side of the shuttir (right).
To alter the shut-ter-aperture combination, move the milled shutter speed ling
ynlilthe aPProPriate aperture.and speed a.rg._opp_osite the index mark (on top and
below the shutter on the Retinette ll and llB).See also page 10.


With a given light value (u.g., I l), setting a fast speed automatically opens the
lens, while stopping down automatically sets a slow speed to keep the exposure
constant (right). To alter the exposure for  d ifferent light cond itions, sim ply
change the light value setting (/eft).
View original page 11Page 12 · Read text
www.butkus.us

    by movlngthe leveron the left of the shutterto "V". On p-ressing the
    release button with the lever set to V the shutter goes off after a delay
     of approximatley l2 sec., giving the operator time to take his place in
    the'picture.  lt goes without saying that the camera must be mounted
   on a rigid support, preferably a tripod.
      After having released the shutter in the ddlayed action settinS, the
    lever automatically moves back into the standard position (X) to avoid
    the next exposure being inadvertently taken with the delay in action.
     The shutt-er is flash-synchronized;  for details, see page 67.
    THE VERO SHUTTER of the Retinette lA has four speeds l/30' l/60'
     lll25, l/250 sec. and B, set by turning the outer milled shutter rim
    t6 the rbquired speed. Time 6xposurei are made as described for the
   Compur shutter. There is no delayed action.
    THE PRONTO LK SHUTTER of the Retinette lB has 6 speeds l/15,
     l/30,   f /60, lll25,l1250, l/500 sec. and B, with built-in delayed action and     flash contact. Speeds are set by the outer milled ring, time exPosures
    as for Compur (page 9).
    THE PRONTOMAT shutter of the Retinette llA has no speed indica-
    tion. ln daylight set the sun symbol on the shutter ring to the black
    index mark and use the exposure meter as indicated on page 59. For
     flash pictures set the shutter to the flash-symbol (the shutter sgeed is
               f /30 iec.) and proceed as for "X" flash synchronisation, page 67. For    time exposures set "B" on the shutter ring opposite the black dot. The
    aperture  is then always f 22. Use the "22" on the right. The 22 on the
      left is for flash.
    THE PRONTOR S or SV shutter of pre-1954 Retinette models has
    speeds from I to l/300 sec. and is set by rotating the milled ring which
     cirries the speeds to bring the required speed opposite the index
    mark on the front of the shutter.
       This shutter (as well as the simpler ones fitted to some of these early
    models) requires tensioning separately before every exposure. For
    that ptirposi push the tensioning lever (just behind the shutter speed
     ring) anti-clockwise until it engages. The camera is then ready to shoot.
      For time exposures proceed in the same way as with the Compur
    Rapid shutter; again remember to tension the shutter. There is no
    green scale of figures. The cable release screws into the release button,
    or (on models before l95l) into a socket next to the button.
     To tension the self-timer, pull the lever with the red dot on the left
    of the shutter (seen from the front) clockwise as far as it will go. gn
   some models this lever is also used for flash-synchronization (page 67).

l2
View original page 12Page 13 · Read text
HANDTING THE RETINETTES  '   ;ii.
 Let us assume that we have a standard 35 mm. film cassette
 available for the Retinettes. Our first task is to load the
 camera with film. This should be done in subdued daylight.
Loading the Retinettes
    l. Open back.
  2. Pull out film rewind knob.
  3. Insert cassette with film in film chamber.
  4. Push back rewind knob.                                            'q.f.
   5. Thread film end into slit of take-up spool.
  6. Close camera back.
  7. Turn film counter to I  mark.
  8. Make blind exposures.
  9. Set film indicator.
 l. Turn the double lever surrounding the tripod bush in the direction
   of the arrovv. Then press the little-button underneath the rever, and
^ !h" back will spring open.2. Pull out the milled knob above the empty film chamber.
3. Insert the cassette so that the projecting siool peg ries in the recess in
   the bottom of the spool chanibei.
5. Pull out about 3{ in. of film from the cassette. Turn the built-in
   take-up spool so that the slot faces the camera back. Fix the film
   end in the slot. Make sure that the film lies flat in its grooves between
   the spools.
6. The camera back is closed by pressing the back against the body
   until the catch engages.
7. Turn the milled edge of the outer rim of the counter window while
   pressing the film release button (on the rear of the top between
   finder and counter window) until the arrowhead I  pointi to the ]  mark in the counter window. lf a 2O-exposurell'm is used, the
  diamond mark between the numbers 20 and 2s shourd be set to the
   arrow-head.
   on the Retinette  ll and llB push the film counter setting button
   at the right of the viewfinder in the direction of the ensravdd arrow
  while pre-s-sing the film release button behind the expo-sure counter
  window. Keep pushing the setting knob until the diamond mark (O)
   beside the numbe.t 36 !l the exposure counter is opposite ttre ndti6   in the window.  lf a 2O-exposure film is used the diamond mark
  between the numbers 20 and 25 should be set to the notch.       t3
View original page 13Page 14 · Read text
www.butkus.us

LOADING


          tr
Top row: Open the camera bac|1 pyll. up the rewind knob, insert the cassette in
ttr! ntm chimber. Second row: Push batk the rewind knob, attach the film end
to the take-up spool, close the camera back. Third row: Set the film counter to the
diamond mark (Retinette  l, tB, left; Retinette lland llB, centle), press thefilm release               'transport                         iever repeatedll: Bottom row: Carry on until the filmand work the
counter indicates No. 36; finally set the film indicator-
View original page 14Page 15 · Read text
PRE.'954 RETINETTE MODELS
    Right: The 195 | Retinette
    model was a folding camera
    with a somewhat different
    body layout. The lens was
   a 2 in. (50 nrm.) Reomar
       f 4.5 in a Prontor S shutter
    with speeds to   li 300 sec.
   The 1952 model had some-
    what modified controls and
   an X M-synch ron ized sh ut-
    ter, but otherwise re-
    sembled the earlier model.
I   In this later version theI   viewfinder housing extend-
   ed right across the top of
   the camera.


                                       1           fti\:lt   ';^:':"-i l:t
                                                                                                                                                                                        I                      Brn-'*A

     Early Retinette features: opening the camera back (left); the reversing iever at
     the back of the camera (centre  left); opening the front (centre right); closing the
     front (press the two buttons at the side of the baseboard and push the front
          cf osed- right).


                                                Setting the slrutle-r speed and rensioning
                                                           !J,q:t',q!ter (far left); setting rhe aperturd                                                              (reft). The shutrer of these rnodels had
                                    no light value scale.
View original page 15Page 16 · Read text
www.butkus.us

    8. Now pull'out the rapid tninding lever and let it fly back. Then press
      down'the film releas-e button. Repeat these two operations until the
       film counter indicates No. 36 or 20. The counter thus shows the
     number of the still-unexposed frames.
    9. Set the film indicator in'the rewind knob by pressing the index
       finger against the serrated ring in the centre of the indicator and
       turningit until the index marl< points to the type of film loaded into
       the camera.
   Loading Pre-1952 Retinette Mod.els
      The general principles are similar, but certain details differ appreciably
     (see also page 8).
      To open tie cdmera bock, lift uP the latch at the side of the body and
     pull the bacl< away. To close, prbss the back against.the body and fold
   down the latch.
      To moke the blind exposures, first make sure the lever at the rear of the
     film winding knob is set to "A" (advance). Open the front of the camera
    by pressing-the button in the 6ottom. Wind the knob until it locks,
    t6niion th6 shutter (page 9) and press the release button. Repeat this
    operation, and wind the film once more.     'To          set the film counter (after the blind exposures) turn the counter                                                                   No..l                                                          to                                                              its two-studs)                             (by                               means of              top                     of the body     disc in the
                                                                                                                          is                                                                 36.-bring.There                                         advances                       ThL                                counter                                          from I to                irrowhead.            the    opposite
    no film indicator.
   Holding the Retinette
                                                                       as        It is obvious that the camera should be held as steady
    possible, as the slightest shake, even if not seen in the
    briginal negative, witl become visible on enlargement.
    A particularly steady hold of tlre camera is necessary when
   working with speeds below I/60 sec.
     Always stand with your legs aPart.
     For horizontal photogrophi: Rest camera horizontally
    against the nose wnile-th'e eye looks. through.the finder.
    K-eep both elbows close to the body, the right thumb being
    pressed against the camera back, right index finger stretch-             -the                  film counter to the body release while the    ing over
    right middle finger, bent downwards,. Presses on camera
    fr5nt. The left hand grasps the camera body on its left side.
    After every exposura move the right thumb to the bottom
    of the camera ind pull out the rapid winder to advance the
16  film.
View original page 16Page 17 · Read text
HOLDING

                               Left: Hold ing the
                              camera for horizon-
                                taf  shots. Below:
                           Holding the  Reti-
                           nette for  vertical
                                   shots. See also page
                                                t8.                   close to your body.


                                               always stand with
                                                 the legs well apart,


Below: To be ready
for action all the
time, carry the Reti-
nette round the neck
on a short str?p,
preferably in its ever                            and hold quite still
ready case.                                              while you release.


                           Below: Whenever possible, support your body
                               against something solid, oF ProP your arms on a
                                fence, railing, or even on your knees when sitting
                      on the grou nd. Th is is specially im portant with
                         slow snapshot exposures. Use a cable release for
                         time exposures from a tripod.
   K Mffiff-
 RET-2
View original page 17Page 18 · Read text
www.butkus.us

           For verticol photogrophs: Rest camera upright against
           forehead and nose, holding the top of the camera with the
               left hand. Keep the left thumb pressed against camera back.
         The right hand holds the camera from below, right thumb
         on the body release, the camera resting In the palm of the
             right hand. Work the rapid winder with the second or third
            finger of your right hand.
            Io releose, use finger pressure only, keep the hand and
              its grip on the camera steady. The actual  pressing down
         must be done slowly and smoothly.
             For slow exposures in the hond rest the elbows or at least
            lean the body against some support in order to avoid shake.
             In this way l/8 sec. and with a very steady hand l/4 sec. can
          be exposed without noticeable camera shake.
            Use of a tripod is necessary when taking time exposures
         and it is also recommended for speeds from l/15 to I sec.
       A rigid tripod with ball-and-socket head should be employed
           to allow the changing from horizontal to vertical position.
         The tripod or ball-and-socket head top screw has to be
          screwed into the tripod bush in the bottom of the Retinettes.
         Carrying the Retinettes
           However elegant  it may be to carrY the Retinettes on a
           long strap hanging from the shoulder, this position is quite
            unsuitable for quick action. A better method is to carry the
          camera on a short straP round the neck, so that it lies on
           one's chest. Opening the case and lifting the camera uP to
           the eye is then a matter of a split second.
          The ever-ready case carries the camera ready for use;
           there is a camera holding screw which Prevents the Retin-
            ettes from falling out of the opened case.
         Shooting with the Retinettes
          The manipulations here described should be practised so
           that in time they will become Practically automatic.
                  l. Operate film transPort lever.
    18  2. Set light Yalue.

L
View original page 18Page 19 · Read text
SHOOTING


                 []r


                         Top row; Advance the film with the rapid winding
                            lever (left), set the light value (Retinette and
                             Retinette  l, centre; Retinette  ll and llB, right).
                           Second row: Select the aperture-speed combination
                                                                                                                                      I B, ll and llB, centre and  nAzA []r      (Retinette  l, left; Retinette
                                        right).
Third row: Set the distance (Retinette and Retinette  l, lB, Ieft; Retinette  ll and llB,
centre), sight the subject in the finder (right). Bottom: Release the shutter to take
the picture.
View original page 19Page 20 · Read text
www.butkus.us

                  3. Select aperture-speed combination.
                 4. Set distance.
                  5. Determine picture in viewfinder.
                 6. Release.
                    l. Swing the rapid winding lever through 180'to a definite stop, when
                  itwillautomaticallyfly  back into its original position. On old Retinette
               models turn the transport knob until it locks (see page l6).
             2. Determine the light value by means of an exposure meter (the built-
                   in meter in the case of the Retinette llB) or find it from an exposure
                  table or calculator. Set this on the light value scale of the shutter
                 (see page l0).
              3. Select the aperture-speed combination you want to use by turning
               the shutter speed ring to a fast speed (for action subjects) or to a
                small aperture (for greater depth of field). The aperture or speed
                respectiyely is automatically adjusted to give correct exPosure
                 corresponding  to the light value set.
             On the Retinette ll and llB the depth of field indicator (page 45)
                 automatically shows the available depth of field as you move the
               speed ring; you don't have to worry about the aperture at all. On
                 Retinette lB a pair of engraved arrows on the shutterfront indicate
                the depth of field at f 5.6.
            On Retinette models without light value scale you have to set the
                shutter speed and aperture separately. For shutter speeds, see PaSe
              9. The aperture controls the effective opening of the lens. The
                 smaller this opening (e.g., when the lens is "stopped down") the
                 greater the depth of field. However, as less light can Pass through the
               itopped down lens in a given time, the exposure must be longer.
              To set the apefture move the aperture lever to the appropriate
               number. On models with light value scale, adjusting the light value
                  also sets the aperture at the same time.
              4. Set the distance by turning the front of the lens mount until the dis-
                 tance figure engraved on the mount is opposite the black arrowhead
             on the front of the shutter. On the Retinette ll and llB move the
                focusing lever below the lens. The distance has to be estimated or
              can be measured with a separate rangefinder (see page 2l) which
             may be attached to the camera accessoD/ shoe. See also page 49. _
                5. Thd optical finder with bright-line frame of the Retinette  l, lB, ll, llB
              shows the subject area outlined by a brilliant frame reflected into
                the view. This automatically ensures that the eye sees the correct
                    field at all times. Outside the frame the surroundings of the subiect
               are also visible. When taking photographs nearer than 8 ft. the
                 negative includes slightly less at the top of the horizontal picture. Th-is
                  reiluction of the field is indicated by two short lines for 3{ ft. At
                 distances above 3| ft. the limit moves upwards to coincide with the
                bold top line at 8 ft. and over. The field lost on toP is added on the
      20    bottom'of the horizontal picture (see page 2l).

L-
View original page 20Page 21 · Read text
THE RETINETTE  l, lA, lB, ll, llA and llB FINDER


                                                          Left: The Retinette  l, lA, lB, ll, llA
                                      and llB finder shows the subject
                                                   in almost natural size, outline by
                             a brilliant reflected line frame
                                         which appears suspended  in space.


                                                   Left: The two marks below the
                                   top of the finder indicate the
                                                        limit of the field at close distances,
                                      owing to parallax. The full sub-
                                                   iect area covered at about 3 to 4                                                          ft. is shown here by the dotted
                                                          lines. See also page 20.
A rangefrnder may be fitted in
the accessory shoe of the Reti-
nettes. This has a fixed mirror
and a movable one; a dou ble
image is seen in a bright central
spot and these fuse together as
the control wheel is adiusted.
The lens is then set to  the
distance indicated.


        .'-':t"'"'--
View original page 21Page 22 · Read text
www.butkus.us

       The direct vision finder of the previouS Retinbtte models should
      be helcl close to the eye. Do not attemPt to turn the camera to the
        right or left, away from the eye' nor must the eye.bernoved from
         th-e centre of the eyepiece to find the limitation of the field of view.
      This "spying rouni ihe corner" is deceptive,. as.th.e film records
     .  only thigsedtion seen in the finder, when you hold the eye close to
       the'centre of the eyepiece while looking straight ahead. The field of
      view given is exactfor photographs taken at 9 to l2 ft. At.infinity a
         trifle irore appears on the negative than is seen through the finder,
      and at 3 to 6 ft, a shade less.
    6. To release the shutter gently Press the release lever-. Speeds from
                 | /30 to  | /500 sec. are initantin'eous and can be taken from the hand.
           It is, however, advisable to use t/30 as sparingly as possible from the
                                                                                       a       hand, as there is some danger of ierking the camera' and even
       slight ierk, six or eight times enlarged, results in unsatisfactory
        definition.
   Unloading the Retinettes
      After all exposures have been taken, i.e., when the film
   counter has reached No. l-or No. 36 on old models-the
    film has to be wound into the cassette in order to remove  it
   from the camera. Do this in subdued light.
        l. Depress reversing button.
     2. Rewind film.
      3. Open camera back.
     4. Pull out rewind knob.
     5. Remove cassette.
     6. Close camera back on insert new film.
      l. Depress the reversing button in the bottom of the camera. (On
       prd-tlsz Retinette models moye the -reversing. lever below the
       winaing knob to "R".)'allWind the rewind knob in the direction of the       engravEd arrow until    the film is wound back; this is done when
      thd resistance of film rewinding ceases and the knob turns freely.
    2. Open the back as described on pige l3 (No. l).
   Cutting off Exposed Film Parts
           lf a film which is only partly exPosed has to be processed,
      it can be cut off in th6 darkroom or in complete darkness.
    After the last exposure the film transPort should be wound
   on once more (dhis in the dark), the camera back opened
22 and the film cut about * in. away from the cassette. The
View original page 22Page 23 · Read text
UNTOADING


lop left;.To rewind the film after exposure, depress the reversing button in rhebase of the camera. Top centre; Turn the rewind knob to rewind t--he film into its
cassette . ToF right: Open the camera back (see page l4).

Bottom left: Pull up the rewind knob. Bottom centre; Remove  tl-re cassette from the
film chamber. Bottom righu Close the camera back again, or reload with a new
fif m. See also page 22.
View original page 23
Page 24 · Read text
www.butkus.us

          exposed part on the take-up spool is removed by pressing
          the reversing button, winding the film from the take-up
           spool and wrapping it up in three layers of black opaque
           paper. The remaining film in the cassette can now be re-
            inserted on the take-up spool (the reversing button auto-
             matically jumps out on actuating the rapid winder), and the
         camera closed. lf the re-inserting has been done in the
         darkroom no further blind exposure is necessary;  if the
            film has been re-inserted in daylight, two blind exPosures
           should be made. The exposure counter should be advanced
            by two to allow for the loss offilmincutting and re-inserting.
            The process is virtually the same with pre-1952 Retinette models,
             except that the reversing lever (instead of the button) and the film
             transport knob (instead of the lever) are operated.
        Changing Partly Exposed Films
         To replace a partly exposed film by another one-for
            instance,  if you want to take a few colour photogr,aphs in
          between soine black-and-white shots-proceed as follows.
                  l. Check number of unexposed frames shown on
                  film counter.
             2. Rewind film.                                                        -t/)            3. Unload.                              -<
         When reloading:                     go#u
            4. Load film in camera.
             5. Close back.
             6. Set film counter to starting point.
             7. Depress film release while winding film on.
             2. When rewinding the film be careful to wind only until you feel some
                  resistance. In the ordinary way this resistance would have to be
              oyercome in order to puli the film end from the take-up spool.  lf
                 the film is to be reloaded again, you must not pull the whole film into
               the cassette, otherwise the film end will have to be extricated by
               opening the cassette in the darkroom for subsequent re-insertion
             .      into the camera.
              3. Take the re-wound film out of the camera. For reference, note the
             number of exposures still left on the film and write this number on
               the label of the cassette. Then put it into a container or wrap it up.
      24   Now you can load the camera with any other type of film.

\
View original page 24Related documents and language editions
From the M. Butkus archive. Original publisher and archive notices are retained.
Check the model and edition against your equipment.
PDF verified 2026-10-10.