Film cameras
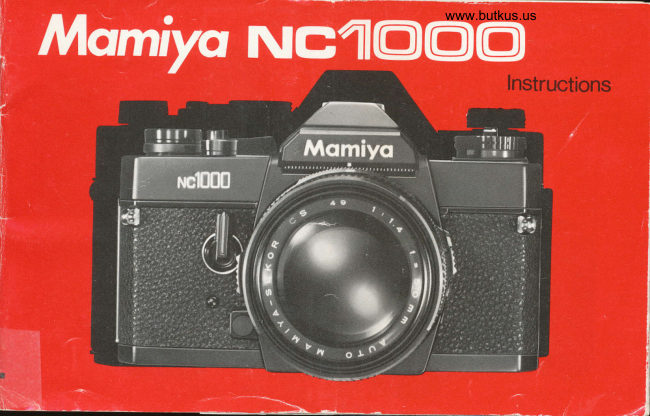
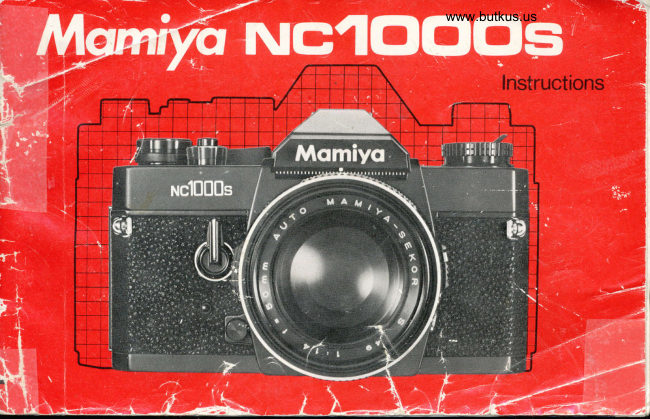
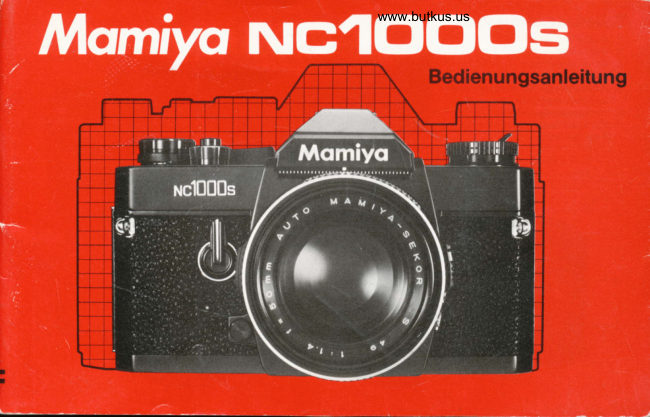
Mamiya NC1000 User manual
User manual for Mamiya NC1000. 37 pages in English. Read the original PDF, download or print a copy without registration.
37 pagesEnglish23.9 MB PDF
Loading your manual…Open PDF directly
Document details
- Brand
- Mamiya
- Model / document
- Mamiya NC1000
- Document type
- User manual
- Language
- English
- Pages
- 37
- File size
- 23.9 MB
- Category
- Film cameras
- Document date
- Not specified in catalog
Search available document text
Find a term, then jump to its page in the original PDF. Image-only pages may not be searchable; check the PDF for exact wording and diagrams.
Page 2 · Read text
The Mamiya NC 1000 is an innovative 35mm bayonet-mount
automatic SLR camera which has been developed with Mamiya's
superior technology and long experience as a leadirrg manufac-
turer of professional medium-format cameras.
This new camera offers the ultimate in handling ea$e because of
its compact size and light weight. Moreover, the open-aperture
metering system assures that the large, brilliant viewfinder
always remains bright, and the exposure automation system  is
of the popular shutter-speed priority type, in which the carnera
meter automatically selects the correct aperture in accordance
with the shutter speed selected by the user.
The NC 10O0 is designed to meet the needs of_the amateurand
professional photographer alike. To further enhance its re-
markable capabilities, a wide range of accessories are available
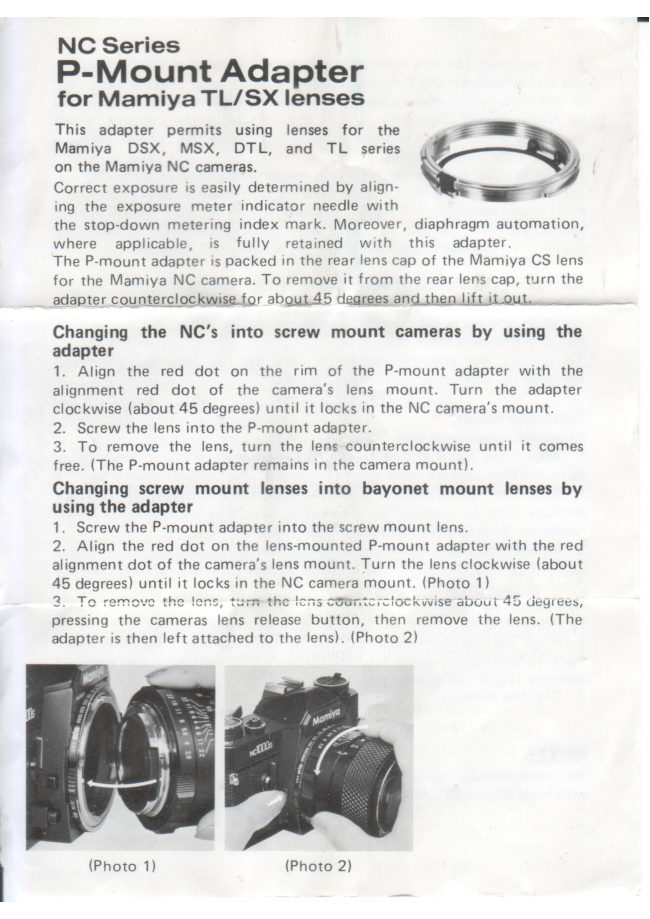
including an adaptor which allows stop-down metering and
diaphragm automation with the TL, DTL, SX series and other
universal thread (42mm) mount lenses.
Every care has been taken to assure that your Mamiya camera
will provide you with years of trouble-free service. However, to
avoid possible mishandling, be sure to read this instruction
manual carefully before using your new camera.
View original page 2
Page 4 · Read text
Nomenclature
 1. Exposure Counter
 2. Meter OFF Button
 3. Film Advance Lever
 4. Shutter Release Button
 5. Hot-Shoe with Safety Cover
 6. Film Plane Reference Mark
 7. Film Rewind Knoband Back Cover Release

      2snuo*6


                                                                www.butkus.us


                                                                          .1
View original page 4Page 7 · Read text
www.butkus.us

                                                                                .!E


Load film and insert the tio ot the    Shoot blank exposures by ad-       Set the Film Speed by turning       Set the Aperture Ring 1o "AE"
film leader into the Take-up Spool     vancing the film and depressing        the Film Speed Ring while de-     by rotating until it locks into
and advance film with the Film     the Shutter Release Button until        pressing the Lock Button until      place with the orange "AE"
Advance Lever, making sure that     the Exposure Counter indicates        the ASA/DlN number of the film        button aligned with the Central
both the upper and lower Sprock-       "1" (one).                        being used appears in  the        Index Mark.
ets are engaged in the film perfo-                                          window.
rations before firmly closing the
Back Cover.


   Compose the image and gently        Advance the film to the next trame            Rewind the film after the entire roll has been exposed
   depress the Shutter Release
    Button.
View original page 7Page 8 · Read text
Precautions
                                                                       1. Do not use 1.3V mercury batteries
                                                                     which are similar in size and shape.
                                                                        Even if a battery fits.into the chamber,                                                                                                                       if it is not a silver-oiide battery, prop-
                                                                   er functioning of the camera cannot
                                                                              be guaranteed.
                                                                          2. When the camera is not used for a
                                                                           long period of time, remove the bat-
                                                                                           teries and store them in a cool, dry
                                                                                        place. Be careful so that the plus and
                                                                             minus sides are not accidentally touch-
 www.butkus.us                                                                        ing and shorted.
                                                                       3. When replacing batteries, properly
Remove the Battery Compartment     tissue before insertion. After inserting     dispose of the used batteries imme-
Cover (36) by rotating it a quarter-     batteries, replace the Battery Compart-     diately as they are potentially danger-
turn counterclockwise with a fingertip   ment Cover, aligning its white dot with     ous. Silver-oxide batteries are explosive                                                                          and should never be thrown into a fire.or coin. lnsert two 1.5V silver-oxide    the "O" (open) symbol indicated on                                                                       4. To assure consistent performancebatteries (Eveready S-76, Mallory    the camera, and lock cover into place    r and the utmost accuracy, your Mamiya
MS-76 or equivalent) into the Battery   by rotating it a quarter-turn (90o)    camera is equipped with an electronic
Compartment with the +  (positive)     clockwise.                                 shutter. However, when the batteries
side facing the Battery Compartment                                               are exhausted, or there are no batteries
Cover (it has a plus sign ind'rcated as                                                     in the Battery Compartment, the focal-                                                                            plane shutter will function normallya reminder on its underside). Perspira-                                                                                 only at B (bulb), and when the Shuttertion, grease and dirt are harmful to the                                                                       Speed Ring is set to any shutter speedbatteries so do not handle them by                                             other than B, a speed of approximately
your fingertips when inserting into the                                                       1/1 000 sec. will result. Of course, the
battery compartment. Batteries should                                          metering system will not operate at
be wiped with a soft, dry cloth or                                                       this time.
View original page 8Page 9 · Read text
www.butkus.us


Battery Gheck                             teries indicates they must be replaced    * On the NC 1000, depressing the
                                        with fresh batteries.                Meter OFF ButtonAfter inserting the batteries, check                                                                        simultaneously                                                                                   turns off the exposure meter and lockstheir voltage by pushing the Battery                                  Exposure Meter Switch              the Shutter Release Button (4) pre-Check Button (27!,. lf the Battery                                                                                                                                is    venting the possibility of an acci-Check Lamp (8) illuminates, it indicates   When the Film Advance Lever (3)
the batteries are in good condition.     slightly pulled away from the camera    dental exposure,
                                            112 in. or 1.Scm) to its click-Battery condition shou ld also be    (about
checked when the camera has not    stop, the exposure meter is activated.
been used for a long period of time.   To turn off the meter, merely depress
When the Battery Check Lamp fails to     the Meter OFF Button (2).
light, remove the batteries and wipe    When the Film Advance Lever is pulled
with a soft, dry cloth to assure good    away from the camera, the Meter OFF                                                            exposing ancontact. Failure of the Battery Check    Button will "pop" up,                                        orange rim which serves as a reminderLamp to light after wiping the bat-                                               that the exposure meter is turned on.
                                                         6
View original page 9Page 10 · Read text
www.butkus.us

Avoid direct sunlight when loading and     Insert the film leader into one of the   Wind the film until both the upper
unloading film. Pull up on the Film    slots in the Film Take-up Spool (32).    and lower sprockets {31) are engaged
Rewind Knob (7) to open the Back   The arrow appearing on the Film Take-    in the film perforations. lf the Film
Cover (33), and drop a 35mm film   up Spool indicates the direction  in    Advance Lever stops advancing, free
cartridge into the film chamber (28l. ,    which it revolves.                                  it by depressing the Shutter Release
locking the cartridge into place by                                          Button (4). Before securely closing the
pushing down on the Film Rewind                                         Back Cover, take up all the slack in the
Knob. lf the Film Rewind Knob does                                           film by gently rotating the Film Re-
not return flush with the camera top,                                      wind Knob clockwise.
rotate it while gently pushing down-
ward until it recesses flush.
View original page 10Page 11 · Read text
www.butkus.us


Move the Film Advance Lever as far as    Each time the film is advanced and the    Turn the Film Rewind Knob clock-
it will go and then depress the Shutter    shutter colcked, the Exposure Counter     wise to take-up the slack, then depress
Release Button. Repeat the above pro-    advances one number, informing the    the Shutter Release Button and wind
                                                                                                    Rewindcedure until the Exposure Counter    user of the number of frames the film    the film again. lf the Film
indicates 1 (one). The camera is now   has been advanced. When the Back   Knob still does not turn, open the
loaded and ready to use.                 Cover is opened, the Exposure Counter    back and check the film loading.
                                           automatically returns to "S" (start).
                                 As the film is advanced, the Film Re-
                              wind Knob should revolve counter-
                                        clockwise. lf  it does not, it indicates
                                          there is slack in the film, or the film  is
                                          not being advanced at all.
View original page 11Page 13 · Read text
the Shutter Speedwww.butkus.us

                                                         To select a shutter speed, rotate theCaution:                                                                        Shutter Speed Ring (16) until theAutomatic exposure is not possible                                                                               desired shutter speed is aligned withwhen the Aperture Ring is NOT set to                                                                                    the Central Index Mark.the AE position.                                                          The numerals on the Shutter SPeed
Do not set the Aperture Ring to the AE                                                                    Ring indicate fractions of a second;
position while depressing the Depth-                                                                                 thus, "500" represents  1 /500 second'
of-Field Preview Button. lf you turn                                       For an exposure time of longer than
the Aperture Ring forceably, the AE                                                            1 second, the Shutter SPeed Ring is
mechanism of the lens will be damaged                                                                                            set to "B" (bulb). In this position, thethough the Aperture Ring will be                                                                                         shutter will remain open for as long as
stopped just prior to reaching the AE   The shutter speed plays a verY im'    the Shutter Release Button is depress-
position. {When operating the camera    portant role in determining the sharp-     ed.
to see the depth-of-field in the view-   ness of your pictures. Therefore, as a    For general purpose photography, youfinder, be especially careful to avoid    general rule, use as fast a shutter speed                                                           may find it useful to set the Shutter
the operation described above.)         as the prevailing lighting conditions                                                                   Speed Ring to the speed indicated in
                                       allow. For sharp pictures, do not use                                                                                        the following table.
                                        shutter speeds longer than 1/30 sec.
                                      (1/15 to 1 sec., or longer) unless the
                                   camera is mounted on a sturdy tripod                           11250 or
                                  and the shutter is tripped with a cable                           11125 sec.
                                                   release.                                    Cloudy or         11125 or
                                                                                                               in the shade        1/60 sec.


                                                     10
View original page 13Page 14 · Read text
FoCusing

                                      1. While looking through the view-     Moreover, simply depressing the Depth-
                                              finder, adjust the Focusing Ring until     of-Field Preview Button after setting
                                       the most important part of the subject     the Aperture Ring to the desired F-stop
                                         appears sharp.                                 will allow one to preview the Depth-of-
                                    2. Extremely accurate focusing is     Field and appearance of out-of-focus
                                        simplified by the split-image range-     images.
                                            finder spot located in the center of the
                                       focusing screen. lts wedge is set at a
                                 45o angle, making it possible to use
                                       either horizontal or vertical lines of
                                   the subject for precise focusing. The
                                         split-image rangefinder spot is  sur-
                                    rounded by a micropr.ism collar which
                                          fractures the image whenever it goes
                                             slightly out-of-focus; consequently, it
                                                        is an invaluable aid for pinpoint focus-
                                                ing accuracy.
                                    3. The outer ground glass area (which
                                      surrounds the rnicroprism collar) can
                                              also be used for focusing.
                                        Since the camera is an SLR, the photo-
                                       grapher always sees in the viewfinder
                                         exactly what will appear on the film,
                                         regardless of the lens or accessory
                                         being used.                                                                       1 1
View original page 14Page 15 · Read text
Determining of Correct Exposure                     www.butkus.us

                                                                                                                                                                                                                                                                                                                                                                                             f ower edge of 2.8 is the upper limit ofViewf inder  I nformation
                                                                                         the correct exposure.
Rangefinder Spot                                                                                            lf the Indicator Needle moves beyondMicroprism Collar
Matte Area                                                        the upper limit, underexposure will
                                                                                           result, so adjust the Shutter SpeedStop-Down Metering Index Mark                                                                                Ring to a slower shutter speed until the
                                                                                       Indicator Needle drops into the correct
                                                                                exposure area.
                                                                                                              lf the Indicator Needle lies below the
                                                                       lower limit. this indicates overexpo-
                                                                            sure, and the Shutter Speed Ring
Pull the Film Advance Lever slightly   of the minimum aperture of the lens     should be adjusted to a faster shutter
away from the camera to its click-stop    being used.                             speed until the Indicator Needle enters
position and look through the view-    For example, when using an f/1 .4 lens      into the correct exposure area.
                                                                            any-finder to check that the Exposure   and the Indicator Needle Points
Meter Indicator Needle is located with-   where between the upper edge of 1.4     Aperture Scale:
 in the correct exposure area before re-   and lower edge of 16 on the aperture    The Aperture Scale is found on the
                                                                                                                                screen leasing the shutter.                        scale in the viewfinder, correct expo-     left-hand side of the focusing
. Correct Exposure Area               sure will be obtained.                     area. The Exposure Meter Indicator                               When using an  f 11 .7,  f 12, or f/2.8 lens,    Needle moves uP and down in this
The correct exposure area is anywhere    the upper edge of the respective nu-     area, indicating the aperture automati-
between the upper edge of the numeral    meral on the aperture scale in the view-     cally selected by the camera when the
corresponding with the maximum aper-    finder is the upper limit of the correct     Aperture Ring of the lens is set to the
 ture and the lower edge of the numeral    exposure. When using an f/3.5 lens, the    AE position.
                                                        I2
View original page 15Page 17 · Read text
www.butkus.us


Caution:
*  During automatic exposure (AE)
operation, be careful not to inad-
vertently apply pressure to the Meter
OFF Button while releasing the shutter,
otherwise incorrect exposure may re-
sult.
* When attaching the camera to a
tripod that has a long attachment
screw, adjust the screw to less than
3/16 inch (4.5mm) to prevent damage                                        After exposing a roll of film, it must    film leader separates from the Take-upto the interior of the camera body.                              be rewound into its cartridge, for if    Spool, there will be less tension upon
                                      the Back Cover of the camera were to   the Rewind Knob and this indicates
                            be opened without  f irst rewinding,      it is safe to open the Back Cover.
                                  anywhere from a few frames to the   To prevent the possibility of fogging
                                               entire roll may be ruined.                  the first few frames, do not unload the
                          To rewind the film, push in on the    film in direct, bright light nor rewind
                                 Rewind Button (37) and gently rotate    the film completely into its cartridge,
                                 the Rewind Knob (7) with its fold-   but leave part of the film leader
                            away Rapid Rewind Crank in the    protruding to prevent light from leak-
                                        direction of the arrow (clockwise).    ing in between the felt lips of the
                            To avoid damaging the film, do not     cartridge.
                                      rewind the film too rapidly nor apply
                                          excessive force. After the tip of the
                                                     I4
View original page 17Page 18 · Read text
The Self-Timer provides a method of    by releasing the shutter with the Shut-
taking delayed action pictures, allow-     ter Release Button.
ing a photographer to get into his own                                          Caution:
photographs!                              When using the self-timer in the auto-When ready to take a picture, rotate                                         matic exposure (AE) mode, be sure tothe Self-Timer Lever (10) counter-                                     attach the Hot Shoe Safety Cover
clockwise and push the Self-Timer    (5A) (which also doubles as a view-
Activating Button (11) to start the    finder cover) to the Viewfinder Eye-
Self-Timer.                               piece (291 to prevent extraneous light
Rotating the Self-Timer Lever as far   from entering the eyepiece, possibly
as it will go (180o) will result in  a    causing underexposure.
shutter release delay of approximately   When using the self-timer, be sure the
9 seconds. The time delay is adjust-    Film Advance Lever is at its click-stop
able by rotating the Self-Timer Lever    position, protruding slightly from the
in a 90 to 180o arc. However, when    camera. lf the lever is flush with the
rotated to an angle of less than 90o,    camera top, the meter is turned off.
the Self-Timer will not start.                   lf the self-timer is started with the
The Self-Timer Lever may be set either   Film Advance Lever flush with thebefore or after the film is advanced.                                     camera top, the shutter will not release
Starting the self-timer before the film                                        because pushing the Meter OFF Buttonis advanced, however, will not result                                      not only turns off the meter, but also
in releasing the shutter.                                       locks the shutter release mechanism.Even after setting the self-timer,  it                                 In the event that the self-timer  iscan be by-passed as often as desired
               15
View original page 18Page 19 · Read text
www.butkus.us                     Using Flash

accidentally started with the Film
Advance Lever flush with the camera
top, pull the lever out to its click-stop
position and then reset the self-timer;
there will be no need to push the Self-
Timer Activating Button again because
the self-timer will start as soon as
pressure is released from the Self-Timer
Lever.

                               Your camera is provided with two    appropriate Sync Terminal.
                                            flash Sync Terminals: FP for synchro                                                                                        Caution:
                                           nization with FP class flash bulbs, and                                                           When using flash units withrsynchro-
                        X for synchronization with electronic                                                                                      nization cords, an electrical charge is
                                                 flash units.                                                                                  present in the "Hot Shoe". Therefore,
                                    Compact electronic flash units designed                                                                            keep the Safety Cover (5A) in place to
                                             for cordless operation may be attached                                                                                      prevent the possibility of a light electri-                                  to the Hot-Shoe (5) after its Safety                                                                                                      cal shock while the cord is connected.                                   Cover is removed. For a large flash                                                        The Hot-Shoe Safety Cover, as ex-
                                     unit used with a bracket, or for a    plained in the previous section, USING                                    compact electronic flash unit without                                                     THE SELF-TIMER, also doubles as a
                                            provision for cordless operation, attach                                                                             vieMinder eyepiece cover.                                      the flash synchronization cord to the
                                                       l6
View original page 19Page 21 · Read text
www.butkus.us


lr
I


    To remove the lens from your camera,    Attach the lens to the camera as    Gaution:
    push in on the Lens Release Button     follows: while matching the red Align-   *  Do not apply pressure to the Depth-
      (12), securely grip the lens by the lens   ment Dots (19 & 22l., seat the lens in    of-Field Preview Button (13) while
      barrel, give it a short (approximately    the bayonet mount, giving it a short    interchanging lenses, as it may cause
     45o) twist counterclockwise, and after    (approx. 45o) twist clockwise until it   damage to the diaphragm automation
    the lens stops, merely lift it straight   comes to a stop with a click, locking    pin on the lens.
     out of the bayonet mount.                  into place.                           * When the lens is removed, protect
                                                                                         the mirror chamber of the camera from
                                                                                                           dirt, and never touch the mirror. lf dirt
                                                                                               particles must be removed frorn theI
                                                                                      mirror chamber, use a blower or soft
                                                                                              brush.
                                                                          *  Protect your camera body and lens
                                                                              by using lens and body caps.
                                                          18
View original page 21Page 23 · Read text
www.butkus.us

When the camera is focused on an
 object, an area in front of and behind
the object will also be in acceptably
sharp focus.
The distance between the nearest and
 farthest points in sharp focus is called
DEPTH-OF.FIE LD.
Each time the aperture is changed, the
depth-of-field changes also. As the lens
is stopped down towards f 116, depth-
of-field increases, and as the lens is
opened up towards f 11.4 or f 11.7, it   mean the difference between a snap-    making it  possible to preview the
decreases.                          shot and a much more successful     depth-of-f ield. Releasing your  f inger
The depth-of-field will appear in the    photograph.                            from the Depth-of-Field Preview Button
viewf inder as it will appear in the   To preview the depth-of-field push in     will return the diaphragm to its maxi-
finished picture. By changing the focus   on the AE Button (26) and rotate the   mum aperture. After this is done, you
while the lens diaphragm is stopped    Aperture Ring (23) until the same F-   can take a picture. However, it   is
down,you can select the area of sharp-   number indicated by the Exposure     better to return the Aperture Ring to
ness in your photograph.                Meter Indicator Needle is aligned with   the AE position immediately after
Knowing how to use depth-of-field     the Central Index Mark 124l-.              previewing the depth-of-field to mini-
allows the photographer to use the    Next, push the Depth-of-Field Preview    mize the possibility of future error.
principle of "selective focus" to give    Button (13) as far as possible and the         lf the focusing screen is not suff iciently
softer focus to unwanted foreground    diaphragm of the lens Will stop down     bright, because of a dark subject or
and background subjects. This could   to the previously selected aperture,    small aperture, to clearly distinguish

                                                  20
View original page 23Page 24 · Read text
Manual Exposure       Correct Exposure in Unu

the depth-of-field, you can determine   The automatic exposure system can be   Your Mamiya camera automaticallY
the approximate depth-of-f ield by refer-   disengaged at any time by pushing the    computes correct exposure in most
ring to the Depth-of-Field Scale (24)  AE Button to unlock the Aperture    photographic situations. However, in
on the lens barrel.                   Ring and rotating  it to the desired    unusual circumstances such as when
                                                                    manual     the background area is large and muchFor example, if the standard (Somm)    aperture. Even when in the
lens is focused at 15 feet, one of the   mode, the Exposure Meter Indicator     brighter or darker than the subject, it
marks representing tl11 appears at the   Needle continues to indicate correct       is best to make an exposure adjustment
                                                                                        a                                                                          to lighten or darken the principal area10 foot mark and the other at the 30   exposure so that it may be used as
foot mark. This means that in a photo-    reference point to assist the photo-    of interest.
graph focused at 15 feet with the    grapher who deliberately wishes to over
diaphragm set at t111, everything be-    or underexpose for special effects. For
                                                                       Needletween 10 and 30 feet will be in   example, when the lndicator
                                                                              canacceptably sharp focus.                    indicates  f 18, the photographer
                                   overexpose two stops by manually
                                       setting the Aperture Ring to    f l4;
                                                 similarly, he can underexpose two stops
                              by setting the Aperture Ring to f/16
                                          instead of  f 18.
View original page 24Page 25 · Read text
sual Lighting                                                     www.butkus.us
                             AE Correction for a Bright Background
                                When the background is exceptionally    compose the image in the vievWinder
                           Yi#    bright, as when the subject is strongly    while maintaining pressure on the
                                                   back-lit, underexposure of the subject    Shutter Release Button. Then, apply
                                                      will normally occur and this will render    additional pressure to the Shutter
                                       the subject excessively dark. To pre-    Release Button to trip the shuttbr and
                                                                                                                                                                                ;l:iilllii:
                                                                                                                                                            '::ii,i.i'   vent this  f rom happening, tilt  the     take the picture.
                                     camera so that the bright background   When you desire to have a brightly
                                     or bright light source is not included     back-lit subject appear as a silhouette,
                              *    in the viewfinder and then press the   do not make the exposure correction
                                           Shutter Release Button slightly (about    suggested above, but simply compose
                             1mm) to lock the exposure in place.    and shoot.
                                        After the Indicator Needle locks, re-
                     o AE Correction for a Dark Background
                                When the background is very dark in    slightly depressing the shutter release
                                                relation to the subiect, as when photo-  button. While maintaining pressure on
                                          graphing a stage performer standing in   the shutter release button to "hold"
                                       a spotlight against a dark curtain, over-  the correct exposure, back away from
                                        exposure will normally occur, washing the subject, recompose, and shoot.
                               out (overexposing) the subject. To     lf  it is not possible to approach the
                                             correct for this type of situation, move  subject, take an exposure measurement
                                           very close to the subject, excluding the     . from a similarly lighted subject (such
                                      dark background from the viewfinder, as one's own hand), tock the exposure,
                                 and lock the exposure into place by   recompose, and shoot.

                                                       22
View original page 25Page 26 · Read text
Using lnfrared Filrn


When using black and white infrared
film it is necessary to make a focusing
adjustment in order to achieve accu-
rate focus. This focusing adjustment  is
particulary important when  i
a) using non-wide-angle lenses                                     2. After focusing in the usual manner,   tance previously indicated on theb) taking close-ups                                 check the distance on the distance    Central Index Mark is now aligned withc) shooting at wide apertures                                         scale that is aligned with the Central    the Infrared Index Mark.
                                      Index Mark of the lens, and then make    *  For information regarding the pro-
o Focusing Adjustment Procedure  a focusing adjustment by turning the    per filter and exposure, refe.r to the
1. The red dot or line on the right side    focusing ring slightly in the direction     data sheet packed with the film.                                                                     accom-    * A focusing adjustment is not re-of the Central Index Mark is the    indicated by the arrow in the
Infrared Index Mark.                   panying photograph so that the dis-    quired with color infrared film.
                                                 23
View original page 26Page 27 · Read text
www.butkus.us

                                 In the stop-down metering method,  a faster shutter speed. Conversely,
                                      there is no relationship between the   when the Indicator Needle lies above
                                  F-number indicated by the Exposure    the index, change to a slower shutter
                                  Meter Indicator Needle and the aper-    speed. lt  is not necessary for the
                                        ture required to achieve correct expo-     Indicator Needle to be perfectly center-
                                                sure. When stop-Cown metering  is neces-   ed in the Stop-Down Metering Index
                                                  sary, proceed as follows:                 Mark, for when the Indicator Needle
                                   1. Focus on the subject and, while     enters any area of the index, it indicates
                                   pushing the Depth-of-Field Preview    that the camera has been adjusted
                                  Button (13) as far as possible rotate     within the range of correct exposure.'
                                     the Aperture Ring until the Indicator    3. After adjusting for correct exposure,When an Auto Mamiya-Sekor CS lens                                                                                                                                                                                                                           , the usual practice is to remove one's                                      Needle comes to rest at the Stop-Downis attached to the camera, stop-down                                    Metering Index Mark (found beside     finger from the Depth-of-Field Previewmetering is not possible. However,                                    1.2 on the Aperture Scale). Correct    Button before releasing the shutterstop-down metering is used on the                                     exposure is now set and the picture is    so that composition and focus can be
following occasions:                                      ready to be taken. (When using preset     rechecked at the maximum aperture.1. When an accessory, such as Auto                                             lenses, there is no need to manipulate     However, it is perfectly acceptable toBellows is placed between the camera                                       the Depth-of-Field Preview Button.  )         release the shutter while the Depth-of-
body and lens.                       2. lf the Indicator Needle cannot be     Field Preview Button is still held.2. When lenses for the TL, DTL, SX                                       aligned with the Stop-Down Meteringseries or any other universal (42mm)                                    Index Mark by rotating the Aperturethread lenses are mounted on the                                         Ring, change to another shutter speed.
Mamiya NC 1000 using the P (Praktica)      lf the Indicator Needle lies below theMount Adapter.                                 Stop-Down Metering lndex, change to
3. When preset lenses are used.
                                                  24
View original page 27Page 28 · Read text
The NC 1000 camera is protected from    *   lf you take up slack in the film
                                      accidental double i.exposures under     before releasing the first exposure, the
                                   normal picture taking situations, how-    film movement in the camera will be
                                           ever, you can make multiple (double)     minimized.
                                       exposures for special effects as follows.    *  The next frame might be slightly
                                    1. Take your  f irst picture in the usual     overlapped with the multiple exposed
                                      manner.                                frame, so when finishing the multiple-
                                   2. Rotate the Film Rewind Knob     exposures, put on the lens cap or cover
                                        clockwise until it stops to take up slack    the lens with your hand, trip the Shut-
                                                    in the film.                               ter Release Button, and advance one
                                   3. Wind the Film Advance Lever while    blank shot of film.
                                         holding the Film Rewind Knob so that
                                     the knob will not be moved, simultane-
                                   ously keeing the Rewind Button de-
                                            pressed.
                                4. Depress the Shutter Release Button
                                          for second exposure. Repeat the above
                                          steps if you wish, for as many times as
                              you wish. The Exposure Counter ad-
www.butkus.us                  vances as many numbers as the Film
                                    Advance Lever is wound.


                                                25
View original page 28Related documents and language editions
From the M. Butkus archive. Original publisher and archive notices are retained.
Check the model and edition against your equipment.
PDF verified 2026-10-10.