Film cameras
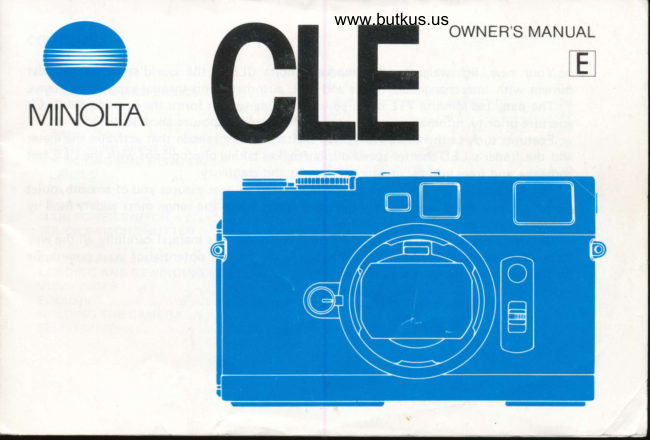
Minolta CLE Rangefinder User manual
User manual for Minolta CLE Rangefinder. 48 pages in English. Read the original PDF, download or print a copy without registration.
48 pagesEnglish8.4 MB PDF
Loading your manual…Open PDF directly
Document details
- Brand
- Minolta
- Model / document
- Minolta CLE Rangefinder
- Document type
- User manual
- Language
- English
- Pages
- 48
- File size
- 8.4 MB
- Category
- Film cameras
- Document date
- Not specified in catalog
Search available document text
Find a term, then jump to its page in the original PDF. Image-only pages may not be searchable; check the PDF for exact wording and diagrams.
Page 3 · Read text
Your new, lightweight and compact Minolta CLE is the world's first rangefinder
camera with interchangeable lenses and TTL automatic and manual-exposure systems.
  The patented Minolta TTL off-the-film metering system forms the heart of the CLE's
apertu re-priority aLjtomati on and provides exceptio na I ex posu re accu racy.
   Features such as the exclusive Touch Switch/shutter release that activates the meter
and the finder's LED shutter-speed display makes taking photographs with the CLE fast
and easy, and frees you for greater enjoyment and creativity.
  The Minolta designed, electronically controlled shutter assures you of smooth, quiet
operation, and the three specially designed lenses cover the range most widely used by
photographers.
   Before using your camera for the first time, study this manual carefully all the way
through. In doing this you will be able to realize the full potential of your camera. Be
sure to keep this manual for later reference.
View original page 3
Page 7 · Read text
PREPARATION AND BASICS

BATTE R I ES
   All power requirements for the electronic
systems of your Minolta CLE are provided by
two 1.5 volt batteries. These may be of the
silver-oxide (Eveready EPX-76/5-76 or equi-            I nstalling batteries                                  To properly install batteries, proceed asvalent) or alkaline-manganese (Eveready A-76                                                        follows:or equivalent) type.                                            1. Press down on and slide the battery-
                                               chamber cover in the direction of the arrowCAUTIONS                                                      until  it stops and the chamber is fully . Do not use 1.3v mercury batteries (Ever-
  eady EPX€75 or equivalent) which are        uncovered.
   similar in appearance to recommended  cells.
o When replacing batteries, change both at the
   same time. lf an exhausted battery is used
   with a fresh one, or if a silver-oxide and
   alkaline-manganese cell are used together,
   there is a possibility of battery leakage or
    bursting.
View original page 7Page 8 · Read text
www.butkus.us


2. After wiping the terminals with a clean dry
   cloth, insert the batteries into the chamber
   with their negative and positive ends posi-
   tioned as indicated inside the chamber.  lf    3. Close the chamber by sliding the cover in
   this is not done correctly, the camera will        the opposite direction until it snaps securely
   not functaon.                                          into place.
View original page 8
Page 9 · Read text
C old-weather operation
                                                         Batteries by nature tend to lose power as
                                                  temperatures drop. While the al kal ine-manganese
                                                       batteries will meet all requirements under nor-
Battery check                         mal conditions, for heavy sustained cold-
  To check battery strength, press the gray    weather operation (approx. -1OoC) it is recom-batterycheck button on the bottom of the   mended that  silver-oxide type  batteries
camera.  lf the red LED self-timer/battery-check     (Eveready EPX-76/5-76 or equivalent) be used.
indicator lights, the batteries are serviceable.  lf       Regardless of which battery type used,
the indicator does not light, replace the batter'    remember to always use fresh batteries and
ies, or if they have just been installed, check to    keep a spare set with you when using your
see if they are positioned properly.               camera in cold-weather.
View original page 9Page 10 · Read text
www.butkus.us
ATTACHING AND REMOVING LENSES


To Attach
1. Remove the body cap from the camera by
   depressing and holding down the lens-release
   button. Turn the cap to the  left, and lift  it       2. Remove the rear  lens cap by turning it
   out of the camera body.                            counterclockwise.
                                                                                                             ' ^                                         1", .,'
View original page 10Page 11 · Read text
3. Align the raised red dot on the lens with the   To Remove
   red index line on the release button, insert               'l . Grip the rear of the lens and press and hold
   the lens into the body and turn it to the      down the lens-release button. Turn the lens
    right. An audible click will be heard when        as far as it will go to the left, and lift it out
   the lens is securely mounted.                    from the body.
View original page 11Page 12 · Read text
www.butkus.us
MAIN POWER SWITCH


                                              The switch locks into place at the "ON" and
   Located on the front of the camera is a     off (indicated by a white triangular index)
three-position slide switch that turns power     positions, but does not lock when set at
from the batteries on or off, and sets the      ,,SE LF-TIMER."
self-timer (See p.22).                         To prevent battery drain or accidental expo-
  To move the switch, place your finger on     sures when the camera is not being used for any
the raised gray lug and slide it towards the lens.     length of time, turn the camera off by aligning
The switch can now be slid up or down to the    the power switches' gray lug with the white
desired position.                                       triangular index.


                         www.butkus.us
View original page 12Page 13 · Read text
TOUCH SWITCH/SHUTTER R EL EASE         SETTING FILM SPEED

   Finger contact with the touch switch/shut-
ter release activates the camera's electronic
shutter and when the shutter-speed/function      Each film has an ASA or DIN exposure-
selector is set at "A," powers the electronic     index number to indicate its sensitivity to light.
exposure control and LED circuits. lf proper     For correct exposure, the camera's meter must
contact with the switch is not possible  (i.e.,     be set for the exposure index of the  f ilm in use.
while wearing gloves or when fingers are dry),      To do this, lift up on the knurled ring of the
slight pressure on the switch will also activate     shutter-speed/function selector and turn it until
the camera's electronic circuits.                    the proper ASA indication appears in the center
   Depressing the touch switch/shutter  release
all the way down  f ires the camera.

NOTE
   Wipe off any dust or dirt that may accumu-
late on the touch switch with a clean, dry cloth.
This will insure proper contact and operation.
View original page 13
Page 14 · Read text
www.butkus.us


of the film-speed window and locks in that        Located on the back cover of the camera is
position when the ring is released. Marks   a convenient ASA/DlN conversion table and
between the numbered graduations indicate   memo holder. The memo holder can be used to
ASA numbers as shown in the following ASA/     hold a  f ilm-box end as a reminder of the film in
DIN table.                                                 use,

   ASA       DIN
          15    .  250  25     25.32     160    320  26
    .40     17  400         27
                    'lg    o  500  28     50.64     19o    640  29
   o80    20  800         30
            21    o  1000 31      100o    't2S  22o    1250 32
   o   160  23  1600         33
    200         24
View original page 14Page 15 · Read text
12   LOADING AND REWINDING FILM


      To open the camera back and load a film
        cartridge, proceed as follows:                   3. Leaving the knob pulled out, position a film
      1. Unfold the rewind crank and pull the        cartridge in the chamber with the project-
          back-cover release knob all the way out.             ing-spool end toward the bottom of the
      2. Turn the release knob in the direction of the       camera. Then push the back-cover release
         arrow until the back cover springs open.           knob all the way in, rotating  it if necessary.
View original page 15Page 16 · Read text
www.butkus.us


                                            TH IS WAY

        lnsert the end of the film leader as shownI     into one of the slots in the take-up spool so
       that the tooth is engaged with a sprocket
      hole near the end of the leader. Make sure
       the end of the leader does not project from
       another slot between tabs on the spool.


                                      NOT THIS WAY
View original page 16Page 17 · Read text
5. With the main power switch turned on and
   the shutter-speed/function selector set to a
 '  manual speed (See p.271, operate the film
   advance lever until the film has begun to     6.  Close the camera back and push in on it
  wind firmly around the take-up spool and         until  it clicks shut.
   the sprocket teeth are engaged with holes on      7. A red "S" should now appear in the center
   both edges of the film. lf the advance lever       of the framecounter window. Advance film
   stops at the end of a full stroke during this      and release the shutter until "1" appears in
   procedure, release the shutter and continue.        the center of the window.


                                                     www.butkus.us
View original page 17Page 18 · Read text
www.butkus.us


NOTES
o To check if film is loaded correctly, watch
   the rewind crank when you advance the
   film. lf it turns when the film is advanced,
   the camera is properly loaded.  lf it does not
   turn, repeat steps 1 through 6.             To rewind and remove an exposed film
  When the camera has not been used for a     cartridge, proceed as follows:
   period of time, check to see if there is film    1. Press the film-rewind release button on the
   in the camera before you open the back       bottom of the camera all the way in.
   cover. This can be done by turning the
   rewind crank in the direction of the arrow.
     lf it turns freely the camera is not loaded.
     lf the camera is fired without film being
   loaded, the shutter speed will be slower than
   indicated by the LED's in the viewfinder.
   This is a result of the direct-metering system
   reading from the filmpressure plate which  is
   of low-reflectance, and does not indicate a
   camera malfunction.
View original page 18Page 19 · Read text
NOTES
2.  Unfold the rewind crank and turn it in the   o The film counter automatically resets itself
   direction of the arrow. When tension on the      when the back cover is opened.
   crank disappears and it turns freely, the film   o Film should be loaded and unloaded in
     is fully rewound.                               subdued light - at least shaded from direct
3.  Pull the back-cover release knob all the way        sunlight by the body.
   out, and turn it in the direction of the arrow   o When the advance lever stops and resists
    until the back cover springs open. Remove        further movement at the end of a film,
   the film cartridge.                                   never attempt to force it farther.


 www.butkus.us
View original page 19Page 20 · Read text
www.butkus.us
 VIEWFINDER

  When you look through the viewfinder of
 your Minolta CLE, you will observe the follow-
 ing items:
A. LED shutter-speed indicators and scale
B. LED over-/under-range indicators
C. Rangef inder  f ield
D. Framing guides for 90mm focal-length lens
E. Framing guides for 40mm focal-length lens
F. Framing guides for 28mm focal-length lens
  For further operational details, see the
following sections on focusing and camera
operation.

NOTES
o The 28mm framing guides are always visible
   in the viewfinder, regardless of   lens
   attached. They are also visible when no lens
   is fixed to the camera. The 40mm and
  90mm framing guides are visible only when
   their respective focal-length lenses are
   attached.
o Viewf inder  f raming guides are coupled with
   the lens-focusing movement for automatic
    paral lax compensation.
View original page 20Page 21 · Read text
Itl    FOCUSING

       The rangefinder field appears in the center       For double-image (coincidence) focusing.
       of  the viewfinder as a bright and sharply     for  instance on a highlight in the eye of a
       outlined area. You can use it to focus on a    person, observe the subject through the finder
       subject by eithei' double-image or split-image    and turn the lens focusing ring until the two
      match   i ng.                                        images  f use into one.

     Out of focus                                              In focus


                         It
View original page 21Page 22 · Read text
www.butkus.us


   For split-image focusing, sight an edge or
other clear outline and turn the lens focusing
ring until the broken outl ine appears conti-
nuous in the rangef inder  f ield. This is the more
accurate and therefore the preferable method
of focusing.
Out of  f ocus                                              In focus
View original page 22
Page 23 · Read text
HOLDING THE CAMERA

   For a steady three-point support, grip the       For vertical shots, simply turn the camera
camera with the right hand so that the index    90". Keep the same grip on the camera as for
finger is on the touch switch/shutter-release and     horizontal shots.
the thumb against the film-advance lever. Use      When the shutter is released, it should be
the left hand to either support the lens from    done with a slow, steady pressure, never a quick
below for rapid focusing and aperture adjust-     jab. Holding your breath at the time of release,
ment, or to grip the left side of the camera. In    with the camera or hands holding it firmly
addition, press the camera to your forehead for     steadied against your face or body, will help
extra support.                                       prevent blurred pictures.


                                                                                                                                     , )"-:                                     6-l        t;
View original page 23Page 24 · Read text
www.butkus.us


   When conditions call for exposure times too
 long for hand-holding the camera, it should be
mounted on a tripod using the built-in socket
on the bottom of the camera, and the shutter
tripped with a Minolta electronic Remote Cord
(p.38) or standard cable release. Either can be
screwed into the threaded remote-release  socket
on the side of the camera body.

         d
             I,F\
View original page 24Page 25 · Read text
22    SELF.TIMER
        Your Minolta CLE has a built-in electronic   3. Depress the shutter release to start the timer
       self-timer that will delay shutter release for        cycle. The red LED self-timer/battery-check
       approx. 10 seconds. Operation of the self-timer        indicator will begin to blink, indicating the
           is as follows:                                           timer cycle has started.
      1. Advance  f ilm, adjust focus and make neces-       Approx. 2.5 seconds before the exposure  is
           sary camera settings.                           made, the LED indicator will blink faster to
      2. Move the main power switch to the "SELF-         alert you.
        TIMER" position (p.9).
                                         NOTES
                                    o The self-timer will not operate when the
                                                              shutter-speed/function selector is set at "8"
                                                                       (bu lb ).
                                    o When  fi nished using the timer, be sure to
                                        move the main power switch  f rom the
                                                "SELF-TlMER" setting.
View original page 25Related documents and language editions
MinoltaPDF
Minolta CLE Gebruiksaanwijzing
User manual
48 pages · DutchRead →

MinoltaPDF
Minolta CLE
Product booklet
12 pages · EnglishRead →

MinoltaPDF
Minolta CLE
User manual
74 pages · GermanRead →

MinoltaPDF
Minolta CLE
User manual
64 pages · JapaneseRead →
MinoltaPDF
Minolta Cle
User manual
49 pages · SpanishRead →
From the M. Butkus archive. Original publisher and archive notices are retained.
Check the model and edition against your equipment.
PDF verified 2026-10-10.