Film cameras
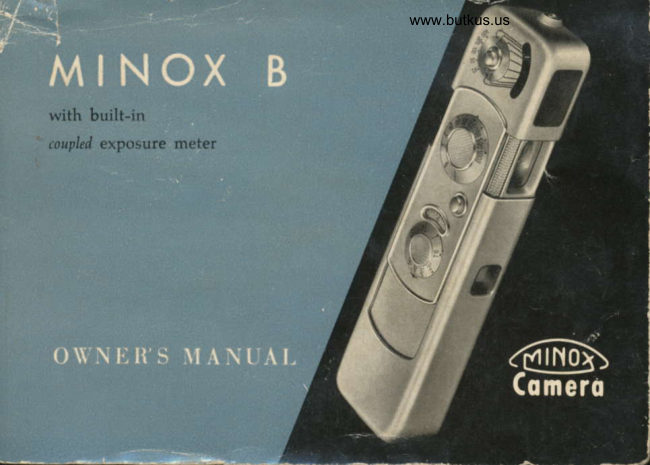
MINOX B - Direct scan User manual
User manual for MINOX B - Direct scan. 56 pages in English. Read the original PDF, download or print a copy without registration.
56 pagesEnglish7.2 MB PDF
Loading your manual…Open PDF directly
Document details
- Brand
- Minox
- Model / document
- MINOX B - Direct scan
- Document type
- User manual
- Language
- English
- Pages
- 56
- File size
- 7.2 MB
- Category
- Film cameras
- Document date
- Not specified in catalog
Search available document text
Find a term, then jump to its page in the original PDF. Image-only pages may not be searchable; check the PDF for exact wording and diagrams.
Page 4 · Read text
@  Snaplod< for Ba& Cover
(D  Film Compartments
(E  Serial Number
                EyepiecelD  Viewfinder
@  Sliding Bad< Cover
(D  Exposure Meter Housing


      www.butkus.us
View original page 4Page 5 · Read text
www.butkus.us
           CONTENTS
                                   (Sce also alphabetical  inilex on pegc 48)

Horv to use the MINOX                                                   Page
opening the camera  ' Telescopic Rapid wind . Holding the MINOX  . Distance
 setting ' zone of sharpness . setting the shutter  . Built-in exposure meter . MINox
 always works at f/3.s . viewfinder  . Exposure counter . Loading . ASA film speeds
 . Un-loading  . Filters  . Measuring chain . Take care of your MINOX               2
Tips for best results
The "best" film. Correct exposur€ measurement. Steady . Longer exposures
 ' Frame your subject ' close-ups of small things . How to stop moving subjects  .
Flash is easy . It's a colourful world . Copying . Changing the film type            ZB
What happened?   .                                             .40
The MINOX Camera Clamp                                       .44
The MINOX Pocket Tripod                                        .44
The MINOX Slide Projector                                        .45
The MINOX Enlarger                                             .45
Other MINOX Accessories                                                                    .  46-47
Subject srze and depth of field tables                                       . Inside Back Cover


                                                                   ,  dqli{L                 .'*!.r'   ,.-  oll**                if,*E-    i,i&&
View original page 5Page 7 · Read text
Congratulations-with   your MINoX B you are embarking on a new, un-burdened
kind of picture taking: Your MINOX B is not only exceptionally small, precise and
modern, it is also far easier to use than almcist any other camera.  It will give you lots
of pleasure!
 It's easy to get fine pictures with the MINOX B but, naturally, the more you know
about the camera, the better, more certain, will be the results. This little book wants
to show you the way.
Read the various sections carefully -  it's time well spent, and will pay off generouslyin fine MINOX pictures!
                  The first section explains the. best way to hold the MINOX,
                  how to load it and unload it, how to set it.
                      Part two will help you select the proper kind of film for best
                            results, and tells about colour photography, flash, filters, close-
                       ups, and about some special uses for your MINOX.
                  ;;:1il',"#?:":::J'i"J,Y.il:'T,':;:T:nlTnil'i"j;
                      occur if you have not read the first two sections carefully! And
                                it's so easy to avoid.such mistakes.
But NOW - why not get acguainted with the ease of MINOX photography?
1
View original page 7Page 8 · Read text
www.butkus.us
HERE'S HOW

                                  You are, naturally, anxious to put the first
                                          film into your MINOX and to start shoot-
                                   ing pictures. Please hold on for  little
                                            while, and get to know the most important
                                            features of the camera while  it is still un-
                                              loaded.
                                         You'll be much more confident and sure
                                       of success when you know more about the
                                   "HOW".

                              Opening the camera
                                The camera is closed when you take it out
                                     of its leather case. To open it for picture-
                                            taking, grasp it with both hands as shown
                                            here, and pull it open as far as it will go.
                                   This brings out the viewfinder and lens
                                    window, and makes the MINOX readv for
                                               shooting.
View original page 8Page 9 · Read text
I t'lt'stopil    s.rpitl  rrintl

 After you have taken a picture, 'closc'
 the camera. Then, for the next pic-
 ture, you pull   it open again. That's
 the  secret of  the  telescopic rapid
winding mechanism of the MINOX:
Each time the camera is closed and
re-opened, the film  is advanced for
the next picture, the shutter is  re-
cocked, and  the  exposure counter
moves to the next number.  all auto-
matically    !
In a hurry? ONE-TWO-your MINOX
is ready for the next picture. But 'it's
important to close and open a ll    t h e
w a y every time   !
The small circle in the lens windorv
indicates that the shutter is wound
ready for the next picture. The circle
disappears after you have released
the shutter. That's your signal that
you must 'push-pull' before you take
the next picture. CIear and simple,
isn't  it?


J
View original page 9
Page 10 · Read text
www.butkus.us


/\  ste.rd\' .rncl firnr holcl is the [rcrt  .rssttr-
.rnet'for good pirtllst's  rvitl-r vour N4 INC)X.
Ii  tlrt'c.rnrcr.l  n1()\'cs rvlrile votr.rrc  taking
n  pirtrlrc,  \'ott  .rrc bottncl to  11et [rltrrrccl
rt'.trlts. Holcl the c-lnre r.l firmlv, vet rel.r\od,
rvith votrr h.rncls.tc'.tcliocl against thc  f.tec.
Kcep both thunrb. turcler the catner.t, otlrcr
firrqcrs on top or.rt  the sicle so tltat  tht'
le nr  .rrrtl c\posur c  ntt' tor  rvinclotr' .lro  ttn-
otrstructecl, Tht'  illtrstr.rtions on  tlris  .rncl
tht'rrert  pJ!lt' sho\\'tlre nrost pr.tctic.rl  \\'.lv
of holcling t,oLrr MINOX;  it's.r    firtn  ancl
stc.rclv holcl,.rrrcl notl'ring covcrs tlre  lerrs,
vicrviirrclrr, or e\p()surc nreter  tvinclLrtr'.
It''   .r goocl icle.r to pr.rcticc this holcl in
frrrnt of  .r nrirr()r to check votrrst'lf. Yotr'll
rrotir  t'  that  the  sintt') hold  is  ttst'cl    f or
horizont,rl .rncl vcrtieal pieturcs.
View original page 10
Page 11 · Read text
Nrrrv tlrat votr knorr thc proprr  holcl , look
into tlre vit.x'finclt'r and fr.rnt('\,()(rr pi(tur('
irr the lunrin()us rc!t.tn!lle; rvhrn t'oLr're  .rll
st't,  s(lrrot'zo tlte  shtrtter  relt'.rre  btrtton
gentlr,. n   littlc  (()untcr-presstrrt'  front   tlrt'
tlrtrmb  rrnclerno.rtlr  tht'  (.tlnori  hclps  to
keep thc N{INOX stc.rc11,..l-he  slrutter opt'r-
.ltcs 1,() sntoothlr,  .rrrcl qrrie tlt'  -  tht' pit trrre
is t,rkt'n rvithout effort!
fhe MINOX B  rerlrrirt's  .t  nrinirnrrnr of
()p('r.rting stcps: Setting distance .rncl t':.-
p()srrrc is.rll   tlt.tt's necclcrl -.rrrcl  t'.ts\',  trrtr.


Oyy,,,tte  I'rr,{c r a.r/cil htll  f or htri:ttt!tl piLlurt.
Right: Srmrlar holdlor tertr,nl  ltirturt..


                                                www.butkus.us
View original page 11Page 12 · Read text
www.butkus.us

Dist.rnce sctting

There are two engraved discs on the control panel of your MINOX; the smaller one is
the distance scale. It is calibrated from infinity  (r)  to 8 inches, with additional mark-
ings 6, 3, 2, ltlz, 1 ft., and 10 inches. A red dot indicates tZ ft., and also serves as a
general "snapshot" setting.
To set a given camera-to-subject distance, rotate the distance dial with your finger
on the knurled centre until  the desired distance number is at the black dot of  the
'sharpncs: zone' bracket.
This little bracket is more important than the black dot in its centre:
Let's say you are taking pictures at a picnic, with the distance setting at 12 feet (that's
                                         the red dot between m and 6'). The camp-
                                                      fire is 12 feet away, some of the guests are
                                                  sitting at a table E feet from the camera,
                                         while one of the youngsters is just bringing
                                  an extra log and is now 15 feet away from
                                        you. You'll get them a I I perfectly sharp in
                                       vour MINOX picture, because  it gives you


                                                                                                                                  rl:-:,r   li  f    r.  ,l    r
View original page 12Page 13 · Read text
a sharpness 'bonus' in front and beyond the       Snapshot Setting:
 focused distance. The zone of sharpness from      Zonc of sharpncss 6 ft
 nearest to farthest distance is also called "depth         to Infinity
of field". The bracket along the distance scale        Grcalest1 2 fcet.  sharpness at tells you the extent of the zone of sharpness
for every distance setting.
For most of your pictures, you don't have to set
the distance critically.  It  is sufficient if  the
main object of your picture is within the zone
of sharpness. The MINOX has exceptionally      Zone of sharpntss 4 ft
great depth of field and makes focusing very        to 11 fi.
simple.                                                                Grealest sharpness al
You get the greatest zone of sharpness with         6ft.
the red dot (Snapshot Setting); from 6 feet toinfinity (oo). This is your ideal choice for all  @
pictures which require quick readiness, fast
shooting. You can shoot groups, games, travel
pictures, races -  whatever comes before your      Zone of sharpncss 3 ft.
camera - as long as the main point of interest        106ft.
is at least 6 feet from the camera.                            Grealest sharpncss at
This snapshot setting (see illustration at top        4ft.
will take care of most of vour pictures.     @
View original page 13
Page 14 · Read text
www.butkus.us

Use the snapshot setting for scenery only if an important part of the foreground  is
closer than 12 ft. Otherwise, always use the infinity (oo) setting for landscape Pictures
(sharpness reaches from 12 ft. to infinity).
Two other settings with zones of sharpness fronr 4 ft. to 11 ft,, and from 3 ft. to 6 ft.,
respectively, are shown in the illustrations on the previous page. Complete tables
showing the depth of field ranges and subject sizes at various distance settings are
shown on page 51. (inside back cover).
As you can see, the zone of sharpness gets smaller at closer distances, and at very
close distances it amounts to inches and less. Therefore, close distances must be set
carefully'on the distance scale, but that is easy because the safety chain of your
MINOX has small beads for distances corresponding exactly with the close distance
settings engraved on the distance scale. With the drain locked in the camera socket,
held taut and at right angles from the camera to the subject, the'beads are placed at
8,10,72, and 16 inches; the full length of the chain is 24 inches.

To sum up:
You need not set distances beyond 3 feet too critically - make the "sharpne ss zone"
bracket do the work for you.
Set the distance scale so that the important part of the picture is safely within the
sharpness zone.
For extreme close-ups always use the measuring chain.
View original page 14
Page 15 · Read text
i hr'slrrrttt.r


To produce a well defined, correctly ex-
 posed picture, the film must absorb a de-
 finite amount of light, The less light comes
 from the picture area, the longer this light
must act on the film -  the shutter muststay open for a longer time. Very bright
scenes require only a short shutter speed.
This length of "exposure" is regulated with
the larger dial on the control panel of
your MINOX. You can set the shutter while the camera is still closed, or after it has
been opened, whether the shutter is cocked nor not.
To set the shutter speed, place the thumb on the knurled centre of the shutter speed
dial while holding the forefinger under the camera and, with the other hand, turn the
camera. (See illustration)'  It's really very easy. The engraved figures represent fractions
of a second: 2 indicates r/r second, L000 is r/rooo second, etc.
But, don't let these figures worry you - you need not even look at them! yours is aMINOX B-the built-in coupled exposure meter does the thinking for you. (Seepage2g
for some helpful hints on exposure measurement!)

9
View original page 15
Page 16 · Read text
www.butkus.us

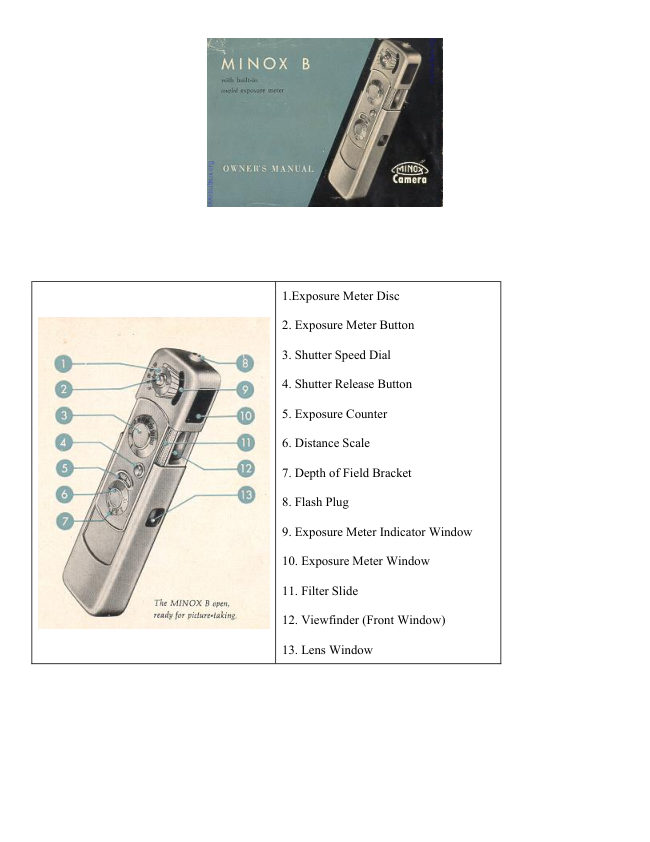
The built-in coupled exposure meter


The coupled exposure meter distinguishes the MINOX B from the MINOX A camera.
You need not estimate shutter speeds, you don't even have to refer to a table or scale,
and then transfer shutter speeds from 1/z to r/rooo second to the shutter speed dial. The
exposure meter is coupled with the shutter speed dial. You simply match a pointer
with an indicator needle -  that's all: You have already set the correct shutter speed!
Only once - when you put the first film into the camera - do you set the exposuremeter for the'speed'of the film, and couple it with the shutter. (see page 20). You
need never touch the meter setting again until you use film of a different speed.
Using the exposure meter is child's play:
Before you take a picture, look at the scene through the viewfinder -  iust be careful
not to cover the front window of the meter with your finger - and hold down the
meter button with the forefinger or third finger of your left hand. After two or three
seconds, Iet the button go and take the camera from your eye.
                                                                                          10
View original page 16Page 17 · Read text
At one end of the c.rmcra you will see the curved indicator window of the exposure
meter, and next to it-surrounding  the meter button-a   flat disc with an open triangle
mark and a green dot. The rotating disc and indicator window are connected by thin
black lines. When you turn the shutter speed dial, the meter disc with the triangle mark                               I
also turns: both are coupled. Now turn the shutter speed dial until the open triangle                              I
is set to the black line that connects with the indicator needle.  If the needle is between
two lines, set the open triangle betrryeen the two lines also.                                                                                                I
ll
View original page 17
Page 18 · Read text
www.butkus.us

 By thus pointing the open triangle to the line leading to the indicator needle, you have
 automatically set the correct shutter speed. If the shutter speed dial happens to be set
 between engraved numbers, don,t worry: The shutter speed scale of the MINOX B is
 matched with the exposure meter, providing an infinite range of speeds between r/: and r/rooo second.
 If you are using the green filter with black and white film (see page z4), turn the green
 dot - instead of the open triangle - to the indicator needle. This setting automatically
 compensates for the exposure difference required by the green filter.


The second measuring range
 Outdoor exposure with ASA 25 and ASA 50 film are usually somewhere between  r/so and
 r/rooo second. However, with faster films, and for very bright scenes (beach in brilliant
 sun, glaciers, snow in high mountain areas, etc.) even 1/rooo second may produce over-
exposure.

                                                                                               1Z
View original page 18Page 20 · Read text
www.butkus.us


                                                                                                                                         I  i   .i.11,/:    I     .r.,   r.,t   ))tar1..t.r'r,i     ,rl,.ia        1,11.,.
                                                                                                                                                lrr'lr'     ., r,l,  d  I  li:a  :..t1v  :,


The shutter sPeed dial cannot be turned past the '1000' mark to line up the meter disc
with indicator needle. Therefore, a second measuring range has been provided.
If you cannot line up the open triangle with the indicator needle, push the filter slide
above the viewfinder window all the way in (see illustration). This puts a neutral
density (grey) fitter in front of the lens, and switdres the exposure meter a u t o -
matically  to compensate for the exposure difference imposed by the filter.

                                                                                          74
View original page 20Page 21 · Read text
l        After this "switch", proceed as usual: Look at the scene through the viefinder - hold
  I      down the meter button two or three seconds - turn open triangle to indicator needle.
        The neutral density filter now puts the exposure into the normal speed scale,
        Whenever the resulting shutter speed is slower than r/so second (1lzo, 1l.r, etc.), remember
          to brace your hands with the camera against a wall, tree, or other firm support. Other-
         wise a blurred picture may result. Of course, the MINOX Tripod (page 44) is ideal for
          this purpose; in fact, it is indispensable for longer (B and T) exposures

      B and T 6xposures
         ln addition to speeds of 1/z lo r/rooo second, the shutter speed dial has the letters B and T
         engraved. What do they mean?
             B: The shutter opens when the shutter release button is pressed down and
                      closes again when you let the button go;
             T: The shutter opens when the shutter release button is pressed down and stays
                  open until the button is pressed a second time.
       Both settings are designed for longer exposures: 'B' for exposures from one to several
         seconds, 'T' fot still longer exposures. For such extended exposure, the MINOX must
        be placed on a solid support, or mounted on a tripod with the camera clamp (page44),
,      and released with a cable release. The MINOX Tripod (page 4a) comes already equipped
I       with a cable release.
Ills
I
I
View original page 21Page 22 · Read text
www.butkus.us

The exposure meter does not automatically
s e t exposures of more than  r/r second, but
it indicates  exposures up to 2seconds.
If, after using the meter, the shutter speed
scale is set to the left 'Z' (r/r second) this
indicates an exposure longer than r/r second
which must be obtained by using the B or T
settin3s.
If the shutter speed dial points to the blue
dot between '2' and B (see illustration at
left), the indicated exposure is 1 second;
if the dial points to B, the indicated ex-
posure is 2 seconds. (see illustration at
right). Exposures indicated by intermediate
positions can be estimated. After you have
determined these longer exposures, turn the
shutter speed dial to B or T and hold the
shutter open for the required time.
The illustrations show: top -  positions ofspeed dial after setting meter triangle mark
to indicator needle; middle - setting of dialfor making the exposure; bottom                                       - a re-minder to use a tripod or other firm support.
View original page 22
Page 23 · Read text
Flash Pictures

 Theshutterof the MINOX B is synchronized
 for flash; you can attadr any type of flash
 unit to the MINOX B: Electronic flash units,
 or flash guns whidl use flash bulbs. Attadr
 the end of the flash cable to the flash plug
 of your MINOX. The flash unit is actuated
when you press the shutter release button.
The built-in exposure meter is not used for
 flash exposure; the shutter speed scale is
 set:
      for flash bulbs -  to rho th second or       slower;
For electronic flash units:
      to r/soo th second or slower.
Small flash units are attadred to the MINOX
by means of the flash adapter; for larger
units use the MINOX camera clamp and a
flash bradcet, whidr is often supplied as
standard equipment with flash units.
For more complete information on flash
Iight photography, see page 94.               www.butkus.us

17
View original page 23Page 25 · Read text
The viewfinder
       The luminous white frame within the large MINOX viewfinder shows you the exact
          picture area that will appear on the film. The viewfinder irnage is automatically  correct-
        ed, at all distances, to agree with the film image. (Parallax Compensation). For ex-
        treme close-ups (8-1.0 inches), the picture area lies a frame-width within the luminous
         frame.
       The viewfinder eyepiece is so large that even spectacle wearers can abserve the full
         viewfinder area; furthermore, they may use the MINOX viewfinder without special
         correction lens.

      The exposure counter
I      The curved window next to the distance scale tells
 II      you how many exposures you have already made
I      on a film. Before you insert a fresh film, the ex-
        posure counter must be set at the red dot between
        50 and 0 (see illustration).
           If you have just finished a complete sO-exposure
        film, the counter will already be at this setting.
       However, if you finished a 36-exposure film, or if
        the counter is at any other setting, you must set
       the counter by repeating a t/r-inch 'push-pull' of
        the camera until it is set at the red dot.

          L9
View original page 25Page 26 · Read text
www.butkus.us


Film cassettes should be shielded from bright
sunlight. Always load - or un-load -  theMINOX in subdued light, or in the shade.
(If there is no other shade within reach,
turn your back towards the sun!)
The built-in exposure meter must be set to
the speed of the film when you load your
first film into the camera, and if you change
to a film of different speed. The necessary
steps are printed in blue on these pages.
If, after completing the first film, you again
use film of the same speed, you can ignore
the instructions printed in blue. |ust make
sure that the shutter speed dial is not
turned while you are changing films.
Set exposure counter at red dot (see pre-
vious page).
View original page 26
Related documents and language editions
From the M. Butkus archive. Original publisher and archive notices are retained.
Check the model and edition against your equipment.
PDF verified 2026-10-10.