Film cameras
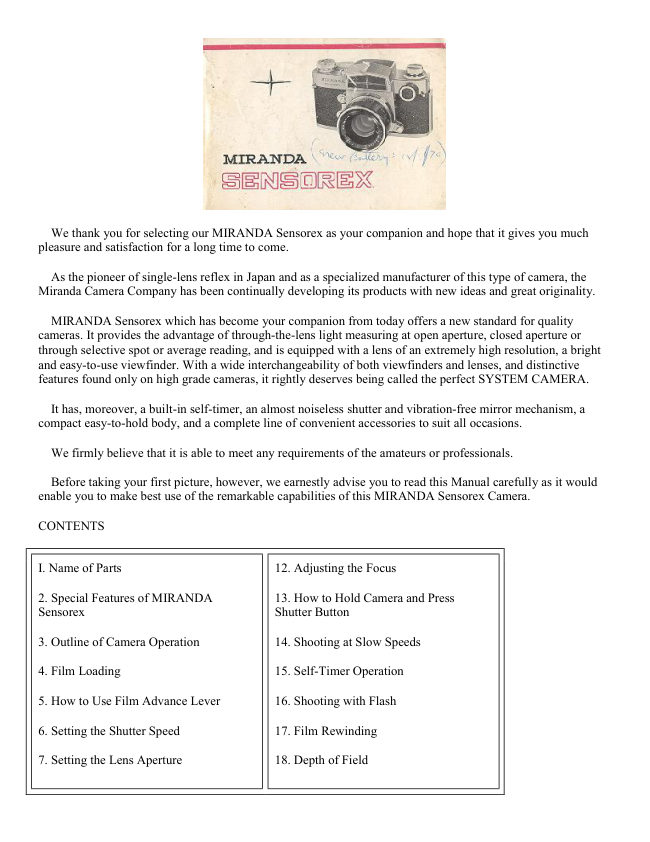
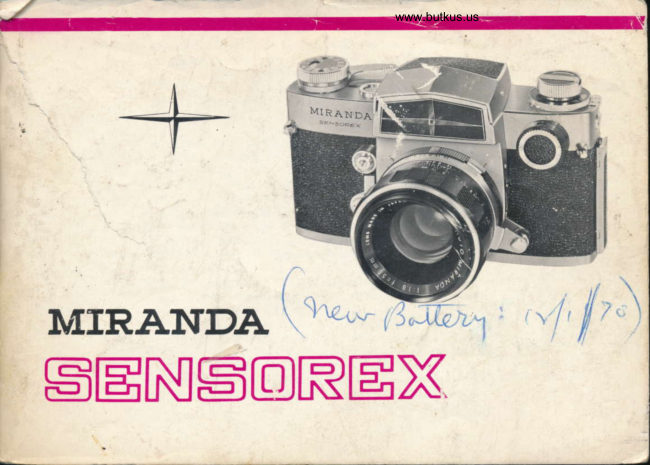
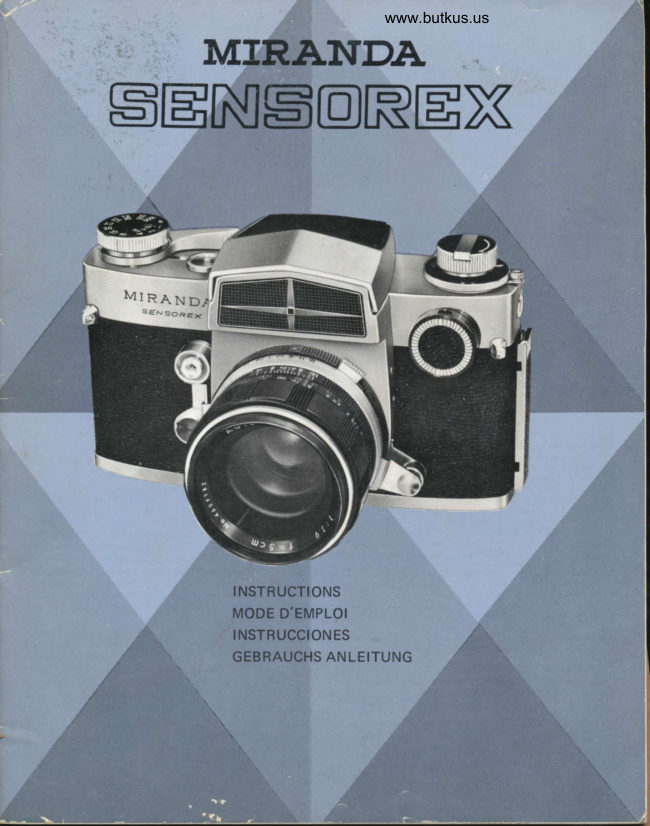
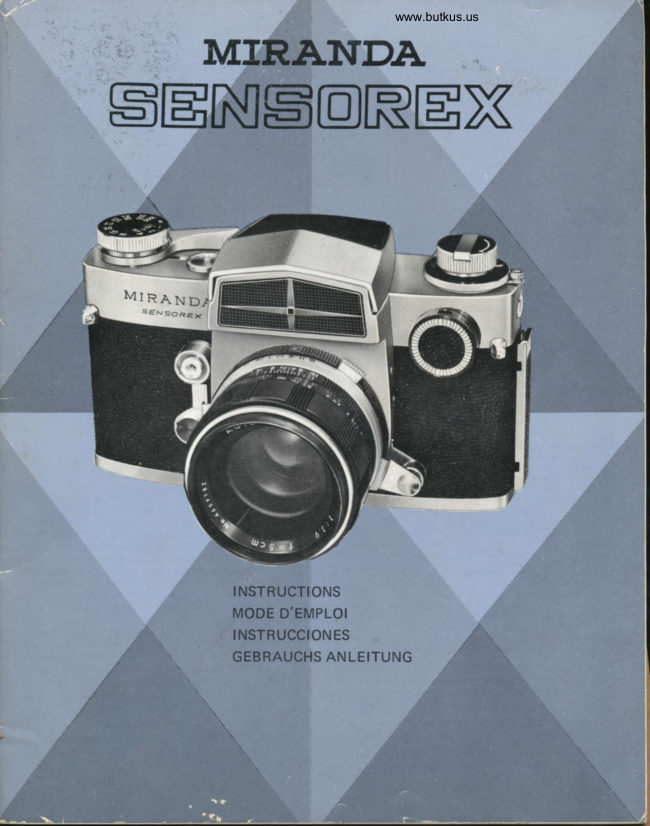
Miranda Sensorex User manual
User manual for Miranda Sensorex. 35 pages in English. Read the original PDF, download or print a copy without registration.
35 pagesEnglish2.2 MB PDF
Loading your manual…Open PDF directly
Document details
- Brand
- Miranda
- Model / document
- Miranda Sensorex
- Document type
- User manual
- Language
- English
- Pages
- 35
- File size
- 2.2 MB
- Category
- Film cameras
- Document date
- Not specified in catalog
Search available document text
Find a term, then jump to its page in the original PDF. Image-only pages may not be searchable; check the PDF for exact wording and diagrams.
Page 2 · Read text
We thank you for selecting our MIRANDA Sensorex as your companion and hope that it gives you much
pleasure and satisfaction for a long time to come.

  As the pioneer of single-lens reflex in Japan and as a specialized manufacturer of this type of camera, the
Miranda Camera Company has been continually developing its products with new ideas and great originality.

 MIRANDA Sensorex which has become your companion from today offers a new standard for quality
cameras. It provides the advantage of through-the-lens light measuring at open aperture, closed aperture or
through selective spot or average reading, and is equipped with a lens of an extremely high resolution, a bright
and easy-to-use viewfinder. With a wide interchangeability of both viewfinders and lenses, and distinctive
features found only on high grade cameras, it rightly deserves being called the perfect SYSTEM CAMERA.

   It has, moreover, a built-in self-timer, an almost noiseless shutter and vibration-free mirror mechanism, a
compact easy-to-hold body, and a complete line of convenient accessories to suit all occasions.

 We firmly believe that it is able to meet any requirements of the amateurs or professionals.

  Before taking your first picture, however, we earnestly advise you to read this Manual carefully as it would
enable you to make best use of the remarkable capabilities of this MIRANDA Sensorex Camera.

CONTENTS


I. Name of Parts                             12. Adjusting the Focus

2. Special Features of MIRANDA            13. How to Hold Camera and Press
Sensorex                                    Shutter Button

3. Outline of Camera Operation              14. Shooting at Slow Speeds

4. Film Loading                             15. Self-Timer Operation

5. How to Use Film Advance Lever          16. Shooting with Flash

6. Setting the Shutter Speed                  17. Film Rewinding

7. Setting the Lens Aperture                 18. Depth of Field
View original page 2
Page 4 · Read text
SPECIAL FEATURES OF MIRANDA SENSOREX


                                       1. The Superb 50mm fl.8 AUTO MIRANDA Len

                        AUTO-MIRANDA 50mm f/l.8 lens is a fully automatic
                               diaphragm lens embodying Miranda's highest technique and
                                  enjoying the highest reputation in all parts of the world It is a
                                     large aperture Gauss type lens of 6-element 4-group
                                     construction, which gives sharp definition even at wide open
                                    aperture and is totally free of any focus-shift at the smallest
                                      aperture. Moreover, as it is perfectly corrected for aberrations,
                                                     it yields sharp images of the main subject and makes it
                                     therefore most suitable for color pictures.
View original page 4Page 5 · Read text
www.butkus.us


     2. AUTO Miranda 50mm f 1.4

    A new high speed 50mm fI.4 standard Auto
    Miranda lens has been developed for use on the
    Miranda Sensorex. It is a gauss type lens, consisting
    of 8 elements in 6 groups, diaphragm calibrations
    from 1.4-I 6, minimum focusing distance is 43 cm or
    17 inches. Angle of view is 45°. It is advisable to use
    a lens hood with this lens to avoid reflection on the
     front element.


     3. Instant-Return Mirror

     One of the advanced features of the MIRANDA
    Sensorex is the instant-return mirror. When the
    shutter release button is pressed, the mirror swings
    up, permitting the light rays from the lens to reach
    the film as the focal plane shutter opens.
    Immediately after the film is exposed, the mirror
    returns to the viewing position. When the mirror is
    up, the view through the viewfinder is momentarily
    blacked out, but, at speeds of I/I 5 second and faster,
    the mirror returns to the viewing position so quickly
     that the photographer hardly notices the interruption.


4. Convenient Interchangeable

Viewfinder

For an SLR system to manifest its fullest capacity, it is
absolutely necessary that its viewfinder be
interchangeable with other types. MIRANDA Sensorex
has this capability. For close-up, copying and low-angle
shooting, its penta-prism viewfinder can be interchanged
with three types of viewfinders. Selective use of these
viewfinders assures utmost convenience in taking
pictures of special effects under all conditions.
View original page 5Page 6 · Read text
5. Variable CdS Sensing Area

    The CdS sensing area is positioned behind the mirror
     right in alignment with the optical axis, for precise
     light reading. The sensing area occupies only 5% of
     the mirror.


     6. Unique Type of Lens Mount

      The lens mount of MIRANDA Sensorex has on its
     outside a 4-claw bayonet mount and on its inside a
    thread mount of 44mm inner diameter (All
   MIRANDA cameras and lenses have the same
    standard lens mount).

      The bayonet mount is for attaching the auto lenses
    (having automatic diaphragms) extension bellows,
      etc., quickly and easily by merely giving I/8 of a full
     turn after mounting. The inner thread mount is for
     preset lenses and most of other accessories.

      As the Miranda mount has a wide diameter and a
     short flange back (distance between lens attaching
    plane and film surface), it permits the use of most
     lenses made for other SLR cameras by means of
    Miranda adapters.

7. Bright, Easy-to-View and Accurate Viewfinder

  MIRANDA Sensorex is equipped with a penta-prism
viewfinder which shows the subject's image right side up
and right way round. It was Miranda Camera Company
which first developed and adopted this system in Japan. It
was Miranda also which first perfected a method of
improving the penta-prism's eyepiece to permit easier
viewing.

   Miranda's viewfinder accurately shows the actual image
and background blurs exactly as transferred to the film,
and is therefore most useful in portraits, close-ups, copying
and color shots, and particularly when shooting with
telephoto lenses or through the microscope
View original page 6Page 7 · Read text
www.butkus.us


                                                 8. Complete Line of Interchangeable Lenses and
                                          Accessories

                             MIRANDA Sensorex is one of the highest grade
                              SLR cameras embodying many outstanding features
                                            within its compact easy-to-use body, but furthermore,
                                                                   it is provided with 19 interchangeable lenses ranging
                                      from 25mm to 800mm focal lengths, along with a full
                                           assortment of useful accessories to make it deserve
                                          being called the full-scale System Camera. Besides
                                            ordinary shooting, it boasts of remarkable versatility
                                                in close-ups, copying and photomicrography in the
                                                  fields of science, medicine, industry, education and
                                             other activities.


OUTLINE OF CAMERA OPERATION


1. Open the back cover                             2. Load the film

While pressing lock button pull up clip lever at     Insert film cartridge, with the spool projection
ton to open back cover.                           facing down.


                                                       4. Wind film advance lever3. Set the ASA speed indicator

                                             Continue winding until film counter shows
                                                    figure " 1 ".
View original page 7Page 8 · Read text
6. Obtain exposure by looking through
5. Set the lens selector dial and turn on the      viewfinder
meter switch
                                          While looking through the viewfinder turn
                                                     shutter speed dial or diaphragm setting lever
                                                         until the needles coincide.


7. Adjust the focus
                                                       8. Decide the composition by looking through
Turn focusing ring until the jagged glitter          viewfinder and gently press shutter button.
disappears from the center focusing spot.


FILM LOADING

· Always load or unload the film in the shade. If
no shade is available, do it in the shadow of your
own body.

· Whenever possible, avoid loading and
unloading in a dusty place or at the seaside
where strong salty wind is blowing.

· When loading or unloading, take care not to
touch the shutter curtains.
View original page 8Page 9 · Read text
www.butkus.us


  The 35mm film is advanced through rotation    As soon as you have loaded the camera, be sure
of the sprocket and not by direct winding of the    to adjust the ASA speed indicator (ASA 25--
spool; therefore, the sprocket must engage the     1600) on the shutter speed dial to the ASA speed
film's perforation perfectly. To check whether      of the film you have loaded. Lift the shutter
the film is advancing properly, the rewind knob    speed dial and rotate it until the required ASA
is first turned slightly to take up any play in the    speed is opposite the indicator mark. Setting the
film; then if the advance lever is wound the     ASA speed is essential to exposure
rewind knob should rotate. But if the rewind       determination since the ASA speed indicator is
knob fails to turn it indicates that the film is not    cross-coupled to the meter needle in the
properly loaded and requires reloading.            viewfinder, along with the diaphragm and the
                                                        shutter. If the ASA speed is not correctly set, the
                                                        built-in CdS exposure meter will not indicate
                                                    correct exposure settings.


1. Open the back cover
    Press lock button in the       2. Insert cartridge into film
                                                                         3. Push back rewind knob to
center of right edge of back     chamber
                                                                  original positioncover and pull up clip lever at
top at the same time, which          Pull up rewind knob and
                                                                                        If the knob does not go all
immediately opens the back       insert cartridge, taking care
                                                                   the way down turn it a little to
cover. When back cover is        that the projecting end of
                                                                   the left or right.
opened, counter automatically    cartridge faces down.
returns to "S" (start) mark.
View original page 9Page 10 · Read text
5. Insert tip of film into      6. Turn film advance lever
4. Position take-up spool
                             spool's film slit.              until perforations on both
slit.
                                                           sides of film are engaged
                                 Insert end of film making   by the sprocket. Turn the bottom knurled
                             sure that one perforation is
flange of take-up spool
                           caught by the claw at the       If one winding fails to make
with a finger until slit
                             entrance of the film slit.      sprocket catch the
appears.
                          Also see that the sprocket     perforations on both sides of
                          engages the film              the film, press shutter button
                               perforation.                and wind again.


7. If film is advancing        8. Turn film advance
                                                                 9. When film counter
properly, close back        lever several times to
                                                          indicates "1" it means film
cover.                  wind up the fogged
                                                      loading is completed.
                           portion of film.
  Upon closing, push
                                                From here, film counter
down clip lever, which will     Shoot several blanks
                                                               will move e frame by frame
automatically engage the    and continue winding the
                                                               for each shot to indicate the
lock button and the back      film until film counter
                                                number of pictures which
cover becomes securely       indicates ''I''. Then, slightly
                                                    have been taken.
locked                        turn rewind knob in the
                               direction of arrow to take
                        up any slack.


TO USE FILM ADVANCE LEVER--


Before winding (WHITE)
View original page 10Page 11 · Read text
www.butkus.us


Turn film- advance lever until it goes no further.   After winding (RED)
One full turn of I80° is necessary to advance one  One full winding of film advance lever:
frame. Insufficient winding may make the
shutter button unworkable, or even if it does           I. Advances one frame of film.
work it may not permit proper opening of the       2. Makes film counter advance one number
shutter curtain. This point requires careful          3. Changes color in signal window from white to
attention.                                             red.
                                                       4. Winds the shutter.
   One full winding also winds the shutter and     5. Sets the automatic diaphragm of lens and
changes the color in the signal window from       mirror mechanism.
white to red. It returns to white again when 4 the
shutter is released.


                                                   SETTING THE SHUTTER
                                                                 SPEED--


                                                       · The red "60" indicates the shutter speed
To set the shutter speed, the shutter speed                                               for synchronization with electronic flash.
dial is turned to the left or right until the
desired speed number lines up with the                                                       · Shutter speed can be freely changed
shutter speed indicator. The dial rotates in                                           before or after winding.
either direction.

                               When turning the shutter speed dial, see
The marks "B. I, 2....... 1000" indicate"                                                 that it falls correctly into click stop
indicate Bulb, I sec., 1/2 sec ....... ......                                                position. If set to intermediate positions,
1/1000 1/1000 sec. shutter speed positions.                                             the shutter will not operate at an accurate
                                            speed.
View original page 11Page 12 · Read text
APERTURE


                                                       · Adjustment of the aperture scale to a
                                             point midway between the settings would
                                           give an intermediate f-value.

                                                       · The aperture may be set either before or
                                                   after film advance.
                                       Because the diaphragm mechanism of the
                           MIRANDA Sensorex is coupled to the
                                         metering system, refer to sections on the
                                CdS exposure meter and method of light
                                      measurement for further details on aperture
                                                   setting.

The aperture scale of the standard lens has
calibrations from f/I.8 (I.4) to f/I6. To
adjust the aperture according to the light
intensity, shift the aperture setting lever in
either direction. The red indicator on the
lens mount or the diaphragm setting lever
is used for reading the aperture setting.

· The larger the aperture value the less
light is transmitted to the film plane. The
calibration on the scale is arranged so that
setting to the next larger value reduces the
volume of incoming light by half. If, there
fore, the scale is adjusted in succession to
the next larger value, the volume of light
transmitted through the lens would be
decreased in progression of 1/2 I/4, I/8,
1/16 and so on.
View original page 12Page 13 · Read text
www.butkus.us

How to Use the CdS Meter

1. Mercury Battery


                             The CdS meter of the MIRANDA Sensorex  is
                               powered by a mercury battery. Before using your
                           new Sensorex, therefore, load the mercury
                                      battery which is supplied with it in the battery
                                compartment of the camera.

                                                     I. Take off the battery compartment lid of the
                                camera by turning it in a counterclockwise motion.
                                        2. Place the mercury battery in the compartment,
                                    seeing to it that the (+) side faces the camera back,
                                and close the lid.
                                        3. The meter will be activated by turning on the
                                 meter switch.

                                              · The meter will not function if the polarity of the
                                mercury battery is reversed.


· Under ordinary circumstances, the mercury battery will provide sufficient power to work the meter over a
duration of about two years. The battery power declines sharply when it nears the end of its life-span, resulting
in sluggish movement of the meter needle seen through the finder. In this case, replacement of the mercury
battery is necessary.

· When replacing the mercury battery, use Mallory # 625 or equivalent.  See this link on a Wein Air
replacement battery.

· Remove the mercury battery from its compartment when the camera is to be left unused over any great
length of time.
View original page 13Page 14 · Read text
2. Setting the Film Speed


                              The CdS meter of the MIRANDA Sensorex is
                                  coupled to the film speed dial. After loading the
                                         film, therefore, see that the film speed dial is set
                                       properly. Failure to adjust this dial according to
                                      the speed rating of the film loaded in the camera
                                        will prevent the meter from giving correct
                                  exposure reading.

                                               · Lift and turn the knurled outer ring of the shutter
                                          dial in either direction until the desired figure
                              comes directly opposite the indicator.
                                               · It is unnecessary to re-adjust the film speed dial
                                     unless film of a different speed rating is loaded in
                                      the camera.
                                               · The same film speed setting is employed when
                                    using filters or in close-ups and
                                   photomicrography.
                                               · Intermediate settings on the dial denote film
                                   speeds given in the illustration.

3. Switching on the Meter


                               The CdS exposure meter is activated by pushing
                                   toward the camera front the meter switch located
                                on the base of the film rewind knob.

                                                · The meter switch has click stop to prevent it
                                 from accidentally slipping out of position.

                                                · The On/Off indicator is on the flash
                                     synchronizer selector. Regardless of whether the
                                         flash synchronizer selector is set to FP or X, the
                                         indicator will show at a glance whether the
                                     switch is turned on or off.


                                                · Be sure to adjust the flash synchronizer selector
                                       accurately to the click stop settings at FP or X.
                                        Failure to do so will prevent the On/Off indicator
                                 from giving the On or Off setting accurately.
                                                · It is unnecessary to turn off the meter switch
                                            after each exposure; however, to prevent battery
                                          drain, it is advisable to shift the lever to Off
                                        position when the camera is to be left unused.
View original page 14Page 15 · Read text
www.butkus.us

4. Open Aperture Light Measuring


                                The MIRANDA Sensorex is the only camera in
                                      the world permitting open aperture light reading
                                   with either exclusive Miranda lenses or other
                                   brands of preset diaphragm lenses. The method
                               employed in light measurement is basically the
                              same with any of these lenses.
                                              · The exposure computer system of the
                       MIRANDA Sensorex is adjusted perfectly to the
                                Auto-Miranda lens or other preset diaphragm lens
                                        in use, simply by setting the lens selector dial on
                                      the camera front according to the maximum
                                      aperture of the lens. If, for instance, a 50mm f/I.8
                                      lens is mounted on the Sensorex, turn the dial until
                                      the figure I.8 appears in the window.


The lens selector dial has the following settings:

1.4 - 1.8 - 2.8 - 3.5 - 4 - 5.6 - 8

  The CdS meter of the MIRANDA Sensorex is cross-coupled to the shutter speed and diaphragm mechanisms.
Therefore, exposure is determined according. to one of the following methods:

1. An appropriate shutter speed is pre-selected and the diaphragm setting lever is turned until the two needles in
the finder are matched perfectly.

2. By pre-selecting the lens aperture, the meter needles are matched by turning the shutter speed dial.

3. In case of preset diaphragm lenses, the diaphragm setting lever is manipulated and the aperture reading where
the two needles coincide is then transferred to the aperture scale of the lens.

5.- Closed Aperture Light Measuring


                                        In ordinary situations, the open aperture light reading is
                               more convenient as it enables bright viewing of the subject
                                       area and also effectively provides against inaccuracy of light
                                 measurement resulting from strong backlight entering
                                    through the viewfinder eyepiece. Nevertheless, closed
                                       aperture light reading is necessary in photomicrography or
                              when using lenses of undeterminable f-number.

                                 The method of closed aperture light reading is identical
                                    with any type of lens used.


                                           1. Adjust both the lens selector dial and diaphragm setting
                                        lever of the camera to f/1 .4.
View original page 15Page 16 · Read text
2. Stop down the lens to the required aperture and match the
                                     needles by turning the shutter speed dial.

                                           3. Take every precaution against backlight entering from the
                                     viewfinder eyepiece. Because the light transmitted through
                                       the lens in case of closed aperture light reading is often
                                 weaker than the backlight, error in exposure reading is liable
                                         to occur. To prevent errors in light reading, therefore, the
                                    use of the eyecup is recommended.


6. Partial Average System


                                          The exposure meter measures an average of a
                                                     part of the image, eliminating the light-influence
                                                  of the sky, which could cause over exposure of
                                                   the picture, especially when color film is used.
                                               This light-measuring is performed in a unique
                                           way. The single CdS-cell, behind the mirror, in
                                                    actual fact is composed of 3 separate super
                                                     sensitive light measuring elements, positioned in
                                                   the upper portion and left and right side of the
                                                    mirror.

                                       As the mirror is placed in the camera at a 45
                                               degree angle, the reflected image in the
                                                viewfinder covers the area as shown in the
                                                       pictures. When photographing it is therefore aThe Sensing area of the CdS meter of the
                                                     prerequisite to have the main subject in the area,Miranda Sensorex is placed behind the mirror in
                                              covered by the exposure meter,alignment with the optical axis of the lens in use,
always in position for exposure reading, except
for the split second action of the mirror when
taking a picture.
View original page 16Page 17 · Read text
www.butkus.us

7. Convenient, Efficient Cross Coupled Match-Needle System


  The CdS meter incorporated in the MIRANDA Sensorex is of the match - needle type permitting speedy,
accurate light measurement. It is moreover cross-coupled to the shutter and diaphragm mechanisms. By looking
through the viewfinder, you can see at a glance whether the prevailing light is sufficient to guarantee correct
exposure without extra adjustments. Moreover, since the meter is cross-coupled, light reading can be done
through pre-selection of either the shutter speed or lens aperture, depending on the method preferred by the
user.
· Aim the camera toward the subject and while looking through the viewfinder turn the shutter speed dial or
diaphragm setting lever until the follower needle (with 0 on the tip) coincides with the meter needle. This
simple procedure enables accurate light measurement.

                                                            · To obtain special effect by doubling
                                                 the exposure, match the upper curve of
                                                 the O to the meter needle. To decease
                                                 the exposure by one setting, match the
                                            lower curve of the O to the needle.

                                                             · When in case of aperture pre-
                                                   selection method the needles fail to
                                               coincide even when the shutter speed
                                                      dial is turned, set the shutter speed to
                                                 the closest setting and then turn the
                                          diaphragm setting lever until the
                                               needles are perfectly matched. Do not
                                            under any circumstances adjust the
                                                   shutter - speed dial to an intermediate
                                                       setting.


AUTOMATIC DIAPHRAGM AND DEPTH-OF FIELD PREVIEW LEVER.


 · The fully automatic diaphragm of Miranda lenses is of special construction which keeps the lens wide open
all the time to provide a very bright viewfinder image for easy picture composition and speedy adjustment of
focus.
View original page 17Page 18 · Read text
· When the shutter button is pressed, the diaphragm automatically closes down to the aperture to which the lens
has been set beforehand and makes it work only at that aperture. But when the shutter closes, the diaphragm
automatically reopens.

· The viewing can therefore be done at fully open aperture at all times. But if one desires to actually check the
effects of a given aperture on the image, the special lever on the lens barrel can be used. This preview ; lever
when depressed stops down the diaphragm temporarily to the aperture which has been pre-selected so that the
depth of field and background blurs can be directly checked.

· Miranda's fully automatic diaphragm system is used not only in the standard 50mm lens but also in all other
Auto-Miranda lenses. As with the standard lens, they permit viewing at full aperture, no matter what f-stop has
been pre-set for the actual shooting. In snapshots particularly, it saves the trouble of having to open the aperture
for focusing and to close it down for the shot.

· When changing the lens, it makes no difference whether the aperture is stopped down or not, for once it is
mounted on the camera the aperture automatically opens fully.


  The mirror is of course of the quick-return type which causes an extremely short viewfinder black-out during
shutter action. Due to its original construction, the mirror mechanism on MIRANDA Sensorex is particularly
quick acting and the viewfinder black-out at shutter speeds of 1/15 second or faster lasts no longer than the
blinking of an eye.

· The coupled action between the automatic diaphragm and the mirror too is very smooth, so that when the
shutter button is pressed:

(I) The diaphragm closes down to the preset aperture,

(2) Almost simultaneously the mirror swings up,

(3) Followed by opening of the shutter curtains and film exposure

(4) Then, the shutter closes, mirror returns to normal position and the lens diaphragm re-opens fully.

All the above actions are instantaneous.
View original page 18
Page 19 · Read text
www.butkus.us

PICTURE COMPOSITION AND VIEWFINDERS


                                  As the viewfinder of the SLR shows the very image
                                       which is formed by the taking lens, it is easy to check
                                              the relation between the subject's perspective and its
                                          background, as well as the color tone effects when
                                            using color film, exactly as will be exposed on the
                                                actual film.

                            MIRANDA Sensorex has a viewfinder of 0.92
                                            magnification (with 50mm f/I.8 lens) and 95%
                                            coverage. The size of the picture is intended to match
                                              the size of the color slide mount.

                                                               It also causes absolutely no parallax (difference
                                        between the area covered by the viewfinder and by
                                              the taking lens) not only in ordinary shooting but,
                                               also in all types of close-ups.


                                   The viewfinder on MIRANDA Sensorex is
                                           interchangeable and can be changed with the most
                                          convenient type according to the purpose of the shot so
                                            as to make best use of the camera's capacity. The v
                                           viewfinders available are the pentaprism type and
                                              waist-level finders Types I and 3.
                                                       · For ordinary shooting it is convenient to use the
                                         pentaprism viewfinder which shows the image right
                                             side up and right way round.
                                                       · For low-angle or high position shooting and for
                                         candid shots, the waist-level finder VFI becomes
                                               useful; however, special care should be taken to avoid
                                                  light entering the camera through the focusing screen
                                     which may cause incorrect exposure.
                                                       · For close-up, copying and photomicrographic work,
                                         use critical focuser VF 3 . This viewfinder when
                                            collapsed turns into a I 5 times magnifier for critical
                                          focusing at the center of the focusing screen. When
                                      opened it becomes a 5 times magnifier for inspecting
                                             the entire picture area.


The viewfinder on MIRANDA Sensorex is interchangeable and can be changed with the most convenient type
according to the purpose of the shot so as to make best use of the camera's capacity. The v viewfinders available
are the pentaprism type and waist-level finders Types I and 3.
View original page 19Page 20 · Read text
· For ordinary shooting it is convenient to use the pentaprism viewfinder which shows the image right side up
and right way round.

· For low-angle or high position shooting and for candid shots, the waist-level finder VFI becomes useful;
however, special care should be taken to avoid light entering the camera through the focusing screen which may
cause incorrect exposure.

· For close-up, copying and photomicrographic work, use critical focuser VF 3 . This viewfinder when
collapsed turns into a I 5 times magnifier for critical focusing at the center of the focusing screen. When
opened it becomes a 5 times magnifier for inspecting the entire picture area.


                           ADJUSTING THE FOCUS--

                                   While looking through the viewfinder, if the focusing
                                           ring is turned either to the right or left it will, make the
                                          blurred image of the subject become clear and sharply
                                         focused.

                                                    · The focusing is very easy as the viewfinder shows in its
                                           center a multi-microprism (collection of minute prisms).
                                       This gives jagged edges to the image as soon as it is out
                                          of focus even in the slightest degree. Light is collected to
                                           the focusing screen by means of a special system of fine-
                                        grained Fresnel lens and condenser, which permits bright
                                          corner-to-corner viewing.


Focusing for Infra-Red Shots

For infra-red shooting, first set to accurate focus in the normal way, then shift that distance reading to match the
red "R" mark on the aperture ring of the lens.
View original page 20Page 21 · Read text
www.butkus.us

HOW TO HOLD CAMERA AND PRESS SHUTTER BUTTON


                                To obtain a sharp picture, the camera must be held
                                            properly. If there is camera shake, good pictures cannot
                                      be obtained even with the best camera in the world.
                                    Whether shooting in the vertical or horizontal position,
                                    aim the camera at the subject with the elbows pressed
                                            against the body if possible, but not too tightly, as this
                                    would stiffen the posture.
                                                     · Depress the shutter gently, while holding the breath
                                              for an instant.
                                                     · Do not press the shutter button with only the fingertip,
                                          but hold the camera between thumb and forefinger and
                                           press it as if trying to squeeze the camera.
                                                     · Use the right eye to look into the viewfinder.
                                                     · When using telephoto lenses avoid camera shake by
                                         holding the lens barrel with the left hand. · Use a tripod
                                 when shooting at slow speeds.


SHOOTING AT SLOW SPEEDS


                           Hand-held shooting at speeds slower than I/30 second is liable to
                             cause camera shake. In such a case. use a tripod when possible
                               preferably a sturdy kind.
                     When using a tripod it is better to work with a cable release, which
                           can be screwed into the cable release socket on the shutter release
                                button. In slow speed shooting, make sure the shutter is completely
                              closed before winding the film advance lever again.
View original page 21Page 22 · Read text
SELF-TIMER OPERATION


                           To use the self-timer, move the self-timer lever located on the
                                       front of the camera body 90 degrees to the left. It allows you a
                                  time delay of approximately IO seconds after pressing the
                                       shutter release button. You may also get any intermediate time
                                    delay- under IO seconds depending on the angle to which you
                                         set the lever. You may set the self-timer either before or after
                                     the shutter is wound.

                                    After setting the self-timer, if you decide not to use it, you
                                 simply have to return the lever to its original position, and the
                                          self timer will be disconnected. The self-timer may be used
                                  very conveniently in place of a cable release. It will release the
                                       shutter without any vibration.


FLASH PHOTOGRAPHY


                             · For snapshots at night, in dark places, and in indoor shooting, flashbulbs
                       or electronic flash can be used to good
                       advantage. Flash units also provide auxiliary light for taking pictures of
                         against-the-light subjects.
                             · For flash shooting, an exclusive flash Bracket is mounted to the bottom of
                        the camera.
                             · The flash units is inserted from the rear of the flash bracket and secured by
                        tightening its mount.
                             · Insert the plug of the flash unit into the camera's synchro terminal. For
                       taking pictures with ordinary flash bulbs, turn the selector dial to FP (focal
                         plane).
                             · For taking pictures with electronic flash, turn the selector dial to X. When
                         electronic flash is used the shutter speed must be set at I/60 marked in red
                    on the speed dial. For details, refer to the table on the next page.
                             · The F Class and M Class bulbs can also be used with slow shutter speeds
                       (slower than l/30 see) but whenever possible use the FP Class bulbs.
                             · Each type of flashbulb or electronic flash has a Guide Number to indicate
                               its light output. Exposure should be calculated from these guide numbers,
                   The Guide Number is the product of "distance to subject" multiplied by the
                        lens aperture value. From this relationship, the correct lens aperture can be
                       obtained by dividing the Guide Number with the "distance to the subject".
View original page 22Related documents and language editions
From the M. Butkus archive. Original publisher and archive notices are retained.
Check the model and edition against your equipment.
PDF verified 2026-10-10.