Film cameras
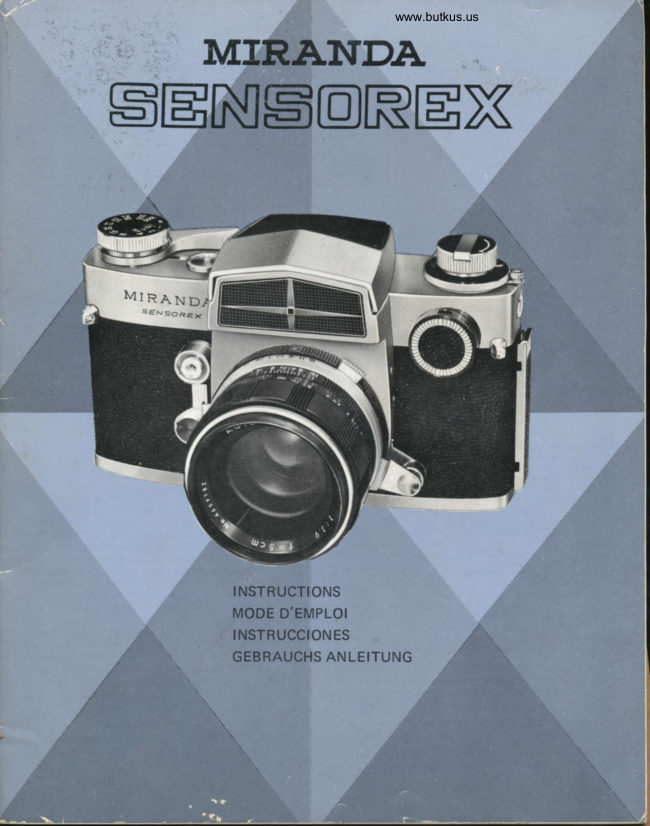
Miranda Sensorex User manual
User manual for Miranda Sensorex. 48 pages in German, French, Spanish. Read the original PDF, download or print a copy without registration.
48 pagesGerman, French, Spanish5.4 MB PDF
Loading your manual…Open PDF directly
Document details
- Brand
- Miranda
- Model / document
- Miranda Sensorex
- Document type
- User manual
- Language
- German, French, Spanish
- Pages
- 48
- File size
- 5.4 MB
- Category
- Film cameras
- Document date
- Not specified in catalog
Search available document text
Find a term, then jump to its page in the original PDF. Image-only pages may not be searchable; check the PDF for exact wording and diagrams.
Page 1 · Read text
www.butkus.us
   MTRAIVDA
StrNg5@RtrX


              INSTRUCTIONS
            MODE D,EMPLOI
              INSTRUCCIONES
             GEBRAUCHS AN LEITUNG
View original page 1Page 3 · Read text
www.butkus.us


CONTENTS                                  Table des matidres
Names of Parts                                                    l-  Nor. des orgones de commonde              PogeJFilm Loading                                              )   Chorgement du film                               5
How to Use Film Advance Lever             9  Le levier d'ormement rooide                    9
Setting the Film Speed                        ro   R5gloge de lq sensibilit6 du film.Setting the Shutter Speed                                    II   R6gloge de lo vitesse d'oblurotion                               l0ll
Setting the Lens Aperture                         IZ   R6gloge du diophrogme                          t2
How to Use the CdS Meter                        r3   Le oosemitre CdS                                  l3
                                                                                                                          21Quick-Return Mirror                            ZI   Le miroir d retour instonton6
Adjusting the Focus                          2Z  Lo mise ou poinl                                22                                          Lo profondeur de chomps                        23Depth of Field                                 2)                                             Le codroge de I'imoge et les viseurs                   25',
Picture Composition and Viewfinders            z5   Comment tenir l'opporeil. Le declenchemenl.      26
How to Hold Camera and Press Shutter Button z6  Lo prise de vue d long temps d'exposiiion        27
Shooting at Slow Speeds                      27  Le declencheur d retqrdemenr                    28
Self-Timer                                     28   Le rebobinoge du film                         29
F;t*    p.,-i-Ji--                                29  Lo prise de vue ou flosh                      30
Shooting with Flash                             )o  Le chongement d'obiectifs                            3l                                                     Les                                                                         interchongeobles                                                                       MIRANDA                                                                       objeclifsLens      Interchanging                                                    )r                                                            Sensorex                                                                                               34             Interchangeable LensesMIRANDA                                                )4                                                                    occessoires                                                 Les                                                       MIRANDA SensorexMIRANDA  Accessories                          )6   Les donn6es iechniques de lo MIRANDA           36
MIRANDA Sensorex: Technical Data         4+     Sensorex                                   44


 ,ND'CE                                                 Inhalteverzeichnie
 Denominaci6n de los dislinfos portes de lo c6moro 3     Funktionselemente                                      )
 Como corgor lo peliculo                        5   Das Laden der Kamera                                  )
 Como utilizor lo palonco de tronsporle de Io           Betitigung des Filmaufzughebels                 o
   peliculo                                   9     Einstellung der Filmempflndlichkeit            IO
 Como ojuslor lo sensibifi'dod de lo peliculo               l 0     Einstellung der Verschlussgeschwindigkeit                    II Como regulor lo velocidod del oblurodor        11                                                        Einstellung des Blendenwertes                  72 Como oiuslor lo operluro del obietivo          12 Como utilizor el fol6melro                      t3     Einstellung des CdS-Belichtungsmessers           r)
 Espelo de relorno r6pido                        2l    Der Schwingspiegel                            2I
 Ajusle del enfoque                        22     Entfernungseinstellung
 Profundidod da compo y sus caroclerislicas    23    Die Tiefenschdrfe                            z)
 Composici6n de la folo y uso del visor         25   Die Sucherelemente                           25
 Como sosfener lo cdmoro y oprimer el              Das Halten der Kamera und der Auslciser     26
  disporodor                               26    Photographie mit langen Belichtungszeiten Como lomor folos o boios yerocidodes       27                                         Der Selbstausliiser                          28 Autodisporodor reluloble                      28                                            Die Filmrtickspulung                       29 Rebobinodo de la peliculo                  29
Como lomor folos con flosfi                  30     Blitzlichtaufnahmen                            3o
 Recombio de obielivos                        3t   Das Auswechseln der Obiektive                 )r
 Obietivos Mirondo intercombiables          31   MIRANDA Wechselobjektive                 34
 Accesorios Mirondo                          36   MIRANDA Sensorex Zubehor                 )6
 Ficho i6cnico de lo MIRANDA Sensorex       15    Technische Daten der MIRANDA Sensorex    45
View original page 3Page 5 · Read text
www.butkus.us


  I   lnlerruptor del exposimefro CdS.                                                           I    C.1 S- Bc'  I  i chtu ngs rnesser-Schalter
 2   Perillo de rebobinodo (con monivelo plegoble)            z   Filnrrrickspulkurbel
 3  Diol poro velocidod del obturodor                                             )   Gcschrv ind iqkeitse instellknopf                    ASA     Escolo                          de                 sensibilidodes                                     lo  peliculo.         de 4                                    ASA de lo  +   F ilnrenrpfindlichkeitseinstellring ASA                                      sensrbilidod              puesfo                        de lo     Aro poro               o pvnto 5                                                                  Filnrempfindlichkeitsmerkscheibe  ASA         pelicvlo.
 6  Polonco de lronsporle de Io peliculo                                           (r   Filnraufzr,rgshebel
                                                                                                                                                                                                                                                                    i hngeschwind igke itsmarkierung 7  lndice de lo velocidod de oblurodor                   7   F
      lCon indicodor de ovonce de lo  peliculol                mit Filmaufzuqindikator
 8  Cuenloexposiciones                                         S   Autonratischer Bildzihler
 9  Visor pentoprismo                                                                           r)   Pentanrisma-Sucher
lO  Disco indicodor de lo sincronizoci6n poro flosh.         IO   S1'nchronisations- E instellring
 I t   Disposilivo poro groduor el sislemo del exposimelro de   II   Objektiv-Wahlknopf       ocuerdo con lo luminorisdod del obietivo monlodo en
       lo c6moro.                                                t2    Auslciser
l2   8ol6n disporodor                                                       r)    Blen.leneinstellring
                                                                                                                                                   r-f    Tiefenschirfe- KontrollhebeIt3  Escolo de diofrogmo
 t 4  8of6n preselector (poro conlrol de lo  profundidod de  r5   Se lL''stauslciser
       compo)                                              I6   Entfernungseinstellring
t 5  Autodisporodor  reguloble                               r7   Blendeneinstellhebel
l6   Anillo de enfoque                                                          rij   Standard Objektiv
17  Polonco del diofrogmo                                   r9   Riegel der Rtickwand               slondord     Objefivol8                                                                  to                                                            Sicherungsknopf                                                                      der Riickwand                           posferior                 lopo            delo19  Cerrojo                                                                         AI                                                                   F ihnandruckplatte                   pored     Relenci5n                              poslerior de lo c6moro           de lo20
2l   Ploco poro presionor lo peliculo                               )7   Filmriickspulknopf
22  8ol6n robobinodor                                     z)   Fihntransportu'alze
23  Correle lomodor                                                   )1    F ilnraufrvickelspule
21  Corono denlodo poro lronsporle de lo  peliculo             -.>   Stativgervinde
25  Asienlo porlo-lripode                                               2(t   Blitzlichtnippel
26 fomos sincronizodos FP y X                        z7   Riickspulgabel27  Eje rebobinodor
28  Govefo poro Lo bolerio                             28   Batteriekammer
29  Bot6n poro desmontor el visor                       2g   Sucher Entriegelungsknopf
30  Corlino del oblurodor                                  lo   Schlitzverschluss
3 t  Oculor de visor                                                lr   Sucherokular
View original page 5Page 6 · Read text
Film Loading                                      Como Cargar La pelicula
Chargement du fllm                                      Das Laden der Kamera


               %*
      the back cover             Insert  cartridse into filn    Push back rewind knob
Press lock button in the center                                   original position
of right edge of back cover and     ll up rewind knob and         If the knob does not go ali the
pull up clip lever at top at the   rtridge, taking care that    way down turn it a litt1e to the
same time, which immediately projecting end of cartridge        left or right.
opens the back cover. When back
        opened, counter auto-
matically   rpf,rrn<     t^    "("      1<trrt\
mark.

Ouverture de Ia paroi dorsa    hargement du fiIm         Repousser Ia manivelle de re-
Appuyer sur lo touche de s6curil6 el          lo monivelle de rebobinoge bobinage en position originale
 retirer simulton6ment le verrou de      inlroduire lo corfouche dons le Si lo monivelle ne se loisse pos
lo poroi dorsole. Lo poroi dorsole          (voir illustrotion).                     compldfement, lourner
s'ouvriro imm6diolement. Le com-                                             -ci l6gdrement d  droite ou d
pteur-imoges reviendro outomoti-                                              iusqu'd ce que lo griffe de
quemeni sur lo position "S" (stqrt),                                       e entre dqns lq corlouche.

Abra la tapa poiterior       fnserte eI camete en el     Vuelva a su situacion
Presione so6re el bot6n del cenoio     te correapondiente         la perilla bebobinadora
    el cenlro del extremo derecho Tire de lo  perillo rebobinodoro elSi lo perillonoboioro hosloelfope,
    fo lopo poslerior y tire simult6-        el correle, teniendo cuidodo         giror un poco hocio la derecho
       de lo trobo en el exlremo,    que el extremo sobresol'enle dello hocio lo izqvierdo.
lo que obrir6 de inmdioto la top        esl6 hocio obojo,
           , Uno vaz obierlo lo top
           , el cuenloexposiciones oulo-
             relorno o lo morco "S"


     Oefrnen der Kamera-        Lsden der Kemera        FihnriickepulLurbel in ilie origi-
Riickwanil                           ilmriickspulkurbel ganz anhebe      Poeition runterdriicken.
       llr,eitig                          Filmpatrone in das             die  Filmriickspulkurbel
  icken und Riesel der Riickwand   hduse einsetzen (siehe Abbil  nicht ganz in die original Posi
   ausziehen. Das Bildzihlwerk                                       tion- zurijckkehren. so ist diese
        automatisch auf "S"                         zu drehen bis die Gabel sich
zurtick  sobald die   Kamera-                                      ie Filmpatrone einfiigt.
Riickwand geciffnet wird.
View original page 6Page 7 · Read text
www.butkus.us
ffir
                                             'a%'r ji


         take.up  spool slit     Insert tip of film into Epool'       film ailvance lever
  urn the bottom knurled flange         elit                           ions on both siiles
    take-up spool  with  finger lnsert end of film, making       film are engaged by the sprocl
until slit appears.                  one perforation is caught by If one windins fails to ma
                                 claw at the entrance of t             t catch the perforations
                            lm slit. Also see that the sproc          sides of the film, pre
                                 ngages the film perforation.         ter button and wind again.
La bobine d'enroulement llntroduire l'amorce du fiIm    ionner le levier d'arme- ourner lo bobine d'enroulementldans  la fente                     rnt rapide jusqu'i ce que la
ovec Vn doigt iusqu'd ce que lollntroduire l'omorce du film dons lo   rfora-tion soit engag6e desfente, oi  s'introduil le  film. soitlfente ef s'qssurer que lo perforotion   ux cAt6s sur Ies grifres de
 visib le.                                soit prise per le crochet de fixqtion I'arbre d'entrainement du film
                              de lo bobine d'enroulement. Conir6- Si le film n'esi pos engog5 d
                                       ler 6golement que lo perforolion se deux c6i6s sur les griffes de  I'
                                 trouve bien engog6e sur les griffes d'entroinement du fllm oprds
                          de I'orbre d'enfroinement du film.  ociionn6  le   levier  d'
                                                                  ropide, d6clencher puis octionner
                                                       une nouvelle fois le levier d'
                                                               ment rqpide.
    icion de la ranura     Inserte el extremo del film   Haga girar  la palanca
  rrete tomad,or Hogo giror       ranura correspondiente d   tranqtorte de la pelicula hasta
    dedos lo brido estriodo     naaarno                  que laE perforacionea en en
        tomodor,                               el exlremo del film, pero         bos Indos del film encastren
                                de que vno de los perforoci-    la corona dentada
                                          encoslre en lo ufio o lo        Si no bosloro vne vuella pora
                                      lo ronvro del correte.            ls coronq dentodo engonche los
                                      bien que lo  coronq dentodo forociones en ombos lodos del
                                  en los perforociones.          e sobre el disporodor y
                                                      de nuevo lo  polonco

    Aufwickelspule                 Einfuhren iles Films in ihe Filmaufzughebel  betitigen
     Aufwickelspuie so               ickelspule               e  Perforation   des
   der Schlitz wo der Film           Filnr so einfddeln damit e      iilseitie durch die Fil
  fiihrt wird, sichtbar  ist.            ationsloch des Films durch     walse erfasst wird.
                             Nocken des Schlitzeserfasst
                                rd. Ebenfalls priifen dass die
                                 ation von der Frlmtrans-
                                    lze richtig erfasst wird
View original page 7Page 8 · Read text
,&             At.


 f film ie ailvancing properly    n film ailvance lever      Vhen  6lm counter
     back cover                    to winil up the            l"    it means film loading
  Pon  closing, push down cl          of film
Iever,  which will  automatically         several blanks and conti    From here, film counter will
 ngage the lock button and the windine the film until film coun   ame by frame for each shot
   k   col,er becomes securely indicates "r". Then. stightly  t       icate the number of
locked.                        rewind knob in the direction       ich have been taken.
                               arrow to take up any slacR.

Si I'entrainement du fiIm Actionner Ie levier d'a    Le chargernent du film es'effectue normalement, fer. ment rapide                  termin6 sitdt que Ie compteu
mer Ia paroi dorsale          Actionner le  levier  d'qrme     mages se trouve sur ..1"
Aboisser le verrou de lo poroi  ooide et d6clencher d            de l'octionnemenf du levier
dorsole, Lo iouche de s6curit6 se      ises iusqu'd ce que le compteur-  ormement ropide, le
mel en ploce outomotiquement.        ges se trouve sur lo position "l."   oges ovoncerq d'une unit6.
                                                                   -imoge indique le nombr
                                                                                   prises de vue effectu6es.

Si eI fllm aad,nzara correcta- Eaga girar  la  palanca d            el cuen
mente, Duelaa a cefiar Ia tapa transporte de peliculo varia
posterior                            s con objeto de bobinar la
Poro cerror, empvie hocio odoio lo   rte velada del film
Irobo, que qccionort autom6tico-        en blonco vorios veces y con-
menle el cerroio, y lo lopo poslerior      bobinondo lo pelicufo hosto   A portir de esle momenfo, el
qudorl firmemente cerrsdq.            cuenloexposiciones indique " 1."            se rro moyrendo
                             o hogo giror leyemenle el bot6n   cuodro codo vez que se
                                        en direcci6n o lo flecho       indicsr el nitmera de
                                       obieto de  eliminor                    efecluodos.


       der Filmtransport richtig                 mehrere             eich aler Filmzihler
funktionniert. Kamera-Riick-                                                   l'n befinilet, ist iler Ladevorgangl
wanil schlieseen.                        sich der automatische
Riegel der Riickwand herunter-   ldzihler auf Nr "r"  befindet. Von nun ap wird der automati-
driicken. Der                          t die Kamera zur ersten Auf-      Bildzihler bei jeder Betlti-
rastet automatisch  ein.                       bereit                     des Filmaufzugshebels auf
                                                              nechste Nummer springen.
                                                            Diese Nummer gibt die Anzahl
                                                                     belichteter Aufnahmen  an.
View original page 8Page 9 · Read text
Merci de faire un don de 2,50 € pour soutenir ce site via E-bay ... www.PayPal.me/butkus


Bitte spenden Sie 2,50 Euro, um diese Website über E-Bay zu unterstützen ... www.PayPal.me/butkus
View original page 9
Page 10 · Read text
www.butkus.us


Always load or unload the film in the shade, If no shade is available, do  it in the shadow of your
own body
Whenever possible, avoid loading and unloading in a dusty place or at the seaside where strong salty
wind is blowins.
When loading or unloading, take care not to touch the shutter curtains.
  Toulours chorger ou d6chorger le film d I'ombre, S'il n'y d pos d'ombre, efiectuer cetfe op6rotion
  dons I'ombre de volre coros.
  5i possible 6viter de chorger ou de d6chorger le film d un endroit humide ou d proximit6 de lo mer
  (donger cous6 per I'eou sol6e).
  Surlout ne pos toucher I'obturoteur d rideou.
  Corgue o descorgue srempre lo peliculo o lo sombro. Si no hubiero sombro, higolo o lo sombro de
  su propio cverpo.
  Siempre gue ello fuero posible, evite corgor o descorgor lo c6moro en un lugor polvorienfo. o  cerco
  de lo orillo del mor, donde soplo uno fuerte briso solitroso.
   Mientros corgo o descorgo lo c6moro, lengo lo precouci6n de no locqr lqs corlinillos del oblurodor.
  Kamera imrner im Schatten laden oder entladen. Wenn kein Schatten vorhanden, diesen Vorqang
  im eigenen Kiirperschatten  ausfiihren.
  Wenn moglich das Laden und Entladen an einem nassen Ort oder direkt an der See (Salzwasserge-
   fahr) vermeiden.
  Beim Laden und Entladen, Beriihruns des Schlitzverschlusses vermeiden.

The 35mm film is advanced through rotation of the sprocket and not by direct winding of the spool;
therefore, the sprocket must engage the film's perforation perfectll. To check whether the film  is
advancing properly, the rewind knob is first turned slightly to take up any play in the film; then if
the advance lever is wound the rewind knob should rotate. But if the rewind knob fails to turn it indi-
cates that the film is not properly loaded and requires reloading.
L'ovoncement du film se foit por I'orbre d'entrqinement du film, et non por lo bobine d'enroulement.  ll
esl donc importoni de plocer soigneusemenl lo perforotion du film sur les griffes de I'orbre d'entroine-
menl du film. Afin de contr6ler I'ovoncemenf du film, octionner lq monivelle rebobinoge, ceci ofin de
lendre le film dqns lo cortouche. Lorsque l'on octionne le levier d'ormement, surveiller lo monivelle de
rebobinoge que doit tourner dons le sens coniroire des oiguilles d'une rhonire. Ci ce n'est pos le cos,
I'enlroinemenl du film ne se foit pos normqlement. D6chorger puis rechorger le fflm.
El frln de 35mm no ovonzo medionle el bobinodo del correte, sino por roloci6n de lo corono denlodo ipor tonlo los perforociones de lo peliculo deberin encoslror perfeclomenle en lo corono denlodo. Poro
controlor si el ovonce de lo pelicvlo se efecltiq correctomente o no, girese primero levemenle el bot6n de
rebobinqdo con objeto de observor cvolqvier flojedod gue exislo en lo peliculo; luego se giro la polonco
de ovonce, y lo perillo de rebobinodo lombi6n giror6. Eslo es uno indicqci6n de que lo pelicvlo ovonzo
odecvodomenle. Pero si lo perillo rebobinodoro no girose, eso significo que lo pelicvlo no esltl corgodo
en formo odecuodo y preciso ser corgodo de nueyo,
Der Transport des 35nrm Fih-nes erfolgt.lurch.lie Fihntransportwalze unci nicht direkt.lurch  die
Aufwickelspule, aus cliesem Grund nuss .1ie Perforrrtion des Films sorefiiltiq auf tlic Greifer .ler
Filmtransportwalze gelegt werden. LIrn zu kontrollieren ob der Filmtransport richtig ftnktionniert,
muss zuerst die l{iickspulkurbel  betitiqt werden, .larnit der Filnr in der P:rtrone anqezoqcl.l wir.l. Bei
Betdtigung des Filmaufzugshebels muss sich die Rr-ickspulkurbcl .lrehen. Solltc .lies Iricht rler
Fall sein, funktionniert der Filmtransport  niclrt. Der Film nruss neu eingelegt  \\'erJen.


                                                    8
                                                                                                                                                                                                                                                                                                                                                                                                                                                                                                                                                                                                      l
View original page 10Page 12 · Read text
www.butkus.us
         Setting the film epeed               Como ajustar la sensibilidad de la pelicula
        Reglage de Ia sensibilit6 du fiIm                       Einstellung iler Filmempfindlichkeit


                                                                                                              32                                                                                                                                                                                                                                                                                    l$l                               40

                                                                                                              ao
                                                                                                                           125
                                                                         r@
                                                                                                  250
                                                                                                  320
                     v                              5@
                                                                                                 'l                                  t@ot3@
                 A
       The (..iS meter of the MIRANDA Sensorex is coupled to the film speed dial. After loading the film,
             tl.rerefore, see that the film speed dial is set properly. Failure to adjust this dial according to the speed
          ratinq of the film loaded in the camera will prever-rt the meter from giving correct exposure reading.
             Lift and turn the knurled outer ring of the shutter dial in either direction until the desired figure
            cornes directly opposite the indicator.
               It is unnecessary to re-adjust the film speed dial unless film of a different speed rating is loaded in
           tne camera.
rl        The same film speed setting is employed when using filters or in close-ups and photomicrog'raphy.
            Internediate  settings on the dial denote film speeds given in the illustration.
       Le posemdlre CdS de lo MIRANDA Sensorex est coupl6 d lo molette de r6gloge de sensibilit6 du ftlm.
        Apris ovoir chorg6 le fflm, s'ossurer que lo sensibilit6 du film soit r6gl6e correclemenf. Une mesure de
          lumidre correcte n'est pos possible si ce q.69loge n'o pos 6t6 efieclu6.
            Soulever lo molette de 169loge de sensibilit6, et lq lourner d droite resp. d gouche iusqu'd ce que lo            voleur exqcle se trouve en foce du repdre rouge.
                   ll n'est pos n6cessoire de 169ler d nouvequ lo sensibilit6 oussi longlemps que I'on utilise le m6me type
         de fllm.
           Lors de I'ufilisotion de filtres, lentilles de ropprochemenf ou lors de prises de vue ou  microscope, I'on
          ne chongero pos le 16gloge de sensibilif6.
           Les voleurs des points interm6dioires de l'6chelle de sensibilit6 sonl indiqu6es sur I'illusirotion ci-contre.
         El exposimetro de CdS de lo MIRANDA Sensorex vo ocoplodo o lo escolo de sensibifi'dodes de lo pliculo.
        Por eslo roz6n, despu6s de corgor lo c6moro con lo peliculo, compru6bese por lo correspondienle  escolo
       que el oro poro pueslo o punto de lo sensi6ilidod de lo peliculo se ho siluodo en lo posici6n sdecuodo.
         Si eslo pueslo o punlo no se efecluose correclomenle de ocuerdo con lo sensibilidod de lo peliculo con que
         se ho corgodo lo c6moro, el exposimelro no podr6 proporcionor uno correclo indicoci6n de lo exposici6n,
            lev6nlese y  girese el oro exlerior moleleodo del disco poro puestq o punlo del tiempo de exposici6n
           hoslo que lo cifro deseodo oporezcq exqclomenle delonte del indice.
        No es necesorio repelir eslo pueslo o punlo, exceplo cuondo se corgue lo c6moro con uno peliculo de
              distinlo sensibilidod.
         Lq mismo puestq q punfo se uso lombi6n ol empleor filtros o pro  fologrofios de cercq y poro micro-
             fotogrofios.

                (-.lS-Bclichtungsnrcsscr  .ier MII{ANDA  Sensorex ist mit dem FilmempfindlichkeitseinstellrinsI      Derlos posiciones inlermedios del disco corresponden o los sensibilidodes de pliculo gue indico lo ftguro.
             gcktrl'1'.'lt. N.r.lr.lerrr Jic K;rrrrcr;r rcl:rJcn ist, ist zu iiberpriifen, dass.iie Filnrempfin.llrchkeit  richtig
           einscstcllt ist. Solltc.lic I"ilnrcnrpfimdlichkeit mit der an der Kamera engestelltenFilmempfindlichkeit
           niclrt iibcrcirrstinrnrcn, k;un cine korrckte Belichtungsmessung nicht erfolgen.
        Dcn [:instcllrins dcr l"iln)ernpfindlichkeit heben ur-rd nach rechts bzw. links drehen bis die
              crwiirrsclrtc l:ilntertrPhndlicl.rkeit neben elem roten Punkt erscheint.
              Solar.rgc .lcrscl['c ['-ilnrtyp verwendet wird, ist eine neue Einstellung nicht erforderlich.
              Ils *'ir.l bci Bcrrutzunq von Filtern, Nahlinsen und in der Mikro-Photographie  dieselbe Filmemp-
             findlichkcit btrrutzt.
         Die Wertc .lcr Zrvischeneinstellungen sind auf nebenstehender Illustration
                                                          t0
View original page 12Page 13 · Read text
Setting the Shuttercpeed                  Velocidad del obturador
 R6glage de Ia vitesse d'obturation         Die Einstellung iler Verschlussgeschwiniligkeit

                                                                                                                                               ,,,,,"'ri                            &&t;.,''-,                                             ,:q


                                                                                                                                                                                                                                                           liliit9
                                                                                                                                         isg
                                                                                                                   t&
                                                                                                                                                                          rs
                                                                                                                                                                                                                      1
                                                                                                                                                                                                                     .,..,_,,..ri:99$

                                                                                                                                                                                                                                                                                                                                "illll *ff'               :_*d
To s_et the shutter speed, the shutter speed dial is turned to the left or right until the desired speed
number lines up with the shutter speed indicator. The dial rotates in either direction
  The marks "B,  t,  z......rooo"   ir-rdicate "Bulb,  r  sec., ]  sec. ......t/rooo  sec." shutter speed
   positions.
        (bulb) is for long exposures with the shutter remaining open as long as the button is depressed.  _8"  The red "6o"  indicates the shutter speed for synchronization with electronic flash.
  Shutter:pccd can ['c freel]'changcJ before or rfter win.ling.
  When turning the shutter speed tlial, see that it  falls correctly into clickstop position.  If set to
  intermediate positions, the shutter will not operate at an accurate speed.
Tourner le boufon de rdgloge de lq vilesse d'obturqfion sur lo voleur d6sir6e. Le bouton oeuf 6trelourn6 d droite ou 6 gouche.
  L'6chelle des vitesses pr6sente les possibilit6s suivontes: B, 1, 2...  IOOO. "8" signifie pose, I signifie I
   sec., 2 signifie {  sec.,... l00O signifie l/IOOO sec,
  B (pose). Aussi longtemps que I'on qppuye sur le d6clencheur, l'obluroteur resfero ouyerr.
  Le chiftre rouge 60 indique lo vilesses synchronis6e pour lo photogrophie qu flosh 6lectronique.
    ll est possible de 16gler lo vilesse d'oblurotion oyqnt ou oprds ovoir oclionn6 le levier J'ormement
   roDide.
  Touiours 169ler les vitesses sur une voleur entidre, et non enlre deux chifires. Un 169loge sur une
   posifion inlerm6dioire ne donne pos un temps pose 6quivolent.
Poro regvlor lo velocidod del oblurqdor se hoce giror el diol de velocidod del mismo hocio lo izquiero o
hociq lo derechq hoslo que oporezco el volor de velocidod deseodo ol nivel de lo lineo roio. El iiot giro
en ombos direcciones.
   los mqrcos "8,  l, 2.....1OOO" indicqn los posiciones del oblurodor correspondienles o "Bulbo, I  seg.
       I l2  ses......1 11000 ses."
   "8"  (bulbo) es poro exposiciones lorgos, cuondo el obturodor permqnece ohierlo mientrss el disporodor
   se mqntengo oprimido. Lo cifro "60" en rojo corresponde q lq velocidod de oblurodor poro sincroni-
   zocion con flosh eleclr6nico.
   lo velocidod del oblurodor puede ser voriodq sin inconyenienles onles o despuris del reSobinodo.
  Cuodo hogo giror el diol de velocidodes, fiiese que quede perfectomenle encqsfrqdo en el foperespeclivo.
   si hubierq quedodo fiiodo entro topes, el obturodor no podr6 funcionor correclomente,
Um die Vercl.rlussgeschw'indigkeit einzustellen, wird der Ceschwindigkeitseinstellknopf nach recht
oder links bis zutn gervinschten Wert einqestellt,
  Die (leschrvrndigkeitsskala unrfasst folqencle Mciglichkeiten: B, r ...   looo.  I bedeutet lsec, 2
  bedeutet   t fz sec, rooo bedeutet r/rooo sec.
  B becleutet Zeitaufi.rahnre. Solange auf den Auslciser gedrr.ickt wird, bleibt der Verschluss offen.
   [)ie rote (ro gibt die zu venrlendende \/erschlussgeschwindigkeit  bei Aufnahmen rnit Elektronen-
   blitzcr. an.
   [)ie        .\'erschlussgeschw'indiqkeiL  kann vor ocler nach der Betitrgung cles Irilnraufzugl.rebels veran.lert
   * erden.
   l)ic Verschlussgeschrvindiqkeit  nrijss auf cjncn vollen Skalenwert cingestellt wcrdelt, und nicht
   zwischetr z\.vei $'erten, da dic Kamera r.richt ruf Mittelrvert-Verschlussgischwirrdigkeiten   anspricht.
                                                                                         ll
View original page 13Page 14 · Read text
www.butkus.us
 Setting the lene aperture              Puesta a punto de la apertura de diafragma.
 R6glage du diaphragme                   Einstellung iles Blendenwertes
                                      The aoerture scale of the standard lens has cali-
                                                      brations hom f/r.9 to flr6. To adjust the aperture
                                                 according to the light intensity, shift the aperture
                                                  setting leser in either direction.
                                  The red indicator on the lens mount or the
                                           diaphragm setting lever is used for reading the
                                                   aperture setting.
                                         The larger the aperture value the less light is trans-
                                            mitted to the film plane. The calibration on the
                                                   scale is arranged so that setting to the next larger
                                                  yalue reduccs the volume of incoming light by half.
                                                             If, therefore, the scale is adiusted in succession to
the next larger r.alue, the volume of light transnlitted through the lens rvould be decreased in progression
of tlz,  tl4,  tl8,  tlr6  and so on.
  Adjustment of the aperture scale to a point midway between the settings would give an intermediate
f-value.
  Because the diaphragm mechanism of the MIRANDA Sensorex is coupled to the metering sl'stem,
refer to sections on the CclS exposure meter anci method of liqht measurement for further details on
aperture settrng.
L'6chelle des diophrogmes de I'obiectif stondord comprend les ouverlures de f/|.9 o f/|6.   Afin de r6gler
le diophrogme, oclionner le levier de r6gloge du diophrogme d droite ou d gouche.
  Lo lecture des voleurs de diophrogme se foit sur les indicotions rouges sur lo monture de I'obiectif ou
  d cAt6 du levier de r6gloge du diophrogme. Plus le chifire du diophrogme est grond, d'qutont
  moins de lumidre possero d trovers de I'oblectif. Lo diff6rence enlre deux voleurs correspond d  lo
   moiti6, respeciivemeni ou double de luminosit6.
  Le diophrogme peuf alre 16916 entre deux voleurs.
  Le m6conisme de r6gloge du diophrogme de lo MIRANDA Sensorex est coupl6 ou systdme de mesure
  de lo lumidre. Pour de plus omples renseignements, voir sous rubrique "Le posemdtre CdS."
lo escofo de operturos de diofrogmo del obietivo Slondord vo colibrodo desde ffl.9 o f116. Poro groduar
lo operturo de diofrogmo de ocverdo con lq inlensidod de lo lvz se desplozo lo correspondiente polonco en
un senlido u olro.
  Lq mqrcs rojo en lo monturo del ob'letivo o en /c polonco poro pueslo o punlo de lo opertvro de
  diofrogmo se uso porq oprecior por lectura directo lo operluro que se ho elegido.
  Con el o1'usle de operlvro pvde groduorse el volumen de lo luz entronle o groduor lo profundod de
  compo
  Cuonfo m6s qllo seo el volor de operluro, fqnfo menos luz posord o lrov5s del objetivo hacio lo
   pelicvla. Esto reloci6n es fol, que codo vez gue se combio hocio el volor f  inmediolo superior, se
  reduce cado vez o Io mitod el volvmen de lo lvz enlronte, de monero que si lo operturo fuero cer-
   r6ndose en formo sucesiyq de un volor F hocio el siguienle immedioto superior, el volumen de luz
   entronte irlo decreciendo o roz6n de l12, ll1,118 y 1116.
   Aiusles enlre lopes dorion volore f  inlermedios.
  Comoguiero que el mechonismo del diofrogmo de lo MTRANDA Sensorex vo ocoplodo con el sislemo del
   exposimetro, consrilfenselosp6rrofos relolivos ol exposimelro de CdS y ol m6lodo poro nedici6n de lo
   luz, donde se enconlror6n mds delolles reloliyos o lo pueslo o punto de lo opertura de diofrogmo.
Die Blendenrverte des Standard-Objektives  umfassen f/t,9  bis f/r6. Um den Blendenu'ert entsprechend
den Lichtverhaltnissen  einzustellen, wird der Blendeneinstellhebel nach rechts oder nach links gedreht.
  Die roten Markierungen oben an der Objektivfassung und an Blendeneinstellhebel erlauben den
   eingestellten Blendenwert abzulesen. Je grilsser der Blendenwert  ist, desto weniger Licht wir.l durch
   das Objektiv durchgelassen. Die Differenz zwischen zwei Blendenwerte entspricht der .loppelten
   resp. der halben Lichtmense.                           -zwischen  Die Blendenwerte kdnnen          zwei Blendenwerte  eingestellt werden.
  Da der Blendeneinstellmechanisr-nus  der MIRANDA Sensorex mit dem Lichtmessystem gekuppelt
    ist, emfehlen wir das Thema "Einstellung des Blendenweftes"'ausfiihrlich under CdS-Belichtungs-
   messer zu studieren,
                                                    12
View original page 14Page 15 · Read text
How to Uee the CdS Meter                     Corno usar el exposimetro de CdS.
 Le posemitre CdS                              Hanilhabung des CdS-Belichtungemessers
The CdS meter of the MIRANDA Sensorex is powered by a mercury battery. nefore using your new
Sensorex, therefore, load the mercury battery which is supplied with  it in ihe battery cJmpartment
of the camera.
 r.  Take off the battery compartment lid of the camera by turning it in a counter-clockwise motion.
z.  Place the mercury battery in the compartment,  seeing to it that the (*)  side faces the camera back,
   and close the lid.
3. The meter will be activated by turning on the meter switch.
  The meter will not function  if the polarity of the mercury battery is reversed.
  UnJer ordinary circumstances, the mcicury battery will provide sufficient power to work the meter
   over a duration of about two years. The battery power jcclines sharply when it nears the end of its
   life-span, resulting in sluggish movement of the neter needle seen through the finder. In this case,
  replacement of the mercury battery is necessary.
  Remove th_e m-ercury battery from its compartment when the camera is to be left unused over any
   great length of time.
Le posemdire CdS de lo MIRANDA Sensorex fonclionne ou moyen d'une pile qu mercure. Avqnt d'uiiliser
volre Sensorex, plocer lo pile dons le boitier comme suitr
 l.   Enlever le couvercle du comportiment-pile por rototion d gouche.
2.   Introduire lo pile ou mercure dons le comporiimenl. Le pole posifif (*l  de lo pile doit 6tre ploc6
     conlre I'orridre (voir illustrotion). Plocer d nouvequ le couvercle du comporliment-pile.
3.  Le posemdfre fonctionnero sit6t que I'interrupleur du posemdlre sero mis sur "ON.',
  Le posemilre ne fonctionnero pos si lo pile o 6f6 invers6e,
  Le temps d'utilisotion moyen d'une pile est de deux ons. Apris ce lemps, lo tension diminuero ropide-
  menl. Cetle diminution de tension se voil de lo mqnidre suivonte: L'oiguille de mesure se trouvont
  dons le viseur, foncfionnero por qccrocs.  ll sero n6cessoire de remplocer lo pile.
  Lorsque I'opporeil n'est pos utilis6 pendonl un certoin lemps, conserver lo pile s6por6ment.
El exposimelro de CdS de lo MIRANDA Sensorex se olimenlo de vno pilo de mercurio. Por eslo roz6n,
onfes de usor su nuevo Sensorex, monte ls  pilo de mercurio que se enlrego con lo cdmoro, coloc6ndola
en el oloiomienlo previslo ol efeclo.
 l.   Soque lo lopo del oloiomienlo poro lo pilo de lo c6moro, girlndolo en senlido controrio ol de los
     monecillos del reloi.
2.  cologue lo  pilo de mercurio en el  oloiomienro, cuidondo de gue el signo "*"   quede mirondo lo
     porle poslerior de lq clmoro y cierre segvidomente lo topo.
3.  El exposimelro fvncionor6 cuqndo se cierre el interrvplor.
  EI exposimetro no funcionori, si se hq inverlido lo poloridod de lo pilo de mercurio.
  En cond.iciones de uso normqles lo pilo de mercurio tiene copocidod suffcienle poro olimenlor el exposi
  melro duronle un periodo de unos dos on-os. Lo corgo de lo pilo desciende bruscomenle cuondo eslo
   llego ol finol de sv duroci6n, lo que puede opreciorse por el movimienlo lenlo de lo ogujo del exposi-
   melro, visible, por el visor. Cuondo llegue esle coso sero necesorio susliluir lo pilo de mercvrio.
  S6quese lo pilo de su oloiomienlo cuondo no voyo o usorse lo comoro durqnte un lorgo periodo de liempo.
Der CdS-Belichtungsmesser der MIIl.Arr-DA Sensorex wird durch eine Nf anqan-Knopfbatterie
betriebsfahig. \'or  cler ersten Benutzung Ihrer MIRANDA Sensorex lvird also die- Mangan-Knopf-
batterie in das Batterie-Ceh5use eincesetzt.
t.  Batterie-Celrause-Deckel durch LinksJrehunt entfernen.
z.  Mangan-Knopfbatterie einsetzen. Das  ( f  ) Pol Jer Batterie nruss nach hinten eerichtet sein.
    Batterie-Gehause-[)eckel wieder einsetzen.
3. Der Belichtungsmesser wird funktionnieren sobald der CdS-Messer Schalter auf "ON"   sestellt
    wirJ.
  Der BeLchtungsmesser wird nicht funktionnieren, wenn .lie Batterre verkehrt eingesetzt  ist.
  Unter normalen Unrstdnden betrigt clie Lelrensclauer tler Batterie z Jllire. Anr Eirde dieser Zeit
   sinkt clie Spannung sehr rasch. Man stellt diesse fcst inelenr die inr Sucher sichtbare Messr.ra.lel
   ruck\yeise funktionniert. Die Batterie nruss dann ausgeu'cchselt  werden.
   Solltc.lic  K;tttrcr:r wilrrcrrJ lirrqcrcr Zcit niclrt bcnutz-.-t wer(icn, jst cs crnnfchlenswcrt dic Batteric
  zu entfcnrcn ulrJ scl\.lrtt ru  l.,g".tr.
                                                      t3
View original page 15Page 16 · Read text
www.butkus.us
 IIow to Use the CdS Meter                  Como usar el exposimetro de CdS
 Le potemetre CdS                      Handhabung dee CdS-Belichtungemessero
   TW


The CdS exposure meter is activated by pushing toward the camera front the meter switch located
on the base of the film rewind knob.
  The meter switch has clickstops to prei'ent  it from accidentally slipping out of position.
  The On/Olf indicator is on the flash synchronizer selector. Regardless of whether the flash synchro'
   nizer selector is set to FP or X, the indicator will show at a glance whether the switch is turned on
  or off,  Be sure to adjust the flash@'ffisynchronizer selector accurately to the clickstop settings at FP or X. Failure
   to do so will prevent the On/Off indicator from giving the On or Off setting accurately.
    It  is unnecessar/ to turn off the n-reter switch after each exposure; however, to prevent battery drain,
     it  is advisable to shift the lever to Off position u'hen the camera is to be left unused.
Lors de I'utilisotion du posemilre, plocer l'inlerrupleur sur "ON."
  Cel inferrupter est cront6 sur "ON" et sur "OFF," qftn d'6viter de le ddplocer en position inierm6dioire.
  Les indicotions ON/OFF (enclench6/d6clench6) se lrouvent sur lc bogue de 169loge de synchronisotion.
  Cette bogue peui aire oussi bien ploc6e sur X que sur FP, les indicotions ON et OFF seront morqu6es
   correctement.
  Lo bogue de r6gloge de synchronisotion doit se trouver sur une des posilion X ou FP, et non en posi-
   tion inlerm6dioire, cor les indicolions ON/OFF ne serqient plus visibles.
     ll n'est pos n6cessoire de d6clencher I'inierrupteur du posemdlre oprds choque prise de vue.  Le
   d6clencher uniquemenl lorsque I'opporeil n'est plus utilis6.
El exposimelro de CdS se pone en funcionqmiento empuiondo hocio lo porle frontol de lo c6moro el inler-
ruplor siluodo en lo bqse del pomo poro rebobinodo de lo peliculo.
  El interrvplor del exposfmelro llevo los correspondienles relenciones poro evitor que se combie occidenlol-
  menle de posici6n.
  EI indicodor de conexi6n y desconexi6n vq silvodo en el seleclor de sincronizoci6n poro flash.  tndife-
  renremente de si el seleclor de sincronizqci6n poro flosh se encuenlro en posici6n FP 6 X bostarl dor
  un vistozo ol indicodor poro sober si el interruplor estri cerrqdo o no.
   Asegrirese de siluor el selector de sincronizoci6n poro flosh exoctomenle en lo retenci6n FP 6 X.  Sino
  se hiciese osi el indicodor de funcionomienlo del exposimelro no podrio dar lo indicoci6n con precisi5n.
  Es innecesorio desconecfor el exposimetro despu5s de codo exposici6n; no obslonte o frn de evitor que
  se ogole lo pilo es oconsejoble siluor lo polonco en posici6n "Off"  (desconexir5n) cuondo se ocobe de
  usor lo c6mora.
Um den Belichtungsmesser zu beniitzen, wird der Schalter auf "ON"   gestellt.
  Dieser Schalter rastet bei "ON"  oder "OFF"  ein, unr Zwischenpositionen zu vermeiden.
  Der "EIN/AUS"  Indikator befindet sich auf dem Synchronisationseinstellindikator.  Es ist gleich-
   giiltig ob dieser Indikator sich auf X oder FP befindet, der Belichtungsmesser-Indikator  gibt
  "EIN"  bzw. "AUS"  richtig an.
  Sich versichern dass sich der Synchronisationseinstellindikator  auf X oder FP befindet, da sonst
  das "EIN/AUS"  des Belichtungsmesser-Indikators  nicht sichtbar  ist.
  Es ist nicht notwendig den Belichtungsmesser-Schalter nach jeder Aufnahme auf "AUS"  zu
   stellen. Sobald die Kamera nicht mehr qebraucht wird, muss er iedoch auf Position "AUS"
  gebracht werden.

                                                 11
View original page 16Page 17 · Read text
Open aperture light meaeuring
 Mesure de la lumi6re  i diaphragme ouvert
  ffi #'r +EF"r''i$".4 4:" it*'S


 i
 The MIRANDA Sensorex is the only. camera in the world permitting open aperture light reading with
 either exclusive Miranda lenses or other brands of preset dhphrrgrrile.rs"r. Th. metfr'od emploled in
 light measurement is basically the same with any bf these iensei.
  The exposure computer system of the MIRANDA Sensorex is adiusted perfectly to the Auto-
   Miranda l€ns or other preset diaphragm lens in use, simply by setting the lens selector dial on the
   camera front according to the maximum aperture.of the^lens.'If, for instance, a 50 mm f/r.9 lens
    is mounted on the Sensorex, turn the dial until the figure r.9 appears in the window.
  The lens selector dial has the following settings:
     r.4  1.9 2.8 ).5 4  j.6  8
The CdS meter of the MIRANDA Sensorex is cross-coupled to the shutter speed and diaphragm
 mechanisms, Therefore, exposure is determined according to one of the following methods:
 I. An aPPropriate shutter_speed is pre-selected and the diaphragm setting levei is turned until the
   two needles in the finder are matched perfectlv.
 z' By pre-selecting the lens apertrre, the_miter n..dle, ... matched by turning the shutter speed dial.
 3. In case of prese_t diaphragm_ lenses, the diaphragm setting lever is manipirlated and the aperture
    reading where the two needles coincide is then lransferred to the apertuie scale of the leni.

Lo MIRANDA Sensorex esi le seul opporeil permetlont lo me3ure de lo lumidre d diophrogme ouverf,
oussi bien ovec les obiectifs originoux AUTO-MIRANDA qu'ovec d'oulres obiectifs d pr6i6lection de dio-phrogme. Lo mdthode uiilis6e est en principe lo m6me pour tous les obieciifs.
  Le systime de mesure de lo MIRANDA Sensorex est utilisoble oussi bien ovec les obiectifs AUTO-  MIRANDA            qu'ovec                      d'oulres                                 obiectifs                        o pr6s6lection                                                             pour                                   de diophrogme.                                                                           outont                                                             que                                                                               le s6lecteur                                                                    -                16916   d'oblecrif soit                      sur lo luminosit6                                moximum                                                                                             utilis6.                                    de I'obiectif                                                                                     luminosil6                                                                Cette                                                                                               indiqu6e                                                                                                          sur lo                                                                                        esi
  morlure_de lous les obiectifs. Si I'on uiilise un objectif ovec indicotion f,/1,9, plocer le s6lecteur sur lo  voleur 1,9.
. Le s6lecteur d'obiecfif comprend les voleurs suivoniesr 1,1, 1,g,2,g,3,5, 1,5,6, el g.Le posemdtre CdS de lo MIRANDA_ Sensorex est coupl6 oux yitesses d'obturotion oinsi qu'ou m6conisme
du diophrogme oulomofique. Le 169loge de I'exposition peul se foire des monidres suivontes:
l.   R69ler lo vitesse d'oblurolion. Actionner le levier de'16gloge du diophrogme iusqu'd ce que les    deux oiguilles visibles dons le viseur re superposenl.
2'  R6gler lo voleur du diophrogme. Actionner le bouton de r6gloge der vilesses iusqu,d ce que les     oiguilles dons le viseur se superposent.
3'  Lors de I'utilisoiion d'obiectifs d pr6s6lection de diophrogme, uciionner le levier de r6gloge du dio-
    phrogme iusqu'd superposilion des oiguilles dons le viseui. Reporter lo voleur d,i dtphrogme     indiqu6e, sur I'obiectif.


                                                   l5
View original page 17Page 18 · Read text
www.butkus.us
                               Medici6n de la luz con plena apertura de d,iafragma.
                                                          Lichtmessung bei ofrener Blende
 lo ittlRANDA Sensorex es lo 6nico c1moro del mundo que permite lo medici6n de lo luz con pfeno oper-
 lvro de diofrogmo. yo seo con obielivos exclusivos MTRANDA o de olros morcds con preselecci6n de oper-
 lura de diofragmo. Bisicomenle el m6todo empleodo poro mdir lo luz es el mismo con cuolqviero de
 eslos obietivos.
  La unidod de c6lculo de lo MIRANDA Sensorex ho sido calculodo poro odoplorse perfeclomenle o los
   objelivos Auto-Mirondo o o cuolquier olro objelivo con preseleccirin de operluro de diofrogmo  exislente,
   boslondo simplemenle lo puesto o pvnto del disposilivo poro groduor el sislemo del exposlmetro de
   ocuerdo con lo operturo miximo del obielivo monlodo en to c6mars, dispositivo que vo siluodo en lo
   porte fronlol de lo mismo.
 Por eiemplo, si se ho montodo en lo Sensorex un obietivo de SOmm  f | 1,9, girese el disco hoslo que enel recusdro oporezco lo cifro 1,9.
   lq escolo del dispositivo seleclor se ho cslibrodo poro los luminosidqdes siguienfes:
     1,4     t ,9  2,8  3,5   I  5,6   I
 Ef expos/mefro de CdS de lo MIRANDA Sensorex vo doblemenle ocoplodo ol exposimelro y ol meconismo
 del diofrogmo. Por lo lonlo, lo exposici6n puede del*minorse siguiendo uno de los m6lodos ggB o con-
 tinuoci6n se detollon:
 l.  Se comienzo por elegir vno velocidod odecuodo del obturodor y se giro lo polonco poro pueslo o
     Punto del diofrogmo hoslo que los dos oguios visibles por el visor coincidon exoctomente.
 2.  Se comienzq por elegir una operturo de diofragmo y se hocecoincidir los ogujos girondo el oro poro
     pueslo o pvnto de Io velocidod del oblurodor.
 3.  Cuondo se trole de obielivos con preselecci6n de operluro de diofrogmo se sctuor| en la  polonco
    poro pueslo o punlo de dicho operlura y, cuondo se logre lo coincidencio de ombos ogujos, se opre-
     ciord por lecturo directo lo operluro de ocuerdo con cuyo vqlor se grodvor1 el aro poro pueslo o
     pvnlo de lo operluro de diofrogmo que lleyo el objelivo.


Die MIRANDA Sensorex ist die einzige Kamera, welche Lichtrressunq bei offener Blende, sowohl
mit  original MIRANDA  Objektiven als mit  anderen Blendenloru'ahl-Objektiven,  erlaubt. Die
angewandte Methode ist grundsitzlich gleich bei Verwendung aller Objektive.
  Das Belichtungsmesser-System der MIRANDA  Sensorex ist sowohl fnr AUTO MIRANDA
  Obiektive wie ftir andere Vorwahlblenden-Objektive  eingesteilt, wenn der Objektiv-Wahlknopf
  auf den, auf der Objektiv-fassung angegebenen, Blendenwert eingestellt wird. Wird  z.B. eln
  Obiektiv mit der Angabe f/r,9  ver*'endet, so wird der Objektiv-Wahlknopf auf der-r Wert 1,9
   eingestellt.
  Der Objektiv-Wahlknopf umfasst folgende Werte:
     r,1, r,g,2,3, 1,5,,1, J,6, unc-l 8.
  Der CdS-Belichtungsmesser der MIRANDA Sensorex ist mit den Verschlussgeschwindigkeiten
  und dem Blendennrechanisn.rus  gekuppelt. Dadurch wird die Belichtungseinstellung  durch eine
  der folgenden Metho.ler-r festselegt:
r. Eine Verschlussgeschwinc-ligkeit rvird vorgewihlt und der Blendeneinstellring wird gedreht bis
   sich die bei.ler-r irl  Sucher befindenden Nadeln tibereinander befinden.
z,  Bei Vorwahl eines Blenclenwertes werden beide Nadeln (im Sucher) durch Drehen des Geschwindig-
    keitseinstellknopfes  iibereinander gebracht.
2   Bei Beniitzung von \/orwahlblenden-Objektiven wird der Blendeneinstellhebel bewegt bis beide
   Nadeln zur Deckung gebraclrt sind. Den angegebenen Blendenwert  stellt man am Objektiv ein.
View original page 18Page 19 · Read text
Cloeed aperture light meaeuring
 Mesure de Ia lumiere i diaphragme ferm6


                                                 *:


 In ordinary situations, the open aperture light reading is more convenient as it enables bright viewing
 of the subject area and also effectively pro'ides_ againit. inaccuracy of light measurement  res",rlting fro.i strong        backlight entering through                                      viewfindeieyepiece.                               the                                                           Nevcrrheleis,                                                                        closed                                                                                  aperture- light--o - r;adine'---."'6 s, necessary.in-photomicrography                            when                             or                                                          undeterminable                                         using lerxes of                                                                               f-.,umb"r.
 lhe.method ol closed aperture light_reading is identical with any type oflens used.
 I.  Adiust both the lens selector dial and diaphragm setting levei oi'the camera to flr.4,2. qtoP down the lens to the required apertuie aid match"the needles by turning the shutter speed
     dial.
3. Take every_ precaution against backlight-entering from the.viewfinder eyepiece. Because the light
    transmitted through the lens in case of.closed aperture light readine'is often weaker than the                   in exposure                                reading is liable to occur. To privent errori in light reading, tfr.t.foi",    lj:kllq-h,:".i:".the use of the eyecup                             is recommended.


L'on pr6f6r'ero, en g6n6rol, lo m6thode de mesure de lo lumidre d diophrogme ouvert, dtont donn6 que
celte m6thode permet d'ovoir une imoge de viseur cloire, et que lo lumidre entroni por I'oculoire du viseur
n'influence pos lo mesure. Lo m6thode de mesure de lo tumidre d diophrogme ferm6 devro n6onmoins
6tre utilis6e lors de micro-phoiogrophie oinsi que lors de I'utilisotion i'obiJctifs dont lo luminosit6 n'esl
pqs connue. Lo m6thode reste lo m6me pour tous les obiectifs  utilis6s,
           le levier de 169loge du diophrogme  oinsi que le s6lecteur d'obiectif sur 1,4. l'   flgcer
2.  R6gler le diophrogme sur lo voleur d6sir6e et ociionner le bouton de i6gloge des vitesses iusqu,d     superposilion des oiguilles dons le viseur.
3.   Eviter foute entr6e de lumidre por I'oculoire du viseur. Lors de lo mesure de lo lumiAre d diophrogme
    ferm6, lo lumidre enlront per I'oculoire pgut influencer lo mesure de lo lumidre.  ll est recommend6      d'utiliser un oeilleton.


                                                  t7
View original page 19Page 20 · Read text
www.butkus.us
  Lichtmessung bei geechlossener Blenile
 Medici6n de la iluminaci6n con la apertura de diafragma previameute elegida


 En condiciones normoles es preferible efecluor la medici6n de lo luz con m6ximo operlura del diafrogmo,
 pues osi se consigue ver el lemq con fodo clqridod y se logro uno eftcoz prolecci6n contro foltos de pre-
 cisi6n en Iq medici6n debibos o incidencio de luz por lo porle posterior, o lrovits des oculor del visor. No
 obslonfe, lo medici5n de lo luz con el diofrogmo cerrsdo es preciso en microfotogrofio o cuondo se usen
 objetivos cvyo luminosidod f seo desconocido.
 El m6lodo de medici5n de lo luz con lo operturo de diofrogmo previomenle elegido es id6nlico con cnl-
 quier tipo de obielivo que se use.
 L   Sitrjense tonto el disposifr'vo poro groduor el exposimelro de ocuerdo con el obielivo como lo polonco
     poro puesto o punlo de lo opertvro de diofrogmo poro f f 1,4.
 2.  Grodiese por el obietivo lo operturo de diofrogmo deseodo y h6gonse coincidir los oguios girondo
      el oro poro pueslo a punto de lo velocidod del obturodor.
 3.  f6mense fodos los precouciones posibles o ftn de evitor lo incidenciq de luz poslerior en el oculor del
     visor. Comoquiero qve lo luz que posq por el obietivo ol  efectuor lo mdici6n con el diofrogmo
     cerrodo es por lo generol nds d6bil que lo luz incidente por lo porte posferior, es f6cil que se pro-
    duzco un error en lo medici6n, Por esfs roz6n y poro evitqr dichos errores en lq medici6n de lo luz
     se recomiendo el uso de lo onteoiero.


tJnter normalen Aufnahmebedingungen  ist die Lichtmessung bei offener Blende angenehmer, d.i js
erlaubt ein klares und helles Sucherbild zu betrachten, und Lichteinfall durch das Sucherokular .len
Messwert nicht beeinflusst. Lichtt.nessung bei geschlossener Blende muss jecloch in der Mikro Photo-
graphie uncl bei Beniltzung r-on Objektiven deren Lichtsterke unbekannt ist, r'erwenclet uer.len. Der
Messvorgand der Lichtmessung bei geschlossener Blende bleibt bei der Bentitzung aller Objektiv-
typen diesselbe.
i.- Blendeneinstellring und Objektivwahlknopf  auf den Wert r,4 einstellen.
z. Cewrinschten Blendenwert ernstellen und Ceschtvir-r.-ligkeitseinstellknopf dreher-r bis L'ci.le sich irn
   Sucher befindenden Nadeln sich clecken.
3. Jeden Lichteinfall durch das Sucherokular vermei.len. Da bei Lichtmessung bei qeschlossener
   Blende das Licht durch das Objektiv unter Umstinden schwicher ist als das durch .len Sucher
    einfallen.le Licht, kcjnnen Fehlnressungen  stattfinder-r. Aus cliesem Crund wird die Yerr.r'endunq
    einer Auqenmuschel enrpfohlen.


                                                  l8
View original page 20Page 21 · Read text
Variable Sensing Spot                                   El punto aensible uariable
 Angle de meaure variable                            Die verinderliche Meeefliiche
                                             28mm (l0ot0')
                                             35mm ( 8ol0')
                                             50mm ( 5o40')
                                                l35mm ( 2" l3')
                                              400mm (45')
                                              800mm (23')


When using a wide angle lens, average light reading is rrore effective, while with telephoto lens spot
reading is a prerequisite. In the Sensorex system, the use of a wide angle lens autonraiically sets ihe
meter closer to average reading, while on the other hand the use of a telephoto lens Jecreases the area
and angle of the sensing spot to enable most accurate spot reading.
  When the lens is interchanged,-the  light acceptance angle of the exposure meter changes automati-
   cally. Since however marking of this variable sensing spot on the scieen of the finder would impair
   clear view, the actual area is not indicated (See illustration for the area of the sensing spot wien
   lenses of different focal .lengths are used).
  With any type of lens, see that the main area of the subject (The face in case of portraits) is centered
  in the multi-microprism focusing spot.
  Aim the                     slightly downward when taking exposure reading of an open landscape. This will             .caTel"_
   Prel'ent the bright light from the sky directly entering the sensing spot and causing under-exposed
View original page 21Page 22 · Read text
www.butkus.us


L'ongle de mesure oinsi que le roppori de surfoce de mesure chonge outomotiquement suivont lo focole
d'obiectif grond-onguloire. I'on obtient une mesure de lumidre comporotive moyenne. Avec un t6l6obiectif,
ce sero une mesure de lumidre poncluelle, (lo surfoce mesur6e esf por rqpport d lo surfoce totole trds
 petite).
   Lors de chongement d'obieclif, I'ongle de mesure du posemdtre vorie qutomqtiquement, ll  n'est pos
   possible d'indiquer les difi6renles surfoces de mesure dons le viseur,6tont donn6 que celo rendroit lo
   vis6e plus difficile. Lo tobelle ci-contre vous indique les dift6renles surfoces de mesure.
   Lors de choque mesure plocer le suiet dons le cenlre du viseur (multimicroprisme).
  Lors de prises de vue de poysqges, boiiser l6gdrement I'opporeil ofln que lo lumidre du ciel n'influ-
  ence pos de moniire d6mesur6e lo mesure du suiei principol,  ll en r6sulteroit une sous-exposiiion.

El 6ra y el 6ngulo del punto senEiSre de, erposimefro de CdS vorisn oulom6licamenle de ocuerdo con
lo  lenle que se usd. Cuondo se uson lenles gronongulores es m6s eficoz efecluor lo medici6n de lo lvz
generol, mienlros que con un leleobjetivo es preferible lo medici6n de lo luz en un punlo pegueio. Con
el sislemo Sensorex ol usor un obielivo gronongulor se grod&o outomilicsmente el exposimefro poro gue
oborque un compo moyor, mientros que por el controrio ol usor un teleobielivo, el 6ngvlo, y con ello el
6reo oborcodos por el expos/melro disminuyen o fin de logror vno medici6n en un solo punlo, lo cudt
pr.oporciono mayor preci si6n.
  Cuondo se combio de obietivo, el 6ngvlo aborcado por el exposimelro combio oulom6licomenle, no
  obslonfe, comoquiero qve indicor eslq zonq de rcnsibilidod vorioble en el compo del visor enlorpeceria
  lo visiSn per el mismo, el 6reo oborcodo reol no se indico (v6ose iluslroci6n en gue oporece el 6rea de
   ls zona de sensibilidod poro objetivos de distintos disfonc/os foco/es).
  Con cuolquier tipo de objetivo procirese que la zona principol del lemo llo cora lrot6ndose de relrolos)
  quede cenlrodo en ls zono de enfoque de microprisma niltiple.
  Al fotogrofior ol oire libre diriiose lo c6moro ligeromenle fiocio oboio ol determinor lo exposicirin. De
  este modo se evilor6 que lo lvz brillonte del cielo incido direclomenle en el punlo sensible y d5 como
   resullodo fologrofios subexpueslos.

Die Messelemente des CdS-Belichtungsmessers der MIRANDA Sensorex befinden sich hinter dem
Schwingspiegel, in der optischen Achse. Das Messfliichenverh?iltniss und der Messwinkel dndern
automatisch je nach verwendetem Obiektiv.
Bei Benutzung eines Weitwinkelobjektives kommt eine Durchschnittsmessung  in Anwendung, bei
Benutzung eines Teleobjektivs, hingegen eine Punktmessung (die gemessene Fliche ist im Vergleich
zlrr ganzen Aufnahme klein)
  Be]n Auswechseln des Obiektivs dndert sich der Messwinkel des Belichtunesmessers automatisch.
  Es ist nicht mciglich die rierschiedenen MessflSchen im Sucher abzubilden, ia es dadurch uniiber-
   sichtlich wtirde. Nebenstehende Abddildung gibt Ihnen die verschiedenen Messflichen an.
  Bei jeder Aufnahn-re ist der zu messende Bildausschnitt in die Suchermitte (Multimicroprisma)
  zu zentrrcten.
   Bei Landschaftsaufnahmen ist die Kamera wihrend der Messuns leicht r-rach unten zu neigen, damit
  das hellere Licht Jes Hinrmels die Messunq nicht beeintlusst. bas Resultat wdre eine Unterbelich-
   tung.


                                                20
View original page 22Page 23 · Read text
Quick return rnirror                                        Eqtejo de retorno rapido
 Le miroir 6 retour instantan6                                             I)er Schwingspiegel

                  *


 The mirror is of course of the quick-return type which causes an extremely short viewfinder black-out
 during shutter action. Due to its original construction, the rnirror mechaniim on MIRANDA Sensorex
 is particularly quick-acting and the viewfinder black-out at shutter speeds of r/r5  second or faster
 Iasts no longer th.rn the blinkinq of an eye.
  The coupled action between tte automatic diaphragm and the mirror too is very smooth, so that
  when the shutter button is pressed:
    (t)  The diaphragn  closes. down to the preset aperture, (z)  Almost simultaneously the mirror
   swings up, (3)  Followed by opening of the shutter curtains and film exposure, (4) Then, the
   shutter closes, mirror returns to normal position and the lens diaphragm re-opens fully.
   All the above actions lre  instalttaneous.
Gr6ce ou miroir d reiour instontqne, l'imoge du viseur ne s'obscurcit que pendonf un court lops de temps.
Dds une vilesse d'oblurotion de l/15 sec., cei obscurcissement  n'est proliquement plus perceptible.6font
donn6 que le m6conisme du miroir d retour instonton6 de lo MIRANDA Sensorex ionctionn6 de moniire
extrAmement rqoide.
Les op6rotions se fonf comme suil:
 l.  Le diophrogme se ferme d lo vqleur pr6s6lectionn6e.
2.  En m6me temps, le miroir s'escomole vers le hqul.
3.  L'obluroteur d rideou s'ouvre et permet I'exposition du film,
4.  L'oblurqleur d rideou se referme, le miroir se remel en posiiion de d6port el lo diophrogme s,ouvre.
Toules ces op6rotions s'efteciuent en un clin d'oeil.

5e lrolo desde luego del espeio de retorno r6pido, el cuol provoco vn brevlsimo oscurecimienlo del yisor
duronte el occionomenlo del obturodor. Grocios o sv originol conslrucci5n, el meconismo de/ espeio de lo
I''ITRANDA Sensorex es de occi6n porticulormente rlpido y el oscurecimiento del yisor o velocldodes de
oblurodor de ll15 segundo o q velocidodes moyores no duro m6s que el pesrofreo del ojo.
  Lo qcci6n combinodo enlre el diofrogms sulom6tico y el espejo es ton susye, que ol oprimir el disporodor.
     ll  el diofrogmo se cierro hosto lo operrura preseleccionodo.
   2l  cosi en formo simult6neo el espeio giro hocio orribo.
  3) luego se qbren los cortinos del obturodor y quedo expuesto lo peliculo.
  4l o continvoci6n, el obturodor se cierro, el espejo lornq q su posici6n normol y el diofrogmo se reobre
      lotolmente
Das Sucherbild wird wdhrend der Aufnahme, dank dem Schwingspiegel, nur ganz kurz verdunkelt.
Diese Sucherbild-Verdunkelung  $'lrd ab r/r5sec fast unsichtbar,  li  air Schwirlspiegel-Mechanislrus
der MIRANDA Sensorex ausserqewcihnlich  rasch arbeltet.
Der zcitlichc Abl;ruf Jcr Aufnehirre ist wjc folut:
(t)  Die Blende wird zunr vorgewihlten Blen.le-nwert geschlossen.
(z)  Cleichzeitig schwingt der Spiegel nach oben.
(3) Der Schlitzyerschluss  l:isst den Strahlensanq zur Belichtuns des Films frer.
(4) Der Sclrlitz-rcrsclrluss schliesst sich, dei Sihwingspiegel kJmmc in seirrc Ausgangslage  zuriick
    und die Blende <iffnet sich.
All diese Vorginge erfolgen in einem Augenblick.

                                                         2l
View original page 23Related documents and language editions

From the M. Butkus archive. Original publisher and archive notices are retained.
Check the model and edition against your equipment.
PDF verified 2026-10-10.