Film cameras
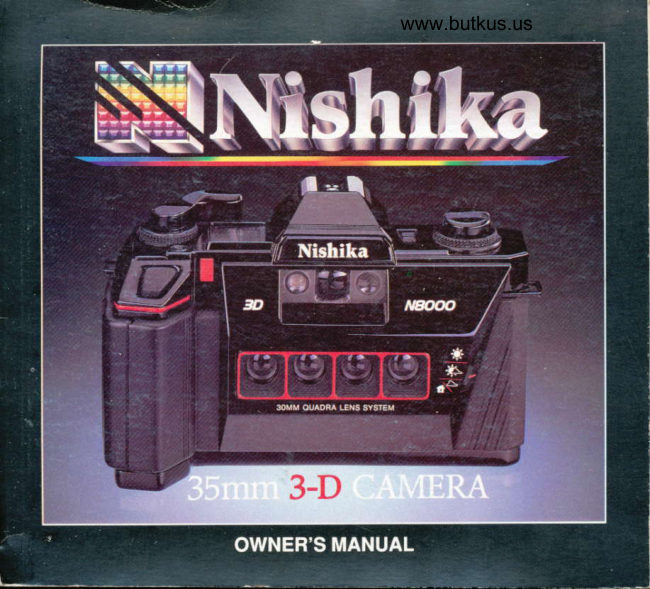
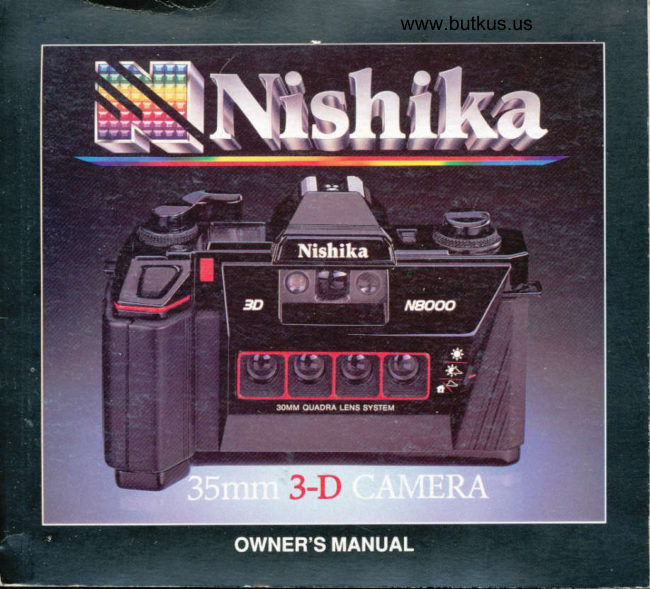
Nishika 3-D camera Owners User manual
User manual for Nishika 3-D camera Owners. 29 pages in English. Read the original PDF, download or print a copy without registration.
29 pagesEnglish4.1 MB PDF
Loading your manual…Open PDF directly
Document details
- Brand
- Nishika
- Model / document
- Nishika 3-D camera Owners
- Document type
- User manual
- Language
- English
- Pages
- 29
- File size
- 4.1 MB
- Category
- Film cameras
- Document date
- Not specified in catalog
Search available document text
Find a term, then jump to its page in the original PDF. Image-only pages may not be searchable; check the PDF for exact wording and diagrams.
Page 4 · Read text
www.butkus.us


General 3-D Guidelines                           graphed from as close as 6 feet when they are in
                                                                   fact the main subject of the composition.  1. Use your Nishika 3-D camera in a horizontal
position only.                                       9. Avoid photographing people from farther
                                            away than 25 feet.  2. Include foreground obiects that visually
overlap more distant obiects in the composition.         10. When photographing a group of people who                                                                                               from                                                                                             distance                                                                  same                                                                                   the                                                                                       all at approximately                                                         are  3. For the most dramatic 3-D effect, keep your                                                                                         there is some                                                                           so                                                                                                   that                                                                             position them                                                           the                                                        camera,foreground obiects as close to 6 feet from the                                                space side-to-side between them.camera as possible.
  4. Avoid having obiects nearer than 5 112 teel      Indoor Photography
from the camera.                                    While 17 to 20 feet is the optimal distance for your
  5. For the best 3-D effect, keep your main sub'       main subject in well-lit outdoor settings, space and
ject between 15 and 22leet from the camera,              lighting considerations may make such distances
with 17 lo 2Q feet being optimal. With the fore-            impracticalfor indoor photography.  lt is therefore
ground at 6 feet, however, good results can also          usually best to photograph subjects at distances
be obtained with the main subject as close as 10          of 10 to 14 feet from the camera when taking 3-D
to 14 feet.                                                    pictures indoors. Remember to keep your fore-
  6. Be sure that all objects in your 3-D pictures         ground as near as possible to 6 feet from the
are well lit, and whenever convenient include a          camera.
variety of bright colors in your composition.          NOTE: For a more complete discussion of 3'D
  7. Avoid posing subjects against a flat back-         technique, refer to the section of this manual
ground such as a wall.                                         titled "Guidelines for Taking the Best 3'D
                                                    Photos."
Special Guidelines for Photographing
    PEOPLE
 L Avoid photographing people in the fore'
ground when the main subiect is at a greater
 distance from the camera. People can be photo-
View original page 4Page 6 · Read text
I         {

General 3-D Guidelines                           graphed from as close as 6 feet when they are in
                                                                   fact the main subject of the composition'  1. Use your Nishika 3-D camera in a horizontal
position only.                                         9. Avoid photographing people from farther
                                            away than 25 feet.  2. Include foreground obiects that visually
overlap more distant obiects in the composition.         10. When photographing a group of people who                                                                                               from                                                                  same                                                                                             distance                                                                                   the                                                                                       all at approximately                                                         are  3. For the most dramatic 3-D effect, keep your                                                                                         there is some                                                                           so                                                                                                   that                                                                             position them                                                           the                                                     camera,foreground obiects as close to 6leet from the                                                space side-to-side between them.camera as possible.
  4. Avoid having oblects nearer than 5 ll2leel      Indoor Photography
from the camera.                                    While 17 lo 20 feet is the optimal distance for your
  5. For the best 3-D etfect, keep your main sub'       main subject in well-lit outdoor settings, space and
ject between 15 and 22teet from the camera,              lighting considerations may make such distances
with 17 lo 2Q feet being optimal. With the fore-            impracticalfor indoor photography.   lt is therefore
ground at 6 feet, however, good results can also          usually best to photograph subjects at distances
be obtained with the main subject as close as 10          of 10 to 14 feet  f rom the camera when taking 3-D
to 14 feet.                                                    pictures indoors. Remember to keep your fore-
  6. Be sure that all objects in your 3-D pictures         ground as near as possible to 6 feet from the
are well lit, and whenever convenient include a          camera.
variety of bright colors in your composition.          NOTE: For a more complete dlscusslon of 3'D
  7. Avoid posing subjects against a flat back'         technique, refer to the section of this manual
ground such as a wall.                                         titled "Guidelines for Taking the Best 3-D
                                                    Photos."
Special Guidelines for Photographing
    PEOPLE
  8. Avoid photographing people in the fore-
ground when the main subiect is at a greater
distance from the camera. People can be photo-
View original page 6Page 7 · Read text
www.butkus.us

 EE E* eE
              F  eii &3

rs*ergFgsgE
tlO(OF@CDOFNoitrfFFFFFF6IC{C{Crl6|
View original page 7Page 8 · Read text
Dear Nishika Owner,
    Since the beginning of photography,
man has sought to capture the elusive "third        SECTION                             PAGE
dimension" of life in pictures. Your new          KEY TO CAMERA PARTS
                                                                                                                                                  . . Inside Front & Back FlaPsNishika N8000 35mm camera represents the
most revolutionary breakthrough in 3-D       HOWTOUSETHISMANUAL  .........2
photography to date. You can now enjoy        CAMERA PARTS AND                                           THEIRFUNCTIONS ...        ........23-dimensional photography without the need
for special glasses or viewers. With the           INSTALLING AND                                    CHECKINGTHEBATTERIES  ....5Nishika N8000 camera and processing sys-
                                           LOADING ANDtem, you get snapshots with remarkably                                          ADVANCINGTHEFILM .       .......7
lifelike depth and realism you experience      USINGYOURCAMERA     ......10with the naked eye.
                                          REWINDING AND
     This owner's manualwill show you how          UNLOADINGTHEFILM .      .......13
simple 3-dimensional photography can be.       CARE AND STORAGE OF YOUR
Please take a few minutes to read the in-              CAMERA, PHOTOGRAPHS
structions and suggestions it contains, which       ANDNEGATIVES       ......14
are designed to help you obtain the best pos-      GUIDELINES FOR TAKING
sible results from your revolutionary new 3-D          THE BEST3-D PHOTOS    ......16
camera.                           TROUBLE-SHOOTINGGUIDE  ..,....20
     Sincerely,                     SPECIFICATIONS            .....22
                              WARRANTY....                ......22
    NISHIKA OPTICAL SYSTEMS      CUSTOMERSERVICE     .......23
       A DIVISION OF NISHIKA LTD.              TIPS ON TAKING THE BEST

                                                                                    Back F,ap                                    :::::T: f:yYT?utside


                                                                                                                                                                                                                                                                                                                                                                                                                                                                            -t.I
                                                                                                                                                                                                                                                              {
View original page 8Page 9 · Read text
www.butkus.us


    Open the front and back flaps of this        1.  Exclusive Quadra Lens System
booklet to reveal the Key to Camera parts                                           The heart of the Nishika 35mm 3-dimen-
pages. Keep these pages opened out as           sional camera is its patented Quadra Lens
you read through the manual. Using your          design, comprised of four 30mm two-ele-
manual in this way will provide a handy refer-      ment lenses positioned to an accuracy meas-
ence to the parts of the camera mentioned  in       ured in thousandths  of an inch. Thesethe instructions.                                                    high-index lenses are coated to reduce flare
                                           and increase contrast, and have exceptional
                                                          optical quality and resolution. Prefocused to
                                                   provide optimal depth of field from as close
                                             as 5  l 12teet to as far away as infinity, the
                                                       four precision lenses eliminate the need tor
                                            manual focusing and ensure maximum edge-
                                                 to-edge sharpness of images.
                                    2. Aperture Selector
                                             The aperture selector controls the size
                                                         of the lens diaphragm opening, thereby de-
                                                    termining the afiount of light entering the
                                         camera. The range of settings, also known
                                             as f-stops, enables you to best utilize avail-
                                                  able lighting. The size of the lens diaphragm
                                               opening is controlled by moving the aperture
                                                      selector up and down to correspond with the
                                                    appropriate brightness symbol.
View original page 9Page 10 · Read text
to maximize the 3-dimensional  effect of your          3.  Shutter Release Button
                                                               photographs.                   This conveniently located button trig-
  ,,             gers the shutter.                         9.  Hot Shoe
It                                                         The hot shoe accepts electronic flash          4. Cable Release Socket
I               The cable release socket accepts stand-        units such as the Nishika Twin Light 3010,
              ard cable releases as well as time delay           which provides high performance  lighting
                units for self-portraits and group shots that        and ease of operation under low-light condi-
               include the photographer.                               tions.
          5.  Battery Indicator Light                   10. Battery Tester Switch
                  This red indicator lights up if your bat-              This switch activates the battery test cir-
                 teries have sufficient charge for the camera           cuit. The battery indicator light (#5) lights up
                to operate.  lt is activated by the battery          when the batteries have sufficient charge for
                                                                   the camera to operate.                tester switch (#10).
          6.  Film Advance Lever                     11. Rewinrt l.rtob
                The film advance lever smoothly advan-          The rewind knob serves two purposes:
             ces the film, rolling the exposed film onto the        1) when used in conjunction with th'e rewind                                                                                                ':::::*                                                                               button, to rewind the film smoothly                  film take-up spool (#18).                                         rr
                                                                                    durr,'rg unloading;2) when pulled up, to open
          7. Exposure Counter                            the camera back.
                The exposure counter indicates the                                                         12. Rewind Crank            number of times the film has been advanced.
                                                                      This crank foltls out for convenient turn-
          8.  ldeal 3-D Distances Ghart                     ing of the rewind knob.
                  This helpful chart, conveniently located                                                      13. Eyelets for Shoulder StraP            on top of the camera for quick reference,
               provides information regarding the optimum          Two sturdy metal eyelets built into the
               distances to position the foreground, mid-         camera body allow the easy attachment of
             ground and background of your composition        the shoulder strap.
View original page 10Page 11 · Read text
www.butkus.us

 14. Viewfinder                             18. Film Take-Up Spool
    The viewfinder provides direct viewing           The film take-up spool receives the film
 of the subject and facilitates the framing and       as it is being advanced from its original car-
 composition of photographs.                         tridge.  lt has four toothed slots for securely
 15. Rewind Release Button                     anchoring the film onto the spool.
    The rewind release button disengages        19. Film Advance Sprockets
 the sprocket wheel from the film advance             These sprockets are tooth-like projec-
 mechanism, thereby making  it possible to           tions that engage the film perforations to
 rewind the film. This button, located on the       measure the amount of film being advanced
underside of the camera, must be pushed in       onto the take-up spool.
before rewirrding the film. lt is important that                                          20. Tripod Mountthis button be used ONLY when rewinding
the film. Once pushed, the button remains              This screw mount is designed for mount-
                                                      ing the camera onto a tripod for self-portraitslocked in the rewind position until the film ad-
vance lever (#6) is operated.                    and group shots that include the photogra-
                                                     pher.
16. Film Pressure Plate
                                            21. Battery Chamber    The film pressure plate on the inside of
                                              The camera is powered by two AA bat-the camera back holds the film in precise
alignment                                                  teries.
                                          22. Rewind Shaft17. Camera Back
                                             The shaft of the rewind knob extends    The camera back, when closed, pre-
vents unwanted exposure of the film to light.         into the film chamber and securely engages
                                                    the top of the film cartridge, enabling theIt is opened by simply pulling up on the re-
wind knob (#1 1), and closed by clicking the        rewind knob and shaft to function as a re-
                                               wind mechanism.back securely shut.
                                                                    ,,1
View original page 11Page 12 · Read text
23. Film Chamber
    The film chamber accepts any standard
roll of 35mm ISO/ASA 100 color print film.
24. Thumbwheel
    The toothed thumbwheel allows you to
advance the film take-up spool (#18) when
loading film into the camera.


                                                 www.butkus.us
                                    1. Opening the Battery Chamber
                                             The battery chamber (#21) is located on
                                                 the underside of the camera. To open, use
View original page 12Page 13 · Read text
www.butkus.us


a thumbnail or a coin to push the battery        NOTE: For longer battery life and to mini-
door in the direction of the broad arrow until       mize the danger of leakage, we recom-
 it swings open.                          mend the use of high-quality alkaline
                                                    batteries.
                                    3. Checking the Batteries
                                              Check the batteries each time before
                                                  using the camera. Do this by simply pressing
                                                 the battery tester switch (#10) forward.  lf the
                                                  red battery indicator light (#5) is illuminated,
                                                 the batteries have enough power to operate
                                                 your camera.  lf this indicator does not light
                                                    up, the batteries are either positioned incor-
                                                            rectly or have insufficient power and must be
                                                     replaced.


2.  Battery Insertion Procedure
      Insert two AA batteries side by side into
the chamber so that the (+) and (-) ends cor-
respond with the symbols on the contact
points inscribed on the inside surface of the.'
battery cover.
View original page 13Page 14 · Read text
1. Use 35mm ISOiASA 100 color Print
     lilm.
NOTE: Two 35mm frames Produce one
3-d   i mensional photograph.

    No. of exposures
    on film cartridge
                                   NOTE: lf the exposure counter (#7) does
                                               not return to "S" (start) when the door is
                                            opened, push the film advance lever (#6)
                                                    to the right as far as it will go.
    The Nishika 3-dimensional process re-      3.  Insert the film into a slot of the film
quires a group of four half-frame 35mm                take-up spool.
negative images (using two regular 35mm              Holding the film cartridge, insert the end
frames) to produce each 3-dimensiclnal              of a new roll of film into one of the slots of
photograph. Therefore, half tne number of         the film take-up spool (#18). Secure a film
pictures stated on the film cartridge will be          perforation hole onto the hook at the base of
produced from any roll of film used in your          the slot.
Nishika camera.                         4.  Insert the film cartridge into the film
2. Open the carnera.                            chamber.
    Open the camera back (#17\ by pulling          Draw the film cartridge across the back
up firmly on the rewind knob (#1 1) until the          of the camera and drop into the film cham-
back door springs open.                           ber (#23), making sure that the film cartridge
View original page 14Page 15 · Read text
www.butkus.us


                                                 toothed thumbwhe el (#24)' rotate the film
                                                  i"f"-rp spool in the direction of the arrow to
                                        r"k" sure that the film is securely attached
                                          and lies flat against the back of the camera'
                                                     *itn no slack. Align the film perforations
                                                       *itn tn. film advance sprockets (#19)' Push
                                                  ine tewinO knob (#11) down into its original
                                                         position.


                                  SB6OBBE!EEE[T

opening is correctly positioned (see,illustra-
tion below). Be sure to draw out only
          film for the cartridge to reach the       EBEBB
"norgllchamber-otherwise there may not be
enough for the last picture' Using the
                       Correct Position      5. Glose the camera back'
                                                    Close the camera back (#17) by firmly
                                                    pressing  it until  it clicks shut'
                                                               the shutter'                                     6.  Release
                                                    Press the shutter release button (#3)'
                                                    This willfree the film advance lever (#6) for
                                                advancing the film.


                                            8
View original page 15Page 16 · Read text
7. Advance the film.
    Operate the film advance lever (#6) by
pushing  it to the right as far as  it will go.
When you release  it, the lever should return
to its normal position. An intermediate dot
will appear in the exposure counter window
(#7).
8. Advance to number 1 for your first
     picture.
    Repeat steps 6 and 7 until the number
"-1-" appears in the center of the exposure
counter window (#7). The film is now in posi-
tion for your first picture.
View original page 16Page 17 · Read text
www.butkus.us


                                                                      Correct camera
                                                                                    position
1. The Exposure Counter
    The exposure counter (#7) is designed
to indicate the number of 3-dimensional
photographs you have taken once the film'
has been advanced. Since your camera
uses two "standard" exposures for each
3-dimensional photograph, always keep in
mind that the number of 3-dimensional  ex-
posures equals half of the exposures stated
on the film cartridge, with the exposure
counter automatically keeping track.
2. Holding the Camera
   HOLD THE CAMERA FIRMLY IN A
HORIZONTAL POSITION WITH BOTH
HANDS AT THE SIDES OF THE CAMERA.
   PHOTOGRAPHS TAKEN WHILE                                              Incorrect
HOLDING THE CAMERA VERTICALLY                                      camera
WILL PRODUCE NEGATIVES WHICH                                              position
CANNOT BE PROCESSED INTO 3-DIMEN-
SIONAL PRINTS.


                                          10
View original page 17Page 18 · Read text
3.  Setting the Aperture
     Select the aperture or lens diaphragm
opening that best represents the amount of
light on the subject being photographed.
There are three possible settings, chosen by
moving the aperture selector (#2) up and
down. Use the top setting (Sunny) when the
subject of your picture is well illuminated by
bright sunlight. Use the middle setting (Part-
ly Sunny) in partially sunny/partially cloudy
situations. Use the bottom setting (Cloudy/
lndoors) when the subject of your picture is
poorly illuminated, as on an overcast or rainy
day, or whenever you are taking a picture
indoors.
         lf you are in doubt as to where to set the
aperture,  it is better to err in favor of allowing
more light into the camera. For example,  if                                           enough light for a proper exposure, and you
you are not sure whether to set the aperture                                                                  will need a flash unit such as the Nishika
selector to Sunny or to Partly Sunny, it is                                           Twin Light 3010 to produce correctly ex-
safer to choose Partly Sunny.                                            posed negatives.  lf no red light appears,
4. The Low Light Indicator                     there is enough illumination for a proper ex-
    Look into the viewfinder (#14) and push        posure.
down lightly on the shutter release button       5.  Framing the Picture
(#3), being careful not to depress  it all the                                                     Looking into the viewfinder eyepiece
way down. When the button is partially de-                                                        (#14), you will see a bright line frame-an
pressed, a red light may appear in the view-                                                         outline of the image area in which you canfinder.  lf so, this indicates that there is not                                          compose your photograph quickly and


                                                    11
View original page 18Page 19 · Read text
www.butkus.us


the sprocket wheel which measures the
amount of film advanced.
9. End of Roll
         lf you have followed the film loading in-
structions correctly, when all the available
exposures are used you should feel a resis-
tance if you try to move the film advance
lever (#6). This indicates the end of the roll.
Do not force the film advance lever as
you approach the end of your roll of film.
You may have already shot the last pic-
ture on that roll.  lf you feel any resis-
tance in advancing the film, rewind the
film to prevent tearing.
    Forcing the lever in order to
"squeeze in" one more picture may
cause exposure overlap, spoiling both
the picture you are trying to shoot and
the one you shot just before it.             1.  Film Rewind Release Button
                                             To disengage your film when you have
                                               reached the end of the roll, depress the
                                                 rewind release button (#15) located on the
                                               bottom of your Nishika camera.
                                    2.  Film Rewind Crank
                                                      Fold out the film rewind crank (#12) lo-                                                                  -;                                                 cated on top of the rewind knob (#1 1). Turn
                                                    the crank in a clockwise direction. You will
                                                            feel tension while rewinding. Continue to


                                             13
View original page 19Page 20 · Read text
I


                                   Camera
                                                      1. When you are not using your camera
                                                           for long periods of time, store  it with the film
                                          advance lever uncocked in a cool, clean,
                                                          dry, well-ventilated  place, free from dust and
                                                     moisture.
           www.butkus.us                                                 2.  lf storing for a long period, remove
                                                    the batteries from the battery chamber.
                                                 3. Do not drop the camera, knock  it
                                                    against anything solid or misuse it. Acci-
                                                 dents and rough handling can easily dam-
                                           age the camera's internal mechanism.
turn the crank until there is no tension,                 4. Your camera is not waterproof.
indicating that the film has been fully re-            Protect  it from water splashes and rain.
wound into the film cartridge.                        5. Do not touch the surface of the len-
                                                                       the viewfinder and lenses3.  Unloading the Film                         ses. Always keep
                                              as clean as possible. To remove loose dust     Pull up the rewind knob (#1 1) to open
                                           and dirt, clean with a lens brush or soft, lint-the back of the camera and remove the film
cartridge.                                        free cotton cloth. Do not try to wipe off                                                                  ;,;?         granular dirt or dust by any other means or
                                          you may scratch the lens.


                                          14
View original page 20Page 21 · Read text
www.butkus.us


    6. Smudges such as fingerprints should      Negatives:
be carefully wiped away with a lens cleaning            Negatives are extremely sensitive to oil
tissue. For difficult marks, use a liquid lens       and scratching. Please remember always to
cleaner and lens tissue.                    HANDLE DEVELOPED NEGATIVE STRIPS
    7. Do not leave your camera in your car     BY THE EDGES. Oil from your skin and
or in direct sunlight for any length of time.           other substances from your fingers can ruin
    8. Have all repairs performed by:              otherwise perfect negatives.
                                        When you require reprinted copies of           NISHIKA LTD.                                                  your 3-dimensional  prints, you must supply         SERVICE CENTER                                                    the original negative groups in strips to                1 Nishika Drive
             Henderson, NV 89014                   Nishika Ltd.
                                     IMPORTANT: A copy print cannot be
                                    made from your Nishika 3-dimensional
Photographs:                                    print. The laboratory must have the orig'
     Nishika 3-D photographs are printed on         inal negative group.
a special highly durable material. However,
you should treat these photographs  like any
other photo-sensitized  product, and be care-
ful to protect the surface from scratches and
liquids which may leave a mark or smudge
on the material.
WARNING: Do not mark or write on the
back of your Nishika photographs! Due
to the special translucent material used
for your photographs, the writing or mark-
ing will show through to the front.


                                             15
View original page 21Page 22 · Read text
Several guidelines are used by Nishika
                                                     technicians to determine the key subject of a
                                             3-D photo.  lf there is only one person in the
                                                           picture, that person will be chosen as the
                                               key subject.  lf there are two people at dif-
    Your Nishika N8000 3-D camera repre-         ferent distances from the camera, the key
sents the state of the art in home 3-D photog-       subject will be the closer person. In photos
raphy, giving you photos that exhibit extraor-       where there are more than two people at dif-
dinary depth and realism. The suggestions          ferent distances from the camera, the key
in this section will enable you to make the           subject will be the person most centrally lo-
best use of your camera, and take the most        cated in the midrange of the composition.
effective 3-D photographs possible.                    Finally, for photos without people, the key
Overview _                                   subjectmined bywillthebetechnician,the main subjectand willasusuallydeter- be
    The 3-D effect of Nishika photographs                                                       centrally located in the midrange of the com-
occurs whenever an object at one distance          position.
from the camera visually overlaps another                                              The following guidelines will help youobject at a different distance. The most ef-                                                take maximum advantage of the 3-D poten-fective 3-D photos have overlapping objects                                                                           tial of the Nishika system.in the foreground, midground and back-
ground of the composition.
   When your Nishika 3-D photos are
processed, a "key (main) subject" must be
selected by the printing technician. This key
subject will be the focal point of the photo-
graph, and objects that share its distance
from the camera will exhibit the most clarity.
Objects either far in front or far behind the
key subject may be slightly less sharp.


                                          16
View original page 22Page 23 · Read text
www.butkus.us


General 3-D Guidelines


                                                   Include foreground objects that
                                                         visually overlap more distant objects
1. Use your Nishika 3-D camera in a                  in the composition.
    horizontal position only.                     The most dramatic 3-D effect is
                                                achieved when objects in the foreground      In the vertical position, no 3-D effect will
                                                  cross over or partially cover more distant ob-be achieved.                                                              jects.


                                          17
View original page 23Page 24 · Read text
3.  For the most dramatic 3-D effect, keep
    your foreground objects as close to 6
     feet from the camera as possible.
    Foregrounds at 6 feet will yield more
dramatic 3-D effects than the same composi-
tion with the foreground at 7 feet or more.
4. Avoid having objects nearer than 5 1/2     feet from the camera.                                                                  I
   The N8000 camera has a focal range of
S l12teetto  infinity.
5.  For the best 3-D effect, keep your
    main subject between 15 and 22teel
    from the camera, with 17 to 20 feet
    being optimal.
    With the foreground at 6 feet, however,
good results can also be obtained with the
main subject as close as 10 to 14 feet. This
is particularly important for indoor photog-
raphy, where space and lighting conditions
may require photographing subjects at
closer distances. (See the special informa-                                                                                        IIIII   6 feettion on indoor photography  at the end of this
section).
                                                                               \\\                                   *                                I!


                                          18
View original page 24Related documents and language editions

NishikaPDF
NISHIKA 3-D CAMERA
User manual
26 pages · EnglishRead →
NishikaPDF
Nishika 3-D camera
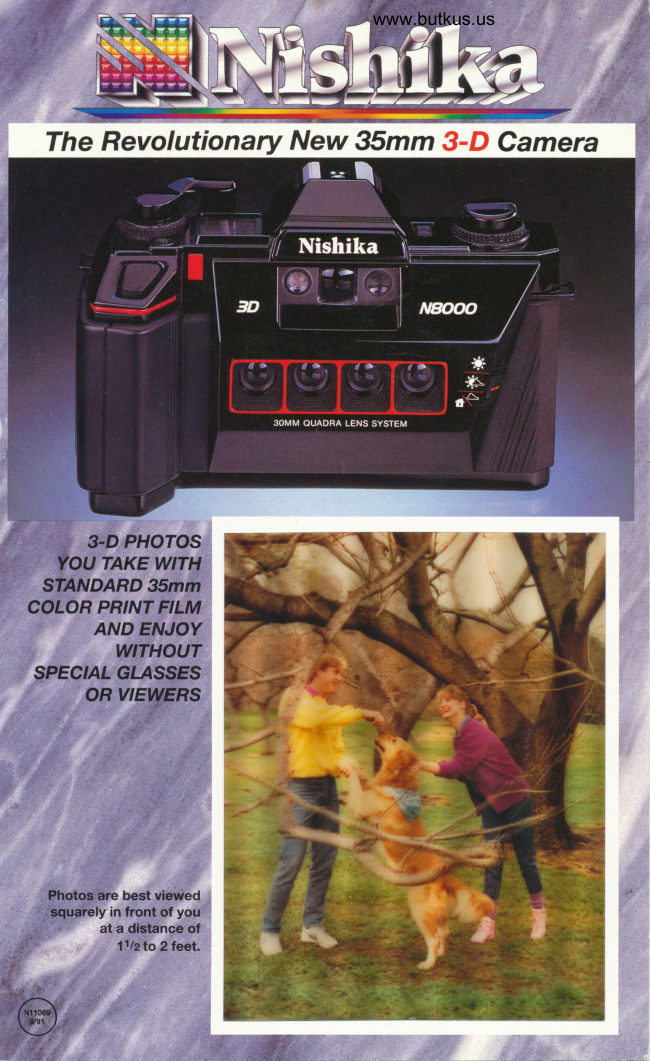
Product booklet
5 pages · EnglishRead →
NishikaPDF
Nishika 3-D documents
User manual
6 pages · EnglishRead →
NishikaPDF
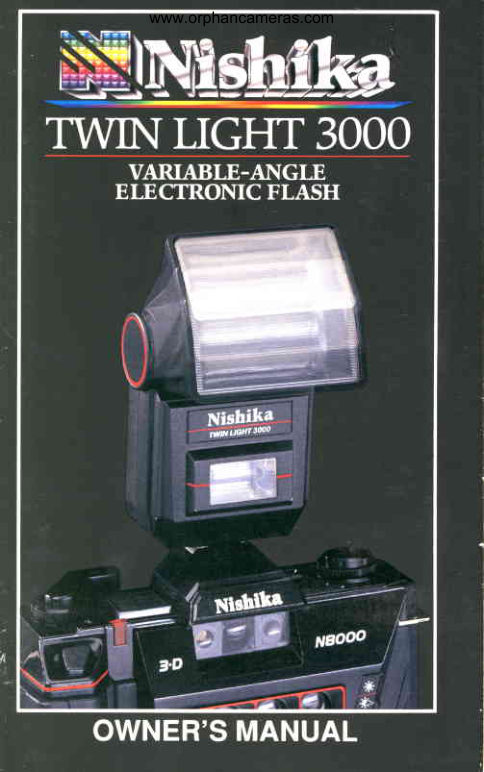
Nishika Twin Light 3000 Flash
User manual
14 pages · EnglishRead →

NishikaPDF
Nishika mailing envelopes instructions
User manual
7 pages · EnglishRead →
NishikaPDF
Nishika 3D Camera
User manual
102 pages · German, French, Spanish, ItalianRead →
From the M. Butkus archive. Original publisher and archive notices are retained.
Check the model and edition against your equipment.
PDF verified 2026-10-10.