Film cameras
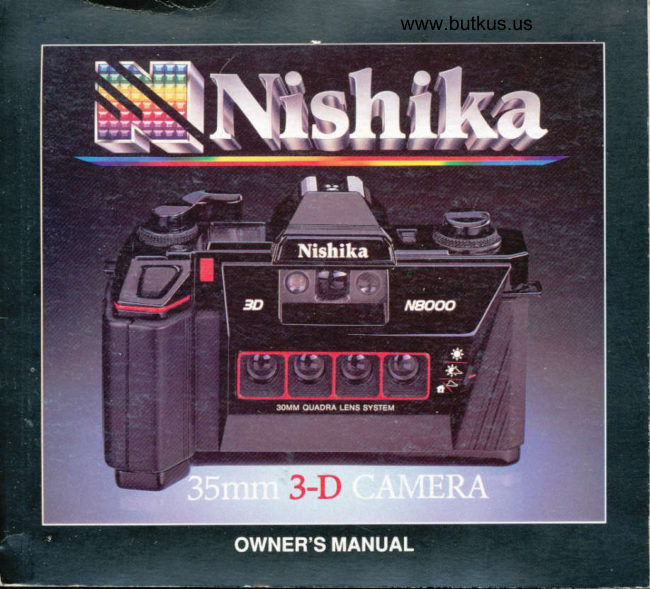
NISHIKA 3-D CAMERA User manual
User manual for NISHIKA 3-D CAMERA. 26 pages in English. Read the original PDF, download or print a copy without registration.
26 pagesEnglish5.1 MB PDF

Loading your manual…Open PDF directly
Document details
- Brand
- Nishika
- Model / document
- NISHIKA 3-D CAMERA
- Document type
- User manual
- Language
- English
- Pages
- 26
- File size
- 5.1 MB
- Category
- Film cameras
- Document date
- Not specified in catalog
Search available document text
Find a term, then jump to its page in the original PDF. Image-only pages may not be searchable; check the PDF for exact wording and diagrams.
Page 3 · Read text
DearNishikaOwner,
    Sincethe beginningof photography,
 man has soughtto capturethe elusive"third     SECTION
 dimension"of life in pictures.your new        KEY TO CAMERAPARTS
 NishikaN800035mm camerarepresentsthe                                                . . InsideFront&
 most revolutionarybreakthroughin 3-D       HOW TO USE THIS MANUAL
photographyto date. You can now enjoy      CAMERAPARTSAND
3-dimensionalphotographywithoutthe need         THEIRFUNCTIONS
for specialglassesor viewers.With the         INSTALLINGAND
NishikaN8000cameraand processingsys-         CHECKINGTHE BATTERIES. .
tem, you get snapshotswith remarkably       LOADINGAND
lifelikedepthand realismyou experience          ADVANCINGTHE FILM
with the nakedeye.                      USINGYOURCAMERA
    This owner'smanualwill show you how     REWINDINGAND
simple3-dimensionalphotographycan be.          UNLOADINGTHE FILM
Pleasetake a few minutesto read the in-       CAREAND STORAGEOF YOUR                                       CAMERA,PHOTOGRAPHS
structionsand suggestionsit contains,which        AND NEGATIVES
are designedto helpyou obtainthe best pos-                                     GUIDELINESFORTAKING
sibleresultsfrornyour revolutionarynew 3-D         THE BEST3-D PHOTOS
camera.                                    TROUBLE.SHOOTING G U IDE
    Sincerely,                         SPECIFICATIONS
                                 WARRANTY
    NISHIKA OPTICAL SYSTEMS       CUSTOMERSERVICE
  A DIVISIONOFNISHIKACORPORATION    TIPSON TAKINGTHE BEST
                                                 3-D PHOTOS(SUMMARY)
                                                                        OutsideBack Flap


                         www.orphancameras.com
View original page 3Page 4 · Read text
Open the front and back flaps of this          1.  ExclusiveQuadra Lens SYstem
bookletto revealthe Key to CameraParts         The heartof the Nishika35mm3-dimen-
pages. Keepthese pagesopenedout as         sionalcamerais its patentedQuadraLens
you readthroughthe manual.Usingyour        design,comprisedof four 30mmtwo-ele-
manualin this way will providea handyrefer-    ment lensespositionedto an accuracymeas-
ence to the partsof the cameramentionedin     ured in thousandthsof an inch. These
the instructions.                            high-indexlensesare coatedto reduceflare
                                      and increasecontrast,and have exceptional
                                               opticalqualityand resolution.Prefocusedto
                                          provideoptimaldepthof fieldfrom as close
                                         as 5 112feetto as far away as infinity,the
                                              four precisionlenseseliminatethe needfor
                                     manualfocusingand ensuremaximumedge-
                                         to-edgesharpnessof images.
                                                   2.  Aperture Selector
                                        The apertureselectorcontrolsthe size
                                                 of the lensdiaphragmopening,therebyde-
                                          terminingthe arnountof lightenteringthe
                                       camera. The rangeof settings,also known
                                        as f-stops,enablesyou to best utilizeavail-
                                          able lighting.The sizeof the lensdiaphragm
                                        openingis controlledby movingthe aperture
                                             selectorup and down to correspondwith the
                                           appropriatebrightnesssymbol.


                      www.orphancameras.com
View original page 4Page 5 · Read text
3.  Shutter ReleaseButton                     to maximizethe 3-dimensionaleffectof your
    This convenientlylocatedbuttontrig-        photographs.
gers the shutter.                                 9.  Hot Shoe
4.  Cable ReleaseSocket                    The hot shoe acceptselectronicflash
    The cable releasesocketacceptsstand-     unitssuchas the NishikaTwin Light3010,
ard cablereleasesas well as time delay        whichprovideshighperformancelighting
unitsfor self-portraitsand groupshotsthat      and easeof operationunderlow-lightcondi-
includethe photographer.                      tions.
5.  Battery Indicator Light                    10. Battery Tester Switch
    This red indicatorlightsup if your bat-           This switchactivatesthe batterytest cir-
terieshavesufficientchargefor the camera        cuit.The batteryindicatorlight(#5) lightsup
to operate.lt is activatedby the battery        when the batterieshavesufficientchargefor
testerswitch(#10).                           the camerato operate.
6.  Film Advance Lever                     11. RewindKnob
   The film advanceleversmoothlyadvan-        The rewindknob servestwo purposes:
ces the film,rollingthe exposedfilmontothe      1) when usedin conjunctionwiththe rewind
filmtake-upspool(#18).                      releasebutton,to rewindthe film smoothly
                                         duringunloading;2)whenpulledup, to open7.  Exposure Counter                                            the cameraback.
   The exposurecounterindicatesthe
                                            12. Rewind Cranknumberof timesthe film has beenadvanced.
                                              This crankfoldsout for convenientturn-8.  ldeal 3-D DistancesChart                                              ing of the rewindknob.
    This helpfulchart,convenientlylocated
                                            13. Eyeletsfor Shoulder Strapon top of the camerafor quickreference,
providesinformationregardingthe optimum       Two sturdymetaleyeletsbuiltintothe
distancesto positionthe foreground,mid-       camerabody allowthe easy attachmentof
groundand backgroundof your composition     the shoulderstrap.


                          www.orphancameras.com
View original page 5Page 6 · Read text
14. Viewfinder                             18. Film Take-UpSpool
   The viewfinderprovidesdirectviewing         The film take-upspoolreceivesthe film
of the subjectand facilitatesthe framingand     as it is beingadvancedfrom its originalcar-
compositionof photographs.                    tridge. lt has four toothedslotsfor securely
                                        anchoringthe film ontothe sPool.15. Rewind ReleaseButton
   The rewindreleasebuttondisengages      19. Film Advance Sprockets
the sprocketwheelfrom the film advance          These sprocketsare tooth-likeprojec-
mechanism,therebymakingit possibleto         tionsthat engagethe film perforationsto
rewindthe film. This button,locatedon the      measurethe amountof film beingadvanced
undersideof the camera,must be pushedin      ontothe take-upspool.
beforerewindingthe film. lt is importantthat      20. Tripod Mount
this buttonbe used ONLYwhen rewinding                                              This screwmountis designedfor mount-the film. Oncepushed,the buttonremains                                              ing the cameraonto a tripodfor self-portraitslockedin the rewindpositionuntilthe film ad-                                     and groupshotsthat includethe photogra-vance lever (#6) is operated.                                           pher.
16. Film PressurePlate                                             21. Battery Ghamber
   The film pressureplateon the insideof                                        The camerais poweredbYtwo AA bat-the cameraback holdsthe film in precise                                                 teries.alignment.
                                             22. Rewind Shaft17. Camera Back
                                        The shaftof the rewindknob extends
   The cameraback,when closed,Pre-                                                intothe film chamberand securelyengagesventsunwantedexposureof the film to light.                                           the top of the filmcartridge,enablingthe It is openedby simplypullingup on the re-                                         rewindknob and shaftto functionas a re-wind knob (#11), and closedby clickingthe                                      windmechanism.
back securelyshut.


                      www.orphancameras.com
View original page 6Page 7 · Read text
23. Film Ghamber
   The film chamberacceptsany standard
rollof 35mm ISO/ASA100 colorprintfilm.
24, Thumbwheel
   The toothedthumbwheelallowsyou to
advancethe film take-upspool(#18) when
loadingfilm intothe camera.


                                                  1.  Opening the Battery Chamber
                                        The batterychamber(#21) is locatedon
                                           the undersideof the camera.To open,use


                        www.orphancameras.com
View original page 7Page 8 · Read text
a thumbnailor a coin to pushthe battery       NOTE: For longer battery life and to mini-
door in the directionof the broadarrowuntil      mize the danger of leakage,we recom-
it swingsopen.                       mend the use of high-qualityalkaline
                                                  batteries.
                                                   3.  Ghecking the Batteries
                                       Checkthe batterieseach time before
                                         usingthe camera.Do this by simplypressing
                                             the batterytesterswitch(#10) forward. lf the
                                           red batteryindicatorlight(#5) is illuminated,
                                             the batterieshave enoughpowerto operate
                                          your camera. lf this indicatordoes not light
                                            up, the batteriesare eitherpositionedincor-
                                                 rectlyor have insufficientpowerand must be
                                           replaced.


2.  Battery Insertion Procedure
     Inserttwo AA batteriesside by side into
the chamberso that the (+) and (-) ends cor-
respondwith the symbolson the contact
pointsinscribedon the insidesurfaceof the
batterycover.


                        www.orphancameras.com
View original page 8Page 9 · Read text
1.  Use 35mm ISO/ASA100 color print
     film.
NOTE:Two 35mm frames produce one
3-di mensionalphotograph.

   No.of exposures       No.of 3-D
   on film cartridge          prints
        1         2         6          NOTE: lf the exposure counter (#7) does
                                                          "S"       24               12             not return to     (start) when the door is
                                        opened, push the film advance lever (#6)       36               18
                                                  to the right as far as it will go.
   The Nishika3-dimensionalprocessre-        3.  Insert the film into a slot of the film
quiresa groupof four half-frame35mm             take-upspool.
negativeimages(usingtwo regular35mm           Holdingthe film cartridge,insertthe end
frames)to produceeach 3-dimensional          of a new roll of film into one of the slotsof
photograph.Therefore,halfthe numberof       the filmtake-upspool(#18). Securea film
picturesstatedon the film cartridgewill be        perforationhole onto the hook at the base of
producedfrom any rollof film used in your       the slot.
Nishikacamera.                                                  4.  Insert the film cartridge into the film
2.  Open the camera.                        chamber.
   Openthe cameraback (#17) by pulling        Drawthe film cartridgeacrossthe back
up firmlyon the rewindknob (#11) untilthe        of the cameraand drop intothe film cham-
backdoor springsopen.                      ber (#23),makingsure that the film cartridge


                        www.orphancameras.com
View original page 9Page 10 · Read text
toothedthumbwheel(#24),rotatethe film
                                          take-upspoolin the directionof the arrowto
                                  makesurethat the film is securelyattached
                                     and liesflat againstthe back of the camera,
                                             with no slack. Alignthe film perforations
                                             with the film advancesprockets(#19). Push
                                            the rewindknob (#11) down into its original
                                             position.


                                                g B E  t s B  t s  t s E O B E E E

openingis correctlypositioned(see illustra-
tion below). Be sureto draw out only
enoughfilm for the cartridgeto reachthe                                                 r'::tH  Ufil  gF.1U f.n@ fit
chamber-otherwisethere may not be
enoughfor the last picture. Usingthe

                      Correct position                                                   5.  Close the camera back.
                                           Closethe cameraback (#17)by firmly
                                          pressingit untilit clicksshut.
                                                   6.  Releasethe shutter.
                                           Pressthe shutterreleasebutton(#3).
                                           This will free the film advancelever(#6)for
                                       advancingthe film.


                       www.orphancameras.com
View original page 10Page 11 · Read text
7.  Advancethe film.
    Operatethe film advancelever (#6) by
cushingit to the rightas far as it willgo.
Whenyou releaseit, the levershouldreturn
to its normalposition.An intermediatedot
willappearin the exposurecounterwindow
(#7).
8.  Advance to number 1 for your first
    picture.
   Repeatsteps6 and 7 untilthe number
"-1-"    appearsin the centerof the exposure
counterwindow(#7). The film is now in posi-
tionfor your firstpicture.


                        www.orphancameras.com
View original page 11Page 12 · Read text
1.  The Exposure Counter
   The exposurecounter(#7) is designed
to indicatethe numberof 3-dimensional
photographsyou have taken once the film
has been advanced.Sinceyour camera
        "standard"uses two         exposuresfor each
3-dimensionalphotograph,alwayskeep in
mindthat the numberof 3-dimensionalex-
posuresequalshalf of the exposuresstated
on the film cartridge,with the exposure
counterautomaticallykeepingtrack.
2.  Holding the Camera
   HOLDTHE CAMERAFIRMLYIN A
HORIZONTALPOSITIONWITH BOTH
HANDSAT THE SIDESOF THE CAMERA.
   PHOTOGRAPHSTAKENWH ILE
HOLDINGTHE CAMERAVERTICALLY
WILL PRODUCENEGATIVESWHICH
CANNOTBE PROCESSEDINTO3-DIMEN-
SIONALPRINTS.


                                  1 0
                     www.orphancameras.com
View original page 12Page 13 · Read text
3.  Setting the Aperture                                                 Low light
    Selectthe apertureor lensdiaphragm                            indicator
:oeningthat best representsthe amountof
 ,ghton the subjectbeingphotographed.
Thereare threepossiblesettings,chosenby
roving the apertureselector(#2) up and
iown. Use the top setting(Sunny)when the
surbjectof your pictureis well illuminatedby
:nightsunlight.Use the middlesetting(Part-
 y Sunny)in partiallysunny/partiallycloudy
situations.Use the bottomsetting(Cloudy/
 ndoors)when the subjectof your pictureis
coorlyilluminated,as on an overcastor rainy
day, or wheneveryou are takinga picture
 ndoors.
        lf you are in doubt as to where to set the
aperture,it is betterto err in favor of allowing
'Trorelightintothe camera. For example,if                                     enoughlightfor a properexposure,and you
./ouare not sure whetherto set the aperture       will need a flashunit such as the Nishika
selectorto Sunnyor to PartlySunny,it is                                       Twin Light3010to producecorrectlyex-
saferto choosePartlySunny.                                     posednegatives.lf no red lightappears,
4.  The Low Light Indicator                  thereis enoughilluminationfor a properex-
   Look intothe viewfinder(#14)and push      posure.
down lightly on the shutterreleasebutton         5.  Framing the Picture
 #3), beingcarefulnot to depressit all the                                            Lookingintothe viewfindereyepieceway down. When the buttonis partiallyde-                                             (#14),you will see a brightlineframe-an
cressed,a red lightmay appearin the view-                                              outlineof the imagearea in whichyou can
finder. lf so, this indicatesthat there is not                                   composeyour photographquicklyand


                         www.orphancameras.com
View original page 13Page 14 · Read text
in the photographis insidethe brightline
                                        frame.WHENCOMPOSINGYOUR PIC-
                                TURES,AVOIDSUBJECTSOR OBJECTS
                                         IN THE SCENECLOSERTO YOU THAN
                                         5 112FEET. Thiswill enableyou to com-
                                      pose beautiful3-dimensionalphotographs
                                       whichare in sharp,crispfocus. For other
                                        suggestionson composing3-D pictures,con-                                                                     "Guide-                                                  sultthe sectionof this manualtitled
                                               linesfor Takingthe Best3-D Photos."
                                                  7.  Taking the Picture
                                        Becausethe lensesare prefocused,no
                                     manualadjustmentsare required.Simply
                                           holdthe camerasteadyand pressgently
                                   down on the shutterreleasebutton(#3) until
                                      you heara click.
                                                 8.  Advancingthe Film
accurately.This frameservesas a guideto          Beforeyou take the next picture,ad-
show you whichobjectsin the scenewill ac-     vancethe film by movingthe film advance
tuallybe in your3-dimensionalphotograph.      lever(#6)to the rightas far as it willgo, and
                                                 lettingit returnto its originalposition.You6.  Viewing a Typical 3-Dimensional                                           are now readyto shootagain.   Scene
   Whencomposingyour pictures,move     WARNING:Avoid touching the rewind
                                          releasebutton (#15)until you have com-aroundwhileyou are lookingthroughthe
camera'sviewfinder.Take the photograph       pletedshooting the roll of film. Should
                                       you push the rewind releasebutton in thewhen you see the most pleasingarrange-
ment,makingsurethat everythingyou want      middle of a roll of film, you will disengage


                                      1 2
                      www.orphancameras.com
View original page 14Page 15 · Read text
the sprocket wheel which measures the
amount of film advanced.
9.  End of Roll
       lf you havefollowedthe film loadingin-
structionscorrectly,when all the available
exposuresare used you shouldfeel a resis-
tance if you try to move the film advance
lever(#6). This indicatesthe end of the roll.
Do not force the film advance lever as
you approach the end of your roll of film.
You may have already shot the last pic-
ture on that roll.  lf you feel any resis-
tance in advancing the film, rewind the
film to prevent tearing.
    Forcing the lever in order to
"squeeze           in" one more picture may
cause exposure overlap, spoilinE both
the picture you are trying to shoot and
the one you shot just before it.                   Film Rewind ReleaseButton
                                        To disengageyour film when you have
                                       reachedthe end of the roll,depressthe
                                         rewindreleasebutton(#15)locatedon the
                                       bottomof your Nishikacamera.
                                                  2.  Film Rewind Grank
                                             Foldout the film rewindcrank(#12) lo-
                                         catedon top of the rewindknob (#11). Turn
                                            the crankin a clockwisedirection.You will
                                                feeltensionwhilerewinding.Continueto

                                  1 3
                        www.orphancameras.com
View original page 15Page 16 · Read text
Camera
                                                     1. When you are not usingyourcamera
                                                   for long periodsof tiffie,storeit with the film
                                     advanceleveruncockedin a cool,clean,
                                                dry, well-ventilatedplace,free from dust and
                                          moisture.
                                                      2.  lf storingfor a long period,remove
                                            the batteriesfrom the batterychamber.
                                                      3. Do not droPthe camera,knock it
                                          againstanythingsolidor misuseit. Acci-
                                        dentsand roughhandlingcan easilydam-
                                     age the camera'sinternalmechanism.
turnthe crankuntilthereis no tension,                4. Your camerais not waterProof.
indicatingthat the film has beenfullyre-          Protectit from watersplashesand rain.
wound intothe film cartridge.                         5. Do not touchthe surfaceof the len-
                                            ses. Alwayskeepthe viewfinderand lenses3.  Unloadingthe Film                                        as cleanas possible.To removeloosedust    Pullup the rewindknob (#11) to open                                     and dirt,cleanwith a lens brushor soft,lint-the back of the cameraand removethe film                                               free cottoncloth. Do not try to wipe off
cartridge.                                           granulardirt or dust by any othermeansor
                                       you may scratchthe lens.


                                      1 4
                      www.orphancameras.com
View original page 16Page 17 · Read text
li
             6. Smudgessuchas fingerprintsshould    Negatives:
       be carefullywipedaway with a lenscleaning                                                   Negativesare extremelysensitiveto oil
        tissue. For difficultmarks,use a liquidlens                                            and scratching.Pleaserememberalwaysto
       cleanerand lenstissue.                                   HANDLEDEVELOPEDNEGATIVESTRIPS
           7 . Do not leaveyour camerain your car    BY THE EDGES. Oil fromyour skinand
        or in directsunlightfor any lengthof time.        othersubstancesfrom your fingerscan ruin
             8. Have all repairsperformedby:           otherwiseperfectnegatives.
            NISHIKACORPORATION           When you requirereprintedcopiesof
                                                your3-dimensionalprints,you mustsupply             SERVICECENTER
                    1 NishikaDrive                  the originalnegativegroupsin stripsto
                Henderson,NV 89014              NishikaCorporation.
                                       IMPORTANT:A copy print cannot be
                                       made from your Nishika 3-dimensional
      Photographs:                                 print. The laboratorymust have the orig-
           Nishika3-D photographsare printedon       inal negativegroup.
       a specialhighlydurablematerial.However,
      you shouldtreatthesephotographstikeany
       otherphoto-sensitizedproduct,and be care-
         ful to protectthe surfacefrom scratchesand
        liquidswhichmay leavea markor smudge
      on the material.
     WARNING: Do not mark or write on the
      back of your Nishika photographs! Due
        to the special translucent material used
        for your photographs,the writing or mark-
       ing will show through to the front.


                                            1 5
                               www.orphancameras.com
View original page 17Page 18 · Read text
Severalguidelinesare usedby Nishika
                                           techniciansto determinethe key subjectof a
                                      3-D photo. lf thereis onlyone personin the
                                               picture,that personwill be chosenas the
                                        key subject. lf there are two peopleat dif-
   Your NishikaN80003-D camerarepre-      ferentdistancesfrom the camera,the key
sentsthe stateof the art in home 3-D photog-    subjectwill be the closerperson. In photos
raphy,givingyou photosthat exhibitextraor-    wherethereare morethan two peopleat dif-
dinarydepthand realism.The suggestions      ferentdistancesfrom the camera,the key
in this sectionwill enab,leyou to makethe        subjectwill be the personmostcentrallylo-
best use of your camera,and take the most      catedin the midrangeof the composition.
effective3-D photographspossible.              Finally,for photoswithoutpeople,the key
                                            subjectwill be the mainsubjectas deter-
Overview                                    minedby the technician,and willusuallybe
   The 3-D effectof Nishikaphotographs      centrallylocatedin the midrangeof the com-
occurswheneveran objectat one distance       position.
from the cameravisuallyoverlapsanother                                      The followingguidelineswillhelpyou
objectat a differentdistance.The most ef-                                           take maximumadvantageof the 3-D poten-
fective3-D photoshave overlappingobjects                                                          tial of the Nishikasystem.
in the foreground,midgroundand back-
groundof the composition.
   Whenyour Nishika3-D photosare
           "keyprocessed,a     (main)subject"must be
selectedby the printingtechnician.This key
subjectwill be the focalpointof the photo-
graph,and objectsthat shareits distance
fromthe camerawillexhibitthe mostclarity.
Objectseithertar in frontor far behindthe
key subjectmay be slightlylesssharp.


                                      1 6
                       www.orphancameras.com
View original page 18Page 19 · Read text
I
       General3-DGuidelines


                                       Incorrect


                                                             2,  Include foreground objects that
                                                               visually overlap more distant objects
          1.  Use your Nishika 3-D camera in a                in the composition.
             horizontalposition only.                  The most dramatic3-D effectis
                ln the verticalposition,no 3-D effectwill     achievedwhen objectsin the foreground
        be achieved,                               cross over or partiallycover more distantob-
                                                             jects.


                                              1 7
                               www.orphancameras.com
View original page 19Page 20 · Read text
3.  For the most dramatic 3'D effect, keep
    your foreground obiects as close to 6
    feet from the camera as Possible.
    Foregroundsat 6 feet will yieldmore
dramatic3-D effectsthan the same composi-
tion with the foregroundat 7 feetor more.
4.  Avoid having obiects nearerthan 5112
    feet from the camera.
   The N8000camerahas a focal rangeof
5 112feet to infinitY.
5.  For the best 3-D effect, keeP Your
    main subiect between 15 and 22 teet
    from the camera, with 17 to 20 feet
    being optimal.
    With the foregroundat 6 feet, however,
good resultscan also be obtainedwith the
main subjectas closeas 10 to 14 feet. This                                          I
 is particularlyimportantfor indoorphotog-                                           I
 raphy,wherespaceand lightingconditions                                        I
may requirephotographingsubjectsat                                              I
 closerdistances.(see the specialinforma-                                      I     6 feet
 tion on indoorphotographyat the end of this
 section).                                                                  \         l
                                                                               \       l
                                                                                \    t


                                      1 8
                      www.orphancameras.com
View original page 20Page 21 · Read text
6.  Be sure that all objects in your 3-D       IndoorPhotography
     pictures are well lit, and whenever                                        As can be seen from the General3-D    convenient include a variety of bright                                          Guidelinesabove,it is possibleto take effec-    colors in your composition.                                                   tive Nishikaphotographswith your mainsub-
    This will enhancethe 3-D effect,as well       ject positionedat a wide rangeof distances
as bringaddedlifeto your pictures.            fromthe camera. In well-litoutdoorsettings,
7.  Avoid posing subjects against a flat      17 to 20 feet is optimal. For indoorphotog-
    background such as a wall.               raphy,however,spaceconsiderationsmay
                                   make such distancesimpractical.Further-    Posingsubjectsagainstflat back-
groundswill naturallyresultin picturesthat       more,the majorityof flashunits,including
lackdepth.                                  the NishikaTwin Light3010,are mosteffec-
                                                   tive in lightingsubjectsthat are 14 feet or
Special Guidelines for Photograph-         closerto the camera. For thesereasons,it
    ing PEOPLE                                    is usuallybest to photographsubjectsat dis-
8.  Avoid photographingpeople in the        tancesof 10 to 14 feet from the camera
    foreground when the main subject is     when taking3-D picturesindoors.
    at a greater distance from the camera.       To maximizethe 3-D effectof indoor
    Peoplecan be photographedfrom as        photographswith the main subjectat these
closeas 6 feet when they are in fact the          closerdistances,rememberto keep your
rnainsubjectof the composition.              foregroundas near as possibleto 6 feet
                                         fromthe camera.9.  Avoid photographingpeople from
                                             For properexposure,makesure you set    farther away than 25 feet.
                                            the lightingselectoron your camerato the'l
 0. When photographing a group of          Cloudy/lndoorspositionwheneveryou are
   people who are all at approximately       takinga pictureindoors.
    the same distance from the camera,
    position them so that there is some
   space side-to-sidebetween them.


                         www.orphancameras.com
View original page 21Page 22 · Read text
lf you haveany difficultywith yourcameraor 3-D prints,the followingguideto commonproble
solutionsmay be helPful.
Problem                               Solution
1. The film does not advancewhen the film advance   1. When loadingthe film,be surethat a film perfora-
  lever is operated.                                    tion hole at the bottomedge of the film is secure-
                                                                  ly attachedto the hook at the base of one of the
                                                       slotsof the take-upspool,and that the film is
                                            drawn tight acrossthe back of the camerabefore
                                                   closingthe back door.
2. The shutterdoes not releasewhen the shutter      2. Make sure that the film has been advanced.
  releasebuttonis Pressed.
3. The red warninglightin the viewfinderdoes not      3. Use the batterytesterto check that the batteries
  come on when the shutterreleasebuttonis par-      are loadedproperlyand have sufficientcharge.
   tiallydepressed,even thoughthe scene is poorly
    tit.
4. The film advanceleverwill not advancethe film      4. Do not forcethe lever,but rewindthe"squeezefilm at this
   for the last shot.                                     point. Forcingthe leverin orderto           in"
                                           one more picturemay causeexposureoverlap'
                                          More than likely,too muchfilm was woundonto
                                                  the take-upspoolduringloading,not leaving
                                          enoughfor the last shot. Make sure to followthe
                                                         film loadinginstructionscarefully.
 5. The rewindcrankwill not turn to rewindthe film at    5. Be sure that the rewindreleasebuttonat the bot-
   the end of a roll.                            tom of the camerahas been pressedbeforeat-
                                               temptingto rewindthe film.
                                      "S"                              When   6. Operatethe film advanceleverone full strokeby 6. The expgsureCOunterdOeSnOtreturntO
   the back door is openedafterthe film has been       pushingit to the rightas far as possible.
   rewound.


                       www.orphancameras.com
View original page 22Related documents and language editions
NishikaPDF
Nishika 3-D camera
Product booklet
5 pages · EnglishRead →
NishikaPDF
Nishika 3-D camera Owners
User manual
29 pages · EnglishRead →
NishikaPDF
Nishika 3-D documents
User manual
6 pages · EnglishRead →
NishikaPDF
Nishika Twin Light 3000 Flash
User manual
14 pages · EnglishRead →

NishikaPDF
Nishika mailing envelopes instructions
User manual
7 pages · EnglishRead →
NishikaPDF
Nishika 3D Camera
User manual
102 pages · German, French, Spanish, ItalianRead →
From the M. Butkus archive. Original publisher and archive notices are retained.
Check the model and edition against your equipment.
PDF verified 2026-10-10.