Film cameras
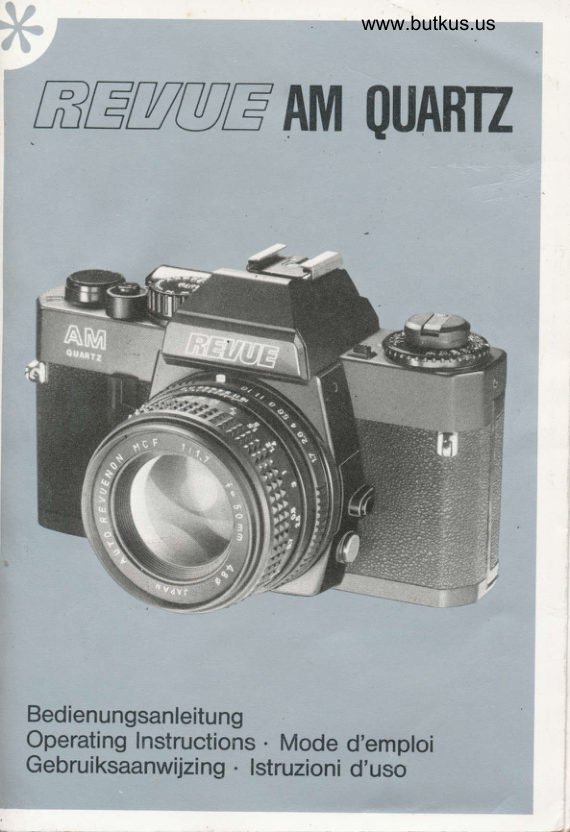
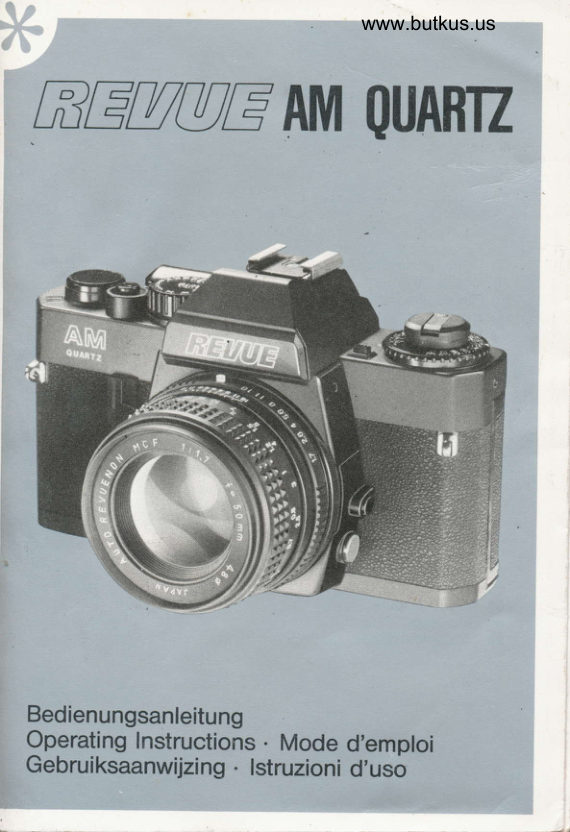
Revue AM Quartz User manual
User manual for Revue AM Quartz. 23 pages in German, French, Dutch. Read the original PDF, download or print a copy without registration.
23 pagesGerman, French, Dutch2.8 MB PDF
Loading your manual…Open PDF directly
Document details
- Brand
- Revue
- Model / document
- Revue AM Quartz
- Document type
- User manual
- Language
- German, French, Dutch
- Pages
- 23
- File size
- 2.8 MB
- Category
- Film cameras
- Document date
- Not specified in catalog
Search available document text
Find a term, then jump to its page in the original PDF. Image-only pages may not be searchable; check the PDF for exact wording and diagrams.
Page 1 · Read text
www.butkus.us
REUAtrAM 0UAHTZ


Bedienungsanleitung
           Instructions . Mode d'emploiQOeratingGebruiksaanwijzing . lstruzioni d'uso
View original page 1Page 3 · Read text
www.butkus.us


                                                       Digitally signed by Mike Butkus
                                          DN: cn=Mike Butkus, o=Butkus camera manuals,
                                              ou=butkus.org, email=mike@butkus.org, c=USMike Butkus Date: 2022.04.06 20:04:06 -04'00'
View original page 3Page 6 · Read text
Operating elements
@ Frame counter
@ Shutter speed knob
@ Shutter release
@ Self-timer
@ Lens unlock button
@ Accessory shoe with hot shoe contact and dedicated contact
@ Lock button for exposure correction scale
@ Exposure correction scale
@ Film speed scale
@ Rewind crank
@ Film speed setting ring
@ Synccordsocket
@ Aperture setting ring
@ Index mark and depth of field scale
@ Distance scale
@ Focusing ring
@ Rewind spindle
@ Film cartridge compartment
@ Power winder socket
@ Battery magazine latch
@ Battery magazine
@ Tripod socket
@ Rewind release button
@ Winding coupler for motor
@ Metalfocal plane shutter
@ Viewfinder eyepiece
@ Film advance lever
@ Film sprocket
@ Take-upspool
@ Camera back cover
@ Film pressure plate
View original page 6
Page 7 · Read text
www.butkus.us

Special features of your AM Quartz
REVUEflex AM Quartz - compact 35 mm reflex camera withquartz-controlled  apertu re priority auto exposure a1!   f ull-aperture
metering. Vertical-run metalfocalplane  shutter (1/60 sec. flash
synch).
Stepless shutter speeds   f rom 1/1000 sec. to 1 sec.
Thrbe exposure compensation  tacilities: Exposure memory lock,
manual setting, correction scale.
Two-step shutter release.
In Auto mode, LED battery check prior to each exposure.
Built-in self-timer with 10 sec. delay.
Automatic disconnection  of metering system when shutter release
button is released.
Power winder connection part of standard equipment.
Accessory shoe with hot shoe contact and dedicated contact for
SM flashguns.
Acoustic slow shutter speed signal.
Technical data
Camera type: Compact single-lens reflex camera with quartz
controlled aperture priority auto exposure, picture format
24 mm x 36 mm.
Sh utter: Vertical  - run metal focal plane shutter with stepl ess shutter
                                            1 1 manually adjustable fixedspeeds from 1 sec. - 1/1000 sec.sieeds from 1 sec. to 1/1OOO sec. plus B. ln "X", manually controlled
shutter speed of 1/90 sec. possible without batteries.
Lens mount: REVUE SM bayonet mount with automatic diaphragm
coupling.
Viewfinder: Rigid prism viewfinder.
Viewfinder inforniation: Shutter speed scale with LEDs for 6 shutter
speeds. Blinking over- and underexposure  indicator, slow shutter
speed warning (lf; tor "Auto" mode, low-battery warning signal.
 Diagonal split-image rangefinder with micro prism. collar, ground
 glass area. lccessory shoe: With hot shoe contact. Dedicated contact provides   il flash readihess information  in viewfinder. Automatic switching to
 1/60 flash sync speed in "Auto" or "AEL" mode (using SM flashguns).                                             ,il

 26
                                  t
View original page 7Page 8 · Read text
illetering system: Full-apetture TTL system with silicon cell for
center-weighted  metering.
Shutter release: Two-step shutter release with wire release
connection. Self-timer with 10 sec. delay.
Exposure control: Exposure meter reacts to slight pressure on
shutter release (not when shutter speed knob is in position "8").
Manualexposure control: Manual setting with blinking indicator
"M" in viewfinder.
Exposure memory: via shutter speed knob in pos. AEL.
Exposure compensation: in 1/1 increments.
                                                                               s)Measuring range: from 1 .5 EV (fl. 7 -                                        1 s) to 18 EV (fl. 16 - 1/1000using 21 DIN film and a 50 mm, f/1.7lens.
                                                  32OO\.Fifm speed range: from 12 - 36 DIN (ASA 12 -Film advance: by film advance lever. Motorized film advance with
REVUEmotor (available as an accessory).
Frame counter: Shows the number of exposures taken. Auto-
matically resets to starting position when camera back cover is
opened. In case of multiple exposures, the frame counter does not
advance.
Flash synchronization: X hot shoe contact (1/60 s), cable socket
for X. Accessory shoe with dedicated contact for automatic synchroni-
zation (when using REVUE SM flashguns).
Power source: Four 1.5 V silver oxide batteries (2 x item No. 2608).
Battery check: Warning LED blinks in viewfinder.
Camera body: black.
Body dimensions: 142.5x 89 x 54 mm (WxHxD).
Weight: 460 g (w/o batteries)

Technical details may be subject to modification.
View original page 8Page 9 · Read text
www.butkus.us


   Inserting and testing the batteries


The power for the REVUEflex AM Quartz is supplied by four silver
oxide batteries available from FOTO QUELLE under item No. 2608
(2 x). As the AM Quartz is an electronic camera,  it requires this power
supply.  lt is recommended that the batteries be replaced once a
year to assure that your camera  is always ready for operation.
Remove the batteries  if you are not likely to use the camera for an
extended period of time.

Four batteries are supplied with the camera. Remember that batteries
should only be handled by the edges; they should never be touched
at their terminals. Fingerprints lead to corrosion and later contact
problems. Therefore, clean the battery terminals before insertion by
rubbing with a dry cloth.

To insert the batteries, press the battery magazine latch @ in direction
of the arrow. The battery magazine @ will then jump out and can be
removed (Fig. 1). Open the battery magazine and insert the batteries,
plus (+) poles up (Fig. 2). Correct polarity is of major importance!
When you are sure that the batteries are properly inserted, close the
battery magazine cover again, push the magazine back into the
camera housing and allow  it to lock in place.

lf the batteries are exhausted and you slightly tap on the shutter
release, an LED automatically  starts blinking in the camera's
viewfinder, about 4 times a second. In such a case, the batteries must
be replaced.

lf your batteries are completely  flat and no fresh batteries are
available, you can go on taking pictures  if the shutter speed knob is
brought into position "X". The shutter speed is then 1/90 sec.
View original page 9
Page 10 · Read text
As with every battery powered unit,  it is advisable to carry
 replacement batteries for your AM Quartz (especially  if ybu are
 travelling) so that you are prepared for any eventuality. Remember
 that batteries lose power at low temperatures. Theref-ore protect
 your camera from cold when shooting snow scenes. This will improve
 the operating condition of the batteries.

   Loading the camera


Avoid loading and unloading your camera in direct sunlight.
 lf necessary, shade the camera with your body.
For camera loading proceed as follows:
 1 . Set the shutter speed knob @ to one of the fixed speeds, preferably
   to the engraved number "60" (1/60 sec.).
2. Open the camera back cover by pulling out the rewind knob @.
   Place a film cartridge into the compartment @ and lock by pressing
    in the rewind knob @. lf necessary, turn the rewind knob slightly so
   that the rewind spindle @ engages with the film spool.
3. Thread the film end - without                                touching the shutter blades! - over   the film gate into one of the yellow marked slots on the take-up
  spool@ (Fig. 3). With the film advance lever @, wind some fitm
   onto the spool and pull  it tight by carefully turning the rewind crank
   clockwise.
4. Depress the shutter release and then operate the film advance
   lever. When the sprocket teeth @ properly engage with the
   perforations, simply press the back cover closed-and, by alter-
   nately ope_rating the shutter release @ and film advancelever @,
   transport the film untilthe frame counter shows "1". The rewind
  knob must turn during every transport operation.   lt serves as a
   transport control.

                                                                             is now readySet the shutter speed knob back to AUTO - the camerafor shooting.
View original page 10Page 11 · Read text
www.butkus.us


  A film memo holder at the back of the camera will accept a flap of
   the REVUE film carton so that you have a reminder of the type of
    film used.

     Setting the film speed


    Setting the speed of the film is of great importance as only then can
   the metering system of the camera guarantee a correct exposure.
   The film speed scale @ is engraved in ASA. Turning the knurled film
   speed ring on the film rewind knob is only possible when the film
   speed setting ring @ is lifted. The ASA number of the loaded film must
    line up with the index mark (Fig. 4). Make sure to change the setting
   when loading a film with a different film speed.

ASA 12    . 25              100                                      .     1600
         16 20   32 40                                                                  1000 1250     2000 2500
DIN 12 13 't4 15 16 17 18 1e 20 21 22 23 24 25 26 27 28 29 30 31 32 33 34 35 36


     Cocking the shutter


   The film advance lever @ transports the film one frame with one
   motion and simultaneously cocks the shutter.  lt is also possible to
   cock the shutter in several shorter movements. When cocked, the
    lever remains in a ready position projecting out from the back cover
   so that the thumb can comfortably  slip behind  it for subsequent
   exposure. To carry the camera, fold the lever over the back cover.


   30
View original page 11Page 12 · Read text
Shutter release


     The shutter release of your AM Quartz is between the film advance
       lever and the shutter speed scale.
     The shutter release @ is the primary control element of your
    AM Quartz.  lt replaces an inconvenient main switch and works in two
      stages (shutter speed knob must be in AUTO position or in one of the
       fixed settings):
       1st stage: The metering system is turned on and the determined
               exposure time is displayed  in the viewfinder by means of
              an LED.
     2nd stage: The shutter is released.
      This usefull feature not only keeps the camera ready but also prevents
      current from being drawn from the batteries except when required.
     The camera is shut off as soon as you take your finger from thd shutter
      release. There is no chance that the camera will be put away while
      turned on.                                     www.butkus.us


I
I       Shutter speed settingI


     Fuery             position of the shutter speed knob @ has a definite catch.
      Normally this knob is set to the AUTO position so that the camera's
      automatic exposure system can be used. In this position the camera
      automatically and steplessly selects the correct shutter speed to
     match the aperture setting you have chosen (Fig. S). The automatic
      shutter speed is displayed  in the vievyfinder.
View original page 12Page 13 · Read text
www.butkus.us


lf you wish to set the shutter speed manually, the AM Quartz
provides 1 1 fixed shutter speeds from 1 sec. to 1 /1 000 sec., as well as
"8" fortime exposuresover2 sec. To movethe shutterspeed knob@
from the AUTO position, first unlock  it by means of the red pin.
Please take into account that manually set shutter speeds do not
allow any intermediate settings and that the shutter speed knob must
always be held by the catch in a fixed position. The numbers from 1
to 1000 designate fractions of a second (125, tor example, means
1/125 sec.). "2s" stands for 2 sec. exposure time. The setting "X"
which is marked in red designates a shutter speed of 1/90 sec. for the
use of an electronic flash.

   Frame counter


The camera is equipped with a frame counter @ which shows the
numbers of exposures taken. The counter resets to starting position
automatically when the camera back cover is opened. Before the
camera is loaded, the frame counter window shows an "S"; after
loading, a "1" appears. Each time the film advance lever is
operated, the counter advances one number.

   Focusing


The main advantage of your reflex camera is that you do not have to
set estimated distances but can focus with accuracy in the vieMinder.
Three focusing aids are available:
1. A diagonal 5plit-image  in the middle of the viewfinder.                   t


:*is,ii5ffSJxl""ottheremaininsviewfinderimase.
                                                               'ffi
View original page 13Page 14 · Read text
Thg t*o focusing aids in the middle of the viewfinder, the sprit image               prism                           coilar, permit quick                                   and                                        accuraG                                                  i";"J;b.  ?.911"^i."f_qr .     ne centrat                    sptit image.rangefinder                                       gives                                         two          .r                                                        offset                                                                half imiges as
    lplq::rne tmageIg rsransecompleteis notandcoriec.ysharo. setl 'ne fdu;id6.oii"Ji*n"n
 2.The microprism coll31,g1ound the split image consists of many
    microscopicaily  fine plsqlg which give an e-mpnaslzeO grornO
     glass_effect. The motif is literally ru,-ptured wh6n not i" t.i"rr.
    The.flimmering  of the prisms m'at<eb the out-of-focus euJn more
    obvious.  lf, however, the correct focus has Oeen oOtain"O, in"
    micro prism qrid oives a.compretery  sriil, shlrpimage oii[e suoject.
    subject texti res-bei ng    i nsigi iti."itJ"i tn" m icro prism coilar,
      yo..u can easiry use the.micro prism grid for the focirsing oiJuoiects                                                                    --    y$.p_gle_grty recognizabte iines. Vour 50 mm,t/1.7 Art"
   REVUENON lens a-llows settings as close as 0.45 m.
   Without accessories, you can alpproach your subjeCt close
   glgugl to sharprv photograph  dri area oi tne sizeioiisiiioaro     letter sheet.

   Ghecking the exposure

 Your REVUEflex AM gygB is equipped with a furt-aperture TTL
 system for center-weighted  meteiin'j which automatibiiiv c-ontrors
the exposure time or the metar tocaiprane ,1ilt6;;'h;;'ir,!1'nutt",
speed knob is in the AUTO position. The sensitive silicon cLlt in tne
camera measures the amount of light falling through the lenJ and-
passes the measured value onto ilie electr6nic syitem *hich
calculates th.e exposure varue and stepresslv Coritrors in" .trtt",
speed from 1 sec. to 1/1ooo sec., depbnoing on the tirr ii""oaperture selected.                                      "no
YourAM Quartz camera measures the incident lightthrough the lens.
Any loss of light due to a firter or extension useo ior ctoi"-"up pnoto-
graphy is therefore automatically taken into account.

                                                       33
View original page 14Page 15 · Read text
www.butkus.us


The system reads the entire focusing screen area and gives an
integrated measurement with special attention to the centralzone -
a technical trick which makes automatic exposure control even more
reliable.
To check the exposure, press the shutter release @ until the LEDs in
the viewfinder are activated. The metering system is then switched
on. The calculated shutter speed is shown in the viewfinder by means
of a red LED.

The shutter speed scale on the right edge of the viewfinder extends
from 1/30 to 1/1000 sec. Blinking signals (LED) give under- and
overexposure warning. In such a case correct exposure  is no longer
provided.

 lf the overexposure signal next to the number "1000" starts blinking
(8 times per second), the chosen aperture  is too large for the
available light and must be closed one or more stops. A neutralgrey
filter, available as an accessory, may also be used.
In case of shutter speeds slower than 1/60 sec., an acoustic slow-
shutter speed signal is to be heard.
 lf the shutter speed determined by the automatic exposure system
is slower than 1/30 sec. (bad lighting conditions or too small an
aperture opening), a red signal is lit at the lower end of the scale,
opposite "LT". In addition, an acoustic warning is to be heard.
In case the determined shutter speed is slower than 1 sec., this signal
blinks 8 times a second and the acoustic warning  is to be heard at
short intervals.

In such a case, open the aperture one stop, or use a more sensitive
film or a flashgun.
Remember that exposures taken with a hand-held camera using a
shutter speed of 1/30 sec. or slower are hardly ever successful.
Therefore use a tripod or some other stable support to eliminate the
blur resulting from camera movement.
View original page 15
Page 16 · Read text
Aperture-preselection,ailows  you to infruence the shutter speed        automaticalty setected.by                                                        !l're camera.  lt is easity po.iior" i5 otserve
         this interaction in the viewfinder. ay-atturningrhe;b;il;; seling  ,.rng,
      you are able to move the indicator   tne rilnt viewiino",        to
        shutter speed you consider best for youi .iOle"t."      "oo"   "
       Note:
      The white button on th9 aperture setting ring must not rine up with the
       index mark @. otherwise correct expo6urel wiil notbe o-biJineo.
            (lf necessaryI untock OV pressing th;iv'hii" button).

        Depth-of-field

      Depth-ofLield designates the zone in front of and behind the main
      suojecr wnrch appears sharp in the picture. The depth-of-fierd  is
      influenced by three factors.'lt increaseJwitn:
            a larger aperture opening (smaller f_stop)
          ,   a shorter range
            a longer focal length (telephoto lens).
I    The full-aperture me.tgling system of your REVUE rens ailows you
       tq q"." the subject in the viewiinder  witir thesharowe;iA;pih:;r-fierd,
              advantageo_us for                                exact focusing.l      which,,is                                           vour nrvr ou-adioi"r"-"         th^e Jollowing,possibirity                                 to determine                                         theiepth-ot-tiercL-'-     you can read.                    the                         depth-of-fierd                                   from                                           the                                                  deith-of-fierd                                                              scare                              @     engraved                    in the                    form                                of f-numbers                                  on                                         both                                                iioes ot tne                                                     in-Giharr.
    when a distance of 5.m is set, tre numoei e at tnJgni ano? ine ret
       of the index mark indicate that subjectJ *inin ;      to 10 m will be sharp in focus wherithe aperture '.""H;i;.;;f/gis used.


                                                           35
View original page 16Page 17 · Read text
www.butkus.us


   Exposure compensation


Normally you will make full use of the automatic exposure system of
your AM Quartz and will leave the shutter speed knob in the AUTO
position. However,  if lighting conditions varying greatly from the
normal (e. g. strong backlight, extremely light or dark subjects, etc.)
make a correction of the automatically determined shutter speed
necessary, your camera offers you three possibilities for compen-
sation:

1. Exposure memory
  Unlock the shutter speed knob @ by means of the red pin and
   bring  it into position "AEL".
  Then frame your subject in the viewfinder and approach  it close
  enough such that the centre of interest almost fills the complete
   viewfinder. Now slightly press the shutter release untilthe
  exposure time reading appears in the viewfinder. This meter
   reading is memorized. Hold the shutter release @ slightly pressed.
  Choose the final picture composition and completely depress the
   shutter release. Then reset the shutter speed knob @ to the AUTO
   position.
2. Manual setting of exposure time
   First press the red pin, then set the desired shutter speed on the
   shutter speed knob @. At the right edge of the viewfinder,
  a blinking signal next to the designation "M" confirms the manual
  mode.
   In case of fixed manual settings, the metering system is
   inoperative.
  Remember to reset the shutter speed knob to the AUTO position
   afterwards. The automatic exposure system of your AM Quartz
  willthen respond again to prevent errors in exposure.
View original page 17
Page 18 · Read text
3. Exposure correction scale
   Every number in direction of + or - on the exposure correction    s9qt9 @ represents an underexposure (-) or overexposure (+)
    of 1 f-stop or a slower or faster shutter speed (: 3 DiN).
   To compensate  this, press the lock button @ dnd turn tire ring
    untilthe corresponding number lines up with-the white mark (Fig. 4).
   This makes  it possible (for example for a series of backlighishots
    or photos taken at the beach or in the mountains)to prog-ram the
   automatic exposure system to the specific lighting cdndiiions for
   the time the pictures are taken, withbut the n-bed 6f setting the
   shutter speed knob @ to "AEL" for each exposure (Fig. 6-). But it
   also allows you to capture a better colour impression f6r c'otour
    :!iq"s. Warning: After exposure correction, do not forget to reset to   "0" on the scale. otherwise erroneous exposure will-result for the
   following pictures.
  We recommend you to use the exposure memory feature when
   being colfronted with occasional lighting conditi6ns other than
   normal. For repeated picture shooting under such conditions   it is
   advisable to use the exposure correction scale.

   Holding the camera


lntelligent holding of the camera  is a prerequisite for sharp pictures.
Blurred pictures can only be prevented   if th; camera is neto'perfectly
still at the moment of exposure. Therefore support your AM buartz
so that the thumb and forefinger operate the focusihg ring, and the
thumb and middle finger the aperture setting ring. R6st tht camera
solidly.on the forehead and nose. The right hand should clasp
the right side of the camera with the forefinger on the shutter
release. only the forefinger should move w-hen taking an exposure.
View original page 18Page 19 · Read text
www.butkus.us


  Time exposures and triPod use


                                                using                                          taken                                    be                                    only                           should    time exposuresFor                                                                                     .a tripod                                                        -                 - which                                                                 position,                                                                  In this                                                        is                                           used.                                knob                          speed    position                         shutter           "8" on thethe
the bhutter remains open as long as the shutter release is depressed.
To prevent picture blur, the use of a cable release is indispensable
(the cable release connection  is in the shutter release)'.
if you do not have a cable release at hand when taking long time
eiposures up to 1 sec. using the camera's automatic exposure
syltem and d tripod, the self{imer can help you out of trouble.

   Exposures with self-timer


The camera should also be mounted on a tripod or placed on a stable
support for exposures taken with the self-timer. First cock the shutter
anb'then press the self-timer @ completely down' The self-timer
starts runhing when the self-timer lever is slightly pressed upward.
Note: When taking self{imer pictures using a tripod, make sure to
cover up the eyepiece with the supplied accessory shoe hood, in
order to prevent faulty exposures.


 38
View original page 19Page 20 · Read text
Rewinding the film


 The end of the film is reached  if the frame counter shows "36" or',24,,
 and a slight resistance  is noticed upon moving the film advance
 lever. In such a case, press the rewihd release 6utton @ on the bottom
 of the camera, unfold the rewind crank @ and turn  it diockwise to
 rewind the film untilthe resistance noticeably slackens (Fig. 7).
 open the camera back cover by pulling the rewind knob. R6m6ve the
 film cartridge and send  it to a REVUEJab for processing.
when the camera back cover is opened, the irame cou"nter 6) auto-
 matically resets to starting position ("s").The rewind releasdbutton
@ snaps out when the film advance lever is operated again.

    Infra-red index


    the depth-of-field scale of the lens, at the right of the index markQ1
@ between the f-numbers 4 and B, you will find Jred "infra-red index"
fo.r infra-red fiJm plotography. Infri-red rays focus at a plane some-
what behind that of visible light. Therefore, focus correition  is
necessary. Proceed as follows: Focus the subject in the viewfinder
and then read the distance determined from the lens. Turn the
foc.using ring to the right untilthe determined reading lines up with the
red mark on the depth-of-field scale.
View original page 20Page 21 · Read text
www.butkus.us


   Changing the lens


Your AM Quartz is equipped with a bayonet mount which allows quick                  I
and safe change of SM bayonet mount lenses. To change the lens,                                         t'I
depress the lens unlock button @ and turn the lens completely to the
                                 When                                                mounting                           from                                  the                                  camera.                 removed              be           thenright.            lt can                                                                the           I*                                                            line                                                up with the                                      must                              camera                    mark                         on the             red                 index          thenew lens.
red dot on the lens. Slip the lens into the bayonet mount and lock it by
slightly turning to the left. The lens is firmly in place when a clicking                 f                                                                                                                                         Isound is audible.

                                                                                                                                                                                                                                                                                  I
   Flash photography with your                                            I
  AM Quartz

Your AM Quartz allows you to take exciting pictures even  if the normal                                                                                               tlighting conditions are insufficient for picture shooting.
Allyou need is a REVUE electronic flash.
First set the shutter speed knob @ to "X". The sync speed is 1/90 s.
When using automatic SM flashguns, the corresponding  flash sync
speed (1/60 s) is automatically set in the AUTO or AEL po_sition of
the shutter speed knob. Besides, flash readiness  is signalled in the
viewfinder by the diode "60" when the shutter release is touched.
Flash units with hot shoe facility are connected the camera's hot shoe
contact in the accessory shoe. Flash units without hot shoe contact
are connected to the sync cord socket @ of your AM Quartz, using a
sync cable. The required working aperture is set manually on the lens.
 In general, make sure to observe the instructions given in the flash
 unit's manual.


40
                                                                                                                        I
View original page 21Page 22 · Read text
{hen using flash units with Fp or M famps, the exposure time on the
 shutterspeed knob must also be set manually. ln such a caielnoose
 a.shutter speed of 1/18 sec. or slower and r5member that tiLing
 pictures with slow shutter speeds makes  it necessary to use a tri-pod.

   Care of your AM Quartz


 Heat, dust and moisture are harmfulto a precision optical instrument.
 Therefore, avoid storing your camera in unsuitable itaceJsucn as
 the glove compartment or the rear shelf of a car. rn'e worsienemies
 of your camera, however, are sand and saltwater. Extra cauiion is
then required. Avoid touching th! glass slrfaces. ringerpiinis may
 leave permanent traces.in oplicar gtass. To clean gta;s s'urfaJes,
 first use a lens brush- obstinate sflots can oe rem6veo ov oi""tning
on the spot and carefully wiping with a rotary motion using an
absolutely clean, soft linen cloth or optical cleaning papei. hememoer
to clean the viewfinder eyepiece oc6asionally.
Never use silicon cloths. or eyeglass tissues fbr the cleaning of optical
instruments. Extra caution is required when cleaning the olciituiing
mirror, the focal plane shutter and the film pressure piate. ftre/snouto
never be touched. Never use force and db not try tb repair ydur
camera.  lf any operating problems occur, contacf the FoToQUELLE
customer service.
View original page 22Related documents and language editions


From the M. Butkus archive. Original publisher and archive notices are retained.
Check the model and edition against your equipment.
PDF verified 2026-10-10.