Film cameras
Voigtländer BRILLIANT F4.5 User manual
User manual for Voigtländer BRILLIANT F4.5. 29 pages in English. Read the original PDF, download or print a copy without registration.
29 pagesEnglish2.1 MB PDF

Loading your manual…Open PDF directly
Document details
- Brand
- Voigtländer
- Model / document
- Voigtländer BRILLIANT F4.5
- Document type
- User manual
- Language
- English
- Pages
- 29
- File size
- 2.1 MB
- Category
- Film cameras
- Document date
- Not specified in catalog
Search available document text
Find a term, then jump to its page in the original PDF. Image-only pages may not be searchable; check the PDF for exact wording and diagrams.
Page 4 · Read text
Fig.  1. The Yoigtland.er  Brilliant
Introduction
      In. spite of the marvellously simple
   construction of the Brilliant camera; it
  has characteristics which are usually
   glly  found in complicated apparatus.
  You are quit_e right  to be fioud  of
   your new  "Voigtlander", and  horv
   satisfied you  will  be rvhen the  first
       good pictures are in your hands!  _dozen
  Vgty few movements are necessary
  when making a picturelvith the Briltiani
View original page 4Page 5 · Read text
Camera; these few must however be
   understoodrwe rvould therefore recom-
  mend you to read this booklet so ttrat
   ygu are conversant rvith the handling
    oI the eamera before you start.


                                                 Digitally signed by mike
                                        butkus
                                     DN: cn=mike butkus,    mike        o=orphancameras, ou=29,
                                        email=mike@butkus.org,
                                   c=US
                                           Date: 2017.10.14 18:17:02    butkus -04'00'


                   Fig.  2.  Find.er hood opeu
The Finder
    The finder consists of a large aper-
   ture finder lens 8 (fig. 1) a mirror inside
   the camera and a secondlens rvhich is
  coveredby the folded finder hood when
    4
                          www.butkus.us
View original page 5Page 6 · Read text
the camera is not in use. If you lift the
cover by the knob 7 (fig. 2) the other
three sides open of their own accord.
 If you now look down vertically at this


           n'ig.3.   I-rooking into  the  find,er

lens from a distanceof about !0",, you
rvill see the finder picture (fig. 3) the
limits of rvhich coincide exactly with
those of the picture throrvn on the film.
It is the right way up, is very brilliant
View original page 6Page 7 · Read text
and measures Lslrc"
           square, i. e. two thirds
           the size of the  pic-
            ture.
           The  four  pointers
          on the edges of the
            finder point towards
           the middle of the pic-
            ture and enable you
            to see that the came-
            ra  is held comectly.
         As a particular  size
             of   the   object  in
           the   finder   always
          corresponds with  a
            certain distance from
           the  object, you can
          determine  the   fo-
          cussing  point  with
           the aid of the poin-
            ters.  For  example:
                   if a man 5'5" tall ap-
          pears as in (fig.4a)-
            that  is, so that the
          view of him reaches   c          from  top  to bottom
            of the  finder, he  is
   e         exactly 7'7" from the
trtig. 4 .     camera.  If  the view

            www.butkus.us
View original page 7Page 8 · Read text
in the finder should coineide with  ilre
     tip qf_tle p_gilte{s (fig.-the4 b) the subjeet
   rvould be g'2" from     camera,'hanrland   a picfure from the right or  left
    pginter to the bottom edge of the finder
     (fig. 4c) representsa distanceof 16,!,,.
   The following table gives the distances
      people of varioui heights,rvith re-    lot
   ference to figs. 4 a, b and c.         r
              I - g * '{
                 l           *  - - * r                        I
                           ':.:1:!              ,-.*

                               #
                 ' =                                                                  I
                    '-/                                                           / "        I -::                                                :
     L
   You rvo                                to
    stick this table on  t[e  back of the
   finder hood.
    when  shutting- the finder hood the
   trvo sides must first be closed, ilren
   the baek, and lastly the cover.g
 ompur  Shufter  (fig. b)
    The shutter is surrounded by the re-
   volving ring Lz on which the ietters  r
   (long time exposure)and B (short timecI
I
View original page 8Page 9 · Read text
exposure), and the instantaneousex-
posures from 1  to  l/soosec. are en-
graved. The instantaneousspeeds are
not engraved as fractions bui as whole
numbers so that they are easier to
read.

,.-$

 \


                                                                                   t 9
              Fig.5.  Compur Shutter

Instantancousexposures
  By turning the ring 17 the required
speed is brought opposite the pointer
on  the  left  [and  side  of  the word'Compur".          The  speeds from  1  to
r/1ess€c. are  all on the same cam so
  I
                       www.butkus.us
View original page 9Page 10 · Read text
that the shutter can be set betweeu
   gny trvo numbers for speeds such as    1/zr       which is between 1/o-oand t/,oosec.
   The shutter mus_tnot, ho-wever,be set   between              and the highest sp'eed;;;             lroo
   betweenB and 1 sec. Tfre shutter is set
      ntupsing.Jhulever LZ to th; rithi    9I    (seen from the front) as far as it  #itt
    go...In  tlu  ordinary way-theit does
    matter whether y_ouset    speed"oio"
                                     ir, horvevei,                                     better                        J!F  theyheqtensionusingfirst.the                   high6st                          speed'to                                      set
    the ring before the shutter is tensioned,
   as setting t-he                 Ting to this speed after
    the shutter has been tensionedis rather
     difficult. The shutter can be released
    either by pressing the lever 1b or the
   wlre releaseserewedinto the nipple 18.
    Tirne exposures
    The shutter must not be tensionedfor
       exposures,the tensioni"g iuu*-ii     liol.
    is loeked when the ring is set-to ? and
  B and if  it is forced th6 shutter will-t["be
   damaged. If the letter B  is our,
   index the shutter wi_ll open when prbr:
   sure is exerted on the wire releaie or
   the lever 15 and remain open as long
   as the pressure is continued.  If  yo;
View original page 10Page 11 · Read text
wish  to  expose for  instance three
  seconds, you should eount as follows.  *One            little second, Two  little seconds,
  Three little seconds". At "One" press
   the release and at the end of "Three
    little seconds"relieve the pressure.
        If the letter T  is over the pointer,
   the  shutter  is opened by  the  first
  movement of the lever or wire release
  and is shut by a second pressure on
   either of these. This position is used
   for exposuresthat will last for minutes
   (for example, Night Pictures) and when
   rvorking u'ith  flashlight.

Focussing
    With the Brilliant F 14,5camera, the
   . focussing scale for 3 ft. to  infinity  is
  engraved on the side of the front lens
   cell so that you can control the focussing
  and see the finder picture at the same
   time (fig. 3). In this way time is saved
  and mistakes are prevented. By tur-
   ning the lens cell the required distance
    is easily brought under the index on
   the pointer 16  (fig. 5).  You can of
   course also set the focus between the
  engraved distaneesif neeessary.
     t0
                 .;'*: *; .: www.butkus.us.,,:',,
View original page 11Page 12 · Read text
lris diqphrogm  ond ,,Depth of Focus,,
    The.SkoparF/4,b lens at full aperture
  pro3ects a  picture  of  the  foiussing
  plane absolul-elysharp right-is  ;p- 6-ihE
  corners.  If,'close_however, it    wishea--;     to
  reproduce       and- aistani    b;,i;
   f.harply            at the same time, tnuptii  oI
  Focus" is necessary; this ban onlv be                'stopping  achieved by-             aorvn'-l      ;;   q
   pntical larv applying'   v Io  all mak",  ofv'__;\  lenses.
    For this purpose the Iris diaphragm .D    .
   is provided;   ii   is  controiled-i;     t"t; X  lever 19 (fig. b) rvhich moves over the .S
  aperture scale 18 on the bottom of t[;  Ti*
  Compur Shutter.  The  smaller   i[;
  aperture number,  the  larger  is  ah;  opening,         The aperture-next   vali,es ur"  ,o         _
  chopenthat the      smalle"-oploi"g
  always needs double the expos^ureoT         t  that immediately                 -*depthpreceding ii.- W[ifsi  increasing_the          of= focur;'--il,                          flfl
  stopping down you also increasl  t[;                                                                     tltl
  exposurenecessaryso you should al_
  wlys work rvith the Iargeit possiblestop.
  The table on the bick ;f  ril  ii"iiJ.
 h9o4gives someidea of the distribution  of the. depth of focus at the  diii;;;;i                                   flttItfr
 Ioeussing points rvith the various dia-                                                                                illilfil                                                                \*.    11
                     -,:;1*{dib*:...,.., -.,u . .                             r  l&-s                 ,-l
View original page 12Page 14 · Read text
of  the  taking and finder  lenses:  it
   amounts to rTstrr to rlq ineh. at tne iiont
   e{qe- of  the' finder.  This- ai.rr"p"-rii"
   rvhich is knorvn as "paraila;;;   i, ;;A'ilh';;
   tess noticeabte in  tLe  griitiaJt
   with most fi_nders,so that  it can vsv'.J
  be allorved for wiih a iittte ,ur". "urilu
     Portraits are best taken when the
  head is  slig_htly-Focarturned to  oo"-sia".
  Should the        lens not  fit  easifv.
   the mount can be pr"rrud  i;-  ;-;;i  a  Iittle.
Holding  the Ccrmero
    Most pictures come out best if vou  can exp-ose             _without wasting too mircf,
  time. The BrilUant Cameri has b;;
   gpe.cia,llVbuilt  for thrF type oi prrto*.
   rr rs nowever a good idea to practice
  the few movemenls necessarywith the
  camera unloaded until  eveiythiog   i,  quite instinctive.
   The lanyard  fixed  to the knob B   (fig.      1)       on fhe side oftn" camera is out
  round the neck.  It  is so toog tdi   ih-;
  finder comes     right  CIsta-nce;;;                     llu  from the eye_,                    _if nee6ssaryyou can cut
 a little  off.  W"ni6i y-ou-;i"'uod- -op"oing-serting the
 shutter and focus                   i[e
                                        13
View original page 14Page 15 · Read text
finder hood you should take up a firm
position as the slightest shake of the
camera during the exposure r,vill result
in double outlines in  your  pictures.
With the  left hand you can hold the
lanyard tight at the same time pressing


             Fig.  6.  Hold.ing the eamera

the camera against the chest (fig.6). In
doing  this  hou'ever you must make
sure that the canlel'a is held quite ver-
tical and horizontal as otherrvise the
li u es  in   )'ollr  picture   rvill   all  be
crooked.  It is quite easy to see n'hether
1 4
                      www.butkus.us
View original page 15Page 17 · Read text
eventuality, a tripod bush is incorpo-
   rated in the base of the camera. Should
   the screw on the tripod be too long,
      it must be shortened or a rvasher must
   be placed underneath the camera as it is
   otherwise possible to damage the thread.


                  Flg.  7.  Opening the base
Locrding the Comero
   On a rollfihn ZrlnX Srlo (B 2) you
  can mahe 72 pictures 2rI o" square with
   the Brilliant Camera.
    The loading of the camera with roll-
   film can take place in daylight as ttre
   actual film is protectedby many layers
   of light tight paper. You rvill of course
    1 6

                           www.butkus.us
View original page 17Page 18 · Read text
not load the camera in  brilliant  sun-
shine but at least in the shadow of
your  o\\'n body. To open the  film
chamber, tift the clip 20 (fig. 7) with
the thumb when the base, and after-
rvards the back, (fig. B) can be easily


              Fig.  8.  Opening  the baek

opened. By the hinge of the back is
the film chamber for the empty spool
rvith the film  turning knob 1  (fig. 1)
and by the hinge of the base is the film
chamber for the full spool.
  First you must put  in  the empty
spool, to do this pull out the nickelled
                                                  L 7
View original page 18Page 19 · Read text
l_rnob22 (fig. 8) on the opposite side of
the film turling knob so that the pin
disappears from  the  inside  of  ine
camera. This hnob 22 can be kept in
this position by turning  it  slightly to


          .4

          tr'ig.9.-b'rg.9. InsertingInserting thethe empry spool

the right or left. On the inside of the
film turning knob there is a key 2I
(fig. B) rvhich conveysthe movementof
the knob to the spool. If you pull out
the polished knob 2 (fig. 9) on the film
turning knob the key  2I  disappears
from the spool chamber and the empty
spool can be easily inserted (fig. 9).
1 8
                       www.butkus.us
View original page 19Page 20 · Read text
You nrust take care that the slottedend
of the spool facesthe film turning knob.
If the knobs 2 and 22 are allon'ed to
snap back into  place and the  film
turning knob is turned a ferv times to


           tr'ig. 10.  Insertiug  the  full  spool

the right the key rvill automaticallyfind
the slot in the spool.
  The lorver spool chamber by  the
hinge of the base has tu'o knobs 6 and
10 (fig. 1) rvhich can be pulled out and
held by turning. This is where you put
the full  film spool (fig. 10). I{ere you
must insert the new film spool so that
                                                  1 9
View original page 20Page 21 · Read text
it lies with the point of the safety paper
appearing on the hinge side of  tne
chamber so that the bottom spool turns
 in  the same direction as the empty
spool. As you press the spool lighlly


Fig. 11.  Attention    ! Thread.  afety  paper rike this
against the spring in the film chamber
you can release the knobs and the pins
rvill hold the spool firmly.
 Now remove the seal of the new spool
rvith your finger  nail, fuaw the safety
paper about 4" out and take the point
underneaththe plush light trap (fig. 11),
so as to run smoothly over the gliding-
rolls provided fgr this purpose. It  is
wrong to draw the safety-paper oyer
20
                        www.butkus.us
View original page 21Page 22 · Read text
the light-trap or  to thread  it under
the gliding-roll as otherrvise the film
u'ould be scratched and the camera
thereby damirged. Finally insert the
point of the safety paper in the long


         Fig.12.   Fixing  the safety paper
slot of the empty spool in the upper
film chamber (fig. LZ). By turning the
film  turning knob, the safety paper
should be rolled on one or two furns,
so that it is lying tightly in the picture
opening of the camera. At the sarne
time, you should make sure that the
safety paper is runiring quite parallel
to the spool as otherwisethe film  rvill
jam later.
                                                  2 L
View original page 22Page 23 · Read text
If everything is correct,the back and
      the base of the camera should be care-
       fully closed when the catch on the back
       will snap into place. Now turn on the
       film  turning knob slowly  until  after
     about 15 turns a hand, a  f ew points,
     and lastly the number 1 appear in the         rl
      red windorv in the back panel of the        f
                                                                                                                                                                                                                                              . 1 1     camera. The camera is now ready for                                t
      the first exposure.                                      ,*
                                                              ;
  The lndicqtor
                                                                                                 I
       For the further control of the film
      transport you can disregard the rvindow
       in the back panel of the camera for an
     automatic indicator now comes into
      action. Number 1 of the new film being
       in the window at the baek panel of the
     camerathe small knob 5 (fig. 13) on the
      side should be pushed to the right. The
      indicator will then set itself automati-
      cally so that the figure 1 appearsin the
      oval red rvindorv 4  (fig. 13). For the
     second and each further exposure the
       film key is turned until the respective
     number from 2 to 72 appearsin the red
      rvindorv of the indieator.  It  is best to
      turn on the film  to the next number
     immediately after eaeh exposure as it      22                       t;
gd*                            www.butkus.us*ili*+.*;-.;;                                                                                                                                                                                                                    .  j ,
View original page 23Page 24 · Read text
is then impossible to expose any pic-
   ture twice.
Unlooding  the Comerct
        If the whole film is exposedthe film
  key should be turned on-until the end


                Fig. 13.  Setting  the indicator
   of the safety paper has gone past the
   window and the film  is all on the top
   spool. You  can't overwind anything
   doing this. The base and back of the
  camera are now opened as described
   under " Loading"(fig.7 and8). Then hold
   the end of the safety paper with  the
    left hand and turn the winding knob a
    little further so that the film  is tightly
   rvound but not too mueh as otherwise
                                          23
View original page 24Page 25 · Read text
you might  scratch the  film.  A  too
loosely rolled film  lets the light in at
the edges.
  Now pull out the knob 22 and turn
it, slightly take hold of the spool with


        n'ig. 14. Removing  the exposed. spool
the thumb and middle finger holding
the paper with the index finger so that
it cannot unroll.  Pull out the knob 2
on the film key (fig. 14) and the spool
can then be easily removed from the
camera. The index finger is kept on the
spool until  it is fixed with the piece of
gummed paper which you  will  find
ready prepared.
24
                      www.butkus.us
View original page 25Related documents and language editions
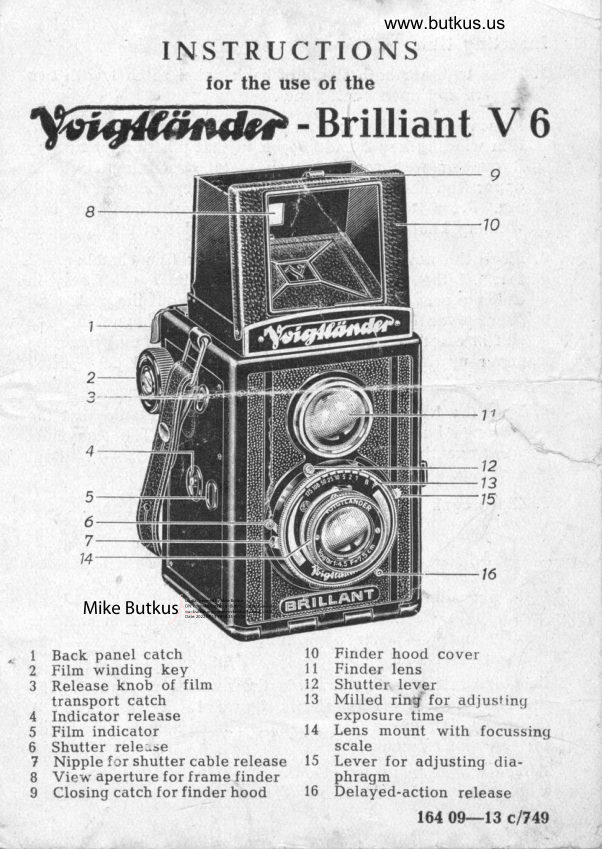
VoigtländerPDF
VOIGTLANDER BRILLIANT V6
User manual
7 pages · EnglishRead →

VoigtländerPDF
Voigtländer BRILLIANT V6
User manual
7 pages · EnglishRead →
VoigtländerPDF
Voigtländer THE BRILLIANT F7.7
User manual
28 pages · EnglishRead →
VoigtländerPDF
Voigtlander Brillant F/6,3
User manual
19 pages · FrenchRead →

VoigtländerPDF
Voigtlander Brillant F/6,3
User manual
35 pages · FrenchRead →
VoigtländerPDF
Voigtlander Brillant 6X6 F/4.5 Gebrauchsanleitung
User manual
32 pages · GermanRead →
From the M. Butkus archive. Original publisher and archive notices are retained.
Check the model and edition against your equipment.
PDF verified 2026-10-10.