Sewing machines
Wheeler & Wilson A Number 8 — User manual
User manual for Wheeler & Wilson A Number 8. 16 pages in English. Read the original PDF, download or print a copy without registration.
16 pagesEnglish2.2 MB PDF
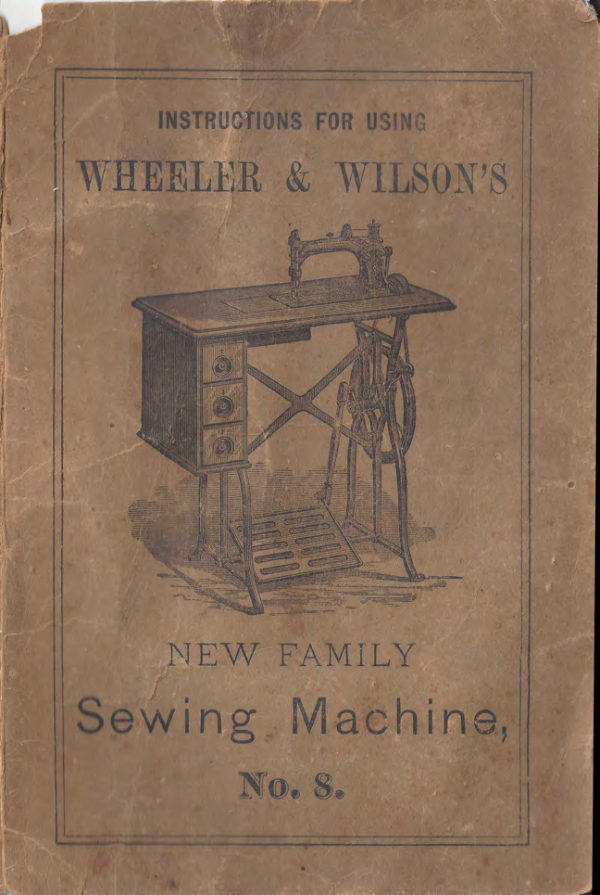
Loading your manual…Open PDF directly
Document details
- Brand
- Wheeler & Wilson
- Model / document
- Wheeler & Wilson A Number 8
- Document type
- User manual
- Language
- English
- Pages
- 16
- File size
- 2.2 MB
- Category
- Sewing machines
- Document date
- Not specified in catalog
Contents
Search available document text
Find a term, then jump to its page in the original PDF. Image-only pages may not be searchable; check the PDF for exact wording and diagrams.
Page 1 · Read text
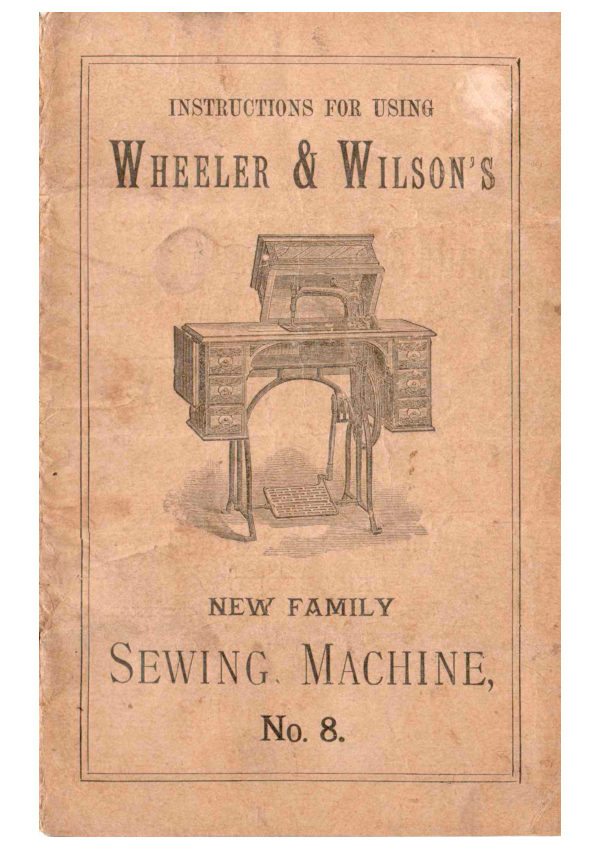
INSTRUCTIONS FOR USING

WHEELER & WILSON'S


  NEW FAMILY
Sewing Machine,

       No. 8.
View original page 1Page 2 · Read text
VIEW OF MACHINE FROM BENEATH.

       • NOTIOE.

    These directions should be carefully studied and followed

by persons learning to operate.
     Any failure on the part of agents to give instructions, if

reported to us, will receive prompt attention.
    Allow no person interested in the sale of other Sewing
machines to handle the machine in any manner whatever.

 Allow the machine to be adjusted or repaired by no one but

an authorized agent, or at our office.

     If the machine needs repairing, take it off the table, en-

close it, with the ring slide, hemmer and bobbins, in a small box,
with the name and address of the owner written plainly and
 tied to it, and send it by express to some agency or office for
 the sale of our machines, and it will be put in order and

 promptly returned. (See 3d page of cover).
View original page 2Page 3 · Read text
DIRECTIONS


                   FOR USING


 Wheeler & Wilson's No, 8 Sewing Machine.


 To Oil the Machine. Use the best Sperm Oil, to be had
of our agents, and at our offices.  Put a small drop of oil in
each of the oil cups (1), surrounding the presser-bar and
needle-bar, also in the joints connecting the needle-bar with
the needle-arm, and occasionally the smallest drop possible
over the small roller screws (2) at the end of the arm, and
end of the take-up (3).  Oil also at the following oil holes:
one at the pivot of the needle-lever (4), one at each end of
the connection (5); two (for the main shaft andtake-up
cam) at base of the arm, and one at the take-up pivot. Remove

the back plate slide (21) and oil at the five oil holes and the
feed cam under the throat plate, andoccasionally remove
the throat plate and oil the sides of the feed-bar.
  Below the table, oil the treadle through three holes ; the
pins through each end of the pitman, and the balance-wheel
shaft through two ho es above it.
   Oil the spooler occasionally.
   After oiling, remove the bobbin, and raise the presser-foot,
 run the machine rapidly a minute, then wipe off all super-
 fluous oil. If the machine runs hard at any time, it is certain
 that some part has not been oiled.
View original page 3Page 5 · Read text
Use the fine throat plate with needles from No. 1 to Fio. 5;
 but for larger the coarse one must be substituted, as the fine
  one would chafe oft the thread.
   Make yourself familiar with the motion of the treadle by
 running the machine without thread and with the presser
 foot raised, until a regular motion is attained.
   (Never run the machine with the presser foot down, except
 when sewing, as it will scratch the foot and dull the feed
 points.)
   Set the needle with the long groove towards the right,
 and be sure to push the needle as far into the socket as it
 will go.


                      SPOOLER.

theThoubobbinin ono thethe spindle.Bibbin: TeSeethatthat init runsthe true.spooler anance
end of the thread a few times around the hub of the bobbin,
and operate the treadle, letting the thread pass firmly between
 the thumb and finger from one side to the other of the bob.
bin, that it may be wound tight and even.


                   RING AND BOBBIN.

  To Place the Bobbin. Draw out the plate slide (19),
loosen the ring-slide (18) and draw it back.  Place the bobbin
within the ring and lay both in the fork of the ring-slide,
with their lower edges within the cavity of the rotating
hook. Let the ring be next to the ring-slide, with the
View original page 5Page 6 · Read text
threaded winding from the bottom of the bobbin, and toward the
         Shove up the ring slide and tighten the screw firmly.
operater.(NoTE. -The inside of the ring should be kept clear of lint
or dirt, and a very small drop ofoil should occasionally be
put upon the inside of the rim.)
  To Thread the Machine.  Place the spool on the spoo.
 vire as shown in the cut, pass the thread over the thread cheel
41), then down in front and once around the tension pulley (12),
then down through the take-up '3), thence through the leader
(18), the roller guard (2), and the
ber, to the needle. Let the then extend throuch the needle
one or two inches when the take-up is fully back. Now hold
       the upper thread loosely between the thumb and finger, and
turn the machine carefully while the needle goes down and
up once, then draw the upper thread and with it the under
     thread up through the hole in the throat plate, and pass them
both back under the presser.
                         Place the cloth beneaththe  To Commence Sewing
presser-foot   Turn the band wheel towards you to start the
machine. Do not pull the work.  The machine feeds it.
 it does not, the feed is turned off

  The Length of the Stitches isregulated by the lever (15)
under the table.   Lowering the lever shortens, and raising

lengthens the stitch.
  Regulate tho Tension of the upper thrend by turning
the small thumb nut near the tension pulley (12); turning it on
tightens the tension, and off, loosens it.  The lower tension
is regulated by means of the tension lever (14) under the cloth
plate; moving the lever from you tightens the tension, and
towards you loosens it.
  In sewing soft, thin fabrics, the tension of both threads
should he loose, s thick they rodes us, thethe tensiontension
shouldIn sewingbe alikeseamson bothwherethreads,strengthin order that the lock may be
in the centre of the goods.   In stitehing, however, where the
upper side is the right side, the under tension may be tightest,
that the lock may be below the centre; and if the lower side
 is for the right side, the upper tension may be the tightest,
 that the lock may be drawn above the centre.
  The best way is to regulate the tension of the upper thread
 before starting, so that when pulling the threadAndsomethentensionwhile
 will be felt, but not near enough to break it.
 sewing adjust the under tension (by moving the lever) till the
lock is as desired.   If both tensions are then found to be too
 ight or too loose, change the upper one first and regulate the
 under one to correspond as before.
  The greatest secret of perfect sewing lies in the proper
 adjustment of the tensions.
View original page 6Page 7 · Read text
To Remove the Work. Stop the machine just before
the take-upis fully back, whiel is before either thread is
tightened.  Take hold of the thread, near the needle arm, and
 pull two or three inches of thread from the spool.  Raise the
 presser-foot and draw out the work fromyou, far enough to
draw out the slack thread, and eut boththreads near the
cloth. •
  Regulate the Pressure of the foot by turning the
 thumb-screw over the presser-foot spring.   Heavy goods re-
quire more pressure than light. Have only enough to keep
the work down.

          GENERAL DIRECTIONS.
  To turn a Corner.  Stop the machine with the needle in
 the cloth, after it has been down and come partly up.  Then
lift the presser-foot. and turn the work in the manner de-
sired, using the needle as a pivot.
  Needles may be Sharpened on the emery wheel. Pluce
 it on the spooler spindle.   Grind the point long and tapering
  The Belt should be only tight enough to move the ma-
chine without slipping.  Should it become too loose, a piece
mustand hookedbe cut again.out near the belt hook, and another hole made,
  For ordinary purposes, the belt should pass, around the
smaller part of the band wheel, andthe larger part of the
balance wheel. To obtain more power for heavy work,Or
to have the machine run easier, place the belt in the other
groove of both wheels.
  To Clean the Machine. Remove the front and back
plate slides, (19 and 21), the throat plate (20), and the ring
slide, and wipe off all the parts;   particularly about the
needle-bar,rotating hook, feed, and the variable motion.
 AfterIfthemachinehascleaning oil as beforebeendirected.neglected and has become
 gummed, use kerosene oil or turpentine, and wipe thorough-
 y to remove all old oil and dirt, after which use sperm oil as
 usual.
        of the Machine notWorking Properly will
usually be found in the tension not being properly adjusted,
the thread being too coarse for the needle, the needle and
thread too coarse for the throat plate, or in the needle being
bent, blunted or imperfectly    See that the needle is
pushed up as far as it will go into the needle-bar, and that it
goes perfectly true through the hole in the throat plate.
 it does not, spring the point in the requisite direction till it
 goes all the way alike.
   If the machine misses stitches when using hard twisted
cotton thread, loosen the set screw and turn the long groove
View original page 7Page 8 · Read text
of the needle slightly towards you, (to throw the loop more
directly in front of the rotating hook).
  Do not let the thread check, or the groove in the tension
pulley, become clogged with lint, dirt, or knots of thread
  In using silk,should it slip around the tension without
turning it, wind it twice or more times around the pulley.
  To adjust the Feed.  Should the feed-bar be worn down
by long use, it may be raised by turning the middle screw in
the feed point, with the screw driveron the smallsteel
wrench. Turning to the right will raise, and to the left, will
lower the point.
   It should never rise more than one thirty-second of an inch
above the plate, or enough to raise the hemmer slightly
   I" The feed is always adjusted properly when the ma
chine leaves the office.


    PLAIN GLASS.    SIDE-CUT GLASS.    CORDER GLASS.

  The Plain Get For a sinchy se ving and,andsirdparalleling
 with very thick seams,and also to be used with the plate
 gauge, for narrow tucking, etc., where it is desirable to place
 the gauge very near the needle.
   To Cord with ths Corder Glass.   -Insert the corder glass into
the presser-foot.Place the cord between the cloth where you
 desire to stitch it, and crowd it into its place as close as possi-
 ble with the point of the scissors or some similar instrument,
by rubbing it along near the cord on top of the cloth.  Place
the work under the presser-foot, with the cord in the crease
 in the bottom of the glass, and stitch as usual.


                   GATHERING GLASS.
 foot;To useGather.for theInsertupper thethreadgatheringa muchglasslargerintoonethethanpresser-usual
 sav No. 36 for ordinary muslin, while you use the ordinary
 size, say 70 below.  Wake the tension of the upper thread
 tight, and that of the under thread as loose as possible.
 Stitch the cloth where it is to be gathered, regulating the full.
View original page 8Page 9 · Read text
ness by means of the feed; the longer the stitch the greater
will be the fullness.  If the fullness is too great even with the
shortest stitch, reduce the upper tension.    If desirable in
any case sew with threads as above,with the upper tension
only tight enough to gather the work slightly, and finish by
drawing up the upper thread by hand.


   BRAIDER GLASS.


                                BRAIDING.
               Insert the braider glass in the presser-loot,
pass the braid through the extra hole and under the needle, so
that it may pass through it, and stitch the fabric where you
wish to lay the braid. By having a pattern first stamped, or
marked upon the goods, the braid may be stitched on in beau-
tiful designs.


      HEMMER.


  To Hem.Insert the hemmer in place of the glass.  Roll

thehemmer,corner andof thedrawclothit slightly,along to enterthe needle,it into andthe scrollproceedof theto
 stitch as usual, and the hemmer will turn the hem ; keep the
edge of the cloth in the hemmer only far enough to surround
View original page 9Page 10 · Read text
10
 the tongue within the seroil, as if too much or too little is
 kept in the hemmer, it will leave a raw edge.  If the seam is
 isnotonbent,thein whichedge casefatespringhem, itit tillsprobablyit is perfectlyBecause true.the  If it
 does not then strike the hem right, it is because the presser-
 bar has been turned, in which case loosen the serew which
 holds the bar from turning and move the hemmer slightly
 in the direction required, and tighten the screw again firmly.
   The hemmer is always in proper position when sent out, so
 that the needle will strike the hem in the proper place, and
 the bar should not be moved unless rendered necessary by
 accident.
  To make a wide hem, fold the cloth over to the width of
 the hem desired, crease it down smoothly, and pass the edge
 through the hemmer, which will turn the edge under while it
 is being stitched do
   To Fell with the Hemmer. First seam up the two
 edges, one a little wider than the other; a good rule for get-
 ting them of the proper width is to keep the edge of
upper piece of cloth under the notch, in the end of the hem-
 mer, and let the under piece project beyond the upper as far
as the side of the hemmer.  Then open the cloth and pass
 it under the presser-foot, allowing the raw edge to pass
 through the hemmer, which will turn itunder as in hemming.
           Nearly the whole seeret in felling is in getting
          the edges the proper width insewing the
                first seam.

               The Plate Gauge is attached to the plate by
             means of the extra thumb-screw, and is used for
              stitching at a regular distance from an edge.

  To Quilt.Attach the
 quilting gauge tothe pres-
ser-foot, as seen in the cut
and adjustit to the width

desired.,
   Let the finger of the
 guage rest upon the cloth
plate for a guide, while
stitching the first seam,
then raise  thefinger
enough to let the quilt
pass underwithout touch-
 ing. and keep the seam
fast stitched directly un-
der the finger, to insure
the seams being equal distances apart,    QUILTING.

  To Stitch Shirt Bosoms.  Set the gauge as far from the
needle as you wish to have the stitching from the edge of the
View original page 10Page 11 · Read text
11
fold or plait. and guide the work so that the edge of the
plait will follow the guage.

          EXTRA ATTACHMENTS.
   Various attachments for special kinds of cork are made, among
rohich are the folloring, which may be purchased from our agents.


  Improved Tuck Maker.  Insert the loose end of the
connection (4) into the tube             and attach
marker to the eloth-plate by means of the serew which ae-
companies it; setting the gauge (3) as far from the needle
as you desire the width of the tuck,and after threading the
needle, place the end of the operating lever (1) under the end
of the needle-bar, with the needle passing through the eye-
    Loosen the clamp screwon the gauge and set the
creaser (6) as far forward of the needle as you wish to fold
the cloth for the next tuck, and tighten the screw.  Regulate
the creaser to make a good mark by means of the connection.
Turning the tube to screw the screw out, increases, and in,
diminishes the pressure. (Have only pressure enough to
make a good mark).
   If the cloth does not follow the gauge evenly, it is usually
because the gauge does not stand true.    If, when the gauge
does stand true, the cloth works away from the gauge,
because the point of the needle is sprung too far back (i. e.
 cowards the gauge), and if the cloth climbs upon the gauge
the needle is sprung too far forward.  See that the needle goe
perfectly true through the hole in the cloth-plate.   Oil the joints
at the back end of the tucker and the operating lever where
the rod slides in the tube, and occasionally put the least drop
possible in the joints of the rocking-foot (5) at the front end
(If too much oil is put there, it may run down and soil the
View original page 11Page 12 · Read text
12

                                  goods  The under
                                          side of the rocking
                                             foot may require oil-
                                         ly,ing especiallyif used constant-by
                                         steam power. If so,
                                             oil the edge of a bit
                                            of cloth slightly and
                                     draw it under. the
               CORDER.               rocking-foot.
   To Cord. Insert the
 steel-corder  into the
 presser-foot, in place of
 the glass, as shown in
 the cut. Draw the cord
 through the tube, and
 place one thickness of
 cloth above and the
other below itand stitch
 as usual ; being careful
 to guide the cloth so as
 to lay the cord close up
 in the fold, or to the
cord last laid.
  (The tube should be
 so set as to deliver the
 cord into the                    CORDING.
the bottom of toe corder, and the presser-foot so set as to
 bring the line of stitching close to the cord).


     RUFFLER.


                               RUFELING.
  To Ruffie. Insert the rufiler in place of the glass.
   Always use a fine thread, 70 or 80, and needle to corres.
pond. Insert the rufiler in the lower guide and below the
View original page 12Page 13 · Read text
13

 flat spring which is beneath the presser-foot, and the cloth
to which you wish to sew it in the upper guide and above
the flat spring and draw them along to the needle.Set the
 machine for a long stitch. Now make a few stitches very
 slowly, and regulate the length of stitch upon the upper
 thickness of cloth, by means of the little lever upon the
rufiler, moving it towards the needie to shorten, and from
 it, to lengthen the stitch.  Regulate it by this means so that
 the stitch is quite short, that the gathers may be fine, then
 regulate the fullness of the ruftle by the feed of the machine,
 lengthening the feed to increase, and shortening it to dimin-
ish the fullness.
  Note. The little lever on the ruffler regulates the stitch by
moving the flat spring so as to covér up more or less of the
feed to prevent it from catching the upper piece of cloth.
 The above instruétions for regulating the length of stitch
 and fullness of the ruftle must be borne in mind.

   It will often be found most convenient to gather and stitch
 the ruffle upon a narrow strip or band, and afterwards sew to
 the garments,using the band for a facing.  The pressure on
 the presser-foot should be quite light for rufiling light, but
 should be greater for heavy material.

                       • Braid with the Brai
                      Holder.  Jace the braid holde
                            on the presser-foot bar, as shown
                             in the cut, and fasten it by means
                           of the serew.  Let the braid pass
                           through the eyelet at the end of the
                         braid holder, and thence into the
                             braider glass, as before described;
                   then turn      cup,
     BRAID HOLDER.     surrounds the presser-foot bar near
 the top, till it comes against the braid holder, and raises the

presser-footwill move theslightlycloth properly,from the andplate,yetnothighso enoughhigh but sothatthatthewhenfeed
 the feed is down the glass will press but slightly upon the
cloth. The needle being at that time down forms a pivot,
and the cloth can be turned with the greatest facility to fol-


then complete the turning.  This will prevent the braid from
turning up edgewise on the sharpest corners.
  The braid holder may also be used with the seam-stay foot
or trimmer, and with the Binder to serveas a support or
guide for the binding.  Though in that case, it should not
rest upon the oil eup as above.
View original page 13Page 14 · Read text
14

                      The Seam-Stay Foot or Trim
                         mer, is used in some kinds of manu
                           facturing, in stitching stay binding
                         over seams to strengthen them, and
                          also in stitching trimming upon chil-
                          dren's clothing.
                     Remove the steel presser-foot and
                            insertthe seam-stay foot in its place
                    Pass the stay binding up fhrough
                     the first, and down through the
                      second slot, adjust the gauge to the
                       width of the binding and the pres
                            ser-foot so that the needle will strike

    SEAM-STAY FOOT.   useuse binethe aboveaboveashea trimmer,properl, insert
 the trimming the same as the stay binding and
ment to stitch the trimming in the place desire guide the gar-

  The Sean-Stay Gauge is used
 for the same purpose as the seam-stay
 foot, but for stitching stay binding
upon the under side of the seam
  Attach this stay gauge to the cloth
plate with the flat headedscrew ae-
companing it, and adjust it so that
the needle will strike the binding as                                STEAM-STAY GAUGE.
desired.  Insert the binding as in the
seam-stay foot, but pass the seam to be stayed above the gauge
and under the fresser-foot, and guide the seam so as to stitch
 the binding as near the seam as is desired.


           BINDER.


                                     BINDING.

   To Bind. Pass the end of the binding through the binder
 and set the guides to the width of the binding
   Attach the binder to the cloth plate by means of the thumb-
 screw and substitute the presser-foot which accompanies the
 binder for the ordinary one.   Adjust the binder upon the
 cloth plate, so that the needle will strike the binding in the
 oroper place  Pass the edge of the material through the
 binder and stitch as usual
View original page 14Page 15 · Read text
WHEELER & WILSON M'FG CO.

                 PRINCIPAL OFFICE,
44 Fourteenth St., Union Square, New York.


                  OFFICES:

 Wheeler & Wilson M'f'g.Co., 167 Tremont St., Boston Mans.
                              249 Asylum St., Hartford, Conn.
                            73 Orange St., New Haven, Conn,
                              306 Fulton St., Brooklyn, N. Y.
                             030 Broadway, Albany, N. X.,
                       454 Fulton St., Troy, N. Y
                        50 S. Salina St., Syracuse, N. Y
                       356 Main St., Buffalo, N. Y.
 S. W. Dibble & Dutton,     57 State St., Rochester, N. Y.
 Wheeler & Wilson M'f'g Co., 8 Newark Ave., Jersey City, N. J.
                       827 Broad St.,       N. J.
                        914 Chestnut St, Philadelphin,
                         " 58 Lexington St., Baltimore, Md.
                        461 Peun Ave., Washington, D. C.
                             30 Ninth St., Richmond, Va.
 J. & J. Johnson,            28 Market St., Wilmington, N. C.
 Wheeler & Wilson M'fg Co., Masonie Temple, Savannah, Ga.
                            Charleston, S. C.
                            Mobile. Ala.
                        Montgomery, Ala.
                        149 Cannl St., New Orleans.
                       2 Masonic Temple, Houston, Texas.
                         26 Geary St., San Francisco.
                         156 J. St. Sacramento, Cal.
 S. B. Kirby,                    Little Rock. Ark.
 Wheeler & Wilson M'f'g Co., 289415SecondNorth FifthSt., SanSt., Jose.St. Louis, Mo.
                        " 108 & 110 Wisconsin St., Milwaukee,
                            Wis.
                           " 55. W. 4th St., Cincinnati, Ohio.
                               Cleveland, Ohio.
                               120 Church St., Nashville, Tenn.
                         " Cor. Jay and Church Sts., Knoxville,
                         Tenn
                          " 23 Marietto St., Atlanta, Ga.
 Farrar & Wheeler,           155 State St., Chicago.
 Wheeler & Wilson M'f'g Co., 199 Woodward Ave., Detroit, Mich.
                              85 King St., West Toronto, Unt.
                        37 Sparks St., Ottawa, Ont
                     « 54 James St., Hamilton, Ont.
                        " 282 & 284 Notre Dame St., Montrol,
              " " * 108 UnionP. Q.St. St. John, N. B.
                                Halifax, N. S W. H. Johnson,
View original page 15Page 16 · Read text
WHEELER & WILSON M'F'G CO.
Sewing Machines,
     44 14th St., Union Square, New York.
View original page 16Related documents and language editions
Wheeler & WilsonPDF
Wheeler & Wilson Adjusting the Curved Needle Sewing Machine
User manual
3 pages · EnglishRead →
Wheeler & WilsonPDF
Wheeler & Wilson Curved Needle
User manual
31 pages · EnglishRead →
Wheeler & WilsonPDF
Wheeler & Wilson Number 3
User manual
9 pages · EnglishRead →
Wheeler & WilsonPDF
Wheeler & Wilson Number 4
User manual
16 pages · EnglishRead →
Wheeler & WilsonPDF
Wheeler & Wilson Number 8
User manual
16 pages · EnglishRead →
Wheeler & WilsonPDF
Wheeler & Wilson Number 8
User manual
17 pages · EnglishRead →
Wheeler & WilsonPDF
Wheeler & Wilson Number 8 (version 2)
User manual
16 pages · EnglishRead →
Wheeler & WilsonPDF
Wheeler & Wilson Number 9
User manual
9 pages · EnglishRead →
Wheeler & WilsonPDF
Wheeler & Wilson Number 9
User manual
24 pages · EnglishRead →
Wheeler & WilsonPDF
Wheeler & Wilson Number 9 (black and white scan)
User manual
12 pages · EnglishRead →
Wheeler & WilsonPDF
Wheeler & Wilson Number 9 Accessory
User manual
12 pages · EnglishRead →
From the ISMACS International. Original publisher and archive notices are retained.
Check the model and edition against your equipment.
PDF verified 2026-10-11.