Sewing machines
Wheeler & Wilson Number 9 — User manual
User manual for Wheeler & Wilson Number 9. 24 pages in English. Read the original PDF, download or print a copy without registration.
24 pagesEnglish4.0 MB PDF
Loading your manual…Open PDF directly
Document details
- Brand
- Wheeler & Wilson
- Model / document
- Wheeler & Wilson Number 9
- Document type
- User manual
- Language
- English
- Pages
- 24
- File size
- 4.0 MB
- Category
- Sewing machines
- Document date
- Not specified in catalog
Search available document text
Find a term, then jump to its page in the original PDF. Image-only pages may not be searchable; check the PDF for exact wording and diagrams.
Page 1 · Read text
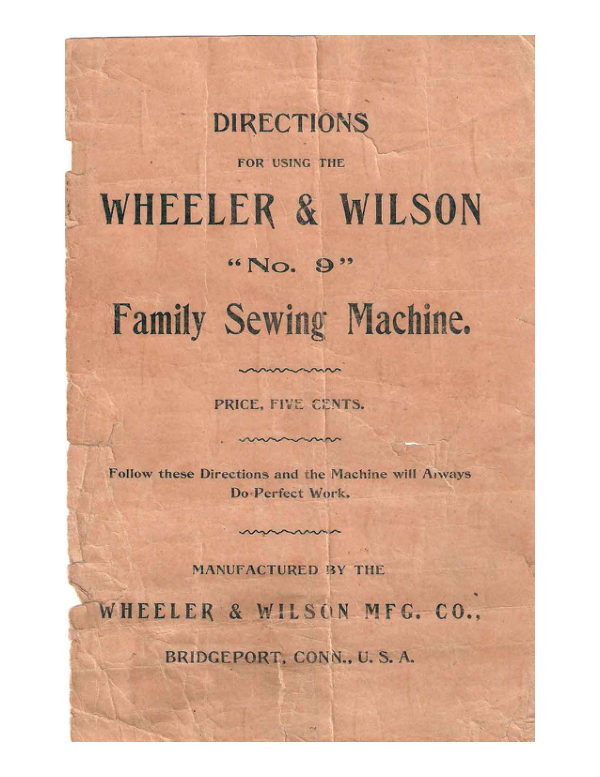
DIRECTIONS

                 FOR USING THE
WHEELER & WILSON
        " NO.  99
 Family Sewing Machine.


              PRICE, FIVE CENTS.


  Follow these Directions and the Machine will Always

                 Do Perfect Work.


        MANUFACTURED BY THE

WHEELER & WILSON MFG. CO.,


       BRIDGEPORT, CONN., U. S. A.
View original page 1Page 2 · Read text
THE WHEELER & WILSON
           No. 9
Family Sewing Machine.


                                            30

                                          /HEELER & WILSON 6


         6


 The Name and Number of each Part as shown in the above Cut,
                          are given below:
  1.  Hand Wheel.                       16.  Thread Leader.
  2.  Needle Bar.                           17.  Needle Bar Thimble and Thread Guide.
     Needle Set Screw.                   18.  Throat Plate.
       Presser-Foot.                    19.  Plate Slide.  4.
       Presser-Bar.                        20.  Back Plate Slide.
      Presser-Foot Themb Screw.       21.   Stitch Regulating Knob.
    • Presser-Thumb Screw.           22.   Rotating Hook
  8.  Presser-Lifter.                    23.  Bobbin Case.
  9.  Bobbin.                            24.  Bobbin Latch.
 10.  Spool Wire.                     25.  Bobbin Case Stop.
                                   26.  Bobbin Winder. IT.  Tension Pulley.
 12.  Tension Nut.                          27-  Peed Points.
 I3.  Thread Guide and Controller.    28  Arm Cap.
                                      29.  Arm Cap Screw. 14.  Take-up.
 15•  Thread Check.                        Loose Pulley Knob.                                   30.
View original page 2Page 3 · Read text
1
 Size of Needles and Thread to be Used on Different Materials.

                                     THREADS.                        SIZE NUMBERS        CLOTH.                         OF NEEDLES.
                                        COTTON.        SILK.       LINEN.

        Finest Linens                 100
        and Silks.           No. 2       10      000   Lawns and Nansooks.              200

    Handkerchiefs, Collars,              80         Fine Shirts,           No. 3       to      0 to 00        Underclothing.                   100

    Common Muslins,               60    Light Dressmaking and       No. 4       to    A to 0            Quilting.                70

           Tailoring,                  40     Light Clothing and       No. 5        to    A and R         90to        Boys' Clothing.                60                100

     Heavy Dressmaking,               30      Cloakmaking and         No. 6       to     Band C         70to       Heavy Tailoring.                36                 80
                               20               50
     Extra Heavy Work.       No. 7        to     Dand C     to                            24               60

    For ordinary work use the SAME SIZE of thread in the bobbin as in the
needle.
    The number of the needle is marked upon its shank.
     In ordering Needles specify for NO. s Machine and the size numbers.
   Use the fine throat plate with needles from No. 2 to No. 5 ; for larger
needles the coarse throat plate must be substituted, as the fine one would chafe
off the thread.

    SPECIAL NEEDLES are made for manufacturers of various kinds of work, such as corsets,
overalls, rubber-webbing, etc.
  To Set the Needle. Loosen the needle set screw, insert the needle with its
flat side to the left; be sure to PUSH THE NEEDLE AS FAR UP as it will go, and
secure it firmly by turning the set screw with the screw driver.
View original page 3Page 4 · Read text
2
To Take Out the Bobbin,
  Remove the left plate slide.
  Toopen the latch easily with
the left thumb, have the point
of the hook towards you, as
shown in the cut. The LATCH
may be reached with the hand                 STOP BAR
EITHER ABOVE OR BELOW
the table, the latter being con-
venient when attachments are
in use.                                                             CVB


                               With the ball of the thumb (not necessary    LATCH
     OPEN                           to use the finger or thumb nail), open the latch
                                       until it stands out straight, then brush the bob-
                               bin outward, until it hangs on the latch, for
                              removal.
           BOBBIN

                                  lee For Hand Machine Directions, See
                                 page 13.


                                                                            Loosen this knob to wind the
  To Wind the Bobbin Automatically.                 bobbin without running
                                                                                  the machine.
   Hold the hand-wheel with the left hand and
 with the right turn toward you the top of the
 knob to loosen the pulley so that the bobbin
 can be wound without running the machine.
      Oil the loose pulley through a hole in the hub.
      Oil the bobbin winder occasionally.
   Swing the bobbin winder until its pulley comes in con-
 tact with the belt, and place the bobbin on the spindle.
   WIND THE THREAD from the spool on the machine oNCE
 AROUND THE ARM CAP SCREW on top of the arm, near
 the hand-wheel, and pass the end from the inside through
 the hole in the bobbin and hold it firmly, as shown in this
 view, while operating the treadle until a few turns cuts off
 the thread at the bobbin. The bobbin will be wound tight
 and even.  If necessary, GUIDE THE THREAD WITH A
 TOUcH of the finger.
   After winding the Bobbin, push down the winder and tighten the pulley
 securely by turning the knob over from you. DO NOT FORGET THIS.
   The inside of the bobbin case should be occasionally wiped out with an oiled rag, to remove lint or dirt.
     If the bobbin does not revolve with the spindle spread the spindle a little with the screw driver.
View original page 4Page 5 · Read text
To Place the Bobbin
and Thread the Bobbin
        Case.
                                                   RIGHT HAND  Hold the bobbin in the left
hand with the thread lead-
ing from the top towards
you.  Hold the end of the
thread with the right hand,
place the bobbin in its case
and close the latch, then,
still holding thethread   STOP BAR
above the latch with the
right hand, push the thread
with the left thumb down
towards you on the edge of                  BOBBIN
the bobbin case until the                    CYB
thread slips into the notch   The Bobbi. is shown, partly cut away, giving
which is just above the      a view of the direction in which the thread
latch, and then pull the      should unwind.
thread from you until it is
drawn up under the notch
at the end of the tension
spring


                                                                     STOP BAR
 Or, you may place the
  Bobbin and Thread
  the Bobbin Case with
  the Hand under the     Showing the                                Bobbin Case
  Machine.                     Threaded.
                                                                          SOBBIN


 To Replace the Slide.
   Lay the slide about a halfinch
 on its track in the machine;
 press on that portion as you
push it in. The edge of the
 slide is filed off so that it can
 be replaced in this way with
 ease, as shown in the cut.
    If the slide does not stay in position, spring the *
 driver.
View original page 5Page 6 · Read text
To Thread the
                                            Machine.
                                                     Place the spool on the     The
     Tension                                             spool wire, which tips      Pulley.
                                         back for the purpose,Turn the
top of the                                       pass the thread under nut to-
ward you                                      the wire through the to tigh-
 ten and                                   WHI  thread check (1), downfrom you to loosen                             INFRONT, and oncethe Ten-
  SIO11.                                             around the tension pulley
                                                    (2), thence under the
                                                       thread guide (3), through
                                            the take-up (4),the
                                                       thread leader (5), and the
                                                  needle bar thread guide
                                                       (6) to the needle. Then
                                                  thread the needle from
                                                       right to left, all as seen                    ×5                                                         in the cut, and draw two
                                                    or three inches of thread
                                             through the eye of the
                                                    needle when the take-up
                                                                   is at its highest point.
                                         THREAD FROM THE
                                        RIGHT TO THE
                                          LEFT.


                                                               Showing Spool Holder Turned
                                                             Sideways to Hold a Large
                                                                             Spool.


     TO USE LARGER SPOOLS than will go on the spool holder, loosen the screw and turn the

  base across the arm of the machine. Then by turning back the wire, it will hold extra large spools.
     IF THE THREAD KINKS or curls before it reaches the "thread check 1," pass it from the
 spool, back of the upright wire, thence to the "thread check 1." Silk thread and cheap cotton
  thread may need this precaution.
    Do not*        nd check, or the groove in the tension pulley become clogged with lint, dirt, or

                                              it slip around the tension pulley without turning it, wind it twice around
View original page 6Page 7 · Read text
5
                          To Draw Up the Under Thread.
                                      Let the thread extend through the needle
                             two or three inches when the take-up is
                                       fully up. Now hold the end of the upper
                                        thread sLACK and turn the hand-wheel care-
                                         fully from you while the NEEDLE GOES
                            DOWN, AND UP, AND DOWN AGAIN TO THE

                                PRESSER-FOOT, WHEN THE TAKE-UP WILL

                                   BE AT ITS HIGHEST POINT; then draw the
                                 upper thread, and with it the under thread
                              up through the hole in the throat plate, as
                              shown, and pass them both back under
  Draw up the under thread before putting the                               the presser. BE SURE THAT THE TAKE-      cloth under the presser, as shown in this
        view, to make the stitches perfect      UP REMAINS at its highest point.
              from the start.

                               To Commence Sewing. Start  Right.                      Have both threads passed back,as
  Have the                          shown, place the cloth under the presser
 threads and                            foot, and let down the presser lifter.
   cloth in
  position as                                Start the machine by turning the hand-
 shown in                           wheel over from you.
  this view.
                      Do not Pull or Push the work;
                                         the machine moves it.

                                                                  If it does not, the stitch regulating knob is too far

                                                   tothethefootleft,is estheror the toofeedheavyis tooorlow,too orlight.the pressure on
                                             The pressure of the presser foot is increased by turn-
                                              ing down, or decreased by turning up the presser
                                           thumb-screw around the top of the presser bar.
   The Length of Stitch is regulated by the knob, at the base of the arm.
Loosen the knob by turning it and push it to the right to lengthen, or to the left
to shorten the stitch, then tighten the knob firmly.
View original page 7Page 8 · Read text
6

    To Remove the Work. Raise the presser foot. Turn the machine by
the hand-wheel UNTIL THE POINT OF THE NEEDLE IN GOING DOWN HAS
REACHED THE PRESSER FOOT. THIS WILL LEAVE THE TAKE-UP AT ITS

HIGHEST POINT. Draw out the work from you until you can draw the threads

into the thread cutter. (If the threads do not draw out easily, the needle is not

in the right position, as directed). If the machine is stopped, as directed, the
needle will not be unthreaded in starting to sew, even IF ONLY A SHORT END
IS LEFT THROUGH THE NEEDLE.
    Regulate the Tension of the upper thread by turning the top of the nut
toward you to tighten the tension, the other way to loosen it. (See cut on page 4)-
WHEN THE PRESSER LIFTER IS DOWN THE TENSION CAN BE TESTED BY
HAND.
    When making a very long stitch, the best tension is obtained by using the coarse throat plate instead
 of the fine one which is usually in the machine.

      For convenience, in taking out the work, the tension of the upper thread is released by

 raising the presser lifter but is not released by the raising of the presser foot when the lifter is not up as

 by thick goods or seams passing under the foot. Do not try to adjust the upper tension when the presser


 lifter is LID.

          To Regulate the Under Tension.

  Remove the left plate slide, turn the machine until the Hook
points towards
you, and the Gib
is below the
latch.
 The Tension
is Regulated
by the screw in
the center of the                         BAB
spring, above
the latch. With
the small screw-
 driver turn this                                              BOBBIN
screw one quar
 ter or one - half
around to the
right to tighten, or to the left to loosen the tension, as shown in this view.

    The Under Tension, when once regulated, will RARELY REQUIRE ANY
CHANGE. Thereafter the proper relation of upper and under tension should be
 produced by changes of the upper tersion only.
View original page 8Page 9 · Read text
7
    In sewing seams where strength is required, the tension should be:
 alike on both threads, in order that the lock may be in the center of the goods,
thus: BOSESSE

     If the lower thread lies straight onthe underside of the goods,
                            the under tension is too tight or the upper tension too
                            loose.thus: Baaa

      If the upper thread lies straight, thus: L             2E the upper ten-

 tion is too tight, or the lower tension too loose.

      In sewing where special elasticity is required, as on bias seams or very elastic material, hold the work

back slightly, to keep the cloth stretched while being sewed.

    To Turn a Corner. Stop the machine with the needle in the cloth, after it has been
 down and come partly up. Then lift the presser foot, and turn the work in the manner desired, using the

 needle as a pivot.
      The Belt should be only tight enough to move the machine without slipping. If it is too tight
 it will make the machine run hard. Should it become too loose, a piece must be cut out near the belt
 hook, and another hole made, and hooked again.
    Causes of the Machine not Working Properly will usually be
 found in the tension not being properly adjusted, the thread being too coarse
 or too fine for the needle, the needle and thread too coarse or too fine for the
 throat plate, or the needle being bent, or blunted. See that the needle is pushed
 up as far as it will go into the needle-bar, and that it goes perfectly true through
 the hole in the needle-plate. Ifit does not, spring the point in the requisite direc-
 tion till it goes all the way alike.

        If the machine misses stitches in running off from a thick seam, hold the cloth back slightly to keep

  it straight and prevent its rising up with the needle.
       In using slack-twist or uneven silk, should it be frayed or roughened, the needle is too fine, or has a

 hook upon its point, made by striking the throat plate.

      If by operating the machine without cloth when threaded a bunch
 of thread collects around the bobbin case, IT MAY EASILY BE REMOVED by lift-
 ing the presser foot and turning the hand-wheel back and forth with the right

 hand while the thread is drawn out with the left hand.
View original page 9Page 10 · Read text
/p.


oil
01l
     oiloil                                                                      oil
       oil


               TRANSPARENT VIEW SHOWING PLACES FOR OIL,ING.
                 To Oil the Machine.
    Use the best Sewing Machine Oil, to be had of our agents and at our offices.
 Oil at all places indicated by the dotted lines shown on the cut above, or wher-
 ever there is friction. The parts on the under side of the machine may best be
cleaned and oiled by removing the belt and turning the machine back as shown
 in the cut.
              To Remove the Face Plate.
                                    Loosen the large screw near the ten-
                                      sion pulley and slide the face plate up-
                                    ward, until the large hole will pass over
                                   the head of the screw. Wipe off the
                                        presser bar, needle bar, and other parts.

                                ALSO                            Any one can remove this plate to clean                                        OIL HERE
                                 and oil the working parts, as shown in
                                            this cut. After replacing the face plate,
                                         tighten the screw firmly.
      (Never run the machine with the presser-foct down, except when sewing, as it will scratch the foot
 and dull the feed points).
View original page 10Page 11 · Read text
9
      If the machine has been neglected and has become gummed, use
 kerosene oil or turpentine, and wipe thoroughly to remove all old oil and dirt,
 after which use good sewing machine oil as usual.
     In cleaning and oiling the machine, OR IF THE BOBBIN CASE MAKES
A CLICKING SOUND, wipe the edge of the bobbin case with an oiled cloth.

                            To Clean the Feed.
                                  Take out the needle and presser foot.
                             Remove the screw and lift out the throat
                                         plate. Clean all of the parts about the
                                   feed bar, rotary hook and bobbin case
                              and oil all of the parts where there is
                           Hand noint actusune scretu.
                                 Turn it to the right to raise friction.
                                             I to the left to lower the
                                feed point.

  To Adjust the Feed Points. Should the feed points or feed bar be
worn by long use, they may be raised by turning the middle screw to the right,
or turning it to the left will lower them.The points should rise about one thirty-
second of an inch above the plate, or enough to raise the hemmer slightly when
it is in the machine.
   To Replace the Throat Plate. Place the back end down into the
groove and SEE THAT THE SMALL PIN COMES through level with the top of
the plate.    It is important to REPLACE THIS PLATE FLAT DOWN into its
proper position.
    After oiling, raise the presser-foot, and run the machine rapidly a
minute; then wipe off all superfluous oil, to prevent soiling the goods.  If the
machine runs hard at any time, it is certain that some part needs oiling.
                 To Replace the Belt.
    Place the belt in the groove of the hand-wheel, operate the treadle and the
balance wheel will take on the belt.
                 To Oil the Stand.
    Oil the bearings at both ends of the treadle, the pitman at upper and lower
ends, and the shaft, which passes through the hub of the leg, at each end of the
hub.
View original page 11Page 12 · Read text
10


                                            BATHE1100 K.


                                                                                 THE UNDER
                                                                                    TESTON


                                          LATCH


                                             OPEN


                                                      BOBBIN CASE REMOVED.

   This Cut Shows the Gib Open and the Bobbin Case Removed.
    To Remove the Bobbin Case from the Rotary Hook, whichis
 UNNECESSARY EXCEPT AT LONG INTERVALS to thoroughly clean the hook or
 show its simplicity of construction. Remove the screw at the end of the gib and
 open the gib, as shown above.  Turn the hand-wheel until the point of the hook
  is toward you, then you can lift ous the bobbin case.
     In returning the bobbin case to the hook, have the position the same as in.
 removing the case, being sure to have the horn up into the notch in the stop-bar.
     Close the gib and turn THE SCREW IN FIRMLY, being careful not to damage
 the head of the screw.
  BACK OF THE HOOK between the point of the hook and the gib should be kept
 clean to prevent soiling the thread or obstructing the loop.

   THE PLATE GAUGE is attached to the plate
 by means of the extra thumb-screw, and is                       Plate Gauge.
 used for stitching at a regular distance from
  the edge.
  To Edge Stitch with Close Gauge.
    Set the gauge between the prongs of the
  presser-foot, as shown in the cut, allowing
  the foot to work freely up and down with
  the feed.
     Keep the presser-foot screw tightly turned in, to hold
  the presser-foot firmly in position.
View original page 12Page 13 · Read text
11
                                 To Hem.
                                     Put the Hemmer in the place of the
                                      presser foot and have the two threads
                                    passed back under the Hemmer ready
                                      to sew. Turn up the right hand edge
                                        of the cloth about ¼ of an inch in width
    The Hemmer Hemming•      and crease it for about an ineh or more.
Clip off slightly the turned up corner, pass the turned up edge of the cloth into the
opening in the Hemmer to the needle. Lower the presser bar, see that the cloth
is not folded under the right hand side of the Hemmer, take hold of the ends of
the two threads, start the machine and pull gently on the threads. If the cloth
 as been passed far enough into the Hemmer as directed, the threads can be
released after two or three stitches are taken, and the hem will be started properly.
 Guide the cloth so that the edge, as turned over by the scroll, will about reach the
left side of the opening in the hemmer.  If too much or two little is guided into
 the hemmer, it will leave a raw edge.

  When the presser-bar thumb screw is loose the hemmer can be MOVED
    YE RIGHT OR TO THE LEFT, so that the needle will stitch the proper dis-
           edge of the hem or fell.

                          The Hemmer Felling.
                  TO FELL WITH THE HEMMER. First sew the two
                         pieces of cloth together as follows: Have the under
                        piece with its edge zen with the right hand side of
                         the hemmer, ando gripper piece with its edge even
               the long point in front ote. Hemmer or far enough to the
                   to hold the serm. This will eave the edges when sewed about
                      irt. Then open and spread the cloth so that the seam will lay
                        ; will stand upright; then fell them den by passing the raw edges
            nmer which will turn them   ler as in hemming. Guide the
              inder the left hand edge of theng point in front of the hemmer.
View original page 13Page 14 · Read text
12
                  The Hemmer hemming and
                            Lace,-One Operatior
                    GUIDE THE BACK EDGE of the lace into m
                         ing at the right side of the hemmer, under the needle,
                       and hold the cloth for the hem, as directed

             To Attach the Quilting Gauge.
    Let down the presser-foot, turn out the presser-foot screw far enough to
 admit the quilting gauge wire into the notch under the head of the screw, and
 tighten the screw firmlv.

  TO QUILT. Let the finger of the gauge rest
 upon the cloth-plate for a guide, while stitching
 the first seam, then raise the finger enough to let
 the quilt pass under without touching, and keep
 the seam last stitched directly under the finger to
 insure the seams being equal distances apart.
  TO STITCH SHIRT BOSOMS. Set the quilting
 gauge as far from the needle as you wish to
                                                    QUILTING OR BOSOM GA
 have the stitching from the edge of the fold or
  plait, and guide the work so that the edge of the plait will follow


                               This cut shows the brake A
                                    the machine from turning in tho
                              ind the guard that guides the b
                         ¿oove of the wheel automati
                                            idle is operated to repicce the
                             can be put out of action by tu:
                                                           it rests upen the pin B.


           If the machine is to be sent ter repairs take it off the table, enclose it, with the

   and have the name and address of the owne written plainly and tied to it.
View original page 14Page 15 · Read text
No. 9 HAND MACHINE.


   This light and portable hand machine has all the superior qualities of the No. 9
                 Trea ile Machine, and the same capacity for work.


             IRON BASE.                             WITH COVER.
 Special Directions for Winding the Bobbin on the No. 9 Hand Machine.
      Press the wire which projects near the handle and slide the cap a little to the right, then release the
  vite and a spring will catch in a groove thus holding the cap so that it may be operated without running
 the machine-Press the bobbin on the spindle of the winder and raise it until the rubber band operates
 on the rim of the cap.
     Vind the thread from the spool on the machine once around the arm cap screw on top or the arm
 lear the hand wheel and pass the end from the inside through the hole in the bobbin and hold it firmly
 as shown in the cut on page 2, turn the handle as in running the machine, and a few turns will cut off
the thread at the bobbin.                                If necessary guide the thread with a touch of the finger. After winding the
 bobbin, restore the cap to its position.

                   To Remove the Cap.
   OCCASIONALLY REMOVE THE CAP to which the handic is attached and clean and oil the
interior parts of the cap and the stud on which it turns.
     Alter sliding the cap to its bobbin winding position, tress the pojecting wire with considerable
 Torce and continue to slide the cap until off the stud
View original page 15Page 16 · Read text
THE WHEELER & WILSON

   Sewing Machine Needles.

 Every genuine Wheeler & Wilson needle is
           stamped on the shank,
     "W. & W. MFG. CO."

            BEWARE. OF IMITATIONS.
A machine cannot be expected to do perfect work with
                  imperfect needles.


 To do the best work use the best thread. We recommend

     WILLIMANTIC SIX CORD SPOOL COTTON.


  Wheeler & Wilson Mfg. Co.,

                Manüfacturers of

       Sewing Machines

for Family and Factory use. Sizes and construction adapted to all grades
of Cloth and Leather: for Hand, Foot, or Engine Power; Two, Three
  d Four Needle Machines; Lock-stitch and Chain-stitch Machines; Button-
              ‹, Walking-foot, Hin-stitch, Variety-stitch, and many other
                      Power thies, power transmitters, shafting, pulleys,
                   ces for machines in factories. Special applances on hand
                    is of sewing machine work   Oil, Needles, attachments,
                    ramily or Factory Machine

                     Speed und Durability,

                   story and Head Office,
                rt, Connecticut, U. S. A.
View original page 16Page 17 · Read text
Directions for Using Attachments for the
Wheeler & Wilson No. 9
       Family Sewing Machine.

Binder, Ruffler, Tuck MarkerAdjustableand     Hemmer and Feller,
        Adjustable for different widths of hem or feil.

              Manufactured by the Wheeler & Wilson Mig. Co

                                         Bridgeport, Connecticut, O. 6. A.
     Factory and Head Office:
                                       The Binder.
                                                              Insert the binder
                                                                    in place of the pres-
                                                              ser foot.
                                                                          If bias binding is
                                                             to be used it must

                                                                be cut 7 of an inch

                                                            wide.

                                                                   Insert the binding
                                                   through the scrol


                                                                the folded edges of

                                                                               If the needle does
                                                        not stiteh the peop
   er distance from the edge of the binding, loosen the screw, move the scroll to
   right or left and re-tighten the screw.
     To use the binding for trimming, insert the binding as usual, but let the
   cloth pass beneath the presser feot so as to stitch the binding at any distance
                                                Lace edging or other
  fromtrimmingthe edge,may orbe wherepassedyouthroughdesiretheto foldslay theoftrimming.the binding at the same time and
                                The quilting gauge may be used to lay the   both be stitched upon the garment.
   rows of trimming equal distances apart.
      To use the binder for dress braid, pass the braid through the slot on the
   back side of the scroll and proceed as usual.
View original page 17Page 19 · Read text
3

 needle will pass down through the center of the needle hole in the foot as shown
 in this cut, then tighten the presser-bar screw firmly with the screw driver,
                To Remove the Ruffler.
    Stop the machine with the needle down through the foot, raise the presser
 lifter, loosen the thumb-screw, push the ruffler downward to the right and it will
 fall out; raise the needle to remove it.
                   In Operating the Ruffler,
     Either the separating or the shirring blade should always be used to prevent
 the feed points from damaging the ruffling blade. Both blades cannot be used
at the same time.
                    The Separating Blade
    Can be removed by loosening the thumb-nut (I5) at the front of the ruMor
and drawing the blade forward.
                   The Shirring Blade,
     Is attached to the bed of the machine by the screw (19) which has a low,
flat head that allows cloth to pass over it freely.
                         In Edge Stitching,
     If the needle does not enter the goods at the desired point, loosen the
presser bar thumb-screw and move the ruffler a little to the right or left as may
be necessary and re-tighten the screw.
                The Fuilness of the Ruffle
   May be increased by moving the adjustingthumb-screw (5) downward on
the graduating scale, or by setting the stitch regulator of the machine for a
shorter stitch. It may be decreased by the opposite movements.
                    It isoften necessary
    To tighten the upper tension when the ruffler is used in order to draw up
the thread and make a good stitch.
                                 Directions
    For placing the ciotu in the guides of the ruffler for doing different kindsof work.
              A.     To Place the Cloth to Make a Plain Ruffle.
  Pass the strip of cloth which is to form the ruffle under
finger No. 4, over the others and back under the ruffling
blade, which is the blade having the sharp points, and oper-
ate the machine. If a strip of paper is guided between the
feed points and the ruffler, it will prevent damage to both by
rubbing together and a more regular ruffle can be produced.
The paper is easily torn off after stitching it on.                                 Fig. A.
View original page 19Page 20 · Read text
4

              B. To Place a Band to which a Ruffle Is to be Stitched.
  Pass the band over finger No. 3 and under the others, then
place the strip of cloth which is to form the ruffle as shown
in Fig. A. This operation is illustrated in the cut showing
"The Ruffler Ruffling."
                                                                                       Fig. B.


                C.To Place the Upper Band when a Ruffle is to be Stitched
       Between two Bands that are Blind Stitched.
  Pass this upper band under the foot andover the blade having
the sharp points. The lower band is to be placed as in Fig. B.

and the strip of cloth to form the ruffle is to be placed as in

Fig. A.

                                                                                                    Fig. C.


               D.To Place the Cloth to Form a Narrow Ruffle when the
          Band is to be Edge Stitched to it.
  The strip of cloth to form the ruffle is to be passed through
the ruffler as shown, under finger No. 5 and over the others and
under the blade having the sharp points.
  N. B.  To edge stitch a wide ruffle remove the separating
blade and attach the shirring blade, guide the cloth for the ruffle
under finger No. 5 of the shirring blade.

                E.To Place the Upper Band in the Rufflerwhen it
        is to be Edge Stitched to the Ruffle.
  Fold under ¼ inch of the edge of the band, pass the folded
edge into the guide slot in the foot which is nearest to the
needle and back under the foot; also pass in the strips to be
ruffled as shown in Fig. D.

                                                                                              Fig. E_
View original page 20Page 21 · Read text
5

                 F.To Place Piping in the Ruffler to be Stitched Between the
              Band and the Ruffle.
  Fold double a ½ inch strip and pass the folded edge into
that guide slot in the foot which is second from the needle and
out under the band. Place the strip to be ruffled as in Fig. D.
and the band as in Fig. E.

                                                                                     Fig. F.
              G.To Place the Lower Band which is to be Edge Stitched
                   to a Ruffle.
  Fold over ¼ inch of the band, pass the folded edge
over guide finger No. 2 under all the others and have
guide finger No. 7 within the fold.Place the strip to
be ruffled as in Fig D. and the upper band as in Fig. E.
using piping as in Fig. F., if wanted, producing a ruffle
                                                                                            Fig. G.between two edge stitched bands.

               H.To Place the Lower Band when it is to be Blind-Stitched
      and the Upper Band is to be Edge-Stitched.
  Place the strip to be ruffled as shown in Fig. D., the upper
band as in Fig. E., and pass the lower band over guide finger
 No. 7 and under all of the others.

                          1.                                          Fig. H.     To Place the Cloth to make Narrow Plaits.
   Take an inch strip of Lonsdale cambric and fold it double.
 Pass the folded edge under guide finger No. 4, over the others
and move the adjusting thumb screw down to the lowest
 position; place the band as in Fig. E. for edge stitching.
 Scallops are made by guiding the cambric from right to left

alternately.

          For Full Ruffles or Small Plaits.

   Set the stitch regulating knob so that figure 2 shows at the
 washer.                                                                               Pig. I.
  Some thicknesses of cloth will work well with a shorter
 stitch and some require that the separating blade be moved and
 set out, leaving a larger opening between the foot of the ruffler
and the blade.
View original page 21Related documents and language editions
Wheeler & WilsonPDF
Wheeler & Wilson A Number 8
User manual
16 pages · EnglishRead →
Wheeler & WilsonPDF
Wheeler & Wilson Adjusting the Curved Needle Sewing Machine
User manual
3 pages · EnglishRead →
Wheeler & WilsonPDF
Wheeler & Wilson Curved Needle
User manual
31 pages · EnglishRead →
Wheeler & WilsonPDF
Wheeler & Wilson Number 3
User manual
9 pages · EnglishRead →
Wheeler & WilsonPDF
Wheeler & Wilson Number 4
User manual
16 pages · EnglishRead →
Wheeler & WilsonPDF
Wheeler & Wilson Number 8
User manual
16 pages · EnglishRead →
Wheeler & WilsonPDF
Wheeler & Wilson Number 8
User manual
17 pages · EnglishRead →
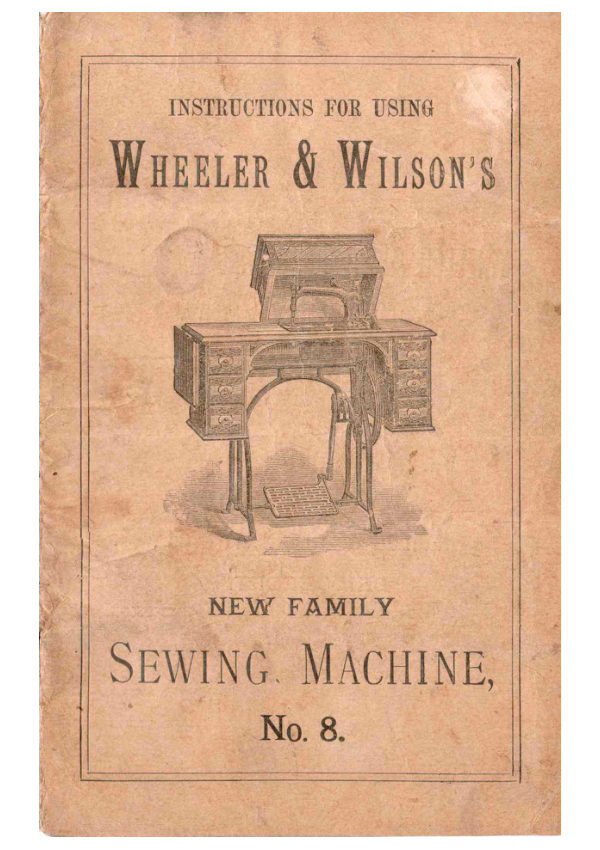
Wheeler & WilsonPDF
Wheeler & Wilson Number 8 (version 2)
User manual
16 pages · EnglishRead →
Wheeler & WilsonPDF
Wheeler & Wilson Number 9
User manual
9 pages · EnglishRead →
Wheeler & WilsonPDF
Wheeler & Wilson Number 9 (black and white scan)
User manual
12 pages · EnglishRead →
Wheeler & WilsonPDF
Wheeler & Wilson Number 9 Accessory
User manual
12 pages · EnglishRead →
From the ISMACS International. Original publisher and archive notices are retained.
Check the model and edition against your equipment.
PDF verified 2026-10-11.