Film cameras
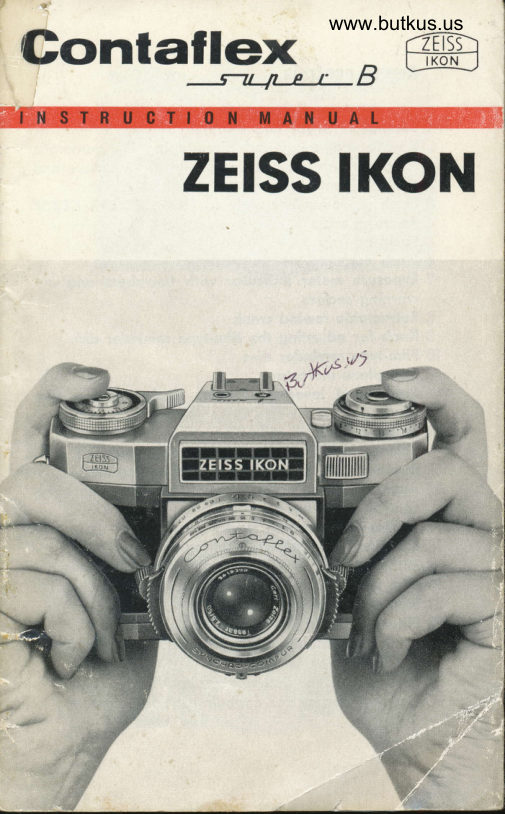
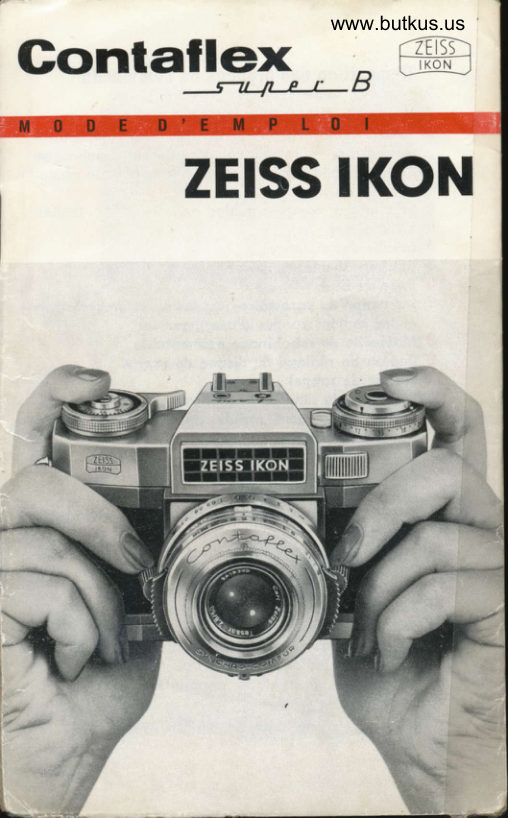
Zeiss Ikon Contaflex Super B User manual
User manual for Zeiss Ikon Contaflex Super B. 25 pages in English. Read the original PDF, download or print a copy without registration.
25 pagesEnglish6.5 MB PDF
Loading your manual…Open PDF directly
Document details
- Brand
- Zeiss Ikon
- Model / document
- Zeiss Ikon Contaflex Super B
- Document type
- User manual
- Language
- English
- Pages
- 25
- File size
- 6.5 MB
- Category
- Film cameras
- Document date
- Not specified in catalog
Search available document text
Find a term, then jump to its page in the original PDF. Image-only pages may not be searchable; check the PDF for exact wording and diagrams.
Page 3 · Read text
For your
own pleasure and
enjoyment

of this fine photogrophic
instrument, we urge you to
reod these instructions
thoroughly ond proctice
with your new comero                              I
                                                          +.1before looding your first         -1I
f ilm.
Fold out the inner flops so
thot os you reod you con
eosily see eoch conlrol ond
eoch reference number.
Proctice every operotion
until you ore fomilior with
it so thot loter on you con
operote the comero without
diff icu lty.
Consult your photogrophic
deoler on ony photogrophic
problems; the Photo Advi-
sory Service (Fotoberqtung)
of ZEISS IKON AG., Stuttgort,
Postfoch 540, will olso be            thoppy to supply odvice ond
informotion free of chorge.
View original page 3Page 6 · Read text
www.butkus.us

         Key to controls                                                                                  r&

        1 Locking colch for lens chonging
       2 Key for engoging ond disengoging the outomotic
           exposure control, olso for seiting the operture ond
            the outo-control.
       3 Flqsh guide-number scole for ZETSS TESSAR f12.8,50
       4 Focusing scole
       5 Focusing grip
       6 Flqsh conloct
       7 Exposure meter indicotor with f/numbers ond red
           worning sectors
       8 Retracloble rewind crqnk
             I Knob for odiusling the film-type reminder disc
        10 Film-type reminder disc
         1l Film plone indicotor
       12 Ropid-wind lever for shuiler lensioning ond fitm
           winding
       13 Frqme counler
       14 Releose knob with threod for coble releose
       15 Deplh-of-field scqle with distonce-setiing mork
       16 Aperture-setling scole (monuol) for use when oulo-
           control is disengoged
       17 Shurler-speed  selting mork
       18 Shutter-speed scqle with setting grips
        f9 zlss TESSAR f12.8,50 mm interchongeoble  lens
       20 Film speed scole (ASA)
        2l Film speed setling mork
       22 Filter correclor
       23 Film-speed selting ring ond dull weqther/bocklighl
             correclor
       24 Setting mork for dull weother/bocklight  corrector
  I      25 Coupling prongs for engoging the film cossette
TI       4
View original page 6Page 7 · Read text
fl1'
     26 Film-cqsselte chomber (with boffle, which must be'l       removed when using the inierchongeoble mogozine)
     27 Setting lever for deloyed-oction releose (V) ond XM
                   l        flosh synchronizotion; used in coniunciion wilh
         i        locking key 34
     28 Grip for selting operture ond flosh guide-numbers
     I        in coniunction with key 2
     29 Sefiing mork for rewinding
     30 Comerq bqck cotches
      3l Tripod bushing                         -(red    32 Seriing mork       siroke) for flosh guide-numbers
        when using ZETSS PRO-TESSAR 35 mm wide-ongle  lens
    33 Flosh guide-number scote for ZETSS PRO-TESSAR
        35 mm lens
    34 Locking key for setting lever 27
    35 Toothed sprocket wheels for engoging the film
           perforotions
      36 Toke-up spool with slot ond lug for securing lhe
          film leoder tongue
      3?  Viewfinder eyepiece
      38  Eyelets for neckstrop
     39 Accessory shoe
          Reference numbers 23-39 refer to the illustroiion on
          the reor cover  f lop.


                  uqJrzErTn
                                                         5
                             J
View original page 7Page 8 · Read text
www.butkus.us

Loading and unloading
Removing the camera baek
Fold both cotches 30 upwords ond turn them in opposite
directions. Then loke off comero bock. Before looding
the film, tension the comero by swinging the ropid-wind
lever 12 until it stops.
Loading the film
Never lood filrn in direct sunlighi. Shode the film with
your body if necessory. Remove the toke-up spool 36
ond insert the beginning of the film leoder tongue into
the slot; hook the lug into ihe 2nd or 3rd perforotion
hole. Wind the film twice oround the spool ond hold  it
in position. lnsert the film spool ond the cossette into
the comero, so thot the perforoiions engoge with the
toothed sprbcket wheels 35 on either side of the film.
Ploce the comero bqck in position from obove, so ihot
obout holf the width of the film is still visible. Then slide
ihe bock on the comero ond lock it. Fold floi cotches 30.
lmportant: set the film speed (Fig. 1)
Note the ASA speed index indicoted on the film corton
or pocked with ihe film. Lift ring 23 qnd set the setting
mork 2l immediotely obove the oppropriote figure on
the film speed scole 20. Estimote volues in between the
engroved numbers.
View original page 8
Page 9 · Read text
Setting the frame counter and checking the film advance
(Fig. 2)
Alwoys set the white mork on the block knurled ring
of the ropid-wind lever 12 io ihree plus ihe number
of exposures on your film. Use the red morks fsr 20-
ond 36- exposure film cossettes. Use l5 for '12- exposure
rolls.
Fold out the rewind cronk I qnd iurn it.corefully in the
direction of the orrow until o slight resistonce is felt.
The film will then be wound tightly in the cossette.
Finolly, olternotely press releose knob l4 ond operote
ropid-wind lever l2 twice, so thot the white mork indi-


cotes the octuol number of exposures on your film.
Note thot the rewind cronk rototes of iis own occord in
the opposite direction to thot indicoted by the orrow: this
ollows you to check thot the film is being odvonced
correctly.
The frome counter olwoys shows the number of fromes
still to be exposed. After the losi exposure (when the                              'l),counter in.dicotes                    fhe ropid-wind lever 12 will ceose
View original page 9
Page 10 · Read text
www.butkus.us

to operote or o definite resistonce will be felt holf woy
through o stroke. The film must then be rewound (see
next poge).
Set the film-type reminder disc l0 by meons of knob 9.
This disc octs solely os on oid io remembering  the
type of film in your comero. The symbols on the film-
type reminder disc signify:


                                     Infrored film  F                                 Color reversol film
                                                                                                                                                                                                                                                                                            '                                     (tungslen type)
                                 Color reversol film
                                       (flosh type)
                                 Color negotive film

                                 Color reversol film
                                      (doylight type)
                                      Block-ond-white   f ilm    tra


Unloading the film
After the lost exposure, lift the left-hond bock locking
cotch 30 ond set it to "R".
Extend the rewind cronk 8 ond lurn it in the direction of
the orrow until o chonge in resisionce is felt (indicoting
the film coming free from the toke-up spool). Now open
both bock-locking cotches, pull off the comerq bock
ond remove the film cossette.
Alwoys keep the toke-up spool ond the film trock per-
fectly cleon.
I
View original page 10Page 11 · Read text
E@


     3
      Focusing with split-imoge         Focusing wilh ground-gloss
       ronge-finder                         ringE@
    Taking pictures                fr'#ut'ut
      Setting the distance (Focusing) (Fiss. 3 ond 4)
    Operote the ropid-wind lever so thoi the shutter is
     tensioned. Hold ihe comero up to your eye ond turn-!     the finger-grips 5 until ihe split-imoge segments visible
      in the center of the viewfinder field line up occurotely;
     for subiects with no cleorly-defined  lines, odiust the
     focus until the imoge oppeors shorp within ihe ground-
     gloss ring. The distonce focused upon is then indicoted
    on scole 4 by the setting mork 15.
     Aperture and depth of field (Fig. 5)
     Every photogrophic lens will form o shorp imoge of
      obiects wiihin o limited distonce in front of ond behind
     lhe obiect focused upon. This "depth of field" becomes
View original page 11Page 12 · Read text
www.butkus.us


greoter the more the lens is stopped down (lorger  f-
stop numbers); ils extent (ot individuol operture stops)
is shown on ihe depth-of-field scole ,l5.
Exomple (see fig. 5): Distonce setting 20 ft
                   Depth of field ot f/8:
                   from l0 ft to oo

Remember:
      lorge operture (ll2.8l :  small depth of field
     Smoll operture (1122) :  mqximum depfh of field
For exociing phoiogrophic work, occurote depth of field
volues will be found in the toble on the reor cover flop.
Setting the shutter speed (Fig. 6)
To odiust the shutter speed, turn ring 18 by meons of
ihe two finger grips to set the desired shutter-speed
volue opposite ihe setting mork 17. The speed selecled
will olso be visible in the bottom right corner of lhe
viewf inder.

10
View original page 12Page 13 · Read text
The correct shutter speed depends on the movement of
the subiect. The foster the subiecf is moving, the briefer
must be the exposure time. The figures on the scole 18
signify froctions of seconds (60 is 1160 second, '125 is
 l/.|25 second, etc.).
At "8", the shufter remoins open for os long os the
releose kn.ob l4 remoins depressed.

Delayed-action  exposures
                                                              ,|2.First tension shutter with ropid-wind lever   Move the
setting lever 27 to "V". Approximotely l0 seconds ofter
operoting the releose, the shutter will open ond close
outomoticofly. The lever 27 will then return to "X".
Time exposures of the "B" setting connot be mode with
the deloyed-oction  releose.

Using filters
Most filters necessitote on increose in exposure. This
filter-foctor  is indicoted on the mount of the filter (2x,


                                                                       11
View original page 13Page 14 · Read text
www.butkus.us

4 x, etc.). Set this focior on the filter corrector 22, obove
the ASA speed index io which the setting mork 2l wos
originolly set when looding ihe film. Return the setting
mork to its originol posiiion when the filier is removed'

The automatic erposure Gontrol (Figs' 7 ond 8)
Key 2 (A :  Automotic) must be engoged ot the setting
mork '17. Select the shutter speed (do not otiempt to
set intermedioie speeds; "8" connot be selected when


 the outo-control is engoged). Hold the comero up to
 your eye ond point ii ot the subiect. lf the exposure
 meter poinler (to the right of the finder imoge) is within
                                                        o the green sector, then there is sufficient light for
 picture ond you con press the releose 14'
 ihe outomoticolly-selecled  operture setting con be reod
 both in the viewfinder ond on top of the comero body
  (7).
  lf there is too much or too little light, the exposure me-

 12
View original page 14Page 15 · Read text
ter pointer will lie within the red worning sectors, in-
      dicoiing thot the piciure will be incorrectly exposed. Re-
      odiust the shutier speed (which is indicoted wiihin the
      viewfinder) uniil the pointer swings into the green sec-
      tor. lf this proves impossible, ihen the lighting condi-
      tions ore unsuitoble for on outomotic exposure.
     (Remedy: Use flosh; see poge 16)
I    By turning the shutter speed ring '18, ony desired oper-
      ture volue con olso be selected, together with its op-
                       speed.I    propriote shulter
                                                                Fis. 8
                            Red worning sector


                                Exposure meter pointer

                              Aperture scole


                            Red worning seclor

                                  Shutter speed

     Pressing the release
    Hold the CONTAFLEX super B os shown on the front
    poge of this instruction monuol. To toke o picture, press
     the releose knob 14 softly ond smooihly downwords -     never ierkily. At the moment of exposure the viewfinder
    imoge will block out; it will reoppeor os socn os the
     ropid-wind lever l2 is tensioned. For shuiter speeds
     slower thon r/so second the comero should be ploced on
    o tripod.

                                                             t3
View original page 15Page 16 · Read text
www.butkus.us

Monuol operotion
Disengaging the auto-control  (Fig. 9)
Depress key 2 ond ot the some lime turn ihe operture
scole l6 (morked "monuell") to the seiting mork 17 by
meons of grip 28.
Shutter speed ond operture con now be combined lust
os you pleose, independently of ihe exposure meter.


The exposure meter
is colibroted ogoinst o stondord ond will ensure the
correct exposure under normol conditions. Open lond-
scopes with lorge oreos of sky, ond bocklit pictures  in
porticulor moy be incorrecily exposed when the expo-
sure meter is used os described obove,since the brighter
sky tones or the sun shining directly into the meter
will folsify the reoding. In such sifuolions the normolly-
delermined exposure should be modified by increosing
the lens operture by one f/stop. This correction is olso

t4
View original page 16
Page 17 · Read text
necessory for pictures of low-controst subiecis on color
 reversol film, e.g. exposures on cloudy doys. For this
 reoson o dull weqther/bqcklight correclor is incorpo-
 roted in fhe comero.

 Dull weatherlBacklight corrector (Fig. l0)
With the thumb on your left hond, turn ring 23 to bring


the cloud symbol over ihe setting mork 24. Hold it in
this position while pressing the releose knob. The resulf
of the correction is shown by the deflection of the
pointer in the operture scoles either in the viewfinder
ond on top of ihe comero. Both will register one f/stop
lorger operlure. The ring 23 will spring bock outomo-
ticolly fo the sun symbol when it is releosed. The figure
2 wiihin ihe cloud symbol indicotes thot the dull weother
corrector corresponds to o filier-foctor correction of
2 x, ond it moy olso be used for this purpose.

                                                     t5
View original page 17Page 18 · Read text
www.butkus.us

Taking pictures by flash (Fig. u)
The ZEISS IKON IKOBLITZ "no-coble" floshgun con be
plugged directly into the flosh contqct 6. Oiher iypes
of flosh units should either be slipped into the occessory
shoe (39) or ottoched to the tripod bushing 31 by meons
of o brocket. Push the synchro-contoct on io the flosh
contoct 6. Determine the guide number of the flosh
unit or floshbulb for the speed of the film you ore
using. This will be given on the floshbulb corton or in
the instructions for the flosh unit.
According to ihe iype of   f loshlight employed,    f he
synchro-contoct musi be odiusied io either X or M by
meons of lever 27. (See olso toble on poge 19).


To odiust the conioct, depress locking key 34 ond push
lever 27 to X or M. Flosh pictures ioken with deloyed
oction (V-setting) will be exposed os ot the X-setting.
Automatic flash erposures  (Fig. 12)
Set the shutter speed occording to ihe toble on poge'19.

t6
View original page 18
Page 19 · Read text
While the stondord shutter speed for both bulbs ond
 electronic flosh is i/so second (shown in yellow), you moy
 operote ihe outomotic  f losh control ot oll shutter speeds.
 Press key 2 ond turn scole 3 by meons of grip 28 so os
io set the oppropriote flosh guide number to the block
 setting mork l7 (provided thot ihe bosic ZEISS TESSAR
 f12.8,50 mm lens is being used).
When toking flosh pictures with the ZETSS PRO-TESSAR
35 mm wide-ongle lens, lhe guide number scole 33 in
red must be employed. The red siroke 32 is then used
os the setting mork.
Switching over from A-setting (outomotic) operoiion to
guide-number control is eosiest to perform when the


comero is iensioned qnd ihe focus-distonce is set to
opproximotely 10 ft.                                         $/f*u.c,rr
lf the exoct guide number for your flosh-light source  is
not engroved on the flosh scole, set it to the numeri-
colly-neorest guide number. Intermediote settings with-
out posilive click-stops should nol be selected.

                                                                                                               l',|
View original page 19Page 20 · Read text
T
                            www.butkus.us
                                                                   IThe following guide numbers con be set:
On the block scole (f : 50 mm) for the ZEISS TESSAR                  t
f12.8,50 mm stondord lens:
260 220 180 tss 130 tlo 90 ?B
65 Eb 45 sB 32
On the red scole  (f :35 mm) for the ZEISS PRO-TESSAR
35 mm wide-ongle lens:
f30 ro 90 ?B 65 sE 45 sB 32
For greoter clority in reoding, the guide numbers
printed here in smoll type ore represented by dots on
boih scoles.
Hold the comero up to your eye, focus, ond press the
releose. The operture setting ot ony speed required to
ensure o correct exposure will be selected outomoticolly
os you focus.
In order to prevent incorreclly exposed flosh pictures,
the focusing movement is stopped outomoticolly of the
closest ond furthest disionces for the pre-set guide
number. Therefore, if you connot focus your comero
properly:
Flosh pictures with the ZEISS PRO-TESSAR 85 mm ond
l'15 mm telephoto lenses should be loken in fhe con-
ventionol monner, with the outomotic control disen-
goged ond the proper operlure setting selected on the
monuol scole.
View original page 20Page 22 · Read text
www.butkus.us

 Accessories
 Key: @ :  Diometer of mounl in mm      S : Screw-on mount
     A:  Push-on mounr
    G :  Yellow
    GR : Green
    O :  Oronge
     R:  Red
 Ever-reody cose                                                23.0007
 Color         filters G - GR - O lkoforA-B-CondF,                              -  R -  UV,                         20.1 000                 AS27 I set of filters (G-GR-O-UV),
Q S 27, wilh cose                                             20.7071
 Lenshood, metol, @ A 28.5                                20.0700
 Lenshood, flexible, A S 27                                 20.0713
 Leother holder for lenshood 20.0700
ond three filters D.l000                                  n.7841
ZEISS PROXAR LENSES, O A 28.5
    for close-ups down to 40 in.                             20.0800
    for close-ups down to 20 in.                               20.080r
    for close-ups down io 12 in.                          20.0802
    for close-ups down to 8 in.                             20.0803
ZEISS PROXAR doublet lens for close-uos
down to 3.6 in., A S 27                                20.08M I set of PROXAR lenses,
with depth-of-field  colculotor ond contoiner              20.7070
CONTAPOL polorising filter, Q S 27                      20.1200
Coble releose with lock                                       20.0281
Vision-correction lenses, from + 0.5 to + 5 dioptres       20.0504
Vision-correction lens, onomolous                            20.0505
Cossette with spool ond contoiner                           20.0300
Spool for cossetle                                             20.0301
Cop for 50 mm lens                                       20.0602
Comero neckstrop with securing otlochments                20.02t1

ZEISS interchangeable lenses and accessories
ZEISS PRO-TESSAR f13.2, 35 mm wide-ongle  lens,
with conloiner                                                                                                                                                               'l ,|.120'l
ZEISS PRO-TESSAR 113.2, 85 mm telepholo lens,
with contoiner                                              11.1202
20j
View original page 22Page 23 · Read text
I"F

i

     ZEISS PRO-TESSAR il4, ll5 mm lelephoto lens,
     with contoiner                                                                                                                                             'l l 1205
         PRO-TESSAR    ZEISS                                        I 'l, for noiurol-size close-ups,         11.1204     in leolher          cose
    ZEISS Monoculor Attochment 8X30 B, for telephoto
     pictures ot 400 mm focol length                            20.1629
     Color filiers for PRO-TESSAR 35
   G-GR-O-R-UV, lkolor B, F, A S 49                   20.1007
     Color filters for PRO-TESSAR 85
   G-GR-O-R-UV, lkolor C, F, 0 S 60                   20.1009
    Color filters for PRO-TESSAR  ll5,
   G-UV, lkolor C, @ S 67                                   20.1017
    Adoptor ring for using S 62 filters on PRO-TESSAR 35 20.101 I
    Lenshood for PRO-TESSAR 85, O S 60
     (wiih odoptor ring 20.1011 for PRO-TESSAR 35)            20.0709
    Adoptor ring for using @ S 60 filters ond lenshood
   on PRO-TESSAR 35                                            20.l0ll
    Lenshood for PRO-TESSAR 115, A S 67            20.0714   d
     Leother contoiner for @ S 60 lenshood                  20.7823
     Leother contoiner tor @ S 67 lenshood                 23.2003     Leother cose for 'l PRO-TESSAR ond I filter              23.1001
     Leother cose for 2 PRO-TESSARS, 2 filters
    ond lenshoods                                             23.1201
    Cose for ZEISS Monoculor Attochmenl                20.7812


    Interchangeable film backs
    Film bock                                                  20.0302
    Cose for I film bock                                      20.7855
    Cose for 2 film bocks                                         23.0201

   Gopying and photomicrography accessories
    Angle viewfinder                                           20.1614
    Adoptor ring for micro-oltochmenl                         20.1620
    Attochment heod for micro-otfochmenl                      20.1616

   Gopying equipment
    Toble copying unit                                                   20.1 850
     llluminotion equipment                                n.1852

                                                                     21
View original page 23Page 25 · Read text
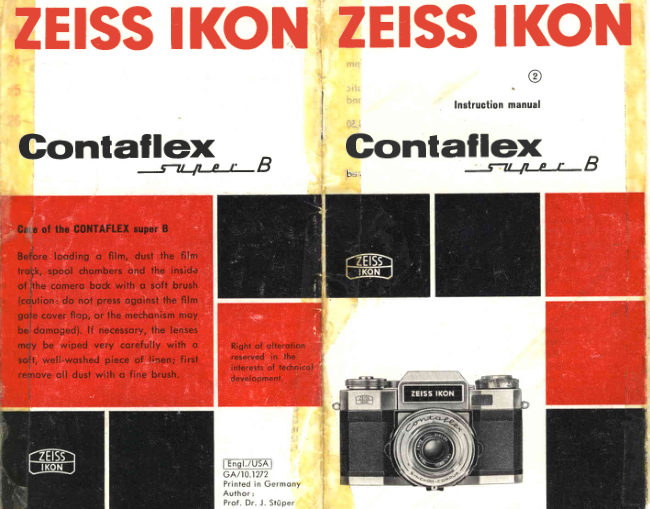
Gare of the C0NTAFLEX super B

 Before looding o film, dust the film trock, spool chom-
 bers ond the inside of the comero bock with o soft brush
 (coution: do not press ogoinst the film gote cover flop,
 or the mechonism moy be domoged). lf necessory, the
 lenses moy be wiped very corefully with o soft, well-
woshed piece of linen; first remove oll dust with o fine
 brush.


                                                                                                                     \
Righi of olterotion reserved in the interests of technicol devel-
opment.
zHtss tKoNSTUTTOART

                             Printed in Germony
                        Author: Prof. Dr. J. StUper 20 1162
View original page 25Related documents and language editions
From the M. Butkus archive. Original publisher and archive notices are retained.
Check the model and edition against your equipment.
PDF verified 2026-10-10.