Sewing machines
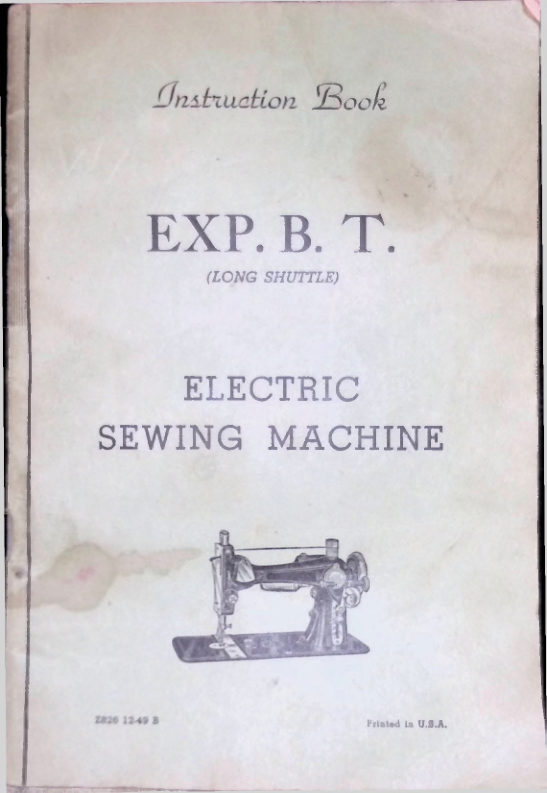
Eldredge B Long-Shuttle — User manual
User manual for Eldredge B Long-Shuttle. 44 pages in English. Read the original PDF, download or print a copy without registration.
44 pagesEnglish29.0 MB PDF
Loading your manual…Open PDF directly
Document details
- Brand
- Eldredge
- Model / document
- Eldredge B Long-Shuttle
- Document type
- User manual
- Language
- English
- Pages
- 44
- File size
- 29.0 MB
- Category
- Sewing machines
- Document date
- Not specified in catalog
Search available document text
Find a term, then jump to its page in the original PDF. Image-only pages may not be searchable; check the PDF for exact wording and diagrams.
Page 2 · Read text
—IMPORTANT—


Be sure that the voltage, marked

on the name plate of your motor,
»  the same as the current  in

         your home.
View original page 2Page 5 · Read text
GENERAL INSTRUCTIONS
Before leaving the factory every machine has been carefully adjusted
and minutely inspected, its sewing qualities having been tested on all kinds
of work, and found perfect in every respect.
Do not tamper with the adjustments of the machine; serious trouble is
almost sure to result from any unnecessary meddling with the working
parts.
Before commencing to sew be certain to oil and clean machine ac
cording to instructions.
After using the machine, always see that it is well cleaned before
putting it away.
Do not attempt to use the attachments until you can manage the
machine with ease on plain sewing.
In sewing where special elasticity is required, as on bias seams, or
veiy elastic material, hold the work back slightly, to keep the cloth
stretched while being sewed.
Machine not working properly generally is caused by the following
The thread being too coarse or fine for the needle, the needle being bent
or blunted; poor thread. See that the needle is perfectly straight and that
it is pushed up as far as it will go into the needle bar. It should past
nearly through the center of the needle plate hole when properly set.
Should the machine miss stitches in running off from a thick seam.
hold the cloth back slightly to keep it straight and to prevent its rising
up with the needle. In using slack, twisted, or uneven silk, should it
become frayed or roughened, the needle is too fine, or has a hook •••;?:•. its
point caused by striking the needle plate.
To turn a corner. Stop the machine with the needle in the cloth. Then
lift the presser foot and turn the work in the direction desired, using the
needle as a pivot.
The presser foot must never be left down on the feed when the
machine is running unless there is cloth between, as the sharp teeth of the
feed will injure the bottom of the presser foot.
When ordering needles, or parts, or supplies of any kind for this
machine, always give the full name and number of the machine. This
number will be found stamped on bed plate underneath front shuttle slide
Know your machine. Refer to large illustration on pages 20 and 21
which will help u to identify the parts as explained in instructions.
3View original page 5Page 7 · Read text
INSTRUCTIONS FOR SETTING MOTOR PULLEY


             Figure 4                            Figure 5


               THE MOTOR PULLEY


      It  is very important to have the motor pulley set correctly. A
bearing as  in  figure 4  will generally be found  to be just  right.   If  the
motor pulley  is set in too far against the balance wheel as  in Figure  5.
the machine will start hard, the motor will heat up quickly, the machine
will not run as fast as it should, and the motor pulley will soon wear out.
A very good way to find  if pulley  is set right  is to hold the balance
wheel and press the control lever.  If the motor pulley slips around on
the balance wheel, the pulley  is set right.   If, by holding the balance
wheel, the motor is also stopped, the motor pulley is set in too far and
should be adjusted until  it slips when balance wheel is held.


   CAUTION:  Be careful  to avoid gCtthl    . any  oil on  the rfa* of the
hand wheel and the rubber face of the motor pulley,


                                                5
View original page 7Page 9 · Read text
WINDING BOBBINS


                         Fig. 7—Winding the Bobbin

   With the  left hand, hold the balance wheel, turning the brake button
(center, right of wheel) toward you with the right hand.  This stops the
sewing mechanism  of the machine.  Push  the bobbin winder up so  that
the rubber wheel conies  in  contact with  the balance wheel.  Catch  the
thread in with the bobbin as  it  is inserted  in the right end of the socket;
pull out the spindle socket at the left to admit the other end of the bobbin
and  let  it back slowly.  Carry  the thread from the bobbin,  first    t .ro‘ <
the upper end, then through the lower slots in the distributor.  Start the
motor and be sure  to stop before  the thread  is wound higher than  th?
metal ends of the bobbin. When  finished  pull bobbin winder  town an
tighten brake button.

          TO REMOVE SHUTTLE FROM CARRIER

                                          Pull  out  front  shuttle  slide  far
                                  enough to bring shuttle carrier into
                                                  full view.  Push down the point of
                                          shuttle to release  it at the back, and
                                      with the thumb and  forefinger  lift
                                                          it from the carrier. Do not attempt
                                           to remove the shuttle by pulling at
                                        the spring, as this  is liable to bend
                                                               it out of shape.
    Fig. 8—Removing the shuttle
           from carrier
View original page 9Page 11 · Read text
THREADING THE MACHINE
Fig. 12—The machine threaded, showing the different thread guide*
Place thread on spool pin (A) carry it between the discs >: he fric
tion thread guide (B). Then down to the right an
(C), under spring, and with a turn from you hook into loop (D). Carry
thread up through takeup (E), threading from front to
takeup, E, at highest point when threading). Bring tinea I Iowa •
guides (F) and (G) and into needle (H)—threading fr >m left to right.
Do not wrap thread around discs of friction thread guide (B) or ten
sion discs (C).
The sewing guide is attached to
the bed of the machine by means of
the thumb screw and is used as a
guide for straight stitching.
Fig. 13
9View original page 11Page 13 · Read text
TO COMMENCE SEWING
After the machine is threaded, pull up the under thread by turning the
balance wheel over with the right hand, while holdin;: the upper thread
with the left hand. Allow the needle to enter the needle hole to pmk up
the under thread. Both threads should then be pulled to the back of the
presser foot. Lower the presser bar after the cloth h inserted, and begin
to sew, regulating the speed with the pressure of the foot on the motor
foot control.
Unless there is cloth between do not leave the presser foot down on the
feed while the machine is running, as this injures both foot and fe-
TO REGULATE THE LENGTH OF STITCH
The length of stitch is regulated by means of the stitch regulating
screw. (See Fig. 16 on pages 20 and 21). To lengthen the stitch, loosen
the screw and push it up. To shorten the stitch, push the screw down or
to a higher figure. Always tighten the screw before sewing.
TO AVOID THE PRESSURE ON THE MATERIAL
In ordinary sewing it is seldom necessary to change the pressure of
the presser foot on the material. In sewing fine silks, chiffon or other
delicate fabrics, lighten the pressure by turning the presser bar reg <
up (See Fig. 16 on pages 20 and 21). This releases the pressure from the
material and prevents prints or roughness appearing on fine materials.
To increase the pressure when sewing on heavy materials or over
heavy seams, turn this regulating screw down.
TO REMOVE THE WORK
Stop the machine with the thread take-up at the highest point, raise
the presser foot and draw the fabric back. Pass the threads over the thread
cutter and pull down gently to
break them. Leave the end of
the threads about three inches
long, so the upper thread will
not pull through the eye of the
needle when you start to sew
again.
THE THREAD CUTTER
It is easily snapped into place
on the presser bar. The thread
cutter will be found in the small
envelope in the box of attach
ments.
Fig. 15
Thread cutter attached to machineView original page 13Page 14 · Read text
TO REGELATE THE TENSIONS

         tl » important to thorr    t.   '.        tand th® regulating of the tension
                                                                                       its  effects upon  the
   general appearance O                                                                 .   matter what kind of material you
   art tmttg. the thread should lock  in the center, as shown  in the figure
   hen-w


          If the upper  tenston  it too  tight, or the under tension too loose, the
        * ---a  - w-                             • ; a' —g the surface of the material, as shown in figure
   brio*


                        .  ... — _r.  .cr .rn  ]k too tight, or the upper tension too loose, the
I CT4f  t        -  »traight along the underside of the material, as shown in
F  igmre hekrw.


                                                                                                               ■    :    take a perfect stitch you will find
                                                                                                                                                            ’      •      '       '               .    :   mmc r cr ’ower tensicu.      -  r.f
                                                   er  tension, and a knot of thread
  CStN* it tt> be beM op. This would not allow spring to press on the thread.
  Looms 4*the sbottJe*.*',•tensionar.d adjustscrewtension(See Fig.screw.11 on page S), slightly raise the

     The opper tension  is governed by flat discs.  These are regulated  to
  pre** on the thread by turning   I             regulators  (See  Fig.  16 on
   pag^CS 30 and 21) to the nght to tighten and  to the  left to loosen.  A
              •'  ’ —                           '   i      '  ''                       tr t mses by loosening the screw
                  '          '                   •   *           '  -                                              .                       •        .  tested when the presser bar
       »   »t  a »                                   ‘       «■ -.  «  -   t 4.     • thrown up


                                            12
View original page 14Page 15 · Read text
TO SEW ON THE BIAS ON FINE MATERIALS
Use a short stitch and a loose tension on the upper thread, so the
thread is left loose enough in the seam to allow the goods to stretch, if
necessary.
A BASTING STITCH
Use the longest stitch the machine will make and a loose upper ten
sion. This stitch can easily be pulled out.
TO AVOID BREAKING NEEDLES
See that the presser foot or attachments are securely fastened to the
presser bar by means of the thumb screw and that the needle passes
through needle hole. Do not sew heavy seams or thick goods with too
fine a needle. Use the table on page 10 for the correct size of needle and
thread to correspond with materials. Avoid pulling the work while stitch
ing; merely guide the cloth and the feed will carry it along.
CAUSES OF UPPER THREAD BREAKING
When the upper thread breaks it may be caused by—
Incorrect threading of machine;
Tension too tight;
Thread too coarse for needle;
Needle bent, blunt-pointed, or set incorrectly;
Starting machine at full speed;
Not bringing up lower thread correctly.
CAUSES OF LOWER THREAD BREAKING
This may be caused by incorrect threading of the shuttle; by net
bringing up lower thread before starting to sew; by having tOO ..
sion; or by having bobbin wound too full to revolve freely in the shuttle
SKIPPING STITCHES
The needle may not be properly set; it may be blunt or bent. The
thread may be too heavy for the size ot the needle. Needle may be too
short.
13View original page 15Page 17 · Read text
FELLING


                        FELLING


   The narrow hemmer  and  feller  arc  the  same.   If  the hemmer   ;>
attached  it can be used in place of the presser foot in running up a >ear.i
Sew together two pieces of cloth with the under edge projecting betwee   i
one-eighth and one-quarter of an inch beyond the upper edge, then  trim
the edges  if necessary, leaving enough goods between the row    ■:  stitchir
and the edges' to  fill the hemmer and turn  it  nicely, open the work  fiat.
wrong side up, and trim  the corner of the same  slightly, then push  the
goods into the  feller until the needle  is reached.  Lower the  feller on the
feed and start the machine. The feed will carry the seam through with mt
assistance, making a complete  fell from the beginning. There is no nerc.
sity of touching the goods at  all, but just as well to keep them m;. mthed
out nice and  flat.


   The positive double feed makes this variety of work a  pcctal feature
of this machine


                                             15
View original page 17Page 19 · Read text
TUCKER


                     TUCKER


     Slip the fork of the tucker into the attachment holder on the presser
bar, and with  the screw fasten  it down firmly, being careful  to have the
needle go through the needle hole in the tucker frame. The tuck marker
is operated by the neck of the needle clamp striking in the tuck  lever.

   The  rear scale of  the. tucker indicates the width of  the tucks  t<> be
made, and  the  front  scale  indicates  the  distance between  the  different
tucks.

   To have tucks that just meet, set rear scale at Figure ‘T* and  front
scale  at Figure "2"  etc. To have tucks  that overlap, set the  front  scale
at a lower figure than  th<- back and to have tucks se]
scale at a higher figure than the back.

    Fold the cloth at the place where the  first tuck k desired, ami place
it under the tucker lever and  the presser  foot, with  the  folded edge   t     ■
the right and against the upri  hi  juide of the                                                        .
and creaser mark  the  cloth  for the next  tuck, and  after the  tivxt  tuck
is completed the  cloth should be  folded along  this mark and  placed
before, and so on..


                                           17
View original page 19Page 21 · Read text
BINDING
Remove the presser foot from the machine and attach the binder in
its place. The binder is adjustable sidewise, to bring the stitching prop
erly close to the edge of binding. The little downward projecting lug
serves as a guide to prevent the narrow widths of binding
under the foot toward the right.
With this new multiple binder a garment can now be piped and b >un '.
in one single stitching. Even two bindings of contrasting color can be
entered into their correct size slots for piping, and enclosed in a still r. i:
rower binding, giving the effect of a double reversible piping The ■ i
rowest width should be entered into its riot first and
the needle, then followed by the others.
The Multiple Slot Binder will carry bindin
single fold commercial bindings sizes 1, 2, 3, 4, 5, and 6. They are tc 1
respectively through the five slots in the binder scroll, beginning with
the smallest. Sizes 5 and 6 are fed through slot No. 5. The single told
commercial binding for sale in department stores must be used In add:
tion, it will carry the familiar 15/16 inch bias cut binding . •.
woman has always used, making it her elf with the
gauge, from self material or otherwise. The 15/16
entered through the open mouth of the scroll.
Finer fabrics call for the narrower bindings. The binding should be
entered into the slot or scroll, depending on th
passed through until the 'aid <ome ui lei
to be bound is placed between the folds of the scroll, next lower the bin let,
then start the machine. Feed the bindin vitl the i
the goods with the left, being careful to keep the goods well between tin
scroll and to keep the binding from becoming twisted.
19View original page 21Page 22 · Read text
Exp. B. T. Long Shuttle Ty


                            refer to this picture and
You will find  it helpful to
                      To Thread Machine


                                                       2C
View original page 22Page 25 · Read text
RUFFLING BETWEEN BANDS
As For Making Aprons
Place the lower band in the ruffler, having the right ide «,f the
up; place the apron into the ruffler gauge, then place the top band <ner
or on top of the ruffler gauge and under the ruffler foot. This operation
will blind stitch the band on each side of the apron.
RUFFLING AND SEWING IN PIPING
It is most convenient to do this work from the upper side, although
it can be done from the lower also, by using the shirring plate. Place the
goods for the ruffle in the ruffler the same as for plain rtiffliriLg, then insert
the piping into the gauge nearest the ruffle gauge, drawing it through
under the foot, insert the folded edge of the band into the gauge nearest
the needle, drawing it also under the foot. You will notice that the band
and piping gauge is made adjustable to the right or left, so you may stitch
as close to the edge as desired.
REMARKS
Should the crimping blade need to be sharpened, never file or grind
it from the bottom side, but always from the top. It should be filed or
stoned on angle, like the edge of a chisel.
The best work can be done when the crimping blade carries the cloth
just beyond the needle as each crimp or pleat is formed.
HEMSTITCHING
Fold a blotting paper (or other soft paper), which can be readily
torn, until you get a thickness corresponding to the opening desired in
the hemstitching; put one of the pieces of goods under the paper and the
other above, then place all under the presser foot and sew through them
After being sewed, both pieces will be doubled back and forth t<> crease
them well exactly on the line of stitches. Then fold all four edges in
the same direction, and hold firmly while you tear out tin- paper (Rm
edge of each or either piece may be cut and passed through the hcminci,
oi a row of stitchin ■ can be pas ed Ion ■ ide the h
edge finished off as you choose.
23View original page 25Page 27 · Read text
SHIRKING
SHIRRING
Shirring is done with the same attachment used tor ruffling, and direc
tions for placing the attachment in position will be found under that head
ing. Before placing the ruffler, the separator blade should be removed
To do this, loosen the little slotted set screw which is at the front end of
the frame; drop the front end of the separator blade downward and draw
it forward. Remove the front shuttle slide and insert in its place the >lnr-
ring plate.
The object of using the shirring plate instead of the separator plate n
the ruffler, is to permit the shirring of work of any width. To produce the
work the goods should be inserted same as for plain ruffle, the pres>er bar
lowered and the stitching commenced. It is always best, however, to run a
small tape underneath the goods, this greatly strengthens the work The
tape should be run through the guides in the shirring plate
The fullness of the shirring is controlled in the same manner .. the
fullness of the ruffle. The length of the stitch should be adjusted t ■ cor
respond with the fullness of the gather being producedView original page 27Page 29 · Read text
BRAIDING


                       BRAIDING


    Attach  the braider foot  to  the holder on  the presser bar instead  of
the regular sewing foot.


   Remove the front shuttle slide and insert in  its place the under hr   ler
plate.  Raise the presser bar  lifter, pass the end of the braid through the
slot, or groove,  in  the under braider  plate, draw  it through and pass   it
under the braider foot.


   Then place the stamped pattern under the foot and lower the   t      t mt
position  to  sew, guiding  the  cloth with  the  right hand and  holdin   the
braid with the  left hand to keep  it from twisting.


                                      27
View original page 29Page 31 · Read text
Illustrated List of Parts
                         for the
            EX. B. T.
           (LONG SHUTTLE)
     Electric Sewing Machines

When ordering new parts, specify the part number and part name


                                   29
View original page 31Page 37 · Read text
LIST OF ILLUSTRATED PARTS (Continued)
Shipping
Part No. Description Weight
Motor Cover and Motor Shell Assembly
NSC-23-R Motor Cover (brush holder end) with NSC-25 bearing.
RM-28 bearing spring, TOC-38 brush holders, TJ-41
screws, and CFC-64 carbon brush screws (order this
motor cover if serial number is prior to 5B-41176) . ... 8 oz.
NSC-23 Motor Cover (brush holder end) with NSC-25 bearing,
and RM-28 bearing spring (order this motor cover i’
serial number is after 5B-41175)---------- ... ... 8 oz.
NSC-25 Bearing with oil wick and rawhide washer. (Used in
both motor covers)----------------------------------------------- 2 oz.
RM-28 Bearing Spring (used in both motor covers)--------------- 2 oz.
TOC-38A Brush Holder (2 used) each....--------------------------------- 2 oz.
TJ-41 Brush Holder Retaining Screw (2 used) each----------- -- 2 oz.
27NS-42 Bearing Cap (fits brush holder end cover) 2 oz.
NSC-44 Motor Cover with NSC-25 Bearing and RM-28 bearing
spring ------------------ ------------------------------------------- 8 oz.
27NS-47 Bearing Cap ........ ......... 2 OZ.
NSC-70A Motor Shell .. ..... lib.
Field Assembly
15NSC-48B Field Core with Coils, brown motor cord and core bush
ing, 115 volt------------------------------------ --- ---- --------- 1 lb.
Specify any other voltage
NSC-46 Field Coil with \1/^' line lead extension, 115-V 4 oz.
Specify any other voltage-------------------- ---- ------
NSC-52 Field Coil with 134" line lead extension, 115-V 4 oz.
Specify any other voltage
NS-60 Fibre Retaining Strip for Motor Cord 2 oz.
10M-59A Field 2 oz, Clip
NSC-49 Field Core, only 1 lb.
15NS-84-B Brown Motor Cord 2 oz.
NSC-73 Cord Bushing . ... 2 oz.
Prices Quoted on Request
35View original page 37Page 42 · Read text
HOW TO ORDER REPAIRS FOR
       THE EXPERT  B.  T.
      SEWING MACHINE

   Repairs  or  needles may be  obtained from  the
dealer who sold you the machine, or direct from
 the  manufacturer.  When  ordering  repair  parts,
always  give the name and number  of the  parts
•wanted as  well as  the number  of your machine
which will be found on the bed plate under the front
shuttle   slide.  When  ordering  needles,  always
specify that Eldredge F.  S. or Class “C” needles
are wanted and be sure to mention the thread size.
A table of correct sizes will be found on page 10.
            Prices Quoted on Request.
View original page 42Related documents and language editions
EldredgePDF
Eldredge
User manual
20 pages · EnglishRead →
EldredgePDF
Eldredge Improved Rotary B
User manual
40 pages · EnglishRead →
EldredgePDF
Eldredge Two-Spool (16)
User manual
13 pages · EnglishRead →
EldredgePDF
Eldredge Two-Spool (25)
User manual
15 pages · EnglishRead →
Montgomery WardPDF
Montgomery Ward Damascus Vibrating Shuttle
User manual
14 pages · EnglishRead →
NationalPDF
National Regal Paveway Electric
User manual
1 pages · EnglishRead →
Western ElectricPDF
Western Electric Number 2 Portable
User manual
44 pages · EnglishRead →
From the ISMACS International. Original publisher and archive notices are retained.
Check the model and edition against your equipment.
PDF verified 2026-10-11.