Sewing machines
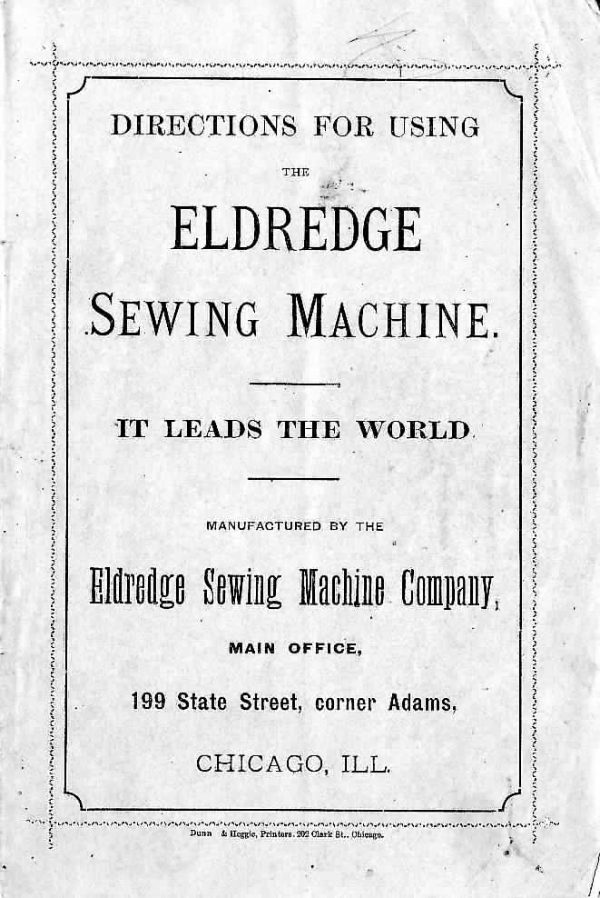
Eldredge — User manual
User manual for Eldredge. 20 pages in English. Read the original PDF, download or print a copy without registration.
20 pagesEnglish2.0 MB PDF
Loading your manual…Open PDF directly
Document details
- Brand
- Eldredge
- Model / document
- Eldredge
- Document type
- User manual
- Language
- English
- Pages
- 20
- File size
- 2.0 MB
- Category
- Sewing machines
- Document date
- Not specified in catalog
Search available document text
Find a term, then jump to its page in the original PDF. Image-only pages may not be searchable; check the PDF for exact wording and diagrams.
Page 4 · Read text
Breakage of Threads.
Cording.              .                 .
Directions to the Dealer,
Directions to the Learner,
Felling,                             .
Filling n Bobbin,
Gathering,
Hemming,
Hints  to Operators.
Length of Stitch,
Looping Stitches,
Needles,
Quilting,
Oiling.                         .              .
Regulating Tension.
Removing the Work.
Running the Machine,
Ruming,                                         .
Setting the Needle.
Sewing Bias Seams,
Skipping Stitches,
Sizes of Cotton,
Threading Needle,
Threading the Shuttle,
Tension Suggestions.
Tightening the Belt,
 Tllcking,
Wide Hamming.
View original page 4
Page 5 · Read text
TO THE DEALER.


   When  sending a machine  to a customer.  you  will ensure
 giving satisfaction by following these instructions:

    Oil the machine and stand according  to directions  in  this
 book, working in the oil and wiping off any superfluity, so as to
 leave it neat and clean.  Use none but good sperm oil.‘

   Wipe out the shuttle-race and the groove down which the
 needle descends carefully.

    Set a No.4 needle. and thread up the  machine above and
 below with No. 60 or 70 cotton, so that  it  will sew correctly at
 the first start.  Let the length of stitch and the tension be as
 they are when machine  is received.  You will usually find the
bobbin filled and the shuttle tension right.

    Lift  the  presser-foot to  its  notch; see that  the slides are
tight together;  slip the belt  all” from the stand~wheel; be sure
that  the  “ trimmings "—oiler,  screw-driver, &c.—are  in  the
drawer.  The machine wlll then be  in such a condition as  to
materially assist the learner in following the instructions.

    If the woodwork should by any means become spotted or
dull in appearance. apply boiled linseed oil with cotton waste or
a soft cloth.

    If the stand  is scratched or marred  apply  “Asphalt Var-
nish," a quick-drying japan, to be obtained almost anywhere.
View original page 5Page 6 · Read text
TO THE LEARNER.


   The machine being in place on  its  table. and cleaned from
dust, grit and  lint.  to prevent injury by  their getting into the
working parts,

                              011 the Stand

at each side of the treadle where it rests upon the cones, at each
end of the pitman, and the center points at both ends of the hub
of the wheel; then

                            Oil the “whine

 at the following points:  The main shaft at the two holes in its
 bearings,—the eccentric and feed connections through hole in top
 of upright arm—the needle.l)nr,—the guide on presser-bar on
 presser-lifter.—needle-b:1r cam through hole on the back side of
 face plate—the take-up pin on needle-bar.—the centers that hold
 shuttle vertical lever, through hole in back side of upright arm,—
 the stitch-regulating slide and connections of feed vertical lever,—
 the grooves in which shuttle-driver slides, through the holes on
 the back side of same—both ends of shuttle-driver pitman,—both
 ends of feed horizontal lever, and swivel to horizontal feed-lever.

   And remember, whenever the machine runs hard, it is proba-
 bly because it needs oil or cleaning.
View original page 6Page 7 · Read text
5

   Always keep the shuttle-race wiped  clean and the shuttle-
drive well oiled.  This is important.


   Next, place the belts around the wheels in the grooves  ; and,
with the presser-foot raised from the feed,


                Prepare to Run the Machine

by seating yourself in front, and placing the feet on  the treadle,
with the hollow as nearly over the rod as possible.  Always turn
the Fly-wine! (award you.  Tip the feed steadily up and down
by an ankle-joint motion. without jerking. keeping the heel and
toes firmly on  the treadlc.  Continue  this motion  until  it be-
comes natural, easy, and uniform.


   After running the machine awhile. wipe off all the superfluous
oil| thus preventing the soiling of your work.  Sufficient  oil  will
have worked into the joints to make them run easily for some
time.  Be  especially  careful  to  clean  the  needle-bar and  the
shuttle-race thoroughly.   Next,


                            Fill  a. Bobbin

with thread from spool placed on spool-pin at the right and top
of machine;  to do which you will place bobbin in spooler by
putting one end  into  the concave cup  at  right hand side of
spooler, then pull the plunger in opposite side of spooler to the
left, and the bobbin will come to placeand be held firmly.  Place
end of thread between end of bobbin and cup of spooler.  Slide
the bobbin-winder to the right, so that the small grooved wheel
will come in contact with the belt. then reverse the motion, and
the loose pulley  revolves, and the works  of the machine will
stand still.  Guide the thread with your right hand back and
forth  across  the  bobbin,  carefully and  regularly. so  that  the
thread will unwind easily and evenly when sewing.
View original page 7Page 8 · Read text
6

                 To Thread the Shuttle.


          [1 carrier forty-two yard: of Na. 50 (011m.
   Hold the shuttle in the  left hand, in position shown in the
above engraving.  With bobbin  in  the right hand, and thread
delivering from the under side toward you, slip it nearly into  its
place, and pass the thread through the narrow angular slot, then
lay  it  from you across  the square opening.  Now,  close  the
shuttle by lowering the point, so that the bobbin  will drop into
place:  raise the latch until it can be pushed into position by the
thumb.  (Be careful to push it in squarely, so as not to unneces-
sarily strain it.)  Themdrnw the thread back toward the heel. or
square end of shuttle, and,  raising the thread,  slip  it over the
notch, and directly beneath the outside flat tension-plate.  Now,


reverse the position of shuttle. and carry the thread out through
the guide-hole and staple, as shown above, and under the outside
curved spring.
   Be careful that the thread passes through the staple, else the
latch will be likely to fly out and be broken.
    It will be noticed that in  this shuttle there is only an:  1101:
through which to pass the thread.
   Tension is obtained by means of the screw near the point of
the shuttle, turning it to 1/1: rig/11 to increase, and to  1/1: lefl to
diminish the preasure on  the thread.
View original page 8Page 9 · Read text
7

    In removing bobbin from shuttle, hold the shuttle point down.
to allow bobbin to drop out of recess in end of latch.


        To Thread the New Self-Threading Shuttle.


              4;4  ..  ,hiltmtillulltmiiliitmiiiiimhiltlifiiiiI


   Hold the shuttle in the left hand with the point towards you.
Take  the bobbin in the right  hand. placing  the point  in  the
end of the plunger at the front end of shuttle, press it in until
the other end of the bobbin will drop into the groove at the
back end of shuttle.  Then press the bobbin downward until it
reaches the recess for its bearing, always having the thread draw
from the under side of bobbin next to the slotted side of shuttle
as shown  in the engraving.  Then hook  the thread over  the
notch formed by the angular slot in the side of the shuttle, as
shown in the engraving. drawing the thread between the spring
and over to the front face of the shuttle as shown, catching  it
under the thumb.  Then draw the thread to the right and down-
ward. and  it will pass under the end of the spring and around
the pin.  The shuttle is then threaded ready for use.
   There are no holes through which to pass the thread.
   Tension is obtained by means of the screw near the heel of
View original page 9Page 10 · Read text
8

the shuttle, turning  it to (It: rig/it to increase and  lo M: 1th to
diminish the pressure on the thread.

   The shuttle being threaded. lay it aside. and next


                                Set. the Needle.

taking in in the left hand. putting  its point through the hole in
presser-foot and needle-plate, then entering the large end into
the perpendicular hole in needle-bar, pushing  it up as far as  it
will go. will; (It! long groove rquare in from qf you. then turn
the set-screw to hold the needle fast.

                    Thread the Needle

by passing the thread from the spool  (in same position as when
 filling  bobbin), with  the  left hand  pass the thread under the
 curved point  to upper spring, carrying it to the left between' the
 two springs. allowing it to draw in little notch at the center of
 under spring; thence into thread-guide at right of needle-bar. by
 slipping it under the projecting tongue and upwards between the
 tongue and the arm;  thence into slot  in head  of needle-bar,
 merely pressing it downwards  ; thence pass a loop of the thread
 through the take-up guide from the back towards you, and slip
 it over the end of take-up; thence down through hole in lower
 end of needle-bar; thence from front  to back. through needle-
 eye, leaving a few inches extended.

    Place shuttle in its carrier, and holding end of upper thread
 loosely by the left hand, turn fly-wheel once around, when the
 two threads will have become locked, and can be drawn through
 the hole in needle-plate by drawing thread in left hand upward.
 Pass the two thread ends back from you.  Put the slides into
 their places over the shuttle.  Turn the fly-wheel until the needle
 is  raised to  the highest  point, then put the goods under the
 presser-foot, and drop it down.
View original page 10Page 11 · Read text
Regulate Tension

  of upper thread by turning the tension or thumb-screw to the
  right. until the thread seems to draw through it with about the
  same  tenacity as  it  did from  the shuttle, for  the purpose  of
  making a  stitch alike on both  sides.
      If the under thread  lies straight, or is not drawn sufficiently
ʼ  into  the goods. turn the tension-screw more to  the right.   If
  such is the case with the upper thread, turn to the left. or increase
  shuttle tension.
     For nllordinary work it is sufficient to change only the tension
  of  the  upper  thread.   If the shuttle-thread draws  easily and
  smoothly, but with n firm  feeling.  it  is probably right, _and the
   stitch should be perfected by the upper tension.
      Soft and  thin goods require but  little tension; but on  thick
  and heavy goods the tension should be heavier.
     Proper adjustment of the tension is one of the most import-
  ant requisites for neat stitching.


                 Get Required Length of Stitch

  by sliding the thumb-screw on the front of the upright arm;
  unfasten the screw by turning it to the left; and slide it upwards
  for a longer. and downward for u shorter stitch; turn the thumb-
  screw up firmly, so it will not jar loose while the machine is in
  motion.

    You can now proceed to sew, remembering that practice is
  necessary for performing these instructions properly.


                    Remove the Work

  when the needle is out of the goods, and the presser-foot raised.
  drawing  it from you after pulling the upper thread out two or
  three inches.
View original page 11Page 12 · Read text
DIFFICULTIES WHICH LEARNERS MOST FREQUENTLY

                   ENCOUNTER.


   BREAKING OF THE UPPER THREAD MAY   liF. CAUSED—

By the machine being wrongly threaded  ;
By the upper tensions being too tight;
By the needle being too small for the thread  :
By the needle being set the wrong side out. or set crooked.


   BREAKING OF THE LOWER THREAD MAY  BE CAUSED—

By the shuttle being wrongly threaded  ;
By the tension being too tight;
By the bobbin being wound too full, so as not to revolve freely  ;
By a sharp edge in the shuttle.


   “SKIPPED STITCHES" ARE CAUSED—

By the needle being set too low, or bent away from the shuttle-
    race, or by  the accumulation  of  lint or  oil  in  the  holes
   through which the needle passes. so as to prevent  it throwing
        - a regular and perfect loop.
View original page 12Page 13 · Read text
HINTS TO OPERATORS.


    The pressure on the foot is presumed to be right for ordinary
  sewing. but can be graduated by the screw at the top of  the
  presser-bnr, turning  it  to the right or downward for more pres-
  sure, and to the  left or upward for less pressure, and regulated
 according to thickness of goods.  Be careful not to turn  it so
 far up as to leave too  little pressure, or so far down as  to cut
  thin goods.

   Do not pull the work, as. by so doing. the needle is liable to
 be bent or broken, and the stitch mnde irregular.

    Never run the machine without cloth between foot and feed,
 or you will scratch the foot, and cause your work to drag.

    Never run the machine with the shuttle in its carrier, unless
 the slides are tightly in their places.

    See that needles have good points, and  are  straight.  Use
 sizes adapted to thread as per list below.

   The needles furnished with the Eldredge Machine are of  a.
 superior quality. We advise the use of needles purchased from
 the Company.  These needles are numbered by  in new  gauge,
and should be used as follows  :

   No. 1, with finer than No. 200 Cotton Thread.
   No. 2. with No. 150 to No. 200 Thread.
   No. 3.  “    “  100   “    140    "
   No. 4,  “    “   70   “    90    "
   No. 5,   “    “   40   "     00    “
   No. 6, with coarser than No. 40 Cotton. and with Nos. 80  to
100 Linen Thread.
View original page 13Page 14 · Read text
The above list is a safe one to follow, though with'good ma-
terial and experience an operator may use a size finer needle.
Uneven. inferior, or wiry thread. requires a coarse needle.
    Sizes of silk vary so much that we only suggest judging which
letters compare with the above standard of thread, and using
corresponding needles.

   Loop stitches sometimes occur from using needles too fine
for the thread;  but generally from the thread feeding of? too
freely. which is remedied by retarding the thread.   If the upper
thread loops, increase the upper tension;  if the lower, increase
the shuttle tension.  Looping with  silk and linen  is caused by
the thread catching on the point of the needle.  To prevent  it,
smooth oil the point of needle with a fine hone.

    If you have too much tention on both threads.  it  will  be
shown by the constant breaking of the upper thread. or the
gathering of the work.

    If you wish to sew with  a. View to ravel easily leave the upper
 tension so light that the under thread will not be drawn into the
 goods, but lie straight.

   For sewing flannel or “bias" seams, use a fine stitch and as
 light  it tension as possible, so as to leave the thread loose enough
 to stand the strain of stretching the goods.
   Use your own judgment about sizes of thread, but you  will
 find that machine stitching can be done as well and as strongly
 with finer sizes than can be used in hand sewing.

    If you prefer to use a size finer thread for the under one,
 there is no objection.

   The treadle in the stand may wear loose so as to rattle.  In
 such a case, loosen the cone on the right hand of the treadle.
View original page 14Page 15 · Read text
13

drive it up close to the treadle, and refasten  it.   If this brings
the pitman out of perpendicular, loosen the  left instead of the
right cone, as the machine runs easier when the pitman  is per-
pendlcular.

    If the belt becomes loose. remove one end from the belt-hook.
cut all about half an inch, punch a new hole, and replace the
hook.


   Always use the finest lubricating  oil.  In case the machine
has been neglected and become gummed,  use paraffin:  oil, or
benzine, until the machine is again clean; but always endeavor
to keep the machine so clean that it will not become gummed or
clogged.

   Of all things, BE SURF. that the machine  is kept cleaned and
well oiled.

    Oil, thread. needles, attachments and other findings, of quali-
ties best adapted to the machine, can be procured at the Office of
the Company. 199 State. cor. Adams St., Chicago, Ill., and should
be kept by all local agents, as the successful working of a sewing
machine often depends upon the quality of these small articles.

                 HEWING.

    Lift the presser-bar to  its highest point with the  left hand,
then raise the lifter as high as it will go with the right hand,  to
support the bar in this position  ; turn the small screw that holds
the foot in its place towards you once around and  slip the foot
05 downward.  Put the hemmer on in place of foot, being sure
that the needle will pass through center of hole in hemmer. and
tighten the screw you loosened.  Clip off the right hand comer
of the cloth. so that it will get the roll more naturally  ; turn up
the edge of the cloth about one-fourth  01 an inch. insert  it  in
the scroll or mOuth of the hemmer, and push or draw  it along
View original page 15Page 16 · Read text
M

with any pointed instrument until the needle will enter it.  Now
let down the presser-bar. and hold the edge of thegoods between
the thumb and forefinger of the  left hand  while  it  is being
hemmed. keeping the scroll of the hemmer just  fall, as  it will
leave a raw edge if there is too much or not enough turned in.

    In hemming a curve, draw gently on the edge being hemmed,
resisting the feed. and guide the work carefully.

                     FEELING.

    Let one edge of the cloth project about one-fourth of an inch
beyond the other (or place the edges together, and stitch about
one-fourth of an inch from the edge, then lrim off the under edge
near  to the seam). open the work and turn the wire edge over
the narrow one—then  slip  this edge into the hemmer, which
turns the raw edge under, and will operate as in hemming.

   When both hemming and felling, practice is necessary before
a neat seam can‘be produced, but this variety of work is a special
merit of our machine.

   The stitch may be laid close to the edge. or away from  it, by
setting the hemmer so the needle does not pass exactly through
the center of the needle-hole.

    WIDE EEMMING, with the “Diamond" Hammers.

   Place the hemmer you desire to use as close  to the needle as
the foot will allow  it to come. and in such a position that the
edge of the cloth. folded for hemming, will be on a line with the
needle, and so ready to he stitched down.  Secure the hemmer in
place by means of a clamp and gauge-screw, and proceed as  in
ordinary hemming.

                       QUILTING.
   To adjust the quilter, put it through the small hole in lower
end of presser-bar, with the indicator or flat end,  to the right.
View original page 16Page 17 · Read text
15

 Drop the indicator so that when  the foot  is down it will just
  touch the cloth. and be at the same distance from the needle as
 you wish the rows of stitching to be apart.  Tighten the set-
 screw in back of presser-bar.  Having made the first row the
 desired distance from the edge. place the work so that that row
  will  be under and  in a line with the lower edge of indicator,
 which will form a guide for each successive row of stitching; the
 row last made always passing under and in a line with the indi-
 cator while stitching the next.


                       OOBDING.

    Put the corder on in place of pressel-foot.  Thread the cord
 through small hole in left end of corder, thence through tube or
 cord~guide,  letting two or three inches remain out.  After the
 cloth has been prepared, either by creasing or stitching a seam.
 place the cloth one thickness over and the other under the cord-
 guide. and the whole under corder-foot.  Draw the cloth to the
 left till fold touches end of corder-guide. then let down the foot.
 and  stitch  as usual. keeping the goods well  to the  left while
 stitching.  Should the needle pass through the cord. or too far
 from  it, change the position of corder as may be necessary, to
 right or left.


   GATHERING AND SEWING ON AT THE SAME TIME.

   Attach the miller to the machine in the place of the presser-
foot, and put the hook at the end of its working-lever, over  the
needle set-screw.  Place the band under the foot of the miller
and upon the needle-plate. and the piece to be ruflled on the steel
plate of the rufller.  Hold the lower cloth gently by the thumb
and fingers of the left hand. so that the upper cloth shall be car-
ried forward by  the  rufiler-feed  faster  than  the  lower.  The
amount of fullness can be regulated by the horizontal lever and
ratchet on the ruflier, and by shortening  the stitch.
View original page 17Page 18 · Read text
16

     meme, with the “Johnston"  Tucker.

   Attach the tucker to the machine with gauge-screw.  Coa-
nect the tucker to the needle with  the small hook on the arm.
The figures on the gauge show the width of the tack.  The fig.
ures on the marker show the width of space.  To make tucks
just meet, of any desired width, place the gauge and marker so
that the indicator will point  to the same figure on both marker
and gauge.  The space can be regulated by moving the marker
to the left the same distance as the desired space.  For example,
to make a V8 inch tuck, without any space.  let indicator point
to the figures yfi on both marker and gauge.  Then if a K inch
space is desired, move the marker to the left }4 of an inch. indi-
cator will then point  to  34  inch on marker.  In commencing,
fold the cloth to be tucked and place it between the upper and
lower  plates  of  the  tucker  close  to the gauge;  after sewing
 this, fold the cloth at the mark and proceed as before.
   These directions  will make a tuck of  practical  width and
 leave no space between the tuck.  To obtain that, move the
 main plate to the  left as far as the distance you wish to leave
 between your tucks.

                 To Make Narrow Tacks.

   The cloth gauge is made in two parts, and to make a narrow
 tuck, slide the back portion of the cloth gauge back so that the
 front portion of the gauge will pass in front of the presser-foot
 and nearly on a line with the needle.  This  will enable  the
 operator to make tucks one-eighth of an inch wide.


    For the numerous special attachments, of very  little or no
 value. with which  the market  is flooded, instructions are gen-
 erally printed  for  distribution  with each  article.  We advise
 our customers  to  deal in and  use  only  the attachments we
 have named.
View original page 18Page 19 · Read text
thangaining                 market.
 is.         rapidly        the

     in
     more ELDREDGE                 Machine
The             popularity any
View original page 19Related documents and language editions
EldredgePDF
Eldredge B Long-Shuttle
User manual
44 pages · EnglishRead →
EldredgePDF
Eldredge Improved Rotary B
User manual
40 pages · EnglishRead →
EldredgePDF
Eldredge Two-Spool (16)
User manual
13 pages · EnglishRead →
EldredgePDF
Eldredge Two-Spool (25)
User manual
15 pages · EnglishRead →
Montgomery WardPDF
Montgomery Ward Damascus Vibrating Shuttle
User manual
14 pages · EnglishRead →
NationalPDF
National Regal Paveway Electric
User manual
1 pages · EnglishRead →
Western ElectricPDF
Western Electric Number 2 Portable
User manual
44 pages · EnglishRead →
From the ISMACS International. Original publisher and archive notices are retained.
Check the model and edition against your equipment.
PDF verified 2026-10-11.