Sewing machines
Eldredge Two-Spool (16) — User manual
User manual for Eldredge Two-Spool (16). 13 pages in English. Read the original PDF, download or print a copy without registration.
13 pagesEnglish3.0 MB PDF
Loading your manual…Open PDF directly
Document details
- Brand
- Eldredge
- Model / document
- Eldredge Two-Spool (16)
- Document type
- User manual
- Language
- English
- Pages
- 13
- File size
- 3.0 MB
- Category
- Sewing machines
- Document date
- Not specified in catalog
Search available document text
Find a term, then jump to its page in the original PDF. Image-only pages may not be searchable; check the PDF for exact wording and diagrams.
Page 2 · Read text
0111166 TUE FACE PLAT! PAI'I‘S
            (See figure 1]
    OIL lace plutc puns,  it  is hwy     to remove  the sled  face  plate by
     removing  tho knurled thumb screw
nut the to  of the plate. (See letter “B",
Glut. 3).    urn lmnd whtel  until nod].
bar  in it highest pmnl and  oil parts in-
dicated b  number, as follows:—
    Nol  A—Tako-up Bearing Stud.
     No. O—lec—up Roll Slot.
    No.  lo—l'ppv—r  end  of  Needle Bar
Driving Pitmln.
    No.  ll—Imwfl'  end  of  Nm‘dlo  Bar
Driving Pitmnn.      ‘            ‘
     No. 12~-ancr end  of Noodle  Bar.
    No. Iii—(lib Pin.
    Do  not  oil  too  liberally.  or  the  oil
will drip down and mil the goods.   After
ailing, wipe off all nu  rflumu  oil and  rt-
 lncc  face.  plate.  01  TH' MACHINE
 VERY DAY YOlT l'SE  l'     .                             '


                              (“LING THE HOOK IACI
                                               (See figure 3)
              T NEshownnrcompuxyingthe spool illustrationcan con
                                               open, to permit. oiling of the
                                                {109k rape. full dfmfitfinsl'or “be
                                      wing given on  t w o omn                    .
                                 A hrr oiling these  urea ”(7m                                        xhrrtmg to an,   "it that the
                                         Spool  I "an Cour ts cloud.
                                                             If the Spool  Cue  Cover
                                       work!  loose  and  will  not. gay
                                              tightly closed. insert u‘fl' drug                                                       in slot in cow-r. (See fixma,in                                           page) and expand the dot ,~.-
                                              ritnlly to cause a tight.
View original page 2Page 6 · Read text
THE AUTOMATIC TENSION
T HEas Automaticit  is entirelyTensionoelf-nrting,is a mostrequiringimportantno nttr'ntionfeature orof adjustmentthis machine,by
      the operator. regardless of the nature of the fabric or of the size or kind
of thread used   This machine, before leaving the factory, is lea-ted on a very
wide range of thread and fabric and under all ortlinnry conditions of family
sewin   .  Absolutely no adjustment of the tensions is roquirwl for this work.
      lf'for manufacturing or special work of any kiml. it is (lmirable to alter
the tensions, the upper tension can he adjusted in the following manner:—
Turn the knurled thumb piece on the tension diac"T". u‘figure ti, page ti) toward
you to tighten the tension, or to the left, or from you. to (it-from“! the ten-
Elfin.
     Tension on the s       l cnae can also be adjusted, but rarely,  if ever,  is
this necessary.  To mac this tension, turn the screw No. 4 (figure  10,
page 8) to the right to increase, or to'thc left to decremw tension.
    When tensions are. properly adjusted the stitch should look in center of
goods thus:


    When uppvr tension is too tight, the app" thread will lay  tint on lspprr
aide of goods and stitch appear thus:


   When upper tension it too loose, the lower thread will lay flat. on under
side of goods and stitch will appear thus:


                                                                    I

              TEE STITCH REGULATOR

                                                                                                              Figure 13
                                                    will“? one of tliengrincipnl features of this machine  is the saving  on
                                                                                                 time used in wi   ng bobbins on other machines, it may hap en that
                                                                                                          the operator will have 0   one spool or part. of a spool of t read in
                                                                                                the house.     f such is the can.   tilts an em ty spool that will fit into the
                                                                                                  spool case (size 50 spool or smaller) and win  onto it b  means of the Auto-
                                                                                            matic Spool Winder, the quantity of thread  on may  esire to use,      ore
                                                                                                          startin  to wind thread, release the hand whee  . by turning the knurled thumb
                                                                                                      piece (otter "1" future  13) one half turn toward you.   This throws th-
                            figure 12                                                machine out of gear.  Then place  full spool on spool pin. as illustrated
                                                                                    Next take the empty spool in the left hand and with the ri ht hand, wrap
                                                                                           _1,  the ma-                       of the spool winder. using care that the thread runs on the under side of theT BEatitehu.numbersByon movingthe indextheplatestitchfromregulator"1" tofrom"0" youindicateto No.long and short                   a few strands of the thread around this spooL Then place apoo on the spindle
     chinewill new live stitches to the inch, while at No. 0, it will sew forty                       spool, an illustrated.   Raise the spool winder until the  ulley comes in con-
stitches to the inch.  This is a wider range than on‘ any other machine.                      tact with the belt! then start the tremlle and proce    to wind spool.   If
You may sew any desired length stitch h  mow    this stitch regulator to                  you wish to sew with thread that is coarser than No. 50. you can easily do
the    int on scale to suit requirements.    he reg" ator automatically lockq                    so by winding the same onto an empty No. 50 spool, following instructions
itself“; all points.                                                                               as given above.
                                              to                                                                                                                           ll
View original page 6Page 7 · Read text
INSTRUCTIONS FOR EMBROIDERING                                   TO RAISE (H! LOWER Till: FEED
                            (See figure 14)

   .\'l'l'la\L  Ult  l'l-ZNNAN'I’ WORK may   ln-
    made by using full sized wool xuphyr yarn
     or three or (our  (‘Olurs  nl’  nlztrnim: rutton-
in place of the lower  thrt-ml,  tumu-r  thruzul  as
usual).   In order to llo this work without chang-
ing  either  tension  of  the   llllll'llllll‘,  m- rumm-
mend  winding  tlu- yarn on    :i    .\'n. 50 empty
spool.  Place this spool on the spun] “lull"? and
wind the yarn on the spool in m-mnlum-u with in-
structions mt  page  11.  To  thrmtl   thn'  ”null
case with this zephyr yum. take  lllt‘ «use in tha-
left hand and the spool in the right   llllll’l.   lu-
sert the end of the yarn otttwnrvl  lrnln  the  in~
side of cast! through the slot. (No.   1  Figure 10»
page 8) across the outside of man mu] over (not
under) the tension spring, {See figurv   l l. page 12}                                                                      Figure 15
then downward from  the  outsi-lu  of  the  ease
                                                              RE feed  is attached to feed bar by tut-ans of m-rew “J" (figure 15).   Inthrough the  hole, (No.  5, figure H;  and bring                                 T  order to  rttise or lower the  lt‘l‘tl, first  raise. the  rexwr loot so thzt. it
this end out again from the inside of the came                                                                  will stand free of the feed.  Then loosen screw “.l  '. which will allow the
through  the  hole.  (No,  6,  figure  ll)  leaving                                                    teed to be missed or lowerml as desimlr  To determine  if fun-d  u; at pro er
About three inrhm of thread  projt-c-ting. so that                                                    height, turn hand whcvl until the take-up is at highest point.  With the ta 1'-
                                                                                  up standing  in  this    sition, the feed points should protrude through thethe upper  thrt'atl  t-an pick   it  up.   {Important                                                                                                  needle plate just the ength of these pointx.Do  not  plan-r  spool  in me   until  yvu  have
threaded nut  ru  rtlmre  infirm-1rd.)   Be  sure
                                                                       THE BOOK POINT AND “00K RACEthat the yarn  is on  the outrr mic  of  trunk)“
spring,  as  illustrated.   ll  then-  it  any  slack                                                                       Figure Is
yarn,  it should be wound up on the spool. Then
put spool in cam, using care to son that none of
this yarn  is wrapped around the spindle,  (Let-
ter "  "', figure  10, page 8) in the center  ol’ the
spool  case,  onto  which  the  spool  qlipe.  You       figure 14
may now pmeeed to embroider. the name in in
doing regular flowing, setting the stitch regulator
for any length stitch to suit the clue of work desired.  The letters or pattern
should be stamped with a tracing wheel on the wrong aide of the goods,
which, in doing thin work, is the upper side of the goods, the design in yarn
appearing on the under side, as the machine operatos.

                                             THE above illustration shown the tlifl't'rcnt parts of the Look mechauiflm,
                                                                                                      not mfxemhled.     ll“ the hook rxu-u- is taken out of the hook, he aura to
                                                                                              wipe it clean nml put n_lew drops of oil into it below “rowing on Lin
                                                                                       hook pltttv to fasten the race In place.

                                                                                                                                                                               13
View original page 7Related documents and language editions
EldredgePDF
Eldredge
User manual
20 pages · EnglishRead →
EldredgePDF
Eldredge B Long-Shuttle
User manual
44 pages · EnglishRead →
EldredgePDF
Eldredge Improved Rotary B
User manual
40 pages · EnglishRead →
EldredgePDF
Eldredge Two-Spool (25)
User manual
15 pages · EnglishRead →
Montgomery WardPDF
Montgomery Ward Damascus Vibrating Shuttle
User manual
14 pages · EnglishRead →
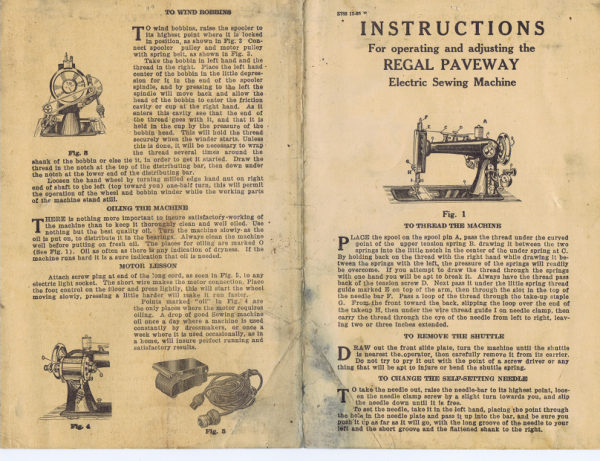
NationalPDF
National Regal Paveway Electric
User manual
1 pages · EnglishRead →
Western ElectricPDF
Western Electric Number 2 Portable
User manual
44 pages · EnglishRead →
From the ISMACS International. Original publisher and archive notices are retained.
Check the model and edition against your equipment.
PDF verified 2026-10-11.