Sewing machines
Western Electric Number 2 Portable — User manual
User manual for Western Electric Number 2 Portable. 44 pages in English. Read the original PDF, download or print a copy without registration.
44 pagesEnglish10.3 MB PDF
Loading your manual…Open PDF directly
Document details
- Brand
- Western Electric
- Model / document
- Western Electric Number 2 Portable
- Document type
- User manual
- Language
- English
- Pages
- 44
- File size
- 10.3 MB
- Category
- Sewing machines
- Document date
- Not specified in catalog
Search available document text
Find a term, then jump to its page in the original PDF. Image-only pages may not be searchable; check the PDF for exact wording and diagrams.
Page 1 · Read text
Western Electric

             No. 2

Portable Sewing Machine

  W


      Rotary  Instruction Book
View original page 1Page 2 · Read text
C’.—":t IZ


          GUARANTEE
      Western Electric
           Portable Sewing Machine


                   E hereby warrant  this Sewing Machine  to
                                stand  the wear  incident  to  family use  for          00
                                a period of FIVE YEARS. from the date
                      of purchase. during which time we agree  to replace
                            all defective parts free of charge  (excepting only the
                     breakage of needles and shuttles).

                    This machine and motor have been carefully inspected
                   and  adjusted and  there  are no  defects  in  material
                        or workmanship.   Natural wear and tear  is not con-
                       sidercd a defect in material or workmanship.

                    This guarantee  is not valid unless you  fill in and mail
                          to us the attached postcard.                                                                      __.J
View original page 2Page 3 · Read text
Introduction

    HIS  is  to show you how  to use the Western
        Electric Portable Sewing Machine.    It  is  to
          tell you new things about your sewing which
will  interest you.  too. and which will help you  get
the best out of your machine.

  Read  it all.  it will help you.

  Many  times  just  a  simple  thing  will  cause you
trouble.  You can avoid  this by thoroughly knowing
your machine before you  start to use  it.  There  is a
photograph of the machine on page  3.  Study  it.    It
will familiarize you with each part.

   Each machine  is  inspected,  tested and well  oiled
before   it  leaves  the  factory.   During   its  shipping.
though,  dust  and  dirt  sometimes  collect.  especially
around the  oil holes.  30 clean  it thoroughly with a
soft cloth before you start to sew.


                          “Sewing:  ldfllclcucy” gives you the
                             practical hints that make your clothes
                        unumml.  Notice the enclosed Folder.
View original page 3Page 4 · Read text
j
                                   i    f;                ‘
           General Instructions

       EFORE the machine is used clean and oil it thor-
            oughly according to instructions on page 5.
            The needle  is important.   Study  the  lesson on page
        IO.    It shows you just how  to  set your needle.  And when
      you need new ones consult the chart on page  ll  for the  size
      you should buy.   It gives detailed information.

      Thread the machine as shown in the diagram on page 9.   in-
       correct threading will cause the thread to break or loop.

      Thread the bobbin case as shown on pages 7 and 8.  Do not
      allow dirt or dust to collect under the spring on the bobbin case.
       as  this will give you an uneven tension and will spoil the ap-
      pearance of your  stitch.

      Unless  there  is cloth between, do not  leave  the  presser  foot
     down on the feed while the machine  is running. as this injures
       both.

     Read the motor lesson on page 4 carefully.    It will show you
     how  to  start the machine and how  to control  it.

    Know your attachments.

      This machine  is equipped with a  full set of attachments. They
       will help you to do  all kinds of family sewing.  The lessons
      on  pages  16  to 34  will  show you  the  best  use  for  each
      attachment.
    Do not attempt to change any of the adjustments on this sewing
      machine.  You will only make trouble for yourself  if you do.
    Do not turn any of the screws to see what they control.  The
      machine has been properly adjusted at the factory and the ad-
      justments should not be interfered with.   If you have trouble
     and cannot determine the remedy from this book. take the ques-
       tion up with the dealer who sold you the machine.   If  this  is
       not convenient, write us. and we will be glad to advise you.
"Sewing “men-nu" given you the
practical  lillltn that make your rlotIu-n                                   PAGE Two
unuuunl.  Notice the enclosed  l-‘older.
View original page 4Page 6 · Read text
,,>       _:‘:    _

                                                                                                              195/47}!  1,“ka   ,'                                                                                                                       "." —    j.:_


     l-‘lg'.  l.—ʼI'l|o  nmolilne with motor
                ululer nrm.
                                                        Fitz.  2.—'l‘lw  lmu-lihu-  wltli motor
                                                                In  posltlon.

                       Motor Lesson
                             To place  the  motor  in working
                                             position.  grasp  the body  part  and
                                     swing   it around  so  that  the  cork—
                                 bound pulley  is against the machine
                                  hand wheel.  Fig. 2.
                                   \Vhen  the motor  is not  in use  it
                                                             is swung back into position under the
                                     arm. as shown in Fig.  l.
                                     Attach the screw plug at the end
            |"|l:ʼ-  3.—'l'llo  l'oot  control.        Of  tllc long cord. as seen  in Fig.  3.
                                              to any  electric  light socket and the
smaller plug on  the  shorter cord  to  the two prongs protruding from the
wood base of the machine.   Place the foot control on the floor and press
lightly;  this will  start the wheel running slowly.   Pressing a  little harder
will make  it go  faster.  To reverse the direction  in which the motor  is to
run, remove the thumb screw (Fig. 2) and raise or lower the reversing lever
as far as  it will go.  Then replace the thumb screw.
      Points    l and 2 on the diagram are the only places where the motor
requires  oiling.  A drop of good sewing machine  oil once a day where
the machine  is used constantly by dressmakers. seamstresses. etc.. or once a
week where  it  is used occasionally. as in the home. will assure perfect run-
ning and satisfactory results.

     Right above the cork pulley will he found a nickel safety plate. which,
when locked on the wheel of the machine. prevents the machine from run-
ning.  This  is a good safety precaution.
“Sewing:  l-lflleleney" given you the
prnetlenl hlntn tlmt nmke your clothes                                mcm-‘uuu
unusual.  Notice the enclosed  Folder.
View original page 6Page 7 · Read text
via:-


                                                       F“                                       vul‘f"w~’“':f(—,                                             L.:-.Lil:
                                                          Hester/r Elegy/2“   h


                              The arrows show (he  oll  holes.

                To Oil the Machine
             To  run your sewing machine properly. and  to have   it wear  well.
            you must thoroughly  oil   it occasionally.   If the machine  is  in continuous
                use.   it should be  oiled every day.   \Vith moderate  use. only occasional
                oiling  is necessary.  The above figure shows you  all the places you must
                    oil.  One drop at each point  is sufficient.
                       If the machine seems to run heavily or  if  it makes undue noise after
              standing  for some  time, use a  little kerosene  in  all  oiling places. run the
             machine rapidly for a few minutes, wipe clean and then  oil with best sew-
              ing machine oil.
                 Never use cheap  oil.    It will gum your machine and  injure  rather
              than lubricate the parts.    It  is safer  to purchase your  oil at a sewing ma-
              chine store or sewing machine department.   Occasionally. when thoroughly
              cleaning your machine. loosen  it from the bed by pressing on the base re-
               leasing screw. shownin the figure above.  Then turn the machine over back
            and oil all working parts.
                  Alter  oiling  the machine.  stitch a yard  or  so on  a  piece of waste
               material before  starting to sew on a garment.   This  will prevent an  oily
              thread from being worked  in.
                                                       “Sen-Ina:  l‘ melt-rue)" glsex you the                                l'.\Gl-: m1;                                practical hints that make your clothes
                                                   unnurml.  Notice the enclosed  Folder.
View original page 7Page 9 · Read text
Removing Bobbin Case


                                      With  the  left hand swing

                                         back  the  bobbin  case  cover.

                                                 as shown in Fig.  I.  This will
                                           allow you to insert your hand

                                                        in order to remove the case.

    l-‘lc’.  l—lluchlnc  with  bobbin  cnne
               cover open.


  Grasp the bobbin case

with the thumb and fin-

ger of the  left hand. as
shown  in Fig.  2.  to  re-

move   it from  the  case.


                                                                l-‘lg'. 2—liemovlng the bobbin cane.


                                "Sewing  Elllelency” given you the
moi; sea-ex                               prnetlcul hints that make your clothes
                                     unusual.  Notice the enclosed Folder.
View original page 9Page 10 · Read text
Threading the Bobbin Case


                              Place the bobbin  in the case. making sure

                                  that the thread runs in the same direction as

                                  that  shown   in   the  accompanying  figure.

                        Hold the bobbin case  in the  left hand. and

                             with the  right draw  the thread through  slot
                        A,  under  the  spring  and  up  through  the
                              forked ends of the spring. between C and D.
   Flu. l—Tlic bobbin                  B shows tension regulating screw.    and bobbln case.


          Replacing Bobbin Case


  Grasp  the bobbin
case with  the thumb
and finger.  as shown
in Fig. 2.  The hole
C  will  then  be  di-
rectly   u n d e r   the
needle.    Push   the
bobbin  case  as  far
as  it will go. so you
can see that the bob-
bin  at  point marked
L  fits  close  to  the
inner  wall   of   the
bobbin case.                             Flux. 2—lnucrtlng bobbin  in case.


“Sewing Emclcncy" given you the
practical blntn that  null-cc. your clothes                                  PAGE Emil!"
unusual.  Notice the cucloucd Folder.
View original page 10Page 11 · Read text
Threading the Machine


     The  maehlae  threaded.  ahowlm.r  the  dlflerent  thread  golden.


     Place thread on spool pin A. carry  it through guide B and entirely
around  the  tension C.   Bring  the  thread down.  then  under  guide D.

making sure  that  the thread  passes through  the  little spring.   Carry  the
thread up. through take-up E. threading from the right to the  left.  Then
bring  it dowa and through guide F and G into needle H.


                                    "Sewing: Emeleney” given you the
mar: xxx}:                                practical hints that make. your clothe-u
                                          liaasunl.  Notice the enclosed Folder.
View original page 11Page 12 · Read text
Setting the Needle


                                         FLAT
                         LONG
                            GROOVE

                                       SHORT
                                      GROOVE

           Needle: needle bar and  needle: needle clamp ”crew.


     Raise  the  needle bar  to  its  highest  point.  then  loosen  the  needle
clamp screw A  with  the  large screw  driver which comes  in  the box of
attachments.  Take  the needle between  the thumb and  forefinger of  the
left hand. pass the shank up  into the  slot oi the needle bar B. with  the
flat side of the shank toward or against the needle bar.  until the end of
the shank  sets firmly against the stop  pin.  Then  turn  the needle clamp
screw  tight with the screw driver.


    When purchasing new  needles measure them with  the above  figure
to make sure they are  the proper  length.   Select  the proper  size needle
                                                                                                                                                 4&—by using the table on the next page.  The thread should match the texture
of the material you  are sewing with  as  nearly  as  possible.   There  is  a
table of  sizes on  next page.    If  the  store which  sold you your sewing
machine cannot iurnish you with new needles, write to the \Vestem Electric
house nearest you.

"Sewing  lsllliclency” gives you the
                                                                                                                                                                                 ‘rr:.\'practical hintn that make. your clothes                           mos
nnnnual.  Notice the enclosed Folder.
View original page 12Page 13 · Read text
Sizes of Needles and Thread

      Sizes of                                                                                                                                                                                                                                                                                                                                                                                                                                                                                                                                                                                                 | Sizes of Silk and                           Class of Materials     Needles                                           Cotton

                Very fine silk or chiffon              120-200 cotton
                                                              00 silk
                  Fine cotton goods, organdie lawn   90-110 cotton
                  and silk                                   0 silk

                    Shirting,   sheeting,   muslin,    all    70- 80 cotton
                      classes  of  household  linen  ant’   A-B silk
                  underwear

               Heavy muslin.  Woolen goods        40- 60 cotton
                                                C silk

                   Ticking, woolen goods, boys’ cloth     30- 36 cotton
                  mg, coats, etc.

         7-8        Coarse  work.   Heavy   stitching     0-  10 cotton
                    only

        Needles for Western Electric
      No. 2 Portable Sewing Machine

             Any of the following will fit:
Acme             ('omus            Eudora           Household Queen
All-murh Dover        ( ‘ottnrxe            Excelsior  I!  ll        ll oust-wile
Aloha                          ( ‘rcncent              l'lxpert            iiown rd
Always Itcady       ‘onrler Journal   Falcon             limlnonAlma                (t'rown            Family Friend
Alva                              Fa mou a                       I X  I;
Amazon          Damascus       Farm & Ranch      lilallaAmerican  No. 9   Dna a t lens             I-‘aultleiot           Imperial
American  l'nion   Decorah l'osten    Favorite          Improved llelvi-
Arlington         Defender               l-‘lcld                dere
Asirlnnd             Della ace           Fireside          Improved  l'll-Atchlnon          Dc-Soto                                                       dredge  Ii
Auutln Special     Detroit           Galloway         Improved   l-‘anlt-
                  Dixon              (layoxo                 lens
Banner            Druid            Germanin         Improved MelvilleBartlett          Duplex              (loldea  I-Inrzie     Improved Seam-
Ileaut)’                                  (loldnmit h            stressllelvlderc                       l-l &  ll  ilall Ilcar-  (Sold NIcdnl        invader
lllade                     Ina:             Goodrich           Invincible
llonlta            Edge-mere                (l rand            Iowallrunmvick           I-Ildorado
ilnrdlck               l-lldrcdn‘e  ll.        liackett                                                        Jewell                  Eldredge Rotary   iiarrin
(‘entnry                N. S.             liappy  Ilonte
(‘halicage          Electric (fity       Hazel            Kantauk
(‘hamplon         Right             Helping "arid     Kernvood
(‘lnyton           Elmira             lilhlmrd            iieystoae
(‘llrnax                I'limo             Hickory           Ki rk wood
(‘lchr Leaf           I‘llvla                Ilonle (‘omfort
(‘o-I.ce          E m p resn           llooue &  l-‘arm    La  iielle
(‘olumlria          Enterprise        ilome  I'rlde       Ln  Ilclle Special
(‘olllmlma          i'vaoy              ilonrcstcad        Lender
                                "Sewing  lolfllclency" given you the
l'A (1 it)  i’ll EV [LS                              practical hints that make your clothes
                                          nnlruaal.  hotice the enclosed Folder.
View original page 13Page 14 · Read text
Manchenter      New South        Proteus            Star
Ninjeutle        New Nterllutz                          Staun‘er
Mara           New Treanllrc    Quaker            SterlingMarshall-“bits   New Victor       Queen             Strange
Marvel            Niobc            Queen of the “’eut St. John
Maryland          Nonparcii                                      St. Paul
Manon            Northern Quccn    Rania-r           Sunflower‘lntchlesn          Noxuil               itczai              Superior“cl-rill                             Regina‘letcor                                            iteiiahlc           Temple.                      (lbioiiidland  ll                                           ileiiancc                   'l‘ri um ph                         (lid HomesteadMilwaukee                                              iii-public          11dende                 Olympia“luncupoiiu                       (irelzon             iicv-(l-Noc              'l‘u xcdn‘iomun                                                                        h (‘cntu ry                        (lrioic                       i’ leh-(‘o a          TwentictMonarch                              Rival                      (lritaniaMontgomery “’ard                                      Riverside          Vciox                 Our Lender & Co.                                           ltoyni  St. John     Victoria                  Oxford                               Ruby             Yiudex  ll
New Axe                              ltua Easy         "index SpecialNew t‘eutury     Pan-A mcrlca n                        VoloNew l'hampiou    I'avewa y          Scandinavian      VulcanNew (‘rowu         l'eerlcus         Schuuemuu &
New Empire       I'clham            Evans            \\'abaah
New England       Perfection:         Scamntrens         \\'altham
  Queen            l'ilgrimn            Sci-era               \\’are rl yNew  l-‘.ra            l'iouccr            Service              \\'ear “'eiiNew  Fireside       l'crfcct              Silent l'rluccua    “lantern  ElectricNew Florence     i'lymouth          Singer illuh firm   \\'hltchiil   llNew Goodrich      i'opular           Singer  \' S No.  I   \\'iuchcuter
New  ideal           l'ralrlc Q uccn     Sinoloo             \\'iuduor
New improved     i’remier            So Easy             \\'or|d'u  l-‘nlrNew chct t         l'rlnccau           Southwell         “Tight
N cw   .\l odel         l'rinecton         Spear Edge         \\'ycthNcw National        l‘ritzlan‘            Spicgci'n
N cw Royal         l'rogrens          Stanley            Zenith


            The Thread Cutter


                                           Loosen the smaller screw at
                                                  the back of the presser bar. so
                                                                                  it  will  allow  the  thread  cut-
                                                        ter  to be slipped  into position
                                           through  the  hole  in  the  bar.
                                  The  thread   cutter   will  be
                                          found in the small envelope in
                                                 the box of attachments.

                    'l‘h read  (.'utter.


"Sewing: Efficiency” given you the
practical hints that make your clothes                                PAGE ‘i'll'filA’F.
unusual.  Notice the enclosed Folder.
View original page 14Page 15 · Read text
To Regulate the Tensions
    An  important  feature  of  this machine  is  that   it has an  automatic
upper tension.    It requires  little or no regulating.   Before the machine  is
sent  out   it  is  tested  at  the  factory.   This  test  covers a wide  range of
thread and  fabric and includes  all  the ordinary conditions  that  the ma-
chine will be called on to meet.
                    No matter what kind of material you are
                                using. the thread should lock in the center. as
                        shown  in figure at  left.
                                   If  the under  tension   is  too  loose  or  the
                                                                                           .      .-,.   ._  .-—--    upper  tension  too  tight.  the  thread  will  lie
 ,_____,.                ,                                        _                 straight along  the surface of the  material. as
                        shown in figure at  left.
                                   If the under tension is too light or the upper
                                                                                                       .        thread  too  loose.  the thread  will  lie  straight
m.                   ,     1 m       «        along the under side of the material. as shown
                                   in figure at  left.ʼ
       It  is better to try and regulate your tension from the shuttle whenever
it  is necessary. as the upper tension  is automatic and  is properly adjusted.
However.  if you find  it necessary  to adjust the upper tension. loosen the
tension regulating screw  (see page 3) by turning  it to the right to tighten.
and to the left to loosen.
    The under tension  is governed by the spring.   (See Fig.  1. page 8.)
To adjust. loosen or tighten the screw.

  To Remove Knots of Thread from Upper or Lower
                      Tensions

    Many times when you are unable to make a perfect stitch you will
find that a knot of thread  is caught either in the upper or lower tension.
To remove a knot from the upper tension, force the disc plates. where the
thread  is  inserted.  far enough apart  to release or remove the  knot.  To
remove a knot of thread from the lower tension. loosen  the spring screw
 (see Fig.  |. page 8) and slightly raise the spring.
    The upper  tension can only be  regulated when  the  presser bar  is
down. as the tension  is released when the bar  is thrown up.  This allows
you to remove your work easily and with no danger of breaking the thread.

         To Regulate the Length of Stitch

                                                                                                                    |  to 0 indicate long and short    The numbers of the index plate from
stitches.  By moving the indicator from you  to No.   I.  the machine will
                                “Sewing  Elllclency” gives you the
mar; numggx                            practical hints; that make your clothes
                                      unuuual.  Notlee the enclosed Folder.
View original page 15Page 16 · Read text
sew 6 stitches to the inch; while  if you
                              move  it towards you to No. 0.  it will
                                sew 34 stitches to the inch.  You may
                                sew any desired length  stitch by mov-
                                       ing indicator  to  the point on  the scale
                                           to suit the length of stitch wanted. The
                                       indicator  automatically  locks  itself  at
                                                all  points. doing away with  fastening
                                    screws and  levers.
           Slltch  lmllcntor.

      To Regulate the Pressure on the Material
       In ordinary sewing  it  is seldom necessary  to change the pressure of
 the  presser  foot on  the  material.   In sewing  fine  silks.  chiffon  or  other
 delicate  fabrics.  lighten  the pressure by turning the presser bar screw up.
 (See figure on page 3.)    This releases the feed from the material and
preVents prints or roughness to appear on  fine materials.
    To increase the pressure when sewing heavy materials or over heavy
seams. turn this regulating screw down.

       To Sew on the Bias on Fine Materials
     Use a  short  stitch and  a  light tension on  the upper thread.  so  the
thread  is  left loose enough  in  the seam  to allow  the goods  to  stretch.  if
necessary.
             A Basting Stitch
     Use the longest stitch the machine will make and a loose upper ten-
sion.   This stitch can easily be pulled out.

             To Commence Sewing
     After the machine  is threaded up. pull up the under thread by turn-
ing the hand wheel  over with  the  right  hand.  while holding  the thread
with the  left hand.  Allow the needle to enter the needle hole to pick up
the under thread.  Both threads should then be pulled to the back of the
presser  foot.  Lower the presser bar after the cloth  is inserted. and begin
to sew.  regulating the speed with  the pressure of the  foot on  the motor
foot  control.
             To Remove the Work
     Stop the machine with  the thread take-up  at the highest point.  raise
the  presser bar and draw  the  fabric  back.   Pass  the  threads  over  the
"Scwlng  I-leiclcncy” gh‘cu ya a the
practical hlntu that make your clothes                              PAGE roostersununual.   .\otlee the encloned Folder.
View original page 16Page 17 · Read text
thread cutter and pull down gently to break them.   Leave the end of the
threads about three inches long. so the upper thread will not pull through
the eye of the needle when you start to sew again.

           To Avoid Breaking Needles
     See that the presser foot or attachments are securely fastened  to the
presser bar by means of the thumb screw and that the needle passes through
the center of the hole or  slot.  Do not sew heavy seams or thick goods
with too fine a needle.  Use the diagram on page    I   l  for the correct size
of needle and thread to correspond to materials.  Avoid pulling the work
while  stitching. merely guide the  cloth and  the  feed  will carry  it along.

          Causes of Upper Thread Breaking
    \thn the upper thread breaks  it may be caused by—
               lncorrect threading of machine;
             Tension too tight;
           Thread too coarse  for needle:
            Needle bent. blunt—pointed. or set incorrectly.

          Causes of Shuttle Thread Breaking
     This may be caused by incorrect threading of the shuttle case or too
tight a  tension.  Or  it may be because the bobbin  is wound too  full  to
revolve freely in the shuttle.

                   Skipping Stitches

    The needle may not be properly set;  it may be blunt or bent.  The
thread may be too heavy for the size of needle.  Needle may be too short.
                                                                                                              .
  importance of Learning to Operate the Attachments
    To make  dainty  trimmings. you  will  find you  must know  a  little
more than plain  stitching.  You must know how  to use  the attachments
which are a part of your machine.   Innumerable dainty  dress trimmings
can be made entirely by the use of these attachments.
       If you learn to operate your sewing machine. taking advantage of all
the labor-saving devices which are provided for you. you will be rewarded
by being able to do beautiful work.  You will find you can make many
of the exquisitely  finished  articles which you may  feel are  too expensive
to buy in the stores—things for either you or your children to wear; things
for the home—and  at a saving of from 40  to 70 cents a dollar on  the
store prices.
                                “Sewing Efliclcncy” given you the
mar: Flt-TEEN                             practical hints that make your clothes:
                                 unmmal.  Notice the enclosed  Folder.
View original page 17Page 18 · Read text
The Set of Attachments

    Do not make the mistake of neglecting to use the attachments which
are supplied with  this machine.   If you do. you  will  miss much of the
fun of your machine.  You will find them so simple to operate that with
a  little practice you will be able to use them all efficiently.

    You will be surprised with the amount of work you can accomplish
and  the amount of time you can save through  their  use.  You  will be
justified in taking all the time necessary to learn to operate them.

    When you have mastered  the  Ruffler. Tucker.  Binder. Hemmers.
etc.. you will feel less inclined to buy so many ready-made garments.  You
will be  far more apt  to do more home sewing—so many hours of hand
sewing will be saved.


“Sewing Eflleleney” given you the
prxlrtlcnl hints that mukc your clothes                                PAGE srxrrzrrs
uuunuul.  Notlce the enclosed Folder.
View original page 18Page 20 · Read text
The Foot Hemmer


                                         l-‘lrx. l—Foot hemmer hclnmlnlz.

    With  the presser bar  raised.  turn  the hand wheel  until  the needle
is at the highest point.  Remove the presser  foot by loosening screw  ring
in  the above  figure.  Then draw  the  foot  forward.   Substitute  the  foot
hemmer.  pushing   it  as  far on  the bar  as   it  will  go.  Then  tighten  the
screw  firmly.
     Beginning at the corner of the material where the hem  is to start. fold
over about one-eighth inch  for a distance of two inches.    Insert the cloth
in  the hemmer with  the  fold uppermost and  gently push   it back under
the needle.  Lower the presser bar. and after taking two or three stitches.
draw gently on  the ends of the thread  until the goods  is well under the
feed.   Guide the cloth with the right hand,  as shown  in Fig.  2. keeping
the hemmer scroll filled at  all times.    If too  little cloth feeds  in. hold the
material to the right.    If too much. guide the cloth to the  left.


                              Fig. 2—.\ nice hem.
"Sewing Emeiency” gives you the
practical hints that make your clothen                              PAGE arc-mus
unusual.  Notice the enclosed Folder.
View original page 20Page 21 · Read text
Hemming and Sewing on Lace


                      Foot hemmer flowing on  lace.


      Start the hem as described on page  l8.  When the hem  is running
well. stop the machine with the needle  at  the highest point and  raise the
presser bar  just enough  to  insert  the  lace  in  the  slot  at  the  right of the
hemmer.  see figure above.  Hold  the  lace with  the  right hand and  the
hem with the  left.

       if sewing on very fine  material.   it  is better  to  insert a  slip of paper
under the foot hemmer to prevent puckering.

    The hemmer   is  also  a  teller.  Sew  two  pieces  of  cloth  together
with the under edge projecting one-eighth  to one-quarter inch beyond the
upper edge.  Trim  the edges.  if necessary.  to make them  even.  Open
the work out flat and  fold the wider edge toward  the  left over the nar-
row edge. then pass the edge into the hemmer.  The material  is guided as
for ordinary hemming.   This  will be found a  most  satisfactory way  to
finish a seam.


                                "Sewing Emeleuey" given you the
mar:  .\'l.\'l.1‘l>;l-:.\'                            practical hlnts that make your clothes
                                          unllsual.  Notice the enclosed Folder.
View original page 21Page 22 · Read text
The Hemmer Set


                                     ilcnl mcr at work.

      This machine  is equipped with  a hemmer  set  consisting of  five  dif-
  ferent sizes.  Hems can be made seven-eighths. five-eighths. one-half. one-
 quarter or three-sixteenths of an inch in width.  You will find the hemmers
 on the rack of the attachment box.
       Substitute  the hemmer  for  the  presser  foot.   Fold over about  one-
 eighth  inch of  material  for  a  distance of about too  inches.    insert  the
 edge of the folded edge  in the hemmer. bringing  it up and over the spoon.
 as showa  in  figure  above.  Draw  the  cloth  back  until  the end  of  the
 crease  is well  in  the hemmer.  then draw   it forward with  the  right hand.
 so that the hem may be started directly on the edge.   Hold  the cloth as
 nearly  as possible  in a  straight  line when operating the hemmer.  How-
 ever.  if too  little cloth  feeds  in. guide to the right;  if too much, guide  to
 the  left.
                 To Hem Bias
    To hem a bias or a slightly curved edge.  it  is better to insert a piece
of paper under  the hemmer next  to  the  feed.  as  this  assists  the  cloth  to
 feed through without stretching.

              To Hem Table Linen
        It   is always  desirable  to  have  nice  table  linen hemmed by  hand.
But  the hemmer may be used  to  turn  the edge  of  the  linen  to make   it
ready  for the hand work.  Take the thread from the needle and run the
linen through the hemmer as you would  for ordinary hemming.  The hem
will then be perfectly turned and a great amount of time saved.
"Sewing  l'liliclcucy" glycn you the
practical hllltn     umkc your clothes                                                 l‘ACl; T\\‘l'i-\"n'lluuuunl.  Noticethatthe cncloxcd Folder.
View original page 22Page 23 · Read text
The Cutting Gauge and How to Use It

                                    The.  cutting gauge  is an important  part
                           ,-                                                                                                                                                                             -      of  the  attachments.  You  should know   it
                                thoroughly.    in  order  to  use  the  binder
                                                                                                                                                                                                                                                             '    conveniently you must know how to use the           \5 EC     3iii.'-i_§
                                   cutting gauge.  You  will  then be  able  to
  rig.  i—‘l’lw cumin: gauge.   cut binding from any desired material and
                              have  it  the. proper width.


     The three  letters on  the cutting gauge stand  for the following:

       C  for cording or piping.

        B  for binding to use with the binder attachment.

        F  for  facing.


    The binder  is adjustable  for  cutting diflerent widths by moving the
blue spring until  it  is at the desired  letter.


Flu.  2—(‘uttlng‘  untrue  attached  to    Fig . It—I'utllm: sumac  In operation.
                    NP'KNIDI‘N.


     The cutting gauge  is  fitted  to the scissors. as shown  in Fig.  2.  The
 cloth  is inserted  in  the gauge.  as shown  in  Fig.  3.  Keep the cloth  close
 to the blue spring at  all times and the strip will be perfectly cut.
                                     "Sc-wing  l-Iiliclcncy"  gls'cn you the
   l' \l-l'i   'l \\ I'.N‘l'\ ~tiN ll                         practical hintu that make your clothes
                                      unuuunl.   Notice the enclosed  Folder.
View original page 23Related documents and language editions
EldredgePDF
Eldredge
User manual
20 pages · EnglishRead →
EldredgePDF
Eldredge B Long-Shuttle
User manual
44 pages · EnglishRead →
EldredgePDF
Eldredge Improved Rotary B
User manual
40 pages · EnglishRead →
EldredgePDF
Eldredge Two-Spool (16)
User manual
13 pages · EnglishRead →
EldredgePDF
Eldredge Two-Spool (25)
User manual
15 pages · EnglishRead →
Montgomery WardPDF
Montgomery Ward Damascus Vibrating Shuttle
User manual
14 pages · EnglishRead →
NationalPDF
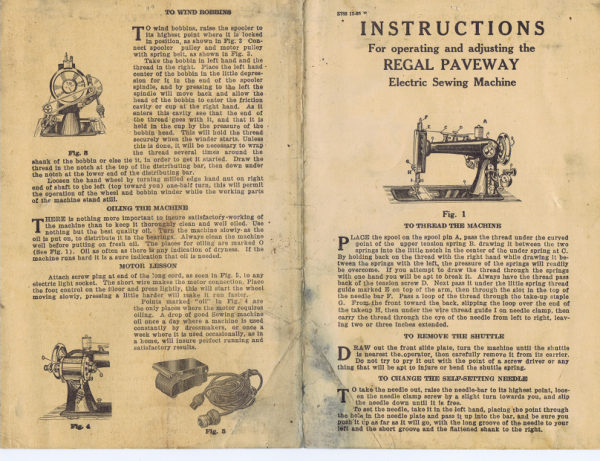
National Regal Paveway Electric
User manual
1 pages · EnglishRead →
From the ISMACS International. Original publisher and archive notices are retained.
Check the model and edition against your equipment.
PDF verified 2026-10-11.