Film cameras
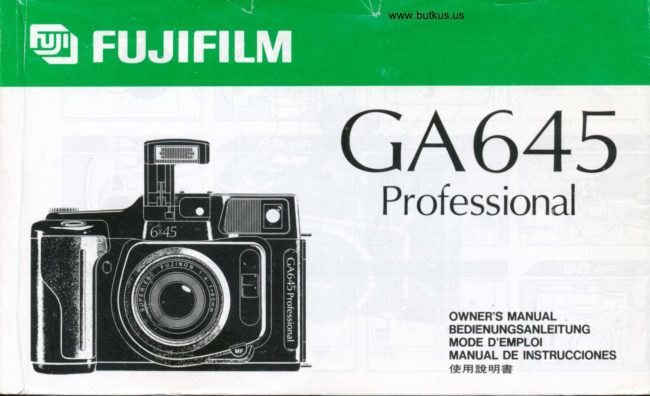
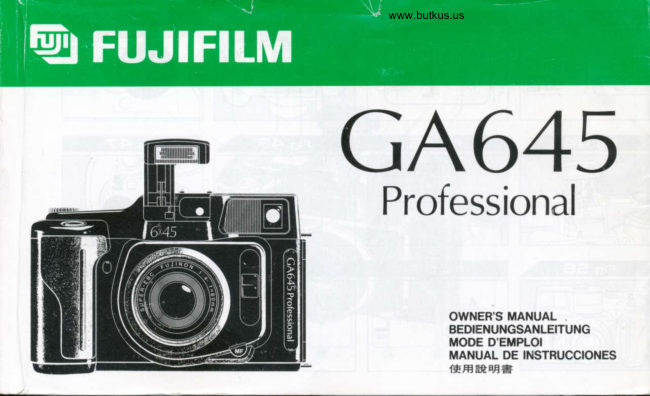
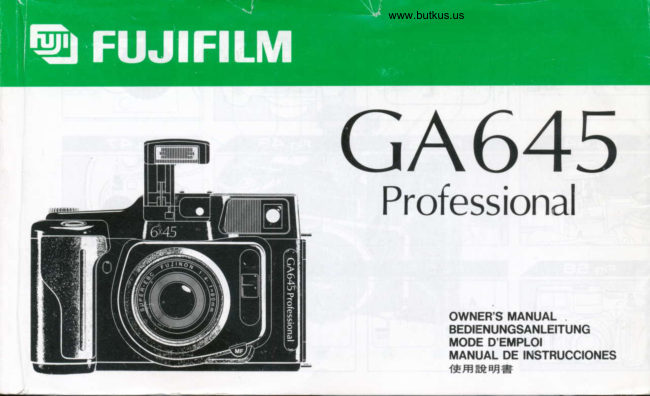
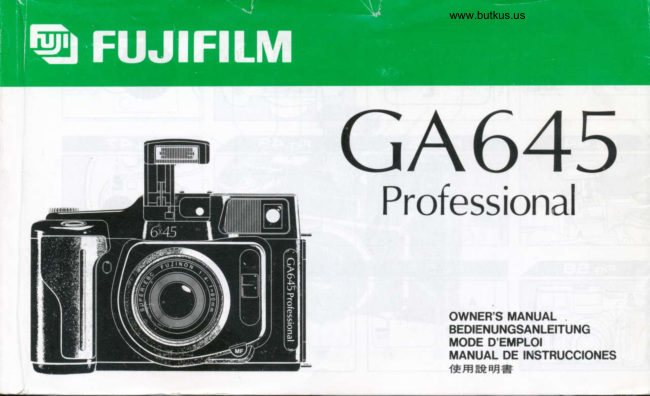
Fujifilm GA645 Professional - only User manual
User manual for Fujifilm GA645 Professional - only. 41 pages in English. Read the original PDF, download or print a copy without registration.
41 pagesEnglish3.9 MB PDF
Loading your manual…Open PDF directly
Document details
- Brand
- Fujifilm
- Model / document
- Fujifilm GA645 Professional - only
- Document type
- User manual
- Language
- English
- Pages
- 41
- File size
- 3.9 MB
- Category
- Film cameras
- Document date
- Not specified in catalog
Search available document text
Find a term, then jump to its page in the original PDF. Image-only pages may not be searchable; check the PDF for exact wording and diagrams.
Page 1 · Read text
www.butkus.us
GA615
   Professional


              OWNER'S MANUAL
               BEDIENUNGSANLEITUNG
             MOOE D EMPLOI
             MANUAL DE INSTRUCCIONES
                                 1r' rit .,? rrj] ,';
View original page 1Page 3 · Read text
www.butkus.us
NAMES OF PARTS / BEZEICHNUNG DER TEILE / NOMENCLATURE / NOMENCLATURA I EJT+Z#


              Mike Butkus Digitally                                                                                        DN:email=mike@butkus.org,Date:cn=Mike2025.01.13signedButkus,by22:17:26Mikeo, ou=Butkus.org,Butkusc=US-05'00'
View original page 3Page 5 · Read text
www.butkus.us

        Liquid-crystal Display
        Fl0ssigkristallanzeige
        Affichage i cristaux liquides
        Visualizaci6n de cristal liquido
      XEHH,J\FT

      @@@


                (8,1
View original page 5Page 17 · Read text
@ Flash Button ( |  )                    @ Exposure Indicator
      €9 Cable Release Socket                  @ Film Speed Sign
                                                                             Speed/Shooting  Distance/Exposuremzotr  @ Camera Back                                             @x Shutter
@  @ Film Loading Knob                                          Compensation/Film  Speed Indicator
   @ Mid-roll Wind-up Button                 @ Seconds
      Ql Film Reminder Slot                   @ Distance Unit Sign (m)
   @ Tripod Socket                      @ F-number
   @ Spool Loading Knob                                        6nv  Manual Focusing Mode Sign  (lf this sign does not
   @ Battery Compartment Cover                                   appear, the camera is set for autofocusing)   @ Battery Compartment Cover Screw                     () Flash Sign
   @ Camera Back Lock                @ Self-timer Mode Sign
   @ Pressure Plate Positioning Pin            @ Exposure Compensation Mode Sign
   @ Film Feed Chamber                                ($ Exposure Counter
   @ Focal Plane Rail                                 (Q Battery Sign
      QQ Data Printing Window               @ Film Type Indicator
   @ Film Wind Sensing Roller
   @ Spool                                       DESCRIPTION OF THE FUNCTIONS OF PARTS
   @ Pressure Plate
   @ Spool Pressure Spring                         o Selecting Dial                                                           (1)OFF:           Film              Sensor   @                                                               Power off -  Set  it to OFF when not using the                                                                          camera.          Spool                  Shaft Buttons   @                                                                                  exposure    For setting   @ Film Take-up Chamber                                         (2) P:  Programmed auto                                                                 exposure (aperture and shutter- speed) auto-
       Liquid Crystal Display (LCD)                                              matically.                                                                                   (3) A:   Aperture-priority auto exposure     you set                                                                                                                            -'lfset automati-        This illustration shows all signs and indicators displayed  in               the aperture, the shutter speed is
       the LCD. Usually, only the information needed for each                    callY.
        shot is displayed.                                                   (4) M :  Manual exposure   You can set your desired                                                                                  - speed.   @ Data Printing Sign                                                    aperture and shutter

                                                                                                                                              Al,+
View original page 17Page 18 · Read text
www.butkus.us
(5) ISO : To set the lilm speed, use this dial and the    o Self-timer Button (U)                      Eg,
       Up/Down Dial.                                      For setting the self{imer mode.
                                                              Button                                                           Flash                                          o                                                                                                                       )              Dialo Up/Down                                                                                   ( |
                                                              popping                                                                up and                                                                                          turning                                                            For             the lollowing functions:This      dial has                                                                             on the flash.                                       (,zut
(1) Feeding of the film leader when loading film.
(2) Aperture setting in the aperture-priority  auto exposure    CAMERA CARE AND CAUTIONS
   mode.
(3) Setting of aperture and shutter speed in the manual      Your camera is a precision instrument. When handling  it,
   exposure mode.                                            take sufficient care and observe the lollowing instructions.
(4) Setting of the film speed (lSO).                         1. Cleaning the camera
(5) Setting of the shooting distance  in the manualfocusing    o Do not use solvents, such as thinner and alcohol, to
   mode.                                                        clean your camera.
(6) Setting ol the exposure compensating  value (+/- EV)    o Make it a habit to clean the camera before and after
     in the exposure compensation mode.                          taking pictures. To clean it, dust off with an air blower
(7) Setting of the date and time.                             and wipe the camera exterior with a soft cloth such as
o Autofocus Button                                                     silicon cloth.
For selecting the autofocus or manual focusing mode.      o Dust and soil inside the film chamber may damage your
o Manual Focusing Button                                                film. Take particular care to clean the camera interior.
(1) In the manualfocusing mode, use  it with the Up/Down
    Dial for setting the shooting distance.                   2. Cleaning the lens
(2) In the autofocus mode, use  it to lock the focus.           r Scratches on the lens sudace can reduce its sharpness
o Exposure Compensation Button (+/-)                         far more than you would think.  lf the contrast of your
(1)To compensate exposure, use it with the Up/Down          picture seems somehow insufficient and  it does not look
     Dial.                                                             crisp enough, the possible cause is scratches on the
(2) To choose a shutter speed for manualexposure, use  it         lens surface. Clean ihe lens carefully in the procedure
    with the Up/Down Dial.                                       described below.
                                                               Set the Selecting Dial to OFF.r Data Button (DATA)                            CD
For selecting the data format (date, time, and exposure   @ Blow off dust and debris from the lens surface with an
data).                                                                              air blower.
View original page 18Page 19 · Read text
@ Moisten a sheet of lens cleaning paper with a commer-       be sure to use new batteries and keep spare batteries
              cially available lens cleaning fluid and wipe the lens      on hand and, while warming them in a pocket, use
            gently with  it in a circular motion. Always start from the        these batteries alternately.  lf the battery power is low,
                         gradually            center                  then                          move out to                                           the edges.                                                                           the                                                                 may                                                              camera                                                                                                                   willmzotro-             Finally,                    after                                all contaminants                                 have   @                                                                              Battery                                                                                                                   lf the                                                                              Sign                                     been removed,    o                                                                (e)not operateswitchesat lowto thetemperatures.Battery Low
          wipe otf the remaining lens cleaning fluid with a dry        Sign (cr), you should change the batteries soon. Take
          sheet of lens cleaning paper. Again, start from the        spare batteries along with you.
            center in a circular motion then move out to the edges.    o Never dismantle the batteries, heat, throw into fire,
     o Breathing a mist on the lens surface then wiping it with        charge or cause them to short circuit.
             silicon cloth or other similar materiat  is the worst thing
         you can do. Never do  it because this is one of the main     5. Storage precautions
         causes of scratches on camera lenses.             o In hot weather, do not leave your camera in a closed
     o Clean the Autofocus Window and Finder in the same        compartment  of your car, or on an ocean beach and in
        way as described above for the lens. Scratches on the         moist places except temporarily  for a very short time.
          Autofocus Window can cause incorrect focusing.        o Keep the camera where it will be safe from moisture,
                                                                              heat, and dust. Be sure to put the lens cap on the lens.
      3. Liquid crystal display                      o Do not store  it in a wardrobe drawer because the gas of
     o Though the liquid crystal display may sometimes look         naphthalin or other insecticides can cause damage to
          black at a high temperature around 60.C,  it will return to         the camera and film.
         normal at an ordinary temperature.
     o At low temperatures, the response speed of the liquid     6. Film loading and unloading
           crystal display tends to become slower. But this is a     r Always load and unload film in subdued light.
          natural character of the liquid crystal and it does not
        mean anything wrong.                           SPECIAL FEATURES
      4. Battery note                              o A fully automatic, 6 X 4.5cm format autofocus cam-
     o Though battery performance willgenerally be reduced        era
        by low temperatures, it will return to normal at an ordi-     CD Super EBC Fujinon 1:4, f=60mm lens (equivalent to
          nary temperature.  lf you are shooting in cold weather,        f=37mm on a 35mm format) promises sharp, clear pic-
View original page 19Page 20 · Read text
www.butkus.us
                                                                                                                                                                                                                       *l    tures with high image quality.                                                   tiorlrs clearly
@ Hybrid autofocus system (passive type with external   @ Thin body with a collapsible lens mount.
    light and active type with infrared rays) backs up the   Super EBC Fujinon lens to bring its high performance     SPECIFICATIONS                                                                                                                      LJ(5zIJJ
    into full play.
@ A variety of exposure techniques are provided, such    o Type
   as programmed auto exposure that frees you from          Fully automatic, 6 X 4.5cm format autofocus camera
   the trouble of exposure settings, aperture-priority auto    o Picture Size
   exposure, manual exposure for experienced photogra-       6 X 4.5cm format (actual picture size: 56 x 41.5cm)
   phers, and fractional exposure control capable of    o Film
   responding to various lighting conditions.                   120 (15 exposures) and 22O (30 exposures) roll film.
@ Automatic, pop-up type built-in flash is simple to use    o Lens
   and saves energy on serial control. lts charge-up time        Super EBC Fujinon 1:4 f=60mm lens (6 components, 7
    is short and the batteries last long.                           elements), equivalent to 37mm on 35mm format, 60o
@ One-touch pressure plate switchover enables you to        angle of view, 0.7m minimum focusing distance, 52mm
   use both 120 and 220 roll films (automatic focal-plane             filter diameter.
   adjustment, automatic counter switchover, and display    o Focusing
    of the film type on the LCD panel).                          Hybrid (active type and passive type) autofocus sys-
                                                                              focusing range, switchable to manual@ Motorized film winding and automatic first-frame posi-        tem, 0.7m - -
    tioning makes  it as easy to operate as 35mm cameras        focusing mode, provided with focus lock.
   because  it is not necessary to position the stail mark.    o Finder
@ Built-in exposure data printing unit enables you to          llluminating window type bright frame finder, automatic
    store your exposure techniques. The date (Year Month          parallax correction, 93% field of view at infinity, 93o/o at
   Day) and time (Day Hour Minute) can also be printed        3m, 91% at 1.0m, 0.5X magnification.
    (outside the picture frames).                   o Display in the Finder
@ LCD panel on the camera top lets you check the         Picture frame (bright frame), autofocus sign, data dis-
   camera's operating conditions at a glance.                       play: aperture value, correct-exposure  sign ( i  ), snut-
@ Major shooting modes can be switched easily with a           ter speed, flash activation, shooting distance (distances
    large-size select dial which shows you camera func-           in feet can also be displayed), distance unit (m).
View original page 20Page 21 · Read text
o Shutter                                                      focked with 1201220 pressure plate switchover, "E" sign
            Electronic, programmed auto-exposure interlens shut-        appears after the last frame is exposed.
           ter (exposure settings on aperture-priority auto expo-    o Liquid Crystal Display (LCD)
          sure and manualexposure are also possible), provided       Number of exposures, shutter speed, aperture, filmmzotraI
           with buzzer lor indicating that the shutter has tripped.          speed, type of film (120 or 22O), battery warning sign,
     o Shutter Speed                                                flash activation sign, exposure compensation mode
           B, 2 sec. - lnOO sec. (1/400 sec. at F4 - 9.5).                   sign, self-timer mode sign, manual focusing mode sign,     o Self-timer                                              date and time (Year Month Day/Day Hour Minute),
           Electronic selttimer with 10 sec. delay, provided with         shooting distance, total shots indicator.
         countdown lamp.                          o Data Printing
     o Exposure Control                                                  Printing outside the picture frames, dates (Year Month
       TTF (Through-the-Finder)  center-weighted light meter-        Day/Hour Minute), exposure data (exposure mode,
         ing (SPD photocell), programmed auto exposure,         aperture, shutter speed, exposure compensating
            aperture-priority  auto exposure, manual exposure, EV          value).
             19 coupling range (lSO 100).                  o Others         3 -     a Exposure Compensation                                     Hot-shoe, film reminder slot, cable release socket, tri-
         t2 EV in 1/2-step increments.                           pod socket, provision for switching on and otl buzzer
     o Film Speed Setting                                         sound.
         ISO 25 - 1600 in l/3-step increments.              o Power Source
     o Flash                                           Two CR123A lithium batteries; about 3000 shots can be
             Built-in, pop-up type flash, automatic control of amount        taken without flash, and about 600 shots with 50% flash
           of light, guide number 12 (lSO 100).                            (as tested according to Fujifilm's battery testing proce-
    o Film Advance                                                      dure).
         Automatic first-frame positioning (alignment of start    o Dimensions
        mark is not necessary), automatic winding, provided        166 (W) x 110 (H) x 66 (8a) (D) mm.
                                                                                                                                                                                                                                                                                                                                                                                                                                              ,          with buzzer for indicating the last frame, film is auto-    o Weight
           matically wound up after the last frame is exposed.           815 g (without batteries).
    o Exposure Counter                          o Accessories
          Additive type counter on liquid crystal display, inter-       Camera soft case, neck strap, lens hood, sott case for
View original page 21Page 22 · Read text
www.butkus.us
   lens hood, lens cap, batteries (two).                    4. Condition of batteries (Fig. 4)               a {c Specifications and performance are subject to change   @ The battery capacity is normal.
   without notice.                  @ The battery capacity is low. Replace the batteries with                                                    new ones.                                                    ozLtl
I. READYING THE CAMERA            @ Since the battery capacity is low, the shutter lock is
                                                                   applied. Replace the batteries with new ones.
LOADING THE BATTERIES                    o A pair of new batteries will provide power for taking
                                                          about 3000 shots without flash, and about 600 shots
1. Open the battery compartment cover (Fig. 1)            when half ol the pictures are taken with flash (as tested
Set the Selecting Dial to OFF and, with a coin, turn the         according to Fujifilm's battery testing procedure).
Battery Compartment Cover Screw toward the arrow to
open the Cover.
2. Insert the batteries (Fig. 2)
Insefi the batteries in the Battery Compartment with the
plus (+) and minus (-) ends correctly as illustrated inside
the Cover, then close  it by tightening it with a coin.
o Use two 3V FUJIFILM-EVEREADY CR123A lithium
   batteries.
o The camera will not operate unless the batteries are
   correctly loaded.
o Change the two batteries at the same time and always
  use new batteries. Do not mix new and old ones.
3. Check the batteries (Fig. 3)
While pressing  in the Dial Lock Release, turn the Select-
ing Dialfrom OFF to "P" (or "A" or "M").  lf the Lens moves
out into shooting position, the batteries are loaded cor-
rectly.
View original page 22Page 24 · Read text
www.butkus.us
 {c The data in the "Year Month Day/Exposure data" or       Down Dial.                                                                                                                                         Ta   "Year Month Day/Hour Minute" format will blink alter-      /Av  Press in the Autofocus Button to complete the Year
   nately because  all these data elements cannot be dis-           setting. The next number (Month) will blink. Set the   played in the LCD at the same time.                       number correctly as described in @. Finally, set the          (5zUJ *  lf you have set an exposure compensating value (+/-          correct Day in the same way.
  EV) in the exposure compensation mode, the compen-
   sated values of aperture and shutter speed will be         Setting the time (Fig. 8)
   displayed.                                                             After setting the date, press in the Dala Button to show                                                                                          4.c * The "bulb" Sign willappear.                                      the time (Day Hour Minute).
 * The LCD will display the correct date (Year Month Day)   @ Make the Hour number blink by pressing in the
   up to the year 2025.                                       Autofocus Button.
                              @ Set the Hour number (blinking) correctly with the Up/
2. Display and printing of data (Fig. 5)                   Down Dial.
The data (dates or exposure data) in the format you have      G) Press in the Autofocus Button to complete the Hour
set will be printed outside the picture frames on your film.            setting. The Hour is displayed and printed on the 24-
The exposure data that can be printed are the exposure          hour system.
mode, F-number, shutter speed, and exposure compen-   @ Set the correct Minute as described above.
sating value.                                                                         Lq/ Press in the Autofocus Button twice. When  it is
 :N. After changing the batteries, be sure to reset the data         pressed in for the first time, the Minute number will turn
  because the data (date, time, and exposure data) which        on and the " : " Sign will blink, which means that time
  have been set willdisappear.                                        setting has not yet been completed. When  it is pressed
                                                                            in for the second time, the " : " Sign will stop blinking
3. Setting the date (Fig. 6,7)                           and glow, indicating that the setting operation has                                nA'or nM").                                                         been completed.CD Set the Selecting Dialto "P" (or
@ Press in the Data Button, and look at the LCD display      e) After setting all numbers, select the data printing mode
    to see Year Month Day.                                    by pressing  in the Data Button.
@ Make the Year number blink by pressing in the
   Autofocus Button.
@ Set the Year number (blinking) correctly with the Up/
View original page 24Page 25 · Read text
I
       ATTACHING THE ACCESSORIES                      To mount the filter or lens hood, just screw it into the front
                                                                                   of the lens barrel.                                                                      I    mzotr     1. Attaching the neck strap (Fig. 9)               o Use commercially.available  filters (filter diameter   '             .  Anti-loosening Ring (Fig.9-A)                         52mm). Do not put on two or more filters because  light  @T             .  Buckle (Fig. 9-B)                              may fall off along the picture edges or the autofocus
    @ Pass both ends of the strap through the camera's       beam may be blocked, making correct focusing impos-
             Strap Lugs.                                                              sible.
    @ Adjust the strap length with the Buckles.             o When taking pictures by using filters with exposure fac-
      o When you pass the strap through the Strap Lugs, slide           tors, exposure compensation is necessary.               I           the Anti-loosening Rings. The strap ends will pass    o Be sure to use the lens hood that comes with your cam-
            through them easier.                                            era. lf you are using other hoods, we cannot guarantee
                                                                            correct focusing because light entering the Autofocus
        2. Using the sott case (Fig. 10)                          Window may be blocked.
        Use the Soft Case when carrying the camera about or put-
           ting  it away.  lt is a good protection against dust, dents and     5. Attaching the viewfinder eyepiece (Fig. 13)                   |
          scratches.                                            The viewfinder eyepiece that comes with your camera has
      o A semi-hard case is also available as an optional ac-     a -1.0 diopter. lf you cannot focus clearly through the
            cessory.                                                      viewfinder, four optional eyesight adjustment lenses (the
                                                        same as those for the FUJIFILM GW series) are available
        3. Putting on the lens cap (Fig. 11)                         (+2D, +0.5D, -2.5D and -4D diopters).
       To prevent accumulating dust and debris on the lens      Generally,   if you are near-sighted, use an eyesight adjust-
          glass, put the lens cap on as soon as you are through tak-     ment lens with a minus diopter, and  if you are far-sighted,
          ing pictures. To clean the lens, refer to "Cleaning the lens"      use one with a plus diopter
        on page 13.
      o Be sure to remove the Lens Cap before taking pictures.    LOADING THE FILM                                                                                                                              I
        4. Putting on the filter and lens hood (Fig. 12)            1. Open the camera back (Fig. 14)                                                                                                                       i             . Lens Hood (Fig. 12-A)                           To open the Camera Back, erect the Camera Back Lock
20          .  Filter(Fig. 12-B)                                   and press  it down toward the camera bottom.
                                                                                                                       I
View original page 25Page 27 · Read text
3. Type of Film and number of exposures               6. Insert the film (Fig. 18)
      o 12O rollfilm: 15 exposures                                        Insert the film in the Film Chamber (on the left side), then     mzatr       220 roll film: 30 exposures                                  press in the Film Loading Knob.
 @    a 120 roll films are marked as "16 exposures on 6 x              :t< The Take-up Spool and roll film can be loaded easier by
          4.5cm format". However, this camera is designed to            fitting in the top side (camera top) first, then pressing in
            take 15 exposures on a 6 X 4.5cm format for improving         the bottom side.
            the film flatness and preventing the risk that the 16th
           exposure may be damaged by a clip when developing     7. Pull out the leader paper (Fig. 19)
             the film.                    @ Pull out the film leader paper and pass  it through the
      o While 120 roll film is attached to an opaque backing            film channel.
            paper over its entire length, such paper is used only on  @ Insert the tip into the slot of the take-up spool.
             the ends of 220 roll film as leader. The thickness of the    o When inserting the tip, adjust the position of the spool
            backing paper causes a shift in the position of the focal          slot by turning the Up/Down Dial toward the arrow so
            plane and the pressure plate adjusts for this difference          that  it fits smoothly into the slot.
            while keeping the film flat on the focal plane. Check to
          make sure, therefore, that the Pressure Plate is set to     8. Wind the leader paper (Fig. 20)             the correct position for each type of film.                        .  Line up the start mark with this pin. (Fig. 2CA)
                                                             Wind the leader paper around the take-up spool by turning
        4. Press in the spool shaft buttons (Fig. 16)                the Up/Down Dial toward the arrow.  lf you are using 120
        Pop out the Spool Loading Knob and Film Loading Knob        rollfilm, wind it until you see the film start mark on the left
         by pressing in the Spool Shaft Buttons on both sides.            side. Do not wind  it any more.  lf you are using 220 roll film,
      o The empty spool is set in the Take-up Chamber, at the     wind it in by about 3 - 5 turns (about 15cm) around the            time of purchase.                                               spool.
                                            o  lf you wind it by only 1 - 2 turns around the spool then        5. Replace the empty spool (Fig. 17)                           close the Camera Back, the rollwillslacken.
        Take out the empty spool,  fit it into the Take-up Chamber    o Exact positioning of the start mark is not necessary
          (on the right side), then press in the Take-up Spool Knob.        because the film tip is detected by the Film Sensor. Be
                                                                                 careful, however, because correct first-frame position-
22                                                                         ing is not possible  if you wind  it in too much until the
View original page 27Page 28 · Read text
www.butkus.us
   start mark comes to the right side of the picture frame.       II. BASIC PROCEDURES                   E
 * To prevent the roll from slackening, keep it taut by                                                                              U'
   pressing  it down on the left side lightly with your fingers    TAKTNG AUTOMATTC-MODE (PROGRAMMED  and wind it securely on the Take-up Spool.         AUTO EXPOSURE/AUTOFOCUS/AUTOMATIC            (5zIrJ                                            FLASH) PTCTURES
9. Position the film for the first shot (Fig. 21)
@ Close the Camera Back.                      o  lf you set the camera to the automatic modes, you can
@ Set the Selecting Dial to "P", "A" or "M". The film will         take pictures very easily.
   automatically advance and position itself for the first
    shot, and the Lens will move out into shooting position.     1. Set the camera to the programmed auto exposure
@  lf the Selecting Dial has already been set to "P", "A" or       mode (Fig.23)
    "M", press down the Shutter Release. The film willau-      While pressing  in the Dial Lock Release, set the Selecting
    tomatically advance and position  itself for the first shot.       Dial to "P". The camera is set to the programmed auto
@  lf the first frame is positioned, the Exposure Counter     exposure mode, in which the aperture and shutter speed
     will show "1".                                           are automatically set according to the brightness of the
 :F Tear off the top of your film box and insefi  it in the Film       subject.
  Reminder Slot in the Camera Back. lt will remind you    o The programmed exposure diagram on page 36 shows
  which film you are using.                                     the coupling ranges of aperture and shutter speed in
                                                               the programmed auto exposure mode.
10. Set the film speed (Fig.221                   o When taking pictures without flash in the programmed
@ While pressing in the Dial Lock Release, set the Se-         auto exposure mode, caution is required because cam-
    lecting Dialto "lSO".                                          era shake is easier to occur with a shutter speed lower
@ Turn the Up/Down Dial until the film speed number        than 1/45 sec.
   (lSO) of the film you are using appears in the LCD.
o The setting range of film speeds  is from ISO 25 to 1600     2. Check the autofocus (Fig. 24)
   in 1/3-step increments.                            Make sure that the Manual Focusing Mode Sign (MF)
                                                       does not appear in the LCD.  lf  it does, turn it off by press-
                                                                   ing in the Autofocus Button.
                                    o lf the "MF" Sign does not appear,  it means that the
View original page 28Page 29 · Read text
camera  is set to the autofocus mode.                       t:             nor the underexposure  sign.
      o  lf the "MF" Sign appears,  it means that the camera is      The sign " A " will appear in case of overexposure,             set to the manualfocusing mode (see page 32).              and the sign " v " in case of underexposure.
                            @ Shutter speed (Fig. 26-G)    mzofa-       3. Readying the flash (Fig. 25)                           The Sign  [ " ] will turn on if the shutter speed is slower
        Pop up the flash Head by pressing in the Flash Button. lf         than 0.7 sec. The "bul" Sign will turn on during bulb
           the camera is set to the programmed auto exposure          exposure.
          mode, the Flash will not fire in bright light.  lt will auto'  @ Flash Sign (Fig.26-H)
             matically fire in dim light.                                                                            lf  it turns on. the flash will fire.
        * For details on flash photography, refer to page 28.    @ Distance (Fig.26-l)
                                                           The following table shows the approximate shooting
          4. Display in the finder (The figure below shows all         distances displayed in the Finder as a guide. In the
          markings displayed in the finder) (Fig. 26)                 case of distances in meters. the letter "m" will be dis-
     @ Field-of-view frame (for distant objects) (Fig. 26'A)             played together.
     @ Field-of-view frame (for near objects) (Fig. 26-8)
     @ Field-of-view frame (fixed) (Fig. 26-C)                      Display of Shooting Distance
         You will get in your picture the area seen inside the                                                                     Meters  0.7 m 0.8 m 0.9 m  1.0 m  1.1 m  1.2 m  1.5 m           frame @ or @. The top and left sides of the finder frame
      C will move to the position of @ with the shooting dis-       Feet             2.3    2.5    3.0    3.5    4.O    5.0
            tance to automatically  correct for parallax.                              1.7 m 2.0 m 2.5 m  3.0 m 5.0 m 10m   INF
        @Autofocus spot (Fig. 26-D)                                        6      7     8     10     15    30    INF        The Lens will focus on your subject at which the
            autofocus spot is aimed.                                                      :r The Finder (and the LCD panel on the body) show, as a
                -Jr- Rim at the desired object by positioning-  it in the         guide, the approximate distances in 14 steps. Actually,                    '  dotted circle (center of ihe cross mark).                   the camera's autofocus system sets the sfiooting dis-
       @F-number (Fig. 26-E)                                         tances in 870 steps and drives the lens according to the
             Blinks  if it is not suited for correct exposure.                      set distance.
                                                                                                                                   "Ft" Sign will not be     @ Over or underexposure  sign (Fig. 26-F)                 * In the case of distances  in feet, the
24                  lf the exposure is correct, you will see neither the over         displayed  in the Finder.
View original page 29Page 30 · Read text
www.butkus.us
 ,F Refer to page 33 for instructions on how to switch the         derexposure (v) Sign in the Finder, you willobtain cor-    a   unit of distances which are displayed.                               rect exposure.
                                                                                                                       the                                                                                           and both                                                                                   on                                                                              Sign                                                                                                  turns                                                                                    (v)                                                                                                                      lf the Underexposure                       @                                                                                                                                         oz                                                                                          camera                                                                                                           cannot                                                                             speed                                                                                                                    blink,                                                                                                        the                                                          F-number                                                                 and shutter5. Holding the camera (Fig. 27)   . Taking vertical-position  pictures (Fig. 27-A)                set correct exposure within its coupling range, and       UI
   . Taking horizontal-position  pictures (Fig. 27-B)              your picture will be underexposed.
Hold the camera  still and keep your hand or fingers away  @  lf the Overexposure Sign (l') turns on and both the F-
from the Autofocus Window.                               number and shutter speed blink, the camera cannot
o lf the Autofocus Window is blocked by the hand or         set correct exposure within its coupling range, and
   fingers, you will gel luzzy pictures because correct         your picture will be overexposed.
                                                                                                 you that the Flash   focusing is not possible.              @  lf the Flash Sign ( I  ) turns on,  it tells
To take horizontal-pcsition  pictures, hold the camera with             will fire automatically.the Camera Grip on the bottom side.                              .  Blinking (Fig. 29-A)
o  lf you take horizontal-position  pictures with the Camera
  Grip on the top side, caution is required because the     8. Check the shooting distance (Fig. 30)  shadow of the lens hood will fall partly on the Autofocus          .  Blinking (Fig. 30-A)
  Window in toplighted or semi-backlighted conditions,  @  lf the distance number turns on, the camera has com-
  causing a focusing error on autofocus.                            pleted focusing and set the correct distance.
                       @ lf "0.7m" blinks, you are too close to your subject.
6. Compose your picture (Fig.28)                        Move back to a distance of 0.7m or more.
O Aim the Autofocus Spot at your subject.            o  lf the displayed distance on autofocus differs greatly
@ Press the Shutter Release about halfway down, hold  it        from that estimated with your eyes, the cause may be
   there and check the display in the Finder.                        that the Autofocus Spot is off your subject. Focus again
 :F lf your subject  is off the center of the Finder frame, use        by aiming the Autofocus Spot correctly at your subject.
  the Focus Lock. For details, refer to "Using the focus  @ lf "lnF" (infinity) blinks, use manual focusing or Focus
   lock" on page 31.                                        Lock because correct focusing is not possible. (For
                                                                      details, refer to the paragraph on the autofocus on
7. Check the exposure (Fig. 29)                             pags 34.)
O  lf you see neither the Overexposure (a') nor the Un-    o  lf the Shutter Release  is depressed with the "lnF" Sign
View original page 30Page 31 · Read text
blinking, the Lens will focus on infinity.                  Camera Back and take out the exposed film.
                                                      To prevent the film from loosening, seal it tightly with themzotr     9. Trip the shutter (Fig. 31)                           End Seal.
U'I      Press the Shutter Release about halfway down and check        the composition, distance and exposure.  lf they are good,     2. Unloading the film in mid-roll (Fig. 34)
       take your picture by gently pressing the Shutter Release      Press in the Mid-roll Wind-up Button on the camera bot-
          all the way down. When the shutter trips, an electronic      tom. The film will wind itself up to the very end then stop.
       buzzer "beep" will sound.                            When winding is completed, the "E" Sign willappear in the
                                                           LCD.
       10. When the last frame is reached (Fig. 32)
            lf the film is positioned for the last shot, an electronic       III. ADVANCED TECHNIQUES
       buzzer will sound six times to tell you that the film has
       reached the last frame.                             APERTURE-PRIORITY AUTO EXPOSURE
       * When using the cable release, this halfway-down mode
              is not possible. Be carefulto make one positive shutter     1. Set the Selecting dial to "A" (Fig. 35)
          pressing to operate the distance, exposure and shutter           lf you set the Selecting Dial to "A", the camera is set for
            tripping.                                                             aperture-priority  auto exposure.
      *  lf the sound of the electronic buzzer is worrisome, you
         can switch  it off . For details. refer to "Extra functions" on       2. Set the aperture (Fig. 36)
         page 33.                                          Turn the Up/Down Dial until your desired aperture ap-
                                                                   pears in the LCD. The aperture  is stopped down by turning
     UNLOADING THE FILM                                    the Dial counterclockwise.
                                             o The aperture  will be displayed in 1/2-step increments.
      1. Exposing the last frame and unloading the film
           (Fis.33)                                                   Step                   F-number
        After exposing the last frame, the film will automatically       wind itself up to the very end and the letter "E" will appear          1 step    4.0 5.6 8.0 11 16  22
          in the LCD.                                                                                                                                                                    '19                                                                           1/2 step      4.8  6.7  9.5It-  13      Make sure the "E" Sign appears  in the LCD, then open the
View original page 31Page 32 · Read text
www.butkus.us3. Press the shutter release about halfway down    MANUAL EXPOSURE                          -@
   (Fig.37)
Aim your subject and press the Shutter Release about     1. Set the selecting dial to "M" (Fig. 39)halfway down. The aperture you have set and the shutter    o  lf you want intentional over or underexposure to take                    (5zlrl
speed suited for  it will be displayed  in the Finder and LCD.         high-key or low-key pictures, use manualexposure.o
lf you change the aperture, the shutter speed will change         This mode can also be used to set exposure for back'
automatically. The upper limit of the shutter speed that          lighted subjects or other subjects for which correct ex-
can be set differs with the aperture as shown below.             posure cannot be obtained  in the "P" or "A" mode.
  F4 - F9.5: 1/400 sec.                                  Set the Selecting Dial to "M". The "TV" Sign will appear in
   Fl1 - F22 : 1/700 sec.                                  the LCD to tell you that the camera has been set to the                                                     manualexposure mode.
4. Check the display in the finder (Fig. 3S)
Press the Shutter Release about halfway down.             2. Set the shutter speed (Fig. 40)                                                                                                                             set                                                                                                                   Button,                                                                     pressing                                                                            Exposure                                                                                   Compensation                                                                                                       in the                                                            While                                       Underexpo'                                  (1,)                                  nor the             the Overexposure      lf neither@                                                                                                                 the Expo-                                                                                                                     Dial. When                                                                                      with                                                                                       the Up/Down                                                                the shutter                                                                speed                                                 expo-                                         will obtain                                            correct                  turns on, you   sure       (v) Sign
    sure.                                                  sure Compensation Button is depressed, lhe "TV" Sign
@  lf the shufter speed blinks and the Overexposure Sign       willblink.   (a) turns on, the correct shutter speed suited for the    o  lf the camera is set to the manual exposure mode, the
   aperture you have set is not within the camera's cou'        Exposure Compensation Button (+/-) can be used for
    pling range, and your picture will be overexposed. Stop          setting the shutter speed, but not for exposure compen-
   down the aperture.                                                  sation.
@ lf the shutter speed blinks and the Underexposure   Sign (v) turns on, your picture will be underexposed.      3. Set the aperture (Fig. 41)
   Open up the aperture or use flash.                         Set the aperture by turning the Up/Down Dial.
o In the case of incorrect exposure in @ and @, the shut'    o  lf the shutter speed is set for bulb exposure, the "bul"
   ter speed in the LCD will also blink.                         Sign will appear both in the Finder and LCD. During
                                                              bulb exposure, no battery power is consumed so you
                                                    need not worry that the batteries may run out during
                                                                    long-time exposure.
View original page 32Page 33 · Read text
a At bulb exposure, the shutter remains open while the     2. Exposure controlwith the built-in flash (Fig. 44)            shutter button is held pressed.                                 .  Flash Sensor (Fig. aa-A)
      4. Adjust the shutter speed and aperture (Fig. a2)        The camera's built-in flash operates as an automatic flashmzoro         .  Correct-exposure  Sign (Fig. 42-A)                    which measures the intensity of the light reflected by the
           . Overexposure Sign (Fig. 42-B)                          subject and automatically adjusts its amount of light in           . Underexposure Sign (Fig. a2-C)                       accordance with the apedure which is set. A flash sensor
       Press the Shutter Release about halfway down.  lf the Cor-     which receives the light reflected from the subject mea-
                                                                                                                             in the center of the picture frame.        rect-exposure Sign ( i  ) appears in the Finder, the expo-      sures the amount of light
        sure is correct.  lf the Over (^a,) or Underexposure (V) Sign    o In the aperture-priority  auto exposure or manual expo-
        appears, adjust the aperture or shutter speed so that the        sure mode, the flash will always fire.  lt can be used as
             (            Sign turns on.                                                                            fill-in light when shooting your subject in the shade of a           i   )     o  lf you want intentional over or underexposure,  take pic-          tree or for obtaining a catch-light  effect on portraits.
           tures with the Over (A) or Underexposure (v) Sign dis-
          played in the Finde

     USING THE BUILT-IN FLASH
      1. Readying the flash (Fig. a3)
   O Pop up the Flash Head by pressing the Flash Button.
                                                        in the LCD stops blink-   @ As soon as the Flash Sign ( |  )
            ing and glows, the flash is ready to fire.
     o The Flash Sign ( f ) will blink while the flash is charg-
           ing. While  it blinks, the camera's operating functions
         such as releasing the shutter will not work.
     o The table shows the minimum exposure (allowable
           aperture) depending on the ISO value, due to the limita-
            tion of flash control capabilities.
          rso               125  50  100  200 or more
          Minimum exposure I  I   11   16      22
View original page 33Page 35 · Read text
The guide number of the built-in flash (with the maximum          .  Light fall-otf (Fig. 46-A)                                                                                                                (in the case of flashes with       amountof light) is 12 at ISO 100. ltwill increase by 1.4          .  Flash covertng area
                                                                                      different vertical and horizontal covering angles)   mzotr      times  if the film speed (lSO) becomes double, and double
 U'             if the guide number increases four times'                           (Fig.46-8)                                                             dividing the          .  Covering area on 6 x 4.5cm format (Fig. a6-C)        r The farthest flash distance is calculated by           guide number by the lens F-number at full aperture (F4    Use an external flash with a coverage equivalent to
            with this camera).                                                             f = 35mm on a 35mm format (50" for the longer picture
                                                                    dimension and 39'for the shorter picture dimension).               Ftash distan." = Sr{&9!F-number                                            lf you are using a flash that has a different vertical and
                     lf the camera is set to the aperture-priority auto expo-       horizontal covering area, it may not be able to cover the
           sure mode. calculate the maximum flash distance with      longer dimension. In such cases, use a wide-panel unit
            the aperture being set.                                         that is compatible with an f = 28mm on a 35mm format.
      o Because negative films have a wider exposure  latitude,
           the flash ranges are longer than those in the above    EXPOSURE COMPENSATION
              table.
                                                                          1.Set the exposure compensating value (Fig. a7)
       USING AN EXTERNAL FLASH                                                             lf you want to take high-key or low-key pictures, use expo-                                                                  sure compensation in the programmed auto exposure or
        1. Mount the flash (Fig. a5)                                   apedure-priority auto exposure mode.
         Clip a commercially available hot-shoe type electronic     While pressing in the Exposure Compensation  Button
           flash into the camera's Hot-shoe.                                      (+/-), turn the Up/Down Dial. The exposure compensating
      o Do not use flashes designed for cameras of other mak-      value will be displayed in the LCD in 0.5 EV-step incre-           ers that have a signal pin because mounting and dis-      ments. The compensating  range is t2EV.
           mounting may become imPossible.
      o  lt is recommended  to use the M mode, since in the PA     2. Display of the compensating value (Fig. aB)
         mode the shutter speed may be quite slow in a dark          lf you press in the Exposure Compensation Button (1)
            place, resulting in blurred photographs.                           after setting the compensating  value, only the "+" Sign will
                                                                   be displayed to tell you that the camera  is set for exposure
30      2. Flash covering area (Fig.46)                          compensation.  lf you then press the Shutter Release J
View original page 35Page 36 · Read text
www.butkus.us
   about halfway down, the compensated values of aper-     Aim the Autofocus Spot at your main subject, press the                                                                                                                                                                                                         tg,   ture and shutter speed will be displayed.                      Shutter Release about halfway down to lock the focus and
 * The exposure compensating  value once set is retained.       hold  it there.   Be careful when using the camera next time to reset as                                                                                                                                                    J(tz                                                                                                                                                                                                                       lrl   required.                                          2. Compose your picture and trip the shutter (Fig. a9)
                                                        While holding the Shutter Release about haltway down,
USING THE FOCUS LOCK                           recompose your picture and take it by depressing the
                                                             Shutter Release allthe way.
1. A word on the focus lock (Fig. 49)                                *. lf the camera is set to auto exposure (programmed or
 lf the Autofocus Spot is off your subject, the Lens will not         aperture-priority auto exposure mode), the exposure
focus on it. Move the camera slightly, aim the Autofocus            will be determined for the picture you composed with
Spot at your.subject to focus on  it, then recompose your        the Shutter Release halfway down (focus locked).
picture by moving the camera back to its original position.
                                             When using the manual focusing button2. There are two methods (Fig.50)                          I
There are two melhods of focus lock. In either method,     1. Press the shutter release about halfway down                                                                       (Fis. s2)activate the Focus Lock with the camera set to autolocus                                             Aim the Autofocus Spot at your subject and press the(there is no "MFu Sign in the LCD).                                                         Shutter Release about halfway down. While holding  it@ Using the Shutter Release only                                                                 there, keep on pressing the Manual Focusing Button.   Use this method  if the exposure does not change when
   you change the picture composition.                                                  2. Compose your picture and trip the shutter@ Using the Manual Focusing Button                                                        With the Manual Focusing Button in depressed position,   Use this method  if the exposure changes substantially
  when you recompose your picture       if the object at     compose your picture then remove your finger from the                                                            Shutter Release to lock the focus. Keep on pressing the   which the Autofocus Spot is aimed -has a great differ-                                                       Manual Focusing Button, recompose your picture apd trip   ence in brightness,  for example.
                                                            the shutter.
I  When using the shutter release only                 * In the programmed or aperture-priority auto exposure
1. Press the shutter release about halfway down       mode, if the Manual Focusing Button is depressed, the
   (Fis.51)                                              exposure is determined when the Shutter Release is
View original page 36Related documents and language editions
From the M. Butkus Camera Manual Library. Original publisher and archive notices are retained.
Check the model and edition against your equipment.
PDF verified 2026-10-10.