Lenses & filters
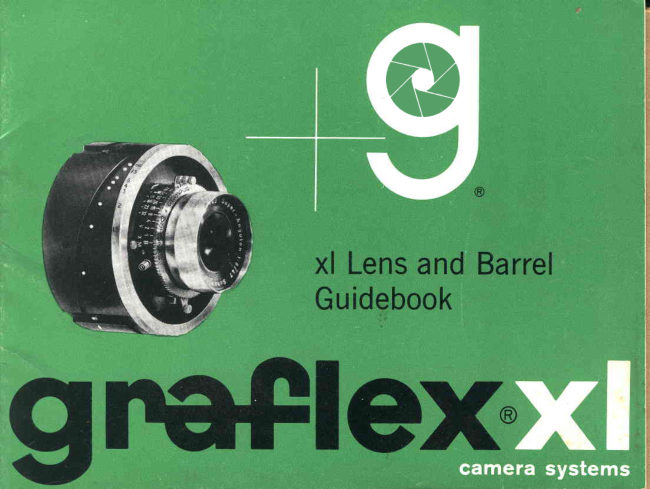
Graflex XL Lens and Barrel User manual
User manual for Graflex XL Lens and Barrel. 15 pages in English. Read the original PDF, download or print a copy without registration.
15 pagesEnglish1.7 MB PDF
Loading your manual…Open PDF directly
Document details
- Brand
- Graflex
- Model / document
- Graflex XL Lens and Barrel
- Document type
- User manual
- Language
- English
- Pages
- 15
- File size
- 1.7 MB
- Category
- Lenses & filters
- Document date
- Not specified in catalog
Search available document text
Find a term, then jump to its page in the original PDF. Image-only pages may not be searchable; check the PDF for exact wording and diagrams.
Page 3 · Read text
Yournewxl lensand barrelplaysa
veryimportantpartin the mostexciting
   newdesignideain photography.. r
               mostpractical,too!

                          The Graflex xl Camera Systems.
                         The first completeand fully flex-
                                    ible system of cameras, lenses,
                           backs and accessories.A unique
                           system that lets you build a per-
                                sonal-stylecamera you can work
                               with easily, efficiently a nd suc-
                              cessfu lly.
                                   Brilliantlydesignedand precision-
                                     built, the xl lens and barrel fea-
                                    tu res a between-the-lensshutter,
                               highly-correctedhigh resolution
                                                                         l e n s e s , a c a m a n d p r e c i s i o n -
                           matched barrel.
                       www.orphancameras.com
View original page 3Page 4 · Read text
Attachinglensto xl carnerabody
     N0TE:To follow these directionscor-    Combination                               Snap-lockopenings       rectly,be sureyou face the camera(as    bayonetmountand
       illustratedin fig. 1, 2, 3).                   focusingring                               Releasebutton
1.  Lensesattach to the bayonetmount
and focusing ring. Simply rotate the                                                LockingCone
focusing ring counterclockwiseuntil  it
stops. Depressthe release button, hold,                                               Snap-lockopenings
and continueto rotatethe ring until the
interior guides and the  interior lugs
a lign.
2.  To insert the lens barrel,line up the
red dot on the focusingring with the red
dot on the lens barrel. Seat the lens
barrel into the mount as far as it will go.
3.  Once the barrel is placed in the
mount, turn the focusing ring clockwise    Synchronizinglenswith
to secure  it. Continue to  rotate the     rangefinderonthexlfocusing ring clockwiseuntil it stops at
the infinity position.                        With the lens set at infinity, press down
4.  To remove the lens barrel, rotate       on the infinity setting button (seefig. 1).
the focusingring counterclockwiseuntil        This  gives you  proper synchroniza-
it  stops. Depress the release button.         tion between the rangefinder and the
And again, rotate the  focusing ring      mounted lens. And  it eliminates the
counterclockwiseuntil it stops. Remove       variations incurred within normal cam-
the lens barrel.                            era manufacturingtolerances.
View original page 4Page 5 · Read text
Lens:  47mm SchneiderSuper AnguEonf/8  Eerls,extnennTe
       wide angle.
Shutter:MXV-00SYNCHRO-COMPURwith 1/500 top speed.

SH U T T ER S P E E D: K n u rled ring (1).     CABLE REI-EASH:Threaded boss (5).
Rotate until red index mark on knurled      Use tapered tip cable release.
ring indicates desired speed setting.                               FLASH C0NNEOTI0N: Terminal postRead from top of shutter.                                                    (6). Attach a Graflite@connecting cord
C0CKING:Lever(2). Moveas illustrated.       with a DIN or PC fitting.
TRlP: Lever (3). Press inward toward                                   S Y N C H R O N I Z A T I O N :
shutter.                                            ElectronicFlash-Lever (7). Move to set
B  Setting: Shutter remains open as                                             indicator pointer at X on scale (8).
long as  trip  lever is held depressed
toward shutter. Use locking type ca ble     M2 Bulbs-Lever (7). Move to set indi-
releasefor time exposures.                  cator at X on scale (8). Use shutter
                                     speeds 1/ 30 sec. or slower.PRESSF0CUS: None. To focus on the
ground glass, set shutter speed at B       AG-l, M5 and Type M Bulbs-Lever (7).
and use a locking type cable release.     Move to set indicator pointer at M on
Cock the shutter and trip through the      scale (8). All speeds are synchronized.
cable releaseusing the locking feature                                 SELF TIMHR; Cock shutter (2). Move
of the cable releaseto hold shutteropen.             fever 7 down to set ind icator at V on
DIAPHRAGM SETTING.LEVEr(4). MOVC     scale (8). Trip shutter,lever (3). Shutter
 lever until index line on lever is point-        will open a u t o m a t i c a l l yi n 8 - L 2  s e c .
 ing to desired f-number. Lever may be      Flash synchronizationwill be the same
moved from bottom of shutter also.          as at the X setting.
                           www.orphancameras.com
View original page 5Page 7 · Read text
Lens:  58m rn Rodenstoek  Gramdagmffif I ffi.ffi HmwrusumwffrmffiTffi
       wide angNe.
shutter:Mxv-00sYNcHR0-c0MPURwith 1/500 top speed.
SHUTTERSPEED:Lever (1). Click stop       lever until index line on lever is point-
action, move lever until index at top of        ing to desired f-number.
shutter is aligned to desired speed set-      CABI-ERHLHASH:Cable support (6) at-
ting on the speed scale (2).                tached to  the  circular mount. Use
C0CKING:Lever(3). Moveas illustrated.      tapered tip cabfe release.
TRIPPING: Lever (4). Press inward     FLASHG0[UNHCTI0NTStraightterminal
toward shutter.                             post (7). Attach a Graflite@connecting
                                          cord with a DIN or PC fitting.B Setting: Shutter remainsopen as long
as trip lever is depressedtoward shutter.      SYNOHRONIZATIffif,{:
Use a  lock i ng type ca b le re lease for        Electronic Flash-Lever (8). Move to set
time exposures.                                                                    i nd icator at X on scale (9).
PRESSF0CUS:Button (10)             M2 Bulbs-Lever (8). Move to set indi-
Cock shutter: Lever (3). Hold in  full-       cator at X on scale  (9). Use shutter
cock position while depressingbutton      speed 1/30 sec. or slower.
(10). Allow (3) to come to a stop against      AG-1, M5 and Type M Bulbs-Lever (8).
button (10).                         Move lever to set indicator at M on
0pen: Trip shutter lever (4).                scale (9). All speedsare synchronized.
Close: Lever (3). Return to  full-cock      S E LF TflM E R: Cock shutter, lever (3).
position,a I lowing button ( 10) to return      Move lever (8) to set indicator at V on
to original position.                       scale (9). Tri p sh utter lever (4). S h utter
Note: Shutter is not cocked. Re-cockbe-        wilf open automatically in 8 - 12 sec.
fore making an exposure.                  Flash synchronizationwill be the same
DIAPHRAGMSETTING:Lever (5). Move      as at the X setting.
                            www.orphancameras.com
View original page 7Page 9 · Read text
Lens:  Sffimrm ffis3#'$mffistmckfr{eHfrgmmfi #.ffi; t:'Y5rT}l"iliffi*ui,ir1i11;i                                                                              '#.;:i i:::,          YSAfffiHfi f4.f,*EmffiS;Tffi#$Tifffi.?lutllltr1;"l;'ifiji,;:rri             ,,
shutter:  ffixw*ffiffiYf\#ffiffiffi#-ffiffiffiffifu$Fi Hsrl,iri , ij,t-fi"i

Sh"flLITTf,R$FHEffi: Knurled ring  (1).      stop action. Move lever until red arrow
Click stop action, rotate until index      on lever is pointingto desiredf-number.
arrow on knurled ring lndicatesdesired                                                           trS,$ilt.t.:fi:i:i rjfi::ir:: Threaded boss (6).speed setting.                                   Use tapered tip cable release.
trffif;K!NG;Lever(2). Moveasillustrated.                                                          Fi[-i-,.i1*i-it.;i.ir,,,if',{I'.{";"rI i.lii, Angled termi nal
TRIFPINffi: Lever (3). Press inward      post (7). Attach a Graflite@connecting
toward shutter.                                         cord with DIN or PC fitting.
B  Setting- S h utter remai ns open as
long as trip lever is depressedtoward         $ if i'i # $-1i,i c_fir, i,i- jir !"i i"l l!:
shutter.                                    ElectronicFlash-Lever (8). Set at X.
                                M2 Bulbs-Lever (8). Set at X. Use shut-F)ffifi"SSFffiffiLi":
                                                  ter speedsof 1/30 sec. or slower.Open-Press focus Lever (4) all the way                                            AG-l, M5 and Type M Bulbs-Lever (8).to the end.                                         Set at M. All speedsare synchronized.
Close-Press focus Lever (4) all the way
back.                                                                           f ,:i".F-Tffri+1i',1,'Cock shutter, lever (2).
                                        Place lever (8) at V. Trip shutter, leverDO NOT TRIP SHUTTERWITH PRESS                                                   (3). The shutter will open automaticallyFOCUSLEVERIN OPEN POSITION.                                                    in 8 - 12 sec. Flashsynchronizationwill
ffilAPh{RAGfdSETTiruffi;Lever (5). Click      be the same as at the X setting.

                           www.orphancameras.com
View original page 9Page 11 · Read text
Lens:
Shutter:

                 Knurled ring  (1).       side of shutter. lf read from side, de-
Click stop action, rotate ring until de-         si red d ia ph ragm setting should be set
sired speed setting is opposite index        to notch.
mark. Doublescalesand indices permit                                                 f h readed boss (6).
 readingfrom top or face of shutter'         Use taperedtiP cable release'
          Lever (2). Move as i | | ustrated'                            Right angle ter-
            Lever  (3).  Press    i nward       minal post (7).Attach a Graflite@Con-
 toward sh utter.                            necting Cord with DIN or PC fitting'
 B  Setting-shutter  remains open as
 long as trip lever is held depressed'         ElectronicFlash-Lever (8)'Set at X'
 T Setting-shutter remains open when     M2 Bulbs-Lever (8). Set at X' Use shut-
 tri p lever is depressed.Wi I I remai n open        ter speedsof 1/30 sec. or slower'
 ,ntil  trip lever is depresseda second      AG-1,M5 and TYPeM Bulbs-Lever (8)'
 time.                                    Set at M. All speedsare synchronized'
                                                 Cock shutter, lever (2).
 Gock-Lever (2)                               Self timer button (9). Push back self-
 Open-Press in focus button (4).              timer button (9) and continue shutter
 Close-Lift out press focus button (4)'         cocking. Trip  shutter lever (3)' The
                      Lever (5). Move       shutter will open automaticallyin 8 - 12
 teverto desiredf-number.Doublescales      sec. Flash synchronizationwill be the
 and indices permit readingfromwww.orphancameras.comface or     same as at the X setting.
View original page 11Page 13 · Read text
Lens:  180rnrnZeissSonnart14.8Nems
shutter: MXV-0SYNGFlR0-C0MPUR with t i 4SStop speed.
SHUTTERSPEED:Speedsettingring(1).   CABLE RELEASE:Threadedboss (6).
Click stop action. Rotatespeedring to     Usetaperedtip cablerelease.
locate desired speed setting opposite    FLASHCONNECTION:Angled boss (7).indexmark on lens.                                        Attach Graflite@connect.r-ngcord with
C0CKING:Lever(2). Move,fullleft.         DtN fitting.
TRIPPING:Lever(3). Pressleft toward                               SyNCHRON;ZATI0N:diaphragmsettingwindow.
                                         ElectronicFlash-Lever(8)' Set at X'B Setting-Shutterremainsopenas long
as a trip leveris depressed.           M2 Bulbs-Lever(8).Set at X. Useshut-
PRESSF0GUS:                              ter speedsof 1/30 sec' or slower.                                                                          a
Open-Press focus lever (4) downward    M5 and TypeM Bulbs-Lever (8). Set at
pastcenterdetent.                     M. All speedsare synchronized.
Glose-Raisefocuslever(4) upwardpast     SELFTIMER:Lever(g). Same as sync
centerdetent.                              lever.Cockshutter,lever(2). Placelever     *
DIAPHRAGMSETTING:Lever(5). Click       (8) in V position.Trip shutter,lever(3).
stop action.Movementof leverchanges    The shutter will open automaticallyin
f numberin diaphragmsettingwindowat      8-12 sec. Flashsynchronizationwill be
top of shutter.                           the sameas at the X setting.


                           www.orphancameras.com
View original page 13Page 15 · Read text
Home 0ffice:
3750 MonroeAvenue
Rochester,New York 14603
WesternDivision:
800 North Cole Avenue
Hollywood,California 90038
Midwest Service Department:
1345 DiverseyParkway
Chicago,I llinois 60614
Graflexof CanadaLimited:
47 Simcoe Street                                     @
Toronto 1.,Ontario,Canada
                                     GRAFLEX,Inc.
                                               Rochester,New York
                                            14603,U"S.A.
                                       A subsidiaryof
                                              GeneralPrecision
                                           EquipmentCorporation


 Form No. L755/466                                                                Printedin U.S.A.
                         www.orphancameras.com
View original page 15Related documents and language editions

GraflexPDF
Graflex Cameras
Product booklet
20 pages · EnglishRead →

GraflexPDF
Graflex XL Camera Guidebook
Reference guide
27 pages · EnglishRead →

GraflexPDF
Graflex XL Eye Shield
User manual
5 pages · EnglishRead →
GraflexPDF
Graflex XL Graflok Back
User manual
12 pages · EnglishRead →

GraflexPDF
Graflex XL Lens Attachments
User manual
7 pages · EnglishRead →

GraflexPDF
Graflex XL Lens Depth of Field
Reference guide
3 pages · EnglishRead →
GraflexPDF
Graflex XL Multi-Grip
User manual
8 pages · EnglishRead →

GraflexPDF
Graflex XL Polaroid Pack Film Holder
User manual
5 pages · EnglishRead →

GraflexPDF
Graflex XL Quick Focusing Ring
User manual
5 pages · EnglishRead →
GraflexPDF
Graflex XL Rapid-Vance RH/50 Roll Film Holder
User manual
11 pages · EnglishRead →

GraflexPDF
Graflex XL Sports Finder
User manual
9 pages · EnglishRead →
From the M. Butkus archive. Original publisher and archive notices are retained.
Check the model and edition against your equipment.
PDF verified 2026-10-10.