Sewing machines
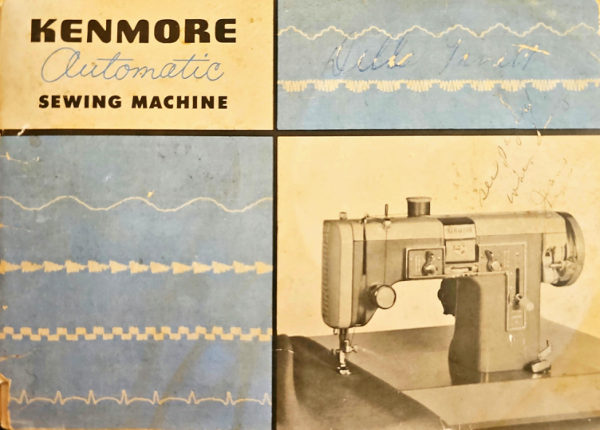
Kenmore 117.841 Automatic Sewing Machine — User manual
User manual for Kenmore 117.841 Automatic Sewing Machine. 67 pages in English. Read the original PDF, download or print a copy without registration.
67 pagesEnglish32.2 MB PDF
Loading your manual…Open PDF directly
Document details
- Brand
- Kenmore
- Model / document
- Kenmore 117.841 Automatic Sewing Machine
- Document type
- User manual
- Language
- English
- Pages
- 67
- File size
- 32.2 MB
- Category
- Sewing machines
- Document date
- Not specified in catalog
Search available document text
Find a term, then jump to its page in the original PDF. Image-only pages may not be searchable; check the PDF for exact wording and diagrams.
Page 2 · Read text
/ / 7.841
       Sears, Roebuck and model


Dear Homemaker:
 Thisyou usebookletand enjoyhas fullybeenyourwrittenKENMOREfor you,Automaticto help
  Zigzag Sewing Machine.
                               The following
           This section explains the operation  We urge you to read pp. 2-18 before using your
   machine.
   of the special controls that allow you to do
   many tedious tasks automatically.
   pages offer suggestions and instructions for
     specific ornamental and time saving operations.     SeezigzagWe feelp. 11stitch.thebeforeKENMOREusingAutomaticthe automaticZigzagpatternsSewing or


       Nachinehave regardingis the finestthe machine.of its kind and we are
       happy to offer help withSincerely,any questions you may


                                         Director                             Jean Economics817 Laboratory
                           HomeDepartmentSears, Roebuck and Co.


                                  Chicago 7, Illinois
View original page 2Page 6 · Read text
STANDARD        SATIN STITCH        APPLIQUE        BUTTONHOLE         BUTTON
     FOOT           FOOT           FOOT             FOOT           FOOT
 used for most    used for zigzag    used for most tech-     used for buttonholes,    used to sew on
                                                                                                                buttons.  straight and zigzag      stitching when stitch     niques with a filler     plain andwith
 stitching.             length control is     thread.                        filler thread.
                          near O.


4
View original page 6Page 7 · Read text
INSTALLING MACHINE HEAD


1 Loosenof the themachinetwo hingebed. screws under holes in the rear edge

2 Raise hinge pins in the cabinet cutout. Slip machine head
    onto the pins and tighten hinge screws securely.

3 Lower machine head to front cabinet flap.


CONNECTING MACHINE

 Push the plug onto three-prong connector under the ma-
chine motor. Plug machine cord into any 110-120V wall
 outlet.


MACHINE LIGHT
Light bulb is located under spool pins on therear of
machine arm. It may be turned on or off by pushing the
button switch on the light shade..
  To remove bulb, stand at rear of the machine. Twist bulb
toward you and pull from socket. To replace, push it into
socket and twist away from you.

                            5
View original page 7Page 8 · Read text
Needle and Thread
      SETTING THE NEEDLE-Refer to Chart, p. 7, when choosing the cor-
         rect needle for the stitching to be done.

       1 Turn the hand wheel toward you until the take-up lever is at its
            highest point.

      2 Hold the needle with flat side away from you.

      3 Slip the needle as far as it will go into the needle clamp, and
            tighten the thumb screw.


      SETTING NEEDLE POSITION-The needle bar should be at its highest
        point when adjusting needle position to avoid twistingor tearing
        the fabric. Set the needle position control to right, center or left
        for corresponding needle positions. When using a right or left
        needle position, check to see that needle enters the needle hole
        without touching the presser foot at both extremes of the zigzag stitch.

      USE ONLY CENTER POSITION WITH DOUBLE NEEDLE. SEE PAGE30


                                                 THREAD SELECTION

                  Use only top quality mercerized cotton, silk, nylon, or machine embroidery thread
                  on your KENMORE. MERCERIZED MACHINE EMBROIDERY THREAD
                      makes a much finer decorative stitch than mercerized sewing thread.

                     The size of thread you use depends on the fabric to be sewn. See the NEEDLE
             AND THREAD CHART, P. 7, for thread size to use for different weight fabrics.
6
View original page 8Page 10 · Read text
REMOVING AND REPLACING THE BOBBIN CASE

      Raise needle to its highest point by turning hand wheel toward
     you. Grasp bobbin case latch as illustrated, and lift case
     and bobbin out. Release latch and bobbin may be removed.

       To replace bobbin case, reverse this process. Holdbobbin
      case by the latch, with thread coming from the top, and slip

     case onto center pin until it snaps into position.


THREADING THE BOBBIN CASE

   1 Hold bobbin case with open side toward you.

   2 Slip bobbin into case with thread coming from left to right
     over top of bobbin.

     3 Draw bobbin thread into the slot, under the tension spring
     and out through the small hole in the case, as illustrated.

   4 Allow 4 inches of thread to hang free.
View original page 10Page 11 · Read text
Winding the Bobbin

 1 theHoldclutchthe handreleasewheeltowardwith youryouleftwithhandyourandrightturn
     hand.

 2, Slip the bobbin on the bobbin winder shaft.

     Place thread on the base spool pin. Draw thread
     from back to front under the bobbin winder guide3
    and tension discs. Bring thread up and wind the
    end around the bobbin several times from front
     to back.

    Snap bobbin winder lever down to hold bobbin.
     Press foot control to start winding action. When4     the bobbin is full, winding mechanism will release
    automatically.

5 Cur the thread and remove bobbin from the shaft.

    Tighten clutch release by holding hand wheel with
    the left hand and turning knob away from you.
View original page 11Page 12 · Read text
Upper Threading      To thread the upper part of your machine, presser foot
      must be up, take-up lever at its highest point, and thread
      on either spool pin.

        1 Draw thread from back to front through slot in
            guide 1.

       2 Bring thread forward on the right of thread
           guide 2. Slip thread under guide into upper slot
          from left side and into lower slot from right.

        3 Pass thread from right to left under tension mecha-
           nism. Place thread either in front or in back of
            the center tension disc.

       4 Pull thread against tension spring and thread
          from right to left through hole in take-up lever.

       5 Draw thread down behind guide on needle clamp.

      6 Thread needle from front to back. Pull several
          inches of thread through needle.


10
View original page 12Page 14 · Read text
PICKING UP BOBBIN THREAD
                               1. Set stitch width control on 0 and hold end of needle
                               thread loosely in left hand. Turn hand wheel toward you so
                             needle enters the needle plate hole andreturns to its highest
                                     point.
                                   2. Draw bobbin thread loop through needle plate, by pulling
                           up on needle thread.
                                   3. Place both threads back under presser foot.

                       TURNING A CORNER
                            Stop machine with needle still in fabric. Raise presser foot.
                            Turn fabric to desired direction. Lower presser foot and con-
                                    tinue stitching.

                      REMOVING FABRIC
                      When you finish stitching, turn hand wheel toward you until
                               take-up lever reaches its highest point. THIS IS IMPORTANT.
                              Raise presser foot and draw fabric away from you. Cut thread
                           on rear edge of presser bar.


                                      PATTERN SELECTOR

                           The pattern selector has five settings and turns from right
     2                          to left. The zig zag setting is used on all operations except
                                  straight stitching, automatic pattern stitching and the
                               curve stitch.

                                  *Thereand ex an edghteen patterns (two on each of nine discs) illustrated
                                          on pages32 and 33.
12
View original page 14Page 15 · Read text
Unscrew stitch length lock.
                  Move stitch length control lever to the desired position be-
                    tween 0 and F on the lower half of the stitch length indicator
 SETTING            plate. The F setting is the longest stitch. The size stitch you
  STITCH             select will depend on the fabric you are sewing. See chart on
 LENGTH         page 7. Recommendedstitch lengths are given in numbers
                which refer to the markings between "O" and "F" as illus-
                      trated here. Tighten stitch length lock so that forward and

                      reverse stitches will be the same setting.


 REVERSE          Move lever up until it stops. Move lever down to original
STITCHING          position for forward stitching.
                            It is best to begin and end most seams with reverse stitching,
                     often called back tacking.
                                                          STITCH
                  Be sure both threads are drawn back under the presser foot.
               Lower needle into fabric about ½ inch from beginning of         LENGTH
                 seam.Push stitch length regulator up for reverse stitching.
FASTENING                      Stitch in reverse until needle reaches beginning of seam.
 A SEAM
                Move stitch length regulator down for forward stitching
                  and complete seam. When you reach the end, raise the stitch
                     length regulator and sew back over ½ inch of completed seam.


                      Set the stitch length regulator at F for the longest possible
                        stitch. Basting is easily removed by pulling one thread.
                           If you prefer to use pins for basting, your KENMORE BASTING
                    will sew over the pins. Be sure to keep the pins at right
                   angles to the seam and the head of the pin away from the
                      presser foot.                                               13
View original page 15Page 16 · Read text
H


   SETTING STITCH WIDTH                           LOCKING STITCH WIDTH
   Move stitch width control to the desired position           The stitch width lock has six positions-0, 1, 2,
   between 0 and 4 on the stitch width indicator                 3, 4, and buttonholes. Turn the lock to the desired
     plate. Zigzag stitch width increases from 1 to 4.                stitch width setting. This limits the maximum
    Straight stitching is possible only with control             width so that the regulator may only be moved
   on 0.                                                 between 0 and the number selected.
                                                              Buttonhole setting locks the stitch width at 4
                                                        and provides a partial stop at 2.

14
View original page 16Page 17 · Read text
CHANGING THE PRESSER FOOT
 Loosen presser foot screw with the large screw driver. Slip presser
 foot to the left and forward until it is free. Reverse procedure to
replace presser foot. Tighten screw with the screw driver.


CHANGING PRESSURE ON PRESSER FOOT
 It is rarely necessary to change the pressure on the presser foot. For
those operations that require it, screw the foot pressure knob down
for increased pressure and up for reduced pressure. There should

be just enough pressure on the foot to allow the fabric to move

along easily, and to prevent it from rising with the needle. If one

or both plies of fabric ripple, increase the foot pressure. If foot

marks the fabric, decrease the foot pressure.


DROPPING THE FEED DOG

The feed dog control at the right front corner of the machine

bed has three positions, as illustrated.

   Position 1 is for general stitching with the feed dog in operation.
   Position 2 lowers and holds the feed dog down until you reset
the control to position 1. Position 2 may be used for darning
and buttons.

   Position 3 lowers the feed dog temporarily, while you press on
the control. This position is sometimes used for decorative stitch-
ing, and for locking stitches.

                                                                         15
View original page 17Page 18 · Read text
Figure 1                                      Figure 2                                    Figure 3
   perfect stitch will have threads locked   When upper thread lays on top of fabric in
between the two layers of fabric with no loops    a straightline,upper tensionis tighterthan     fabricWhen bobbin threadstraightlays en the bottom of the
on top or bottom.                           lower tension. Loosen upper thread tension.                                     Tightentensionupperis
                                                                                                            tighterthread tension.upper tension.

               When stitching is unsatisfactory as in figures 2 and 3, adjust the upper
                      thread tension. Lower thread tension is pre-set, and rarely requires adjust-

                        ment for general sewing. However, if stitch is satisfactory, as in Fig. 1 and

                      seam is badly puckered, the cause may be tight tensions, and both must be
                         adjusted.


                                CHANGING UPPER THREAD TENSION
                                       To tighten or increase the tension on the upper thread,
                                               turn tension knob to the right. To reduce tension, turn
                                             knob to the left. The tension knob has a range of 10
                                                revolutions.


                                CHANGING BOBBIN THREAD TENSION
                                Remove bobbin case as described on Page 8. To in-
                                        crease bobbin thread tension turn spring screw to the
                                                    right with small screw driver. To decrease bobbin ten-
                                             sion turn spring screw to the left. Any adjustment of
                                               the bobbin tension should be slight as the tension spring
                                                         is very sensitive.
View original page 18Page 19 · Read text
If you should get the bobbin case far out of adjustment, the following method
                          will help you reset the correct tension.

                     1 Begin with a full bobbin of #50 mercerized sewing thread, properly threaded
                               into the case, and a loose bobbin thread tension.

                           Tighten the spring screw gradually until bobbin case and full bobbin can be
                                  lifted from your hand by the end of the bobbin thread.

                     3 Make a row of bias stitching on a double thickness of fabric. If fabric puckers
                    —both tensions are too tight.
   RESETTING

BOBBIN THREAD
                        Hold row of stitching taut between thumb and forefinger of each hand.
   TENSION              Pull evenly with both hands until one or both threads break.

                             a. If both threads break-tensions are in proper balance.

                          b. If neither thread breaks-both tensions are too loose.

                                   c. If only upper thread breaks-upper tension is too tight.

                           d. If only lower thread breaks-upper tension is too loose.


                                                                         17
View original page 19Page 20 · Read text
Your KENMORE will sew all the new fabrics of synthetic fibers,
                                      such as nylon, *Orlon, * *Dacron, rayon, acetate, blends of these,
                                     and combinations of synthetic and natural fibers. When stitching
                                           a fabric of blended or combined fibers, handle it as you would a
                                             material of the fiber present in the largest percentage. For example,
                                        a fabric woven of 60% Orlon and 40% silk should be handled as
                                      one made entirely of Orlon.
                              When stitching a fabric that is over 50% synthetic fiber, re-
                                       member:
                                              Select patterns of the loose fitting type with cap or kimono sleeves,Synthetics a because most synthetic fiber fabrics cannot be eased with steam
                                              pressing, and are not absorbent.
                                b Use a synthetic thread.
                          C Use a fine needle as recommended in chart on page 7.
                     d Wind the bobbin in the usual way, but do not pass thread between                                             tension discs. Guide thread by hand for a smoothly wound bobbin.
                                          Set the stitch length as recommended for a similar weight cotton                  e (page 7). Also, try some longer and shorter stitches. Choose the
                                                   stitch length that gives the most satisfactory seam.
                                          f Check thread tensions by sewing on a double thickness of the fabric
                                          to be used. Usually the upper thread tension must be loosened.
                                            Sometimes both bobbin and upper thread tension must be loosened.
                                        (page 16)

          SEWING ON        Set the machine with normal thread tensions and a large size stitch.
                                            Use a fine needle and mercerized thread. Hold plastic pieces to-
          PLASTIC FILMS                                            gether with cellophane tape or paper clips rather than pins. Sew
                                               corners slightly rounded rather than square.

18                                           *Trademark for DuPont's Acrylic fiber. **Trademark for DuPont's Polyester fiber.
View original page 20Page 21 · Read text
0


                                                         - 0


                AND OILING ....


                                     Keep the moving parts free from dust and threads for
                                                 quiet and efficient operation. Cleaning should be done
                                            with a small brush; never with a sharp or pointed tool.

                                   When machine runs hard or makes excessive noise,
                                               place a drop of KENMORE sewing machine oil at the
              Figure A                           points indicated in figs. a, b, c.
Swing hinged face cover plate open to
oil points indicated at end of machine
head.


                                                                                 19
View original page 21Page 22 · Read text
0 00           000


       Remove two retaining screws
       and left arm cover plate off
          to oil points indicated at top
         of machine head.


                                                                      Figure B


         It may be necessary to clean the shuttle area occasionally.

      1. Raise the takeup lever to its highest point 3. Brush, remove lint and threads from
        and remove bobbin case.                         shuttle race.

      2. Press lever (1) to release race cover. Lift 4. Put a drop of oil on center pin, on back of
         out hook by center pin.                                                          shuttle and on front of shuttle race.                                                                                                                                     I-Shuttle Assembly
20
View original page 22Page 24 · Read text
PROBLEM          PROBABLE CAUSE                      CORRECTION            What
                           Incorrect size needle.               Choose correct size needle for thread and fabric (page 7).
                        Improper threading.               Rethread machine (page 8 and page 10).
                      Loose upper thread tension.         Tighten upper thread tension (page 16).
   Irregular
                           Pulling fabric.               Do not pull fabric; guide it gently.   Stitches
                            Light pressure on presser foot.       Increase pressure on presser foot (page 15).

                     Loose presser foot.               Reset presser foot (page 15).

                       Unevenly wound bobbin.          Rewind bobbin (page 9).
                           Pulling fabric.              Do not pull fabric; guide it gently.
                            Incorrect size needle.                 Choose correct size needle for thread and fabric (page 7).
                           Incorrect setting of needle.          Reset needle (page 6).
  Breaking             Loose presser foot.                 Reset presser foot (page 15).
  Needles
                           Incorrect needle position
                                                    Reset needle position to center (page 6).                           (with double needle only).

                     Too wide stitch width.
                                               Check needle drop                          (with double needle only).

                    Upper and lower threads not
Bunching of                                      Draw both threads back under presser foot (page 12).                     drawn back under presser foot.
  Thread
                    Feed dog down.                  Raise feed dog (page 15).
                         Incorrect thread tension(s).                                                  Reset thread tension(s) (page 16 and page 17).
                          Light pressure on presser foot.                                                            Increase pressure on presser foot (page 15).
                   Using two differentsizes or
Puckering              kinds of thread.                 Upper thread and bobbin thread should be same size and kind.
                     Bent or blunt needle.                                                                 Insert new needle (page 6).
                    Loose presser foot.                                                       Reset presser foot (page 15).
                      Fabric too sheer or too soft.                                              Use underlay of tissue paper or tarleton when stitching.
View original page 24Page 25 · Read text
PROBLEM          PROBABLE CAUSE                      CORRECTION
                             Incorrect size needle.                Choose correct size needle for thread and fabric. (See page 7).
                        Bent or blunt needle.                 Insert new needle (page 6).
     Skipping                Incorrect setting of needle.         Reset needle (page 6).
      Stitches
                            Tight upper thread tension.        Loosen upper thread tension (page 16).
                              Light pressure on presser foot.       Increase pressure on presser foot (page 15).
                           Starting with take-up lever in                                                        Take-up lever must be in highest position when starting to sew.
                        low position.
                            Starting to stitch too fast.            Start to stitch at a medium speed.
                         Improper threading.               Rethread machine (page 8 andpage 10).
 Breaking Upper            Tight upper thread tension.        Loosen upper thread tension (page 16).
    Thread                            Incorrect size needle.            Choose correct size needle for thread and fabric (page 7).
                       Sharp eye in needle.              Insertnew needle (page 6).

                     Wide stitch width setting                                                      Set stitch width regulator at 0 when picking up bobbin thread
                     (when picking up bobbin                                                           (page 12).
                          thread only).

                        Improper bobbin case thread-                                                  Check bobbin case threading (page 8).
                          ing.
Breaking Bobbin
    Thread               Tight bobbin thread tension.     Loosen bobbin threadtension (page 16).
                             Lint in bobbin case or shuttle.       Clean bobbin case and shuttle (pages 20-21).

                     Feed dog down.                     Reset control to "]" (page 15).
   Fabric not               Light pressure on presser foot.      Increase pressure on presser foot (page 15).
    Moving                                            Place both threads back under presser foot before beginning
                      Threads knotted under fabric.                                                            to stitch.

   Machine                          Thread caught in shuttle.           Disassemble and clean shuttle (pages 20-21).
   Jamming

        Note: See summary of proper control settings for straight or zigzag stitching-page11.           23
View original page 25Page 27 · Read text
Sewing Elastic
                         Applique foot
                               Stitch width
SHIRRING WITH                               Stitch length
ELASTIC THREAD                        Needle position         Center

                 Draw elastic thread through small hole in center of foot.
                    Zigzag stitch over elastic.Adjust fullness by pulling edge
                        of elastic. To fasten elastic thread, straight stitch a small
                       tuck across each end, on the wrong side.


                      Standard foot   LINGERIE
                            Stitch width           2 to 3
   ELASTIC                              Stitch length         1
                       Needle position         Center

                      Stretch elastic while zigzag stitching to fabric.


                                     SHAPING DARTS IN INTERFACINGS


                                      Standard foot                            90                                                Stitch width
                                                  Stitch length     ½
                                       Needle position          Center


                               Cut interfacing down center between dart lines. Overlap cut edges,
                                 matching dart lines. Zigzag stitch along marking line from point to
                                wide end of dart. Trim both raw edges close to stitching.
                                                               25
View original page 27Page 28 · Read text
Standard foot
                                                      Stitch width     2-3
                                                         Stitch length    1-1½
                                           Needle position  LeftHemstitching
                              Draw two threads from fabric, on each side of desired
                                      depth of hemstitching. Zigzag stitch along drawn thread
                                           line so needle enters fabric on one side of Zigzag stitch
                                      and drawn thread line on the other. When one edge of
                                        the hemstitching is sewn, turn fabric and stitch second
                                      side similarly. Match lines of stitching, as illustrated.
                              Draw threads between the two rows of stitching to com-
                                           plete the hemstitching.

                      WritingFREE HAND   and    Fringe      Set machine                    controls as for hemstitching.                                 Stitch width     0 to 4
                                                                       Feed Dog         Position 2
      Decide on fringe length and draw one thread
                                                 Draw initials or words to be
       that distance from the raw edge of the fabric.                                                         sewn, on fabric and fit fabric
     Lower needle and stitch along the drawn                     into embroidery hoops.Writ-
                                                                     ing is done with either zigzag      thread line, as for hemstitching. Unravel all                                                                       or straight stitching.
       threads from the raw edge to the line stitching.                Remove presser foot. Set stitch
                                                          width for straight or zigzag
                                                                              stitches, as desired. Slip hoop
                                                       and fabric under the needle,
                                                                 lower presser bar and take one stitch to raise bobbin
                                                                       thread through fabric. Using a medium speed, stitch
                                                                       along marked outline, guiding fabric carefully by hand.
26
View original page 28Related documents and language editions
FranklinPDF
Franklin Long Shuttle
User manual
26 pages · EnglishRead →
KenmorePDF
Kenmore Buttonhole Attachment
User manual
10 pages · EnglishRead →
SearsPDF
Sears Burdick
User manual
13 pages · EnglishRead →
SearsPDF
Sears Franklin or Minnesota Model M
User manual
34 pages · EnglishRead →
SearsPDF
Sears Franklin or Minnesota Model M (black and white scan)
User manual
34 pages · EnglishRead →
KenmorePDF
Sears Kenmore Models 14502 or 14401
User manual
28 pages · EnglishRead →
SearsPDF
Sears Minnesota Model "E" Sewing Machine Instructions
User manual
13 pages · EnglishRead →
SearsPDF
Sears Minnesota Model A
User manual
18 pages · EnglishRead →
SearsPDF
Sears Minnesota Model A Sewing Machine Instructions
User manual
15 pages · EnglishRead →
SearsPDF
Sears Minnesota Model C (black and white scan)
User manual
20 pages · EnglishRead →
SearsPDF
Sears Minnesota Model C Sewing Machine Instructions
User manual
20 pages · EnglishRead →
From the ISMACS International. Original publisher and archive notices are retained.
Check the model and edition against your equipment.
PDF verified 2026-10-11.