Sewing machines
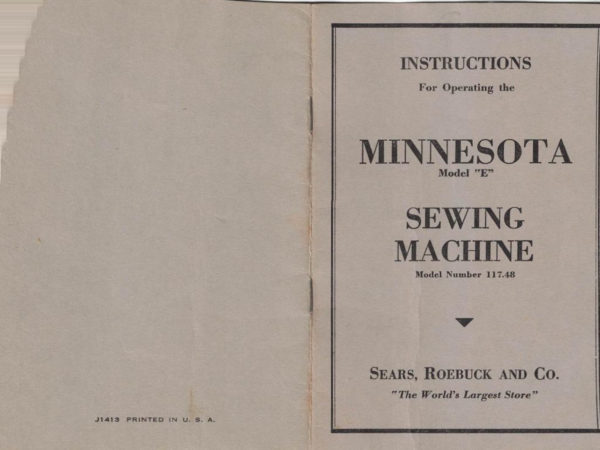
Sears Minnesota Model "E" Sewing Machine Instructions — User manual
User manual for Sears Minnesota Model "E" Sewing Machine Instructions. 13 pages in English. Read the original PDF, download or print a copy without registration.
13 pagesEnglish7.1 MB PDF
Loading your manual…Open PDF directly
Document details
- Brand
- Sears
- Model / document
- Sears Minnesota Model "E" Sewing Machine Instructions
- Document type
- User manual
- Language
- English
- Pages
- 13
- File size
- 7.1 MB
- Category
- Sewing machines
- Document date
- Not specified in catalog
Search available document text
Find a term, then jump to its page in the original PDF. Image-only pages may not be searchable; check the PDF for exact wording and diagrams.
Page 1 · Read text
INSTRUCTIONS

          For Operating the

MINNESOTA
             Model "E”

  SEWING
  MACHINE
           Model Number 117.48
     v


 SEARS, ROEBUCK AND Co.
     ”The World's Largest Store”
View original page 1Page 2 · Read text
QIzrtifitate of QBuarantp


  This is to Certify that this sewing machine is guar-
anteed to be perfect in material and manufacture. and
to be perfect in operation if properly managed.  This
machine has been carefully inspected and adjusted, and
there are no defects in material or workmanship. It has
been delivered to the transportation company in perfect
condition, carefully packed  and we  guarantee  it  to
reach your station  in good order.

  In the event that working parts prove to be defective
in material and workmanship. they will be exchanged
free of charge.  Natural wear and tear on any of the
parts  is not considered a defect in material or work-
manship.

 We guarantee the electrical equipment on this ma-
chine, if any, for one year, in keeping with the general
practice covering electrical goods.

  This guarantee does not apply to attachments, or the
breaking of needles, shuttles, bobbins or belts.

  When referring to this guarantee please do not fail
to state Model Number of the machine.


SEARS, ROEBUCK AND  CO.
           ”The World’s Largest Store"
View original page 2Page 3 · Read text
shown in Figure 2.  Figure 3 shows the parts of the stand to                    Motor Lubrication
 be oiled. and applies to treadle machines only.                                                     Two cups (one at either end of the motor shaft) provide for
                                                             motor lubrication.  Unscrew the caps and  fill with vaseline
                                                                         occasionally, depending upon the use of the machine.
                                                                      Motor
                                                           The motor can be used on either direct or alternating cur-
                                                                              rent, 110 to 115 volts up to 75 cycles.
                                                                                Control
                                                            The desired speed is obtained by  ressing downward on foot
                                                                     pedal of the rheostat, and raising t e foot automatically stops
                                                                                                                 it.   If machine is equipped with knee-lever control, the speed
                                                                                         is regulated by pressing knee against the lever.
                                                      Running Machine (If Treadle Operated)
    if the machine runs hard  it  is most likely due to lack of         Loosen the friction nut, Figure 3A, so the handwheel will
                                 proper oiling of some beer-        turn free.  Raise the presser foot and take out the shuttle
                                                                         (see Figure 5).  Place your feet on  the treadle with the                                        ings. Should the oil become
                                                                        instep directl  over the center. Draw the belt downward with                          gummed from long stand-                                                                       the hand an  move the feet up and down on the rocking
                                   ing or use of poor oil, ap-        treadle by pressing on the treadle first with the heel and then
                                     ply kerosene or gasoline to        with the toes until an easy and steady motion  is obtained.
                                              all bearings to remove the      When that  is accomplished, tighten the friction nutY Figure
                                                              8A, and repeat the treadle  recess until you can easily start                          gummed oil. Then run the                                                                    the machine in the proper   'rection and can make a smooth
                                machine rapidly and wipe        motion.  After becoming familiar with the treadle movement
                                       clean, after which oil prop-         in this way, put a cloth under the presser foot and lower  it,
                                    erly with good machine oil       and without threading the machine, practice the treadle mo-
                                                                           tion until you have complete control of  it, when you will be                                   before beginning to sew.                                                                 ready to sew.
                                Be sure to use only good                   Threading the Machine
                                    quality sewing machine oil.                              (See Figure 1
                                                                       Place the spool on the spool pin  (1), guide the thread
   How to Prepare Motor (Electric Machine)            through the eyelet (2) in the upper forward corner of the face
                                                                                       late. then between the discs 0  the tension (3). from right to
    1.  Place pulley on motor shaft (rubber end toward motor).          eft between the two tension plates, bringing it up under the
   2.  Tighten set screw in pulley.                                  thread controller spring  (4), then through the   ole  in the
   3.  Remove the air felt pad from between motor and the        thread take-up lever (5)  then through the thread guide (6)
                                                                                in the face plate, then through the thread guide (7) on thearm of the machine so the spring on motor bracket can force                                                                     needle bar. then throu h the eye in the needle from left to
the rubber pulley against the hand wheel.                               right.  The thread gui e (6) on the face plate is so arranged
  NOTE: Be sure that screws No. 209 (see Figure 8A) are         that the thread may easily be inserted by sliding it under the
                                                                        eyelet from the rear instead of slipping it through the hole intightened securely.                                                                     the guide.                                5
                                          4
View original page 3Page 4 · Read text
How to Wind Bobbin         stop windin  before the thread is wound higher than the brass
                            on Electric Machine        ends of the   bbin.
                                            A DROP OF OIL should be applied to places indicated by                             FlllCTlON "01          1. Swing the bobbin
                                                                     the arrows marked “oil."                                   winder upward until rod                                                    When throu h winding the bobbin, push the bobbin winder                          A   (see  Figure  3A)                                                                back a       '  st   e arm of the machine, tighten the friction nut                                       forces motor pulley out                                                               on the  and wheel and the machine will be ready for sewing.                                      of  contact  with  hand
                                       wheel.
                                                      2.  Apply rubber belt                   To Set the Needle
                           some   to grooved pulley D on          Raise the needle bar to  its highest point and loosen the
                     Nun  motor and  ulley B on        needle clamp screw.  Hold the needle between the thumb and
                                                                                                                                                                                                                              »       bobbin win  er.                 first finger of the left hand and      the shank of the needle
                                                         S OP PI   . WITH THE FLAT SIDE 0  THE SHANK T0-                                                                                                                                                                                                               ‘ “m   structions3.  Proceedbelowas per forin-       u  throu h the hole in the n    e clam  AS FAR AS THE                                   winding bobbin.         WARD THE NEEDLE BAR.  After setting the needle, turn
                                                                     the hand wheel until the needle passes part way through the                                                    4.  After  bobbin   is                                                                       hole in the needle plate and then tighten screw securely.                                  wound, remove belt and                                                             Never leave the screw loose, nor the needle partly out of its                          eusume   swing  bobbin  winder                                                                           socket.                               down as far as  it will
           time 3A                  go.                          Never use a needle with the point blunted or turned over.                                                                                If the needle is blunt, bent, or not set properly it will prob-
                                                                    ably cause skipped stitches.
    How to Wind Bobbin on Treadle Machine
                                                           To Take Out the Shuttle   Hold handwheel with the left
 hand  while  loosening  friction                                 Withdraw the front shuttle slide and turn hand wheel of
 nut (Figure 3A) with the right                                 machine until shuttle is at the front end of its swing.  This
 hand.      's will release the sew-                                          will permit easy removal of the shuttle; lifting  it out from
 ing mechanism of the machine.                                  back end.  Do not take hold of the spring on top of shuttle.
 Pull bobbin winder toward you                                and never use any tools to raise the shuttle when removing it.
 until the small pulley wheel (8).                                Use fingers only.
Figure 4. comes in contact with
the  belt.  Operate the machine                                         Threading the Shuttle
until the distributor (C)  is as                                                                                            Hold the shuttle  in the  left
far to the  ri  ht as  it  will  go.                                                                                       hand with the point to the left
Place one en  of the bobbin  in                                                                                        and tension 8 ring up  most.the  socket  of the  spindle  (E)                                                                                    Take the bob in  in  t e right
and the other end of the bobbin                                                                      r                hand and push  it into the bar-
 in the socket of the step (F), pulling the step nut (G) out to             'm' 5              rel  of  the  shuttle,  with  theadmit the bobbin and letting it spring back into place.  Catch                                                                                                thread  drawing  toward   outhe end of the thread between the brass end of the bobbin and                                                           from the inside end and over the up   r edge of the bob  in.center of the spindle on the right side. carrying the thread                                                     Draw the thread through the  slot at)  at the heel of thethrough slot  (       , then to the lower end of the distributor to                                                                          shuttle and, with the forefin   r of the  left hand, hold the
the slot (ll). then up over eyelet (2), Figure  1. placing the        bobbin in place, drawing the   read to the left until  it passesspool on the spool  pin.  Run the machine as ¢Previously in-                                                               under point (C) and comes back out through hole at end ofstructed and the bobbin will automatically win   .  Be sure to                                                                                        slot.  Leave about 3 inches of thread hanging from shuttle.
                                          6
                                                                                                                                                        7
View original page 4Page 5 · Read text
Regulating the Tension                       The following table will be found useful as a general guide,
                                                              which may be varied as experience and judgment suggest:
  Any adjustment of the upper tension must be made with
                                                                                                                                                                                                                                                                                                                                                                                 7            7         7    Materials             Cotte- ‘l‘hreajl ‘Sllk Thread lo. stifleedlethe presser foot down, as the automatic release removes all
tension when the presser foot is lifted.  To change the upper        Fine linens, lawns, etc                     000
tension, turn the tension regulator nut (No. 8 in Figure 1).        Fine linen underclothing
Whether increasing or decreasing tension. always turn the        Muslin or linen
thumb nut only about one-quarter of a turn at a time, then       Dressmaking
sew a short distance; repeating the operation  until desired       Woolen clothing and flannels;  30 to
tension is obtained.  The lower tension is regulated by a small       Heavy woolen clothing
screw  ( B. Figure 5) which can be tightened or loosened—but
only a little bit at a time—to increase or decrease tension on                 To Prepare for Sewing
the lower thread.  After this tension  is properly set  it  is
                                                                    Before commencing to sew, raise the presser foot and takerarely. if ever. necessary to change  it.
                                                                     hold of the end of the needle thread. leaving  it slack from
                                                                     the end of the needle; turn the balance wheel toward you                    For ordinary stitching the upper and                                                                            until the needle moves down, and up again to its highest point.                   under threads  should be locked  in the                                                          The needle thread has then been carried around the under                    center of the thickness of the material                                                                       thread, which can be drawn up through the hole in the throat                    as shown by Figure 6.                                                                        plate by the needle thread as shown in the illustration, and
                          It the upper thread is held too tightly,                                                                  both should then be laid back under the presser foot.
                  by its tension, or if the under thread  is
                     too  loose,  the  thread  will  lie  straight
                                                                           .      along the upper surface of the material
                                          ;:'_f7'1.‘~:‘ii.      ii,"-   as shown in Figure 7.
        Figure 9          If the under tension is too tight or the
                  upper tension too loose. the thread will
lie straight along the under side of the material as shown
in Figure 8.

               Needles and Thread                         The best results are obtained when both the upper and under
                                                                   threads are the same size and quality.  Use good needles and thread.  First select the thread to
                                                         To turn a corner, stop the machine while the needle is stillsuit the goods; then the needle to suit the thread. Remember
                                                                              in the cloth, raise the presser foot and turn the corner, usingnot to use too large a size of thread for the work, because
                                                                     the needle as a pivot.the coarser thread will not sink into the material and make
                                                            For sewing flannel or bias seams use a short stitch and lightas pretty a stitch as fine thread.
                                                                       tensions so that there will be sufl‘icent thread in the seam to
                                                                   allow the goods to stretch, if necessary.

                                                                                                                         9
View original page 5Page 6 · Read text
To Alter the Length of Stitch               DIRECTIONS FOR USING ATTACHMENTS
   The  stitch regulator  is  located on  the arm  of machine                 (If Furnished With This Machine)
 behind the bobbin winder (No.  9, Figure  1).  Loosen thumb
 screw and move pointer up to lengthen the stitch; down to         With the different attachments there is no end to the va-
                                                                             riety of the work which you can do with your machine. shorten.  For most purposes a stitch set at No. 16 on the
 regulator gives good  results.  On heavy work  the  stitch       Remember that the successful operation of the attachments
                                                             comes through practice, and you must not expect to make should be lengthened.
                                                                 anything by means of the attachments without first prac-
              To Remove Work                               ticing their uses and knowing just what they can do.  We
  To remove the work, raise the needle bar to  its highest       recommend  that  you  purchase  material and  practice  the
 point, raise the presser foot and with the left hand draw the         various operations of the different attachments, and as a
 fabric back about 8 inches  in a straight line with the back        guide we suggest that you buy the following materials:
 shuttle slide. passing both threads over the thread cutter with         One yard of white cambric cut into strips  1 inch wide.
 a slight downward pressure, and they will be cut close to                                                               These strips are most useful in learning the operation of the
 the end of the stitch.                                                                                     rufi’ler.
         To Avoid Breaking the Needle                      One-half yard of lawn or similar material;  V4  yard of
  Never pull the material while operating the machine. When          batiste.  Cut these into 10 or 12-inch squares and practice
 a needle is broken it is in nearly every case the fault of the        tucking and shirring; then after some of this material has
 operator, caused by pulling the  fabric  so that the needle        been shirred or different styles of tucks have been made (see
bends and strikes the needle plate.                                Figures 15 and 16 for tucking and Figure 14 for shirring),
                                                                     the edges of the squares may be bound by the use of the
           Breaking the Upper Thread                      binder (see Figure 21).
  This may be caused by improper threading of the machine.                                                          One roll of bias binding ‘is-inch wide will be sufficient to
the upper tension being too tight, needle being too small for                                                                       learn how to use the binder.
the thread, the needle being set the wrong side out or set
                                                           One strip of heavy muslin, ifi-Yard wide, cut crosswise. willcrooked, or by a sharp edge on the shuttle or the needle rub-
                                                                     give you sufllcient cloth for learning the operation of the setbing against the presser foot, or the point of the needle being
                                                                       of hemmers.blunted or turned over.
                                                           One bunch of cotton soutache braid for learning the use of          Breaking the Under Thread                                                                    the under braider.
  This may be caused by the tension being too tight, bobbin
                                                                Three or four squares of some heavy and rather stiff ma-being wound too full so it will not revolve freely, by presence
                                                                                    terial, stamped with a design, would, in connection with theof lint or dust in the end of the shuttle which forces the bob-
                                                                           braid, be suficient for learning the operation of the underbin against the shuttle carrier spring and keeps it from re-
                                                                           braider.volving, by a sharp place on the edge of the shuttle spring or
on the heel of the shuttle, or by failing to keep the shuttle
race clean.
                                           10                                                                                                              ll
View original page 6Page 7 · Read text
.
                 The Rufller                             To make a fine ruffle, shorten the stitch and turn the ad-
                                                                        justing screw E to the right one-quarter turn at a time until
   Remove the presser foot and attach the rufl'ler in  its place                                                                         the ruffle looks satisfactory.
 on the presser bar with the fork of the ruffler lever 8 around
 the needle clamp screw A, then tighten the attachment holder
 thumbscrew C.
   Turn the hand wheel slowly and see that the needle passes
 down through the center of the round hole in the foot of the
 rufl’ler.


                                                           To make a full gather, turn the adjusting screw E to the
                                                                                    left and use a short stitch.  By regulating the adjustment
  The lines  1, 2, 3 and 4 show how to place the diflerent        screw E and the length of stitch you can make all variations
 pieces of cloth under the mfller.                               from the very scant to the full ruflle.
   Line l—The lower  piece  or band  to which the  rulile  is          Never try to regulate both the adjusting screw E and stitch
 sewed.                                                                   at the same time.
   Line 2—The piece to be gathered.                                         If the ruffle is to be sewed on to the band,  lace the band
   Line 8—The heading,  or upper  piece, when  milling  be-        under the separating blade.  See “Line  1,"   ‘gure  9.
tween two pieces.                                    NOTE—The rufier should never be used without cloth be-
  Line 4—The strip of piping.                                   tween the blades.
  The thumbscrew E regulates the fullness of the ruflle.                   To remove the work, see Page 10.

                    Ruining                                              Ruiiling and Sewing On
  Place the goods to be gathered between the rufller blade            Place goods below both blued blades on feed of machine and
and the separator blade and push forward until under the        up over first guide.  See “Line 1," Figure 9.  Place material
foot; lower the presser bar and commence to sew.                     to be milled as in “plain ruflling," under second guide.  See
                                            12                                                                                                                        ll
View original page 7Page 9 · Read text
0
                                  the tucks, move the marker                     Wide Hemmers  To regulate the space between
C to the left for Wide s ace and to the right for narrow.
  The figures on the sea e B show the width of the tuck and         The width of the hem  it makes is stamped on each one of
those on scale C the width of space.                                 the hemmers.  The wide hammers are set in place by means
  By adjusting gauge B and gauge C so that the scale indi-         of the bedplate thumbscrew.  BEFORE TIGHTENING THE
cators will point to the same figure,  it will make the tucks                                           THUMBSCREW see that the hemmer  is far enough to thejust meet.  When the adjustments have been made be sure
 to turn screw A down tight.
                   Tucking
  After attaching the tucker to the presser bar and adjusting
 it so that the width of the tuck, as well as the distance be-
tween the tucks, will be made the size desired, proceed to
make the first fold by hand and crease it carefully for its en-
 tire len        .  After creasing the first fold, insert  it into the
tucker mm the left, with the cloth to be tucked uppermost,
as shown in Figure 16. Lower the presser bar and proceed to
sew, keeping the crease against the guide D, Figure 15. When
the tuck  is finished flatten  it way from the crease so that  it
lies in the  roper direction, and proceed in like manner for
the next tuc   . creasin   it along the line made by the marker,
always placing the   ge of the last tuck under the hook in
front of the marker (see letter B in Figure 15). This is done
by moving the goods just a little to the right and back again
without raising or lifting the material.


                                                                                    left so that the needle will pass through the cloth as it leaves
                                                                     the hemmer.  Fold the goods by hand the width of hem re-
                                                                          quired, turning one fold only, adding about  56  inch, which
                                                                              will be turned under by the hemmer.  Then insert the goods
                                                                                  in the hemmer, forcing it back until the needle will catch the
                                                               edge of the goods.  Lower the presser foot and sew as usual.
                                                                        Slightly press on the goods with two fingers of the left hand.
                                                                                         if more goods are required to fill the hemmer and turn the
                                                               edge properly, slightly carry the goods to the right;  if too
                                                      much goods are taken, carry to the  left.
View original page 9Page 10 · Read text
To Attach the Binder                      any description can  be used,  “Ts-inch wide and uniform  in                                                                      width, if very light, sleazy material is used the binding should
  Raise the needle to  its highest   oint; attach the binder,        he cut a  litt e wider than ia-inch in order to have the edges
fastenin   it securely with the thum screw.  Fold the binding        properly turned  in.
length      in the middle for a distance of about 4 inches
from the end, creasiniothe fold.  Insert the crease into the                  To Do Dress Binding
opening of the binder,   lding the binding as the cloth is held
in starting a hem. Draw the binding through the binder with         Ordinary dress binding can be used  in the binder by the
the the  left hand until  it  fills the scrolls of the binder, as       same method as described above.  When such binding  is used
shown in Figure 21.  If the binding cannot be forced into the        the edge of the binding will not be turned under.
scrolls use a pin or the small shuttle screwdriver, by means
of which it can be drawn into the scrolls far enough so that                       Underbraiding
the needle can pass through the binding.  Lower the presser                                                                                    Use the short prong braiderbar, insert the edge of the cloth to be bound into the opening                                                                                                            foot in place of the regular pres-of the binder and proceed to sew, guiding the binding with
the right hand and the cloth with the left, keeping the edges                                      scr  foot.  The underbraider  is
well within the opening of the binder, as shown in Figure 21.                                     placed  in position by removing                                                                                                                                                                                                                                                                                     _                    the front shuttle slide and put
                                                      “3°“ ‘3            ting in the s    ial slide with the
                                                                  underbraider attached (Figure   2).  Be ore pushing  it into
                                                                       place be careful to put the braid into the channel of the at-
                                                               tachment with enough projecting from the end to insure  its
                                                            coming under the needle and presser foot. Use a No.  1 needle
                                                              and about 16 length of stitch. The pattern should be marked
                                                                       or stamped on the wrong side of the material  Place the goods


             To Do Bias Binding
  Pass the binding through the scrolls of the binder and draw
it back under the needle. Place the edge of the material to be
bound between the upper and lower scrolls, then lower the
must bar and sew as usual.  Guide the cloth with the left
   d and let the binding glide easily through the fingers of
the right hand to keep it straight. For bias binding, goods of
View original page 10Page 11 · Read text
under the pressor foot, with the PATTERN SIDE UP (See
 Figure 23), and so the needle will be directly over the point
 where (you desire to commence braiding.  Lower the  resser
 bar an  sew as usual. guiding the material so the  it    Is will
 follow the pattern.  The braid will be stitched on the under
 side of the goods. as shown  in Figure 28.
   To make a square or sharp angle, sew to the point of turn-
 ing; stop the machine while the needle is still in the cloth,
 slightly raise the presser foot and swing the cloth around on
 the needle.  Care must be taken in turning the cloth not to
 pull) thel‘needle, therby causing it to strike the plate and bend
 or  rea
  NOTE—All the attention that need be given to the braid is
 to have it pass freely and smoothly through the braider. The
 bunch or spool of braid may  lie in the lap of the operator.
            To Applique With Braid
   Baste the goods to be appliqued on the background. Have
 pattern on wrong side of background.  Braid desigln as above
 and cut out the upper goods around the design.   his leaves
 the design appliqued on the background.

                      Quilting
   Loosen the quilter screw enough to allow the insertion of
 the quiltcr through the presser bar from the right, fastening


it the desired distance from the needle by means of the quilter
screw.  Fold a crease in the cloth to be quilted as a guide for
the first line of stitching. thereafter guiding each succeeding
line by holding the cloth so that the  last line of stitchin
made is run directly under the guide. as shown in Figure       .
                                       10
View original page 11Related documents and language editions
FranklinPDF
Franklin Long Shuttle
User manual
26 pages · EnglishRead →
KenmorePDF
Kenmore 117.841 Automatic Sewing Machine
User manual
67 pages · EnglishRead →
KenmorePDF
Kenmore Buttonhole Attachment
User manual
10 pages · EnglishRead →
SearsPDF
Sears Burdick
User manual
13 pages · EnglishRead →
SearsPDF
Sears Franklin or Minnesota Model M
User manual
34 pages · EnglishRead →
SearsPDF
Sears Franklin or Minnesota Model M (black and white scan)
User manual
34 pages · EnglishRead →
KenmorePDF
Sears Kenmore Models 14502 or 14401
User manual
28 pages · EnglishRead →
SearsPDF
Sears Minnesota Model A
User manual
18 pages · EnglishRead →
SearsPDF
Sears Minnesota Model A Sewing Machine Instructions
User manual
15 pages · EnglishRead →
SearsPDF
Sears Minnesota Model C (black and white scan)
User manual
20 pages · EnglishRead →
SearsPDF
Sears Minnesota Model C Sewing Machine Instructions
User manual
20 pages · EnglishRead →
From the ISMACS International. Original publisher and archive notices are retained.
Check the model and edition against your equipment.
PDF verified 2026-10-11.