Film cameras
Konica Ee Matic F User manual
User manual for Konica Ee Matic F. 50 pages in German, French, Spanish. Read the original PDF, download or print a copy without registration.
50 pagesGerman, French, Spanish7.8 MB PDF

Loading your manual…Open PDF directly
Document details
- Brand
- Konica
- Model / document
- Konica Ee Matic F
- Document type
- User manual
- Language
- German, French, Spanish
- Pages
- 50
- File size
- 7.8 MB
- Category
- Film cameras
- Document date
- Not specified in catalog
Search available document text
Find a term, then jump to its page in the original PDF. Image-only pages may not be searchable; check the PDF for exact wording and diagrams.
Page 2 · Read text
NOTE S   FOR  CAMERA USE  NOTE    SUR    EMPLOI
HINWEISE  run DEN GEBRAUCH   NOTAS EN USAR LA cA,rnlu
w
     {r

                                                                                                                                                  f ilm wind lever connot ony, moreT The KONICA EE-matic Deluxe F's CdS      i{ When the
   meter uses o mercury boltery os its electric      be cockeci ofter o roll of film hos been
   soirrce. Thoroughly wipe the bottery, which        completely exposed, do nol try to wind the
   comes in os on occessory to the comero,         lever by force. While depressing the film
   with o piece of cleon cloth before it is put       rewind button, wind the film until the lever
    into the mercury bottery chomber.               does not move further
2 Moke sure lhol the monuol lever is de-     51 The synchro-flosh socket, coupled to film
   pressed with o  f inger when the monuol ring       wind, outomoticolly iurns. Do not try to
    is turned.                                         turn the synchro-flosh cube with fingers
3 The self-timer lever musl be set ofter the
        f ilm wind lever hos been cocked.
View original page 2Page 3 · Read text
!F
                                            www.butkus.us
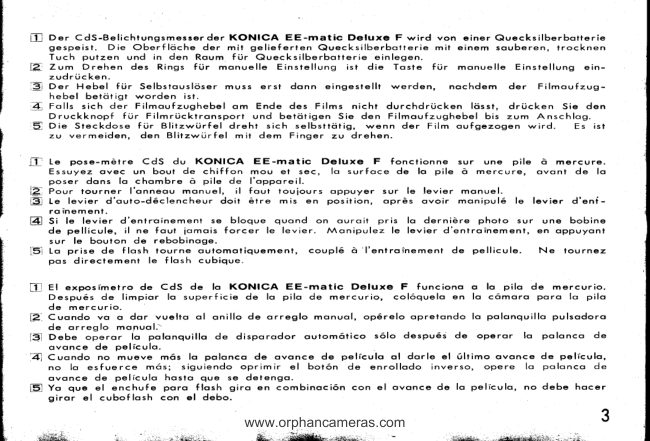
 [f]l Der CdS-Belichlungsmesserder  KONICA  EE-matic  Deluxe  F wird won einer Quecksilberbonene
    gespeist.  Die Oberflijche  der  mit gelieferten  Quecksilberbotterie   mit einem squberen.  trocknen
   Tuch putzen und  in den Roum  fijr  Quecksilberbotterie    einlegen.
12 Zum Drehen des Rings  fijr  monuelle  Einstellung   ist  die  Toste    fiir  monuelle  Einstellung  ein-    zudriicken.
Q Der Hebel   fijr  Selbstouslijser muss  ersi  donn  eingestellt  werden,  nochdem  der  Filmoufzug-
    hebel  betcit igt worden   ist.
.4  Folls sich der  Filmoufzughebel om Ende des Films  nicht  durchdrijcken   l6sst.  drijcken  Sie oen
   Druckknopf     fijr  Filmrijcktronspori   und bercitigen Sie den Filmoufzughebel  bis zum Anschlog.
5  Oie Steckdose   fijr   Blitzwijrfel   dreht  sich  selbsttdtig,  wenn der  Film oufgezogen  wird     e"   irt
   zu vermeiden,  den  Blitzwijrf  el m it dem Finger zu drehen.

.1j] f"  pose-r1€ire  CdS du KONICA  EE-rnatic   Deluxe  F  fonctionne  sur  une  pile  d  mercure.
   Essuyez ovec un bout de chiffon  mou et  sec,  lo surfqce  de  lo  pile d mercure,  ovont  de  lo
   poser dons  lo chombre d  pile de  I'opporeil.
]2  Pour-tourner    I'ot..o,    monuel,    il  fout  touiours  oppuyer  sur  le  levier  monuel.
iJ  Le levier  d'outo-d6clencheur   doit  6tre  mis en  position,  opr6s  ovoir  monipul6  le.lewier.d'ent-
    rotnemenf,
El  S;  l.  levier  d'entroinemenl  se bloque quond on  ouroit  pris  lo derniEre  pholo  sur une bobine
   de pellicule,    il ne fout  iomois forcer   le levier.  Monipulez   le lewier d'entroinement,  en oppuyont
    sur  le bouion de rebobinoge.
i5l Lo prise de  flosh  tourne  outomotiquement,   coup16 d I'entroinement  de  pellicule.   Ne  lournez
    pos.directemeni    le   f losh cubique.

 I  El exposimetro  de CdS de  lo KONICA  EE-rnatic   Deluxe  F  funciono  o  lo  pilo de  mercurio.
   Despu6s de  limpior  lo superficie  de  lo  pilo de mercurio,   col5quelo en  lo c6moro  poro  lo  pilo
   de mercurio.
,2 Cuondo vo o dor  vuelto  ol  onillo de orreglo  monuol, op6relo opretondo  lo polonquillo  pulsodoro
   de orreglo  monuol.
i3l Debe operor   lo  polonquillo  de disporodor  outom6tico  s5lo despu6s de  operor   lo  polonco  de
   ovonce de  peliculo,
i4l Cuondo no mueve m6s lo polonco de owonce de  peliculo  ol dorle  el Oltimo ovonce de peliculo,
   . no  lo esfuerce  m6s;  siguiendo  oprimir   el  bbfon  de  enrollodo   inverso,  opere   lo polonco  de
   ovonce de  peliculo  hosto que se detengo.
[5 Yo que  el enchufe  poro  flosh  giro en combinoci6n  con  eil ovonce de lo pelrculo, no debe hocer
    giror  el cubof losh con  el debo.
                                                                         3
View original page 3Page 4 · Read text
Merci de faire un don de 2,50 € pour soutenir ce site via E-bay ... www.PayPal.me/butkus


Bitte spenden Sie 2,50 Euro, um diese Website über E-Bay zu unterstützen ... www.PayPal.me/butkus
View original page 4
Page 7 · Read text
NAMES   OF   PAR              DES    PIECES
BEZEICHN UNG DER TE         DE  LAS   PA RTES
@ Eyepiece   @ Film wind ["ue,            @ Film Toke-up.  Sltr

       @ Sprocket


                                       @ Bock Cover

@ Mercrry
   Boltery           www.butkus.us                       @ Pressure Plote
   C hom ber
@ril^
   Corlridge                @ fripod Screw                     Srobilizing Roller
   C hom ber                                       Top-Hole
@ Bock Co"er               @ Guide Number
  Metol [ock  @ Dry Bottery Chomber     Qp Guide Number Index Mork  @ Rewind Button
View original page 7Page 8 · Read text
www.butkus.us

@ Suchereinblick      @ Viseur         @ Oculor-
@ Riickspu loc hse      @ Axe de rebobinoge   @ Eie de Enrollodo                                                             nverso@ Roum f iir                                                                 poro Pilo de             @ Chombre d pile     @ C6moroI    Quecksilberbotterie             @ Chombre d cortouche     M ercurio@ Roum fi.ir Filmpotrone             @ Verroue du couvercle  @ C6moro poro Cortucho@ Verriegelung   fijr                                   de Pelfculo
    Riickendeckel              de dos         @ Seguro de Topo
@ Roum  f iir        @ Chombre d pile sEche       Trosero
    Trockenbotterie     @ lndice du        @ C6moro poro Pilo                           @ Indicodor poro@ Morkierung   fiir                  chif f re-guide                                                NOmero de Gu-ro    Leitzohl             @ Chiffres  guides     @ NOmero de Gu-ro
@ Leitzohl             @ Prise de tr6pied     @ Rosco p<rrq Tripode@ Geweinde  fiir  Stotiv                @ Bot6n de Enrollodo             @ Bouton de rebobinoge                          I nverso@ D ruckknopf   f Lir
     F il mrijckt ronsport    @ Borre de pression    @ Rodillo poro es-
@ Filmondruckrolle    @ Ploque de pression             tobilizor   lo pelfculo
@  F ilmqndruckplotte    @ Couvercle de dos    @ Ploco de presi6n                           @ Topo Trosero@ Riickendeckel      @ Fente d'introduction   @ Aberturo  poro@ Schlitz der               de pell icule                   insertor  lo peliculo    Filmouf wickelspule                                                                    tomo                                                            Correte                                                           de                           @                               Bobine d'entroinement             @     F ilmouf           wickelspule@                                                                           tomos                                                        Contodor                                                            de                           @                            Compteur                                    de poses             @      ildzcih lwerk@ B                                                                      ovonce                                                        Polonco de                           @@ Filmouf zughebel     @ Levier d'ent roinement       de peliculo
@ Zohn rodt rommel     @ Tombour        @ Ruedo dentodo
                                                                                1


               .i  r
View original page 8Page 10 · Read text
www.butkus.us

 @ Set Comero lo AUTO.
 E Ring  f ijr monuelle Einstellung    l5] Focus Lens ond Frome Subiect.     [@ Depress Shutfer.
    ouf AUTO einstellen.        p Entfernung einsfellen und Bildous-  Q Ausl6ser dri.icken.
 @ Ragloge sur AUTO.                   schnitt festlegen.                 ,@ D6clonchemenr
  12il Poner o AUTO.          S R6gloge de mise ou point et             d'obturoleur.
                                            cod roge.            @ Disporor el
                                    '$ Enfoque y conpomgo lo visto.            obtu rodor.


                                         i{ Mount Flosh bulb.
                @ Blitzwijrfel ouf srecken.
www.butkus.us                              Zil Fixotion du flosh.
                                         l{ Colocor lo bombillo de  f losh.
View original page 10Page 11 · Read text
LOADING OF MERCURY BATTERY   COMMENT POSER LA PILE A,rarnCUnr
 EIN LEGEN DER QUEC KS ILBERBATTERIE   COLOCAC ION DE LA PILA DE MERCURIO


 The KONICA EE-matic Deluxe F's CdS meter     l1 To toke of f the cover of Mercury Bottery
 uses. o mercury bottery os its electric source.      Chomber €), ir.n  it counterclockwise  with
 Thoroughly wipe the bottery, which comes in      o coin or the like.
 os ctn occessory to the comero, with o piece
 of cleon cloth before  it is put into the mercury     i2 Insert the mercury bottery into the chomber,
 bottery chomber.                                   the "*" side of the bottery focing thot of
                                                  the cover, ond then screw the cover tight.


r0
View original page 11Page 12 · Read text
www.butkus.us
 Der CdS-Belichtungsmesser  der KONICA EE-matic Deluxe F wird von einer Quecksilberbotterie
 gespeist. Die Oberflciche der mit gelieferten Quecksilberbotterie mit einem'souberen. trocknen
Tuch putzen und in den Roum fijr Quecksilberbotterie einlegen.
f  Die Koppe fijr den Roum fijr Quecksilberbotterie @ mit einer Mijnze noch links (im Gegen-
   uhrzeigersinn) drehen und qbschrouben.
E Die Quecksilberbotterie einlegen, wobei sich der positive Pol der Botterie mit der positiven
    Seite der Koppe deckt. Die Koppe onschrquben.

Le pose-mdtre CdS du KONICA EE-matic Deluxe F fonctionne sur une pile d mercure. Essuyez
ovec un bout de chiffon mou et sec, lo surfoce de lo pile d mercure, ovont de lo poser dons
 lo chombre d pile de I'opporeil.
E Retirez le couvercle de lo chombre d pile @, en leitournbnl dons le sens inverse des oiguilles
   d'une montre, d I'oide d'une piEce de monnoie.
E Posez lo pile de focon que le c6i6 "*" de lo pile soit en foce de lo morque * du couverc'le.
   Ensuite, remettez le couvercle. en le vissont.

El exposimelro de CdS de lo KONICA EE-matic Deluxe F funciono o lo pilo de mercurio.
Despues de limpior lo superficie de lo pilo de mercurio, col6quelo en lo c6moro poro lo pilo de
mercurio.
E Poro quitor lo lopilo de lo Como.o @ poro lo Pilo de AAercurio, d6le vuelto con uno monedo
  o lo izquierdo (en el sentido controrio del de los oguios del reloiy.
p Coloque lq coro "*" de lo pilo poro iunlorlo con lo morco *  de lo topito, y ci6rrelo.
                                                                                                        tl
View original page 12Page 13 · Read text
{< A mercury bottery is usoble for o period of over one yeor in normol use. For sofety's soke,
   however,  it is odvisoble to chonge it with o new one ofter it hos been used for oboui one
    yeor.
 * The mercury bottery usoble on this cqmero is o l.3V Mollory PX-13, PX-625, Evereody
   EPX-I3, EPX-625 or GE No.625.
 :F When lhe comero is not to be used for o long perbd, it is odvisqble to toke out the mercury
   bottery ond keep it ot o dry ploce.
 * Bei normolem Betrieb hot die Quecksilberbotterie eine Lebensdouer von mehr qls einem Johr.
   Zur Sicherheit ist iedoch die Botterie noch einitihrjgem Betrieb ouszuwechseln.
 * Verwendbore Quecksilberbotterien  sind : Mollory-PX-13, PX-625, Evereody -EPX-13, EPX-625
   und GE No.625, ie mit 1.3V. {. Folls die Komero tiir eine longe Zeil nicht benutzl wird, nehmen Sie die Quecksilberbotlerie
   herous und bewohren Sie sie qn einem trockenen Ort ouf.
 {< Lo vie d'une pile d mercure est de plus d'un on, d I'usoge normol de I'opporeil. Mois pour
   plur de s6curil6,  il voudroit mieux lo remplocer por une pile nouvelle, ou bout d'un on.
 * Lo pile d mercure qui peut 6tre utilis6e dons cet opporeil esf :   l 3V Mollory PX-13,'
   -PX-625, Evereody EPX-13, -EPX-625, GE-No. 625 ou leurs 6quivolonts.
 X< Si I'opporeil n'est pos utilis6 pendont une longue p6riode, relirez lo pile d mercure el
   conservez-lo dons un endroit frois et sec.
 * Lo pilo de mercurio duror6 m6s de un oio en los usos regulores, pero es meior reemplozorlo
   por uno nuevo o un ono.
 * Pod16 empleor lo pilo de mercurio de l.3V de Mollory PX-13, PX-625, Evereody EPX-13,
   EPX-625, GE No. 625 y on6logos.
 * Cuondo no vo q usor io c6mqrq por mucho liempo, soque lo pilo de mercurio y gu6rdelo en
  un lugor seco.
t2
View original page 13Page 14 · Read text
www.butkus.usMETTRE LA PELLICULEFILM     TOADING   COMMENT
FILMEINLEGEN       COLOCAION DE PELiCULA
* The KONICA EE-matic Deluxe F tqkes 35 mm roll  f ilm which comes in o cortridge.
{c Avoid the direct sunlight for film looding. Do it in the shode.
{< While Monuol Lever @ is being pressed down, turn Monuol Ring @ ond detoch the mork
  "AUTO'from the index mork, Blonk shots moy be token with the lens cop mounted on the
  lens. This mokes the monipulotion eosier.
* Fiir die KONICA EE-matic Deluxe F wird ein 35-mm-Film in Potrone verwendet.
{c Beim Filmeinlegen ist dos direkte Sonnenlicht zu vermeiden.
* Drehen Sie den Ring fijr monuelle Einstellung @ und verstellen Sie ihn von AUTO w€9,
  wiihrend Sie die Toste @ drijcken. In diesem Zustond ktinnen Sie Blindoufnohmen mochen,
  ouch wenn der Obiektivdeckel oufgesetzt  ist.
{< Avec le KONICA EE-matic Deluxe F, on utilise lo pellicule 35mm en cortouche de s6curit6.
* Pour poser lo pellicule dons I'opporeil, evitez le soleil direct. Le trovoil doit 6tre foit a
   I'ombre.
* Pour les prises d vide, oppuyez sur le levier monuel @ et tournez I'onneou monuel @ pour
   le mettre d lo position en dehors de lo position AUTO. Ainsi, on peut effectuer des prises
  d vide, foul en gordont le copuchon sur l'oblectif.
{c En lo KONICA EE-matic Deluxe F se empleo lo peliculo de 35 mm en cortuchd.
* Cuondo vo o colocor lo peliculo, evite los royosd ireclos del sol; hogolo en uno sombro.
* Si deio fuero de AUTO el Anillo de Arreglo Mqnuol @ siguiendo opretor lo Polonquillo
  Pulsodoro @ d" Arreglo Monuol, podro hocer el disporo fronco del obturodor ounque lo
  topo de lente est6 pueslo.
                                                                              l3
View original page 14Page 15 · Read text
t\


 T Flip down Bock Cover Metol Lock @ ond   2 Put o film cortridge inio Film Corfridge
    open bocK Lover A6l .   rltp up rtlm Kewlnd      Chomber @, th" side from which the cor-
   Cronk @ ond pull oul .Film Rewind Knob        tridge spindle sticks ouf focing the comero
   @.                                            boltom, ond then press Film Rewind Knob
                    @ into the originol position. lf  il does not
                                                           fully refurn into the originol position, turn
                                               the knob counferclockwise or clockwise o
                                                                           little, ond it will sink bock into fhe originol
                                                            oos  if ion.
                                            'S                                                         lnsert the film tip into Film Toke-up Slit @
                                                of Film Toke-up Spool @.  Any slit  is
                                                  usoble. Choose the one into which vou con
                                                         insert the tip wifh fhe leost difficulty.
t4
View original page 15Page 16 · Read text
www.butkus.us
I  Die Verriegelung  fijr Riickendeck"l @ ousziehen und den Rtickendeck"l @ 6ffnen. Dobei
   die Rilckspulkurbel @ hochkloppen und den Knopf @ herousziehen.
E Die Filmpoirone in den Roum fijr Filmpotrone @ einlegen und den Riickspulknopf @ in die
   Anfongsstellung eindrijcken. Folls dieser nicht richtig sitzt, drehen Sie ihn ein wenig noch
   rechts oder links.
E  f in Filmende in den Schlitz @ der Filmqufwickelspule @ stecken. Wcihlen Sie dobei beliebig
   einen der Schlitze.

E Ouvrez le couvercle de dos, @    tiront lo u"rrou" @.  Relevez le levier de rebobinose @   el sorlez le bouton @.         "n
E Posez lo cortouche dons lo chombre d cortouch. @, en mellont le c6t6 o0 il y o le bout
  de l'oxe, sur le fond de I'opporeil. Remettez le bouton de rebobinoge @ d so position
    initiole. S'il ne se remel pos bien, lournez-le 169Erement d droite et d gouche.
@ lnserrez l'ovonce de lo pellicule dons lo fente @ d" lo bobine d'entroinement @.  Intro-
   duisez-lo dons n'imporle quelle fente.
E Abro lo Topo Trosero @, tirondo el Seguro @ d" lo Topo Trosero. Levonte lo Polonco @
  de Enrollodo Inverso y deie levontodo el Boton @.
@ Coloque el cortucho de peliculo en lo Comoro poro Corlucho @, deiondo hocio lo porte
    inferior de lo C6moro el eie solienie del cortucho. Oprimo el Boron @ a" Enrollodo Inverso
  en lo posici6n originol. Cuondo no vuelve o lo posici6n suficientemente, d6le un poquito de
   vuelto o lo izquierdo o derecho.
S lnserte lo tiro de peliculo en lo Aberturo @ en lo Correte de Tomo @.  Escoio lo oberturo
  m6s convenienle.
                                                                                   t5
View original page 16Page 17 · Read text
tw""*


                                                                    www.butkus.us       lw
 f4l Cock Film Wind Lever 0l to toke up rhe   5 Af ter the bock cover is closed,   f lip up Film
    film on the spool. Close the bock cover       Rewind C ronk '.14\ ond gently turn it in the
    ofler oscerloining thot the teeth o{ Sprocket       orrow-morked direction to minimize the film
 @ ore in geor with the film perforotions.              s toc K.
   The bock cover moy be closed with pressure
   opplied by o  f inger tip.                6 Wind the film ond depress Shufter Button
                         O  - repeot fhis oction for two blonk shots.
                                            Here, Film Counter Q4t showt o point im-
                                                   mediotely before the  f igure "l'l
                            A subsequent full cocking of the film wind
                                                lever mokes it reody to toke the first reol
                                                                shot.
t6
View original page 17Page 18 · Read text
www.butkus.us
   E Den Filmoufzughebel @ drehen und den Film oufwickeln. Dobei feststellen, doss die Zdhne
        der Zohnrodtrommel @ in di" Rondlijcherung des Films greifen. Donn den Riickendeckel mit
         Fingerdruck schliessen.
     15 Noch dem Schliessen des RLickendeckels die Riickspulkurbel @ hochkloppen und in Pfeilrichtung
           leicht drehen, um den Film stroffzuziehen.
   @ Den Film tronsportieren und den Ausltiser @ drijcken. Diese Blindoufnohme zweimol ous-
                     f ijhren. Jetzt zeigt dos Bildztihlwerk @ eine Stuf e vor Zohl t.
    Nun ist die Komero schussbereii.
   @ Tournez le levier d'entroinement @ pour enlroiner lo pellicule. Ensuile v6rifiez bien I'engoge-
        ment des dents du tombour @ orr perforotions de lo pellicule. Et fermez le couvercle de
        dos, en y oppuyont ovec le bout de doigt.
   S Aprbs ovoir ferm6 le couvercle de dos, relevez le levier de rebobinoge @, et tournez-le
        doucement en direction indiqu6e por lo flEche, ce qui permettroit de tendre bien lo pellicule.
   @ Ef fectuez deux prises d vide, en oppuvont sur le bouton d'obturoteur @.  L'indicotion dons
I                                                                                                                                                                                                             ".          le compteur de pose @ doit morquer lo lettre ou chiff re iuste ovont I'indicotion "l
      On. peut ef fectuer lo premi6re prise, opr6s ovoir monipu16 encore une fois le levier d'entroinem.ent.
   E Enrolle lo peliculo sobre lo correle de tomo, dondo vuellos o lo Polonco @ de Avonce de
        Peliculo. Despu6s de verificor que los perforociones de peliculo quedon en los dientes de
r         lo Ruedo Dentodo @, cierre lo topo trosero. Apriete lo topo lrosero con el dedo poro
         deiorlo cerrodo con el seguro.
    $  Levonte lo Polonco @ d" Enrollodo Inverso y d6le vueltos lenlomenfe poro que no quede floio.
         lo pelfculo en el corlucho.
   @ Hogo ovonce de peltulo; oprimo el Bot6n Disporodor @ poro dor dos disporos froncos y  el
        Coniodor de Tomos Q9 indicoro un punto onlerior o 1.
     Al dor otro ovonce, lo Comoro estor6 listo poro fotogrof ior
                                                                  n
View original page 18Page 19 · Read text
KONTROLLE DES FILMTRANSPORTS
                                              Wdtirend der Film ordnungsgemiiss oufgezogen
                                                 wird, dreht sich der Rijckspulknopf l5 im Ge-
                                                  genuhrzeigersinn. Folls sich dieser nicht dreht,
                                                bedeuiet es einen Fehler im Filmlronsport.


                                        VERIFICATION DE L'ENTRAi NEMENT
                                                 Si lo pellicule esi bien entroin6e, choque foisa[:                                       que I'on octionne le levier d'entro inement, le
 CHECKING OF FILM WIND                                                bouton de rebobinoge.lS-t torrn" dons le sens
  lf  the f;lm is being wound in on occurote     inverse des oiguilles d'une montre. Si Ie bouton
 monner, Film Rewind Knob l5 lurns counter-                                       ne tourne pos, celo signifie que I'enlroinemenl
 clockwise eoch time the  f ilm wind lever is cocked.    ne se foit oos correctement.
 Note thot if  it does nol turn, the film is nol
 being token up in on occurole monner,

                                       VERIFICACION DE AVANCE DE PELiCULA
                                       Cuondo lo peliculo est6 enrol16ndose debido-
                                                mente, se do16 vuehos el Boton @ de Enrollodo
                                                 Inverso en el senlido controrio del de los ogujos
                                              del reloi. Si no giro osi lo peliculo no est6
                                                    renrollodo debidomente.
t8
View original page 19Page 20 · Read text
(CETTULEINCORPOREE)       PH OTOG RA PHY  PHOTOGRAPHIEEEwww.butkus.us
AUTOMATISCHE:HE (EE)(EE) AUFNAHMENAUFNAHMEN FOTOGRAFIA A    EE


When the KONICA EE-matic Deluxe F    is      Set Film Speed (ASA or DIN>.                                                          "!looded with o new roll of  f ilm, toke the fol-         P_ut your  f ingers on Film Speed Switch Ring
                                                                                                                                                                 f igure corresponding to thelowing two steps for electric-eye photogrophy,           1.9) to moke lhe
                                                                reoding of your film oppeorAfter this preporotion is done, oll thot  is     ASA (DlN)                                                       in Film Speed Indicotor Window @.necessory is lo look through lhe viewfinder,
focus the lens on lhe subiect ond depress lhe
shutter.                                                     [2] Align "AUTO" on Manual Ring with Index
                                                Mark.
                                           While Monuol Leuer @ i, d"pr"rt"d, turn
                                            Monuol Ring @ to olign the mork "AUTO'
                                                   with the index mork. The ring clutches into
                                                        posifion ot this mork.
                                                                                    t9
View original page 20Page 21 · Read text
Um mit der KONICA EE-matic Deluxe F ouiomotische Aufnohmen zu mochen, sind. noch dem
  Filmeinlegen folgende zwei Einstellungen erforderlich. Donn !urch den Sucher ouf des Motiv
  schouen, die Entfernung einstellen und den Auslijser drijcken. Dos ist olles.
 E Einstellung der Filmempfindlichkeit (ASA oder DIN).
    Den Einsteilring  fijr Filmempfindlich!git @ drehen, bis ein entsprechender Wert in dem Kon-
     trollfenster fijr Filmempfindlichkeit  (0) erscheint.
 E Einstellung des Bings fUr manuelle Einstellung auf AUTO.    Wiihrend Sie die Toste fijr monuelle Einstellung @ drijcken, drehen Sie den Ring fijr monuelle
     Einstellung @ und stellen Sie ouf AUTO ein. Der Ring verhorrt in dieser Stellung.
  Pour lo prise EE ovec le KONICA EE-matic Deluxe F,  il y o deux i6gloges d foire.  ll  suffit
  ensuite de r69ler lo mise ou point et d'oppuyer sur I'obturoteur.
                                         DIN). E-- Reglage de sensibilite (ASA ou    Touiner I'onneou de sensibilite @ iusqu'd ce qu'opporoit dons lo fen6tre de sensibilit6 de
     pellicule @ lo voleur de lo sensibilit6 d'e le pellicule utilis6e.
 p*  Reglez I'anneau manuel  i  la position-rnonr"l AUTO.
    Tout en oppuyont sur le levier   @  tournez I'onneou ronrel @, pour le fixer a
      I'indicotion AUTO, por embroyoge.
 Despu6s de colocor lo peliculo en lo KONICA EE-matic Deluxe F, hogo los dos oiustes
  siguientes y se completo16n los preporotivos poro fotogrofior.  Y solo le folto poro fotogrof ior
  enfocor o trov6s del visor y disporor el obturodor.
  I  Haga el ajuste de la sensitivid?d seg0n ASA o DIN de la pelicula.   D6 vuelto con el dedo ol Anillo (D de Combio de Sensitivldod de Peliculo poro que el volor
   de ASA de lo peliculo en uso oporezco en lo Ventonillo @ de Sensitividodes de i'eliculo.
 E Ponga a AUTO el Anillo de Arreg[o Manual.
    Oprimiendo lo Polonquillo Pulsodoro @ d" Arreglo Monuol, d6 vulto ol Anillo @ d" Arreglo
    Monuol poro deiorlo q AUTO en donde el Anillo se quedor6 engonchodo.
20
View original page 21Page 22 · Read text
www.butkus.us
NOTES ON SETTING OF FILM SPEED
 :|. The film  sensitivity speed <ASA or DIN)  is shown on the film pockoge ond in the film  in-
   slructions. The mistoke in setting the film sensitivity speed will moke it impossible to secure   correct exposure.
 *< The  f ilm sensitivity speed. scole is not usoble when the intermediote point between speed
   reodings oppeors in the indicotor window. Moke sure thol the ring clicks inlo position (or
   thot the desired film speed reoding is siiuoted ot the center of the indicotor winjow).
BEMERKUNGEN ZUR EINSTELLUNG DER FILMEMPFINDLICHKEIT
 * Die Filmempfindlichkeit <ASA oder DIN)  ist ouf derm Filmpockung oder in der Gebrouch-
   sonweisung ongegeben. Die richtige Einstellung der Filmempfindlichkeit ist erforderlich, um
   die Belichtung richtig einzusrellen.
 * Bei der Einstellung. des Rings fijr  Filmempf indlichkeit beochten Sie, den Ring sicher einzurosten.   (Dobei erscheint der entsprechende Wert in der Mitte des Anzeigefensreis.)
NOTE SUR LE NECIACE DE SENSIBILITi
 :|. Lo sensibilit6 d'une pellicule <ASA ou DIN) est indiqu6e sur I'embolloge et sur lo feuille
   d'explicotions.Si  I'on ne r69le pos correctemenl lo sensibilit6,  il  est  imf,ossible d'ovoi,r--une   expos  il ion correcte.
{< L'6chelle de sensibilit6 ne peut 6ire utilis6e lorsque le point interm6dioire entre deux sensi-
   bilit6s opporoit dons lo fen6tre-indicoteur.. V6rifiez bien que I'onneou se bloque d lo position   r69l6e (ou que le chiffre de sensibilit6 choisie soir ou centre de lo fen6tre-indicoteur).
NOTAS EN ARREGLAR LA SENSITIVIDAD DE PELICULA
{c Lo velocidod de sensitividod de peliculo est6 indicodo en lo coiito de pehculo o en el folleto
  de instrucciones. Cuolquier equivococi6n en este orreglo de lo sensitividod le ho16 imposibls  .  oblener exposici6n correcto.
      pod16:F No                   puntos                utilizor                            inlermedios                                en                                             los indicociones                                                                 escolo                                               de lo                                                                                 de.sensitividodes                                                                                                                   -i"ai-de   peliculo         que              oporecen                                 ventonillo                   en lo                                        indicodoro.                                             Compruebe                                                                        posici6n                                                                         lo                                                            en lo qr.-f"
  coci6n quede engonchodo con un clic (o  seo, el fndice ASA deseodo deber6 estor correclomente  en el centro de lo ventonillo indicodoro).
                                                                                 2l
View original page 22Page 23 · Read text
EXPOSURE WARNING SIGNAL  In the evenl thot it is too dork to toke piclures in elec-    F
  lriceye photogrophy, red Worning Signol (synchro-
  flosh mork) 0D oppeors in the viewfinder whe Shutter         Ql Worni
  Button @ is depressed. Simultoneously will the sofety lock         Ql Wo.n work to prevenl the shutter from being releqsed. In such
  circumstonces,  it is odvisoble to swiich to synchro-flosh              (/) Morque    overilssem enl
 photogrophy. (Refer to Synchro-flosh photogrophy on              r 5enol de coucion
 Poge 36.)                                   o
 WARNSIGNAL FUR BELICHTUNG
  Folls dos Lichi zu dunkel  ist, um outomotische Auf nqnmen
  z^u mochen, erscheint im. Sucher ein rotes Wornsigno     I
 Q?, wenn der Ausloser Q) gedrLickt wird. Gleichzeitig orbeitet ein Sicherheitsmechonismus,  der
 dos Ausl6sen verhindert. ln diesem Foll scholten Sie ouf Blitzlichtoufnohmen um. (Siehe Seite
 36 "Blifzlichf ouf nohmen")
 MARQUE D'AVERTISSEMENT
 Si l'6cl{roge est lrop sombre pour effectuer lo prise EE, lo morque d'overlissement (morque
 flosh Q/ opporoit dons le viseur, quond on oppuie sur l'obturoteur iO, 1'o5yuroteur ne peut
 6lre d6clench6 dons ce cos. Utilisez le flosh pour effectuer lo prise. (Voir pp.36 prise ovec
   f losh)
 SENAL DE CAUCION
 Cuondo no puede fologrofior debido o lo folto de luz, oporece16 lo Senol @ Roio de Coucion
 (Morco de flosh) en el compo visuol dentro del visor ol oprimir el Boton Disporodor @) y  el
 meconismo de seguro troboio16 poro no i,ocer troboior el disporodor. Entonces, hoy que fofo-
  grof ior con  f losh. (Ver "To.os con  f loih-' en la pogino 36)
22
View original page 23Page 24 · Read text
www.butkus.usFOCUSING AND LOOKING INTO VIEWF!NDER
ENTFERNUNGSEINSTELLUNG UND BETRACHTEN DURCH DEN .SUCF{ER

 FOCUSING
As you look irito lhe viewfinder, you will see o yellowcolored squore section ol the cenler.
 This is Double-imoge Section @ used to set the rongef inder.  lf the lens is properly focused on
 the subiect, double imoges will be visible in this section. As you move Focusing Ring @, you
 will see one of the two imoges move. The lens will be occurotely focused on the subiect when
 the imoges ore oligned with eqch other.
FILM PLANE INDICATOR
 Distonce Scole of the lens indicotes the distonce between the subiect ond Film Plone Indicotor
@.


 E NTFERNU NGSE  I NSTELLU NG
Wenn Sie durch den Sucher blicken, sehen Sie in der Mitte ein gelbes, viereckiges F.eld. Dos
 ist der Doppelbildfeld @ des Entfernungsmessers.  Folls die richtige Schorfeinstellung nicht
 erfolgt, sind in diesem Feld zwei Bilder sichtbor. Wird der Entfernungseinstellring @ betcitigt,
bewegt sich eines der zwei Bilder. Wenn die zwei Bilder sich decken, findet die richtige
Schorf einstellung  stott.
MARKIERUNG FUR FILMFLICHE
Die Entfernungsskolo om Obiektiv zeigt die Entfernung zwischen dem Motiv und der Morkierung
 fijr Filmfldche @.
                                                                     23
View original page 24Related documents and language editions
KonicaPDF
Konica EE matic
User manual
39 pages · EnglishRead →
KonicaPDF
Konica Eematic
User manual
57 pages · German, FrenchRead →
KonicaPDF
Konica Eematic F Deluxe B&w
User manual
17 pages · German, French, SpanishRead →
KonicaPDF
Konica EE-Matic Deluxe
User manual
38 pages · Not specifiedRead →

KonicaPDF
Konica Koncia EE-matic F Deluxe B&W
User manual
34 pages · Not specifiedRead →
From the M. Butkus archive. Original publisher and archive notices are retained.
Check the model and edition against your equipment.
PDF verified 2026-10-10.