Sewing machines
Singer's Sewing Skills Reference Book — Reference guide
Reference guide for Singer's Sewing Skills Reference Book. 60 pages in English. Read the original PDF, download or print a copy without registration.
60 pagesEnglish26.9 MB PDF
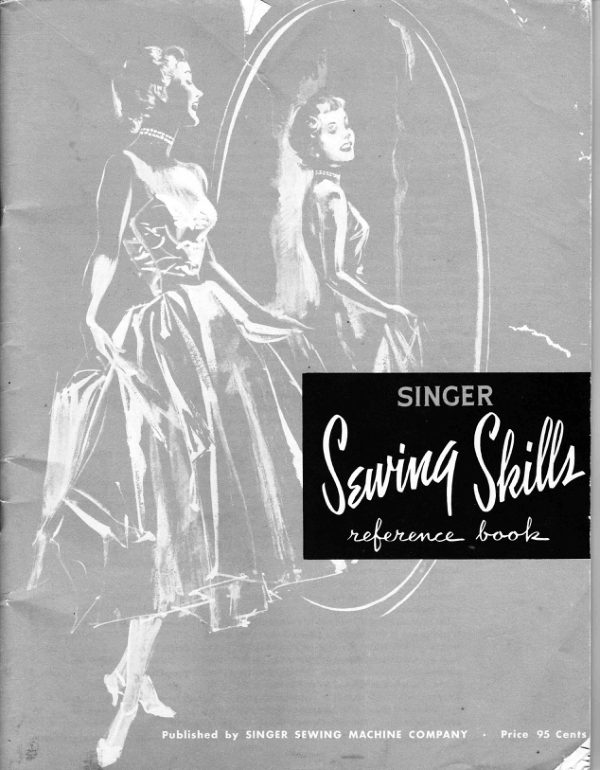
Loading your manual…Open PDF directly
Document details
- Brand
- Singer
- Model / document
- Singer's Sewing Skills Reference Book
- Document type
- Reference guide
- Language
- English
- Pages
- 60
- File size
- 26.9 MB
- Category
- Sewing machines
- Document date
- Not specified in catalog
Search available document text
Find a term, then jump to its page in the original PDF. Image-only pages may not be searchable; check the PDF for exact wording and diagrams.
Page 3 · Read text
Sewing Milehine Prineiples


 Sewing Maehine Care             General Bule* tor Oiling


      rrE KNowLEDGE AND cenu with which the sewing machine is
     handled determines to some extent the pleasure and satis-
 faction in its use as well as the service that it renders. Many fab-
 rics, when sewed, drop lint and particles of filler. These, with
 dust and moisture from the air, all work together on the sewing
 machine to create a film that is best removed from time to time.
A good craftsman is meticulous in the care of his tools.
  When the sewing machine is used all day and every day, it
 should be oi.led eoery day. When used less continuously, a weekly
 oiling is usually adequate. Oil is never placed on the machine
 before the dust and iint are removed. The sewing machine in-    /T\HERE anr several general rules for oiling all SINGER Sew-
 struction book carries diagrams and procedures for oiling the        I  ing Machines. Always use SINGER* oil on SINGER Sewing
machine being used. It is best to devote some study to these     Machines. The lubricating qualities are right for your machine
diagrams while the machine is new to avoid overlooking any of    and there is no harmful residue formed when the machine is
 the points indicated. Oil keeps the sewing machine running freely,       idle. Remove dust and lint before oiling. Oil the sewing machine
 preventing friction and wear.                                     thoroughly following the diagrams in the Instruction Book,
                                                                 point by point, until every oiling point is completely familiar.
                                            Do not d.rench the machine with oil. One drop at each oiiing     %
                                                                 point is usually sufficient. However, where there is a wick to
                                                                   hold and dispense the oii several drops are used. Oil holes in theBemooal of lDast and Lint                                                                     enclosure of the machine are provided for bearings which can-
                                                          not be reached directly. Arrows indicate oiling points where
                                                             metal works against metal and where oiling is so important to
                                                                 reduce friction. Oil is placed sparingiy on the threads of all ad-
                                                                         justable thumb screws to keep them working freely.
                                                                   Several machines have gears that are lubricated instead of
                                                                           oiled. Such gears are clearly indicated in the Instruction Book
                                                                diagrams. SINGER* lubricant is furnished with new SINGER
     ilN                                               Sewing Machines and is available separately at any of the more
                                                          than 1600 sTNGER sEwrNG cENTERS in the United States and
                                                              Canada. Here, specially trained men are available to render ser-
          sl!1                                                                        vice. It is often an economy to call for periodic service by a
                                                                     Singer Representative.

                                 Bernooe Dxeess Oil

         rHE MovrNG panrs of the sewing machine by removing     r r THEN rsn lracnrNn, hasf,xrosa
r--i the throat plate, the face plate and the slide plate. The lint  W  1..r, thoroughly, but
and dust particles are best removed with a small brush reserved      sparingly oiled, run it slowly
for cleaning purposes. The SINGER* hand vacuum cleaner is     for several minutes to allow
invaluable for taking away the dust and lint that eludes the      the oil to work into the moving
brush or that is merely dislodged by it. The rotmd cover plate      parts. Then remove the excess
at the back of many machines, when turned upward, reveals      oil with a clean cheese cloth,
working parts at the top of the upright arm that require dusting       or a soft Iintless fabric. Learn to
and oiling. Several other machines have cover plates underneath      pass the folds of cloth between
to protect the moving mechanism. To reach these oiling points      the tension discs to polish them
at the base of the machine, remove this cover plate as well.         and to remove any dust, lint or
View original page 3Page 4 · Read text
-l


 oil that might have found its way there. Learn to avoid catching      sit in sewing position. Several models are equipped with a
 the fine wire take-up spring in the cloth when polishing the ten-    SINGER light on which the lens encloses the bulb. The separate
 sion discs. Each thread guide and the face plate must be polished      instruction book for each model machine clearly indicates the
 with clean cheese cloth to remove any accumulated dust, Iint or     removal of the lens prior to removing the bulb. The new bulb is
 oil. The area around the presser foot and needle where both the      replaced by pressing it into the socket and then turning it a
 presser bar and needle bar leave the heavy enclosure of the arm      quarter turn toward the operator,
 of the machine are often flowing with excess oil unless care was
 exercised when oiling. Remove both presser foot and needle and
 with a clean cheese cloth wipe all the excess oil from this area.
 Polish the presser foot and needle before replacing. Thread the   Speed, Control and, Postare
 machine and stitch until the thread is clear of oil.

                                                             ouR PosruRE, when seated at the
                                                                  machine, has a direct influence
                                                            on your comfort as well as on the re-Lahrieating Dlotor
                                                                             sults in sewing. Sit squarely in front
                                                                            of the machine with both feet flat on     IrE MoroR on the SINGER Sewing Machine is never oiled.
   SINGER motor lubricant is placed in the tubes or cups that      the floor.
carry the Lubricant to the revolving shaft and gears. Motor      When controlling the machine with
                                                                    the knee lever, sit so the knee com-
                                                                  fortably engages the lever. Most
                                                                    cabinet model sewing machines are
                                                             equipped with an adjustment that
                                                                   permits moving the lever to the right
                                                          or left to suit the operator. Some
                                                                        prefer to use the foot control and all
                                                                       current machines having a knee lever also permit the alternative
                                                                       of a foot control, as well. The speed control is built to produce
                                                                    steady even stitching that is accelerated or retarded as the pres-
                                                                 sure on the controller is increased or decreased. In using the
                                                                       foot control, steadiness and evenness of speed is gained through
                                                                  balancing the right side of the shoe on the foot rest and gently
                                                                                 tilting the foot inwardly to depress the controller.
lubriiating tubes are to be filled with fresh lubricant twice yearly
                                            A full range of gradual speeds is at the operator's command.
when the machine is used moderately. Motors equipped with
                                                    The skill of the operator in home sewing is more often judgedIubricant cups require attention only once yearly. The old
                                                   by her ability to control the machine at even rhythmic slozo
lubricant  is removed before filling with fresh lubricant. SINGER*
                                                                 speed than by her ability to stitch rapidly. High speeds are at-motors are especially built for the machines they power and
                                                                 tained by merely depressing the controller and are importaut
give long trouble-free service with a minimum of attention.
                                                                 only for stitching long straight seams. The fine careful detail of
                                                                       beautiful clothes is most often done at slow rhythmic speeds.

Retnoo al and Beplaeernenl
        ol Balb in SfNGDtr. LIGET
                                     fr,emooal and, B,eplaeetnent
                             .f""   slNGBn* light will focus a                               of Need,le
                             r  soft clear light on the needle       MoNG the simple sewing ma-                                       A
                            point and presser foot, prevent-       I  \ chine facts that everyone
                               ing eyestrain and making skillful,      should.know is that of setting a
                              careful work easier to produce.      needle correctly. AIl sewing ma-
                          While the bulb is of long burning      chine needles are not the same.
                               filament, occasionally it must be     They difier mainly in length, size
                                replaced. The bulb is of a bayonet      of the blade and eye as well as in
                         and socket type and does not un-     workmanship and quality. Al-
screw. To remove lamp, press the bulb into the SINGER.light      ways purchase SINGER* needles
socket and, at the same time, turn it a quarter turn away as you      for use in a SINGER Sewing
View original page 4Page 5 · Read text
Machine. SINGER needles are manufactured with the greatest                         Preparation for Stitehtn$
care under strictest manufacturing limits and are superior in
quality, durability and performance.
  Sewing machine needles characteristically have a shank one                                    Soleetion of lVeed,le and, Thread,
side of which is rounded, the other, flat. The blade of the needle
carries a long groove on one side and is rounded on the other.
                                                           t-nrrE sELECrroN of both needle and thread is based on the
The long groove down the blade of the needle, on the opposite        I   t"b.i. to be stitched. The Fabric, Thread, and Needle Chart
side from the flat shank, protects the thread as the needle car-
                                                                  given below will be a helpful guide for this selection. The thread
ries it downward. Therefore, the long groove always faces the
                                                          must blend with the fabric in color, fiber, and size. Silk is stitched
side from which the needle is threaded.
                                                             with silk. Wool, an animal fiber, is also stitched with silk, an
   If, when setting the needle, the groove is not placed in this
                                                             animal fiber. Cottons are stitched with cotton or mercerized
position, the machine will not form the stitch. When threading
                                                                       thread. Rayon fabrics with a sheen are most often stitched with
an unfamiliar machine, the direction for threading can be
                                                                                            silk, while those with a dull surface, or of the spun yarn type are
quickly determined by locating the long groove with the finger
                                                                       often stitched with mercerized thread.
nail and threading from that direction, and in addition a thread
                                                      The synthetic threads now appearing for use in home sewing
guide is always located above the needle on the side from which
                                                         vary somewhat in properties. Their greatest advantages are
the machine is threaded.
                                                               found in their fine sizes yet great strength and in their uniformity  Some machines thread from front to back, others from left to
                                                                    of diameter. While selections are somewhat limited, colors are
right and still others from right to left.
                                                             becoming more numerous and uses broader.
  The needle clamp is so designed to hold the needle securely
and to control the height to which the needle can be set. It is     The size of the thread must blend with the fabric when
important to set the needle into the clamp as high as possible       stitched. A "too-heavy" thread will remain on the surface of the
and then tighten the thumb screw securely. If set to improper      fabric and will give shorter service and less strength than a
height the machine will skip stitches. A bent needle will cause       finer thread that imbeds itself into the texture of the fabric. The
the fabric to draw to one side feeding in a curve rather than a      thread that is "too-heavy" and remains on the surface, is weak-
straight line. A needle too fine for the thread will cause the     ened by the friction and abrasion to which it is subjected when
thread to fray. A blunt needle will cause pulls in the fabric. It is     worn.
a good practice, when a stitching problem occurs, to check the      The needle is selected with consideration for both the thread
threading, and then replace the needle, if necessary. It is most    and the fabric. The eye of the needle must be large enough
convenient, therefore, to have a full supply of all sizes of needles       for the thread to pass through  it freely. The blade of the needle
on hand to meet all needs.                                    must be fine enough not to mar the fabric with a large puncture,

         FABNIC9 THBEAI} ANID NDRIDLE CIIABT

                                                                                   Seuing Maebine        Nachine Stitchu Per Inch        Hand
                   Typu of Fabrks                           Tbread Sizes            Needle Sizes          Intide Seams I  Top Stitchhg        Ncedlet
   Filmy ,ilol.riol3                                          100 Cotton
   Comparable to Net-Marquisette-Silk Organdy          oo & 000 silk                9              t5-20           20-)o             10
                              Sheets-Silk Velvet        OOO & OO0O Mercerized
  -Chiffon-Ninon-Nylon
   Shrrr Molcriqlr                                       8G-lO0 Cotron
   Comparable to Lawn-Dimiry-Synthetic Sheers-            0 silk                             ll               t2-r5           tt-20            9
   Paper Taffeta-Pure Silk-Silk or Synthetic Tricots          fl) and 0 Mercerized
               Velvets and Satins-Nylon Crepes.               Nylon
   -Synthetic
   Lightwcight Motcriclr                                                       60-80 Cotton
   Comparable to Gingham-Chambray-Percale-        A and B Silk                 r4                   t2                      1 r-18                I
   Broadcloth-Sheer                                  Dress Crepc                     Linen-Synthetic                                        A or 50 Mercerized
                                        Surah.             \D7ool Crepe-Taffeta-Silk
   -Sheer
   Modium !,ightwcight llctrriolr                            6O-70 Cotton
   Comparable to Pique--Poplin-Faille-Bengeline        A or B Silk                  t4                    L2             1r-18       7or8
                                        A or J0 Mercerized   ings-CottonTweed-Fashion-Wool Jersey-Dress Linen-FeatherweightDenim         Suit-
   tlodium Hoovy trlclcriclr                                                        4o-ro Corton
   Comparable to Gash-Tertured Drapcry Frbrics        B or C Silk                     ,16                   t0                 72              6
           Velveteeo-Heavy                            Cordutoy-Coeting                                                HeavyDuty Mercerized  -Cotton                              and Sheedng.                         Muslin   -Suiting-Unbleached
   H.ovy Motcriol3
                                                                                 18 or 19                8                t0          4orj   Comparable to Sailcloth-Sturdy Denim-Ticking      Heavy3O-40DutyCottonMercerized
                  Drillcloth.
   -Coatings-
   Ve:y Hcovy Motcriclt                                    4O-60 Linen
   Comparable to Canvas-Duck-Overcoating.              20-24 Cotton           19 or 2l              6                8                 )
                                   D or E Silk
    ?lorlic Malcrioh                                        50 Mercerized                   11                   t0                 12
View original page 5Page 6 · Read text
t


         yet heavy enough to pierce the fabric without being bent or      surface. Satin, tafieta, velvet and most of the luxury silks
           deflected. The Fabric, Thread and Needle Chart is a practical      require gentle handling and pinning with needles, or pinning
           guide to needle selection.                                           within a seam or dart allowance.

      Seleetion of lland, Sewing Need,les Wind,ing the Bobhin


                                                                        /-I-\HERE ARE GENERAL RULES that apply to the threading of
                                                                                        I  a[ SINGER Sewing Machines. The bobbin is filled with a
                                                                         thread identical to that used for the upper threading. It must
                                                                                                                        fill in level layers and must not "spill" over the sides of the
            AND sEwrNG NEEDLES are selected for size according to the                                                                             bobbin. Always empty the bobbin of other thread before filling
               weight and character of the iabric. The type of needle is                                                                         so that the thread can be started on the bobbin by passing the
         governed by the stitching to be produced. Where multiple      thread end through the eyelet on its side. This method provides
            stitches arewoven onto the needle as done in basting,hand shirr-                                                                   even handling of the bobbin thread to the very end, and is
           ing, overcasting and similar stitching, the Straw or Milliner's                                                                      important because the quality and regularity of the stitch is
          needle is used. This long, slender, round-eyed needle produces                                                                                    influenced by the free flow of the thread from the bobbin. Careful
            better results because of its length, slender shaping and flexibility.                                                                                storage of the supply of bobbins prevents them from being bent
          Where fine, short, "invisibie" stitches are required a very short      out of shape. A bobbin with bent sides will unreel with alternate
          needle is used. The "Between" is the very short round-eyed     heavy and light tension causing an irregular stitch.
          needle of the type used by Tailors to produce the short, sturdy,       The Sewing Machine Instruction Book outlines specific thread-
            invisible stitches that are a mark of good tailoring.                                                                                 ing points for threading the bobbin case of each sewing machine.
           The all-purpose, or "Sharp" needle is of medium length, round
         eyed and is made for general usage.
            Gaining                                                                              is                        in                        popularity                                                  is the Crewel                                                                   similar                                          Needle that
                                                                              to   Threud,ing the Dlaehine          the                       needle                                    but is designed                                                     with                                                   a                                                              long oval                                in length,            "Sharp"
          eye for easy threading and for carrying multiple strands, as used
            in hand embroidery.
          The "Darners" are long needles with long oval eyes and.are
          designed to carry multiple strands and permit many stitches to
          be woven on to the needle with a single stroke.
            Upholstery needles are curved and are made to use when
           stitching into a cushioned surface. The curved needle rises out
            of the cushion with each stitch, thus accomplishing stitching that
         would be diftcult, if attempted with a straight needle.
        A sewing box supplied with all types of hand sewing needles
          as well as a full size range of both hand and sewing machine
           needles is a convenience and a step toward better sewing results.

                                                       HE rrppER THREADTNG of the SINGER Sewing Machine
                                                                                                                                              discs on      Seleetion of Pins                                                     is simple and follows a natural sequence. The felt
                                                                              the spool pins (sometimes found in the box of attachments) con-
                as well as needles deserve attention in their selection.      tribute to the free and even flow of thread from the spool and       DINS
            I  Pins used for sewing always should be kept separate from     always should be used under the spool. The threading of the
         household pins, since they become burred and blunt from their     machine is the first point to check, when stitching problems
          variety of uses. Pins used for dressmaking should be the fine,       arise. Some threads, especially silk and nylon, in dry weather
          slender "silk pins" with needleJike points and smooth blades.      tend to create static electricity and twist. If a second loop is
        Some fabrics are best pinned with needles to avoid marring their     thrown over a threading point, the usual good performance of
View original page 6Page 7 · Read text
the sewing machine is impaired. Careless threading of tensions   ISegalating the Length of Stiteh
 leads to non-performance.
  The final step in threading is to draw the thread from the
 bobbin case to the surface. Holding the needle threacl loosely
 with the left hand, turn the balance rvheel with the right hand
 drawing up the lorver thread ri'ith the loop of the needle thread.
Lay these threads back diagonalll'beneath the presser foot and
                                 bring the balance wheel forward
                                    sufficiently to place the take-up
                                  lever at its highest point. This is
                                  the correct starting and stopping
                                position in all sewing machine
                              rvork and should be practiced
                                    until it becomes habit.


                                                             sEwrNG MACHTNE in the home is called upon to stitchIlotc to Start and Bnd a Searn          ,T,r"
                                                                             I  innumerable weights and textures of fabrics and a SINGER
                                                               is designed and constructed to accommodate this variety
                                                           through a few simpie, understandable adaptations, one of
                                                           which is stitch length.
                                                                     Delicate fabrics require a short, fine stitch. Heavy coarse
                                                                           fabrics require a long, heavy stitch to blend with the character
                                                                    of the fabric. Outside stitching is shorter than inside stitching.
                                         A short stitch is a mark of quality and beauty. Comparison of
                                                          economy clothing with high quality clothing reveals that quality
                                                         garments are stitched with shorter stitches and appropriate
                                                                 weights and types of thread, while economy clothing is often
                                                                         stitched with long stitches and less durable thread. In sewing at
                                                         home, the greatest saving is experienced when the standards
                                                                       set by the high quality manufacturers, or custom-made estab-
                                                                     Iishments, are employed. The Fabric, Thread and Needle Chart
quccESSruL srrrcHrNG is closely related to the simple principles
                                                                      tabulates the recommended length of stitch for each weight andt-J employed rvhen starting and ending a seam. There are seven
                                                                     texture of fabric for both inside seams and top stitching.
steps to observe in this sequence:
                                                      The length of stitch is changed to accomplish many sewing1-The take-up lever should be at its highest point, the threads
                                                                        constructions. Basting, stitching curved seams, stitching scallops,
    brought under the presser foot and drari-n back diagonally.
                                                                      stitching to control ease, stitching to produce gathering and
2-Position the needle into the fabric rvhere the first stitch is
                                                                            shirring, and stitching bound buttonholes and pockets are only
    to fall.
                                                            a few of the steps in dress construction where the stitch length
3-Holding the thread ends, lower the presser foot.
                                                          must be changed from that suitable for straight stitching.4-Stitch, controlling the speed to a slon' rhtthniic tempo.
                                                                    Basting with the sewing machine requires a long stitch. The
S-When the end of the seam is reached. br:ng the take-up lever
                                                                             stitch regulator is set at No. 6 or No. 8, depending on the weight
    to its highest point b1' turning the balance rvheel forrvard.
                                                                        of the fabric. Heavier fabrics tolerate longer stitches.
6-Raise the presser foot and rvithdrari' the fabric to the back
                                                             Curved seams require a stitch shorter than used for straight   and left.
                                                                            stitching. Where a No. 12 stitch is used for straight stitching,
7-Sever ihe threads b1- drat'ing them across the thread cutter.
                                                                a No. 15 stitch is suitable for curves to produce greater elasticity
  This procedure should become so "automatic" that it is done     and strength over the bias or semi-bias cut areas that must be
without a thought. Although the establishment of such good     more elastic than seams following the lengthwise or crosswise
practice requires deiiberate attention in the beginning, it results      threads of the fabric.
in a more evenly controlled acceleration of the machine and in        Scallops require an even shorter stitch than curves in order
a perfectiy formed and positioned first stitch. The evidence of       to maintain a smooth, rounded contour and permit close blending
such good handling of ihe sewing machine is revealed in the more      of the seams. A No. 20 stitch is usually used for this stitching.
exact assembling of seams, coliars, facings, pockets and all        Stitching to control ease, as around a patch pocket or a
intricate details of sewing.                                        curved lapped seam, at the sleeve cap, at the elbow of a long
View original page 7Page 8 · Read text
sleeve, at the top of a hem, or wherever one seam edge is eased      notched collar with the lapel is a typical example' Corded button-
to another, requires a longer stitch than required for straight      holes and pockets require back stitching at several steps of their
stitching. For example, No. 8, No. 10 or No. 12 length stitch      construction, as do many other steps in assembling a well-
might be used, as required by the fabric.                     made garment.
  Stitching to produce gathering requires a longer-than-average
stilch, the length of which varies with the texture of the fabric'   Pre*sure Changes to Aeeottottlo-
  Bound Buttonholes and Pockets are made with a shorter
stitch, to increase strength and durability of construction' A
No. 20 length stitch is frequently used on medium light-weight
fabrics for stitching buttonholes and pockets'
  A stitch regulator that is easy to set, and one that is positively
marked, is convenient and contributes to better sewing, as well
as to the pleasure and ease with which sewing is accomplished'
The Instruction Book that accompanies each sewing machine
 illustrates clearly the simple procedures for setting the stitch-
length control.

Staging a Sea,lnr at Beginning
and Dnd
                                                           TIRESsTIRE is the force the presser foot exerts on the fabric
                                                                                                                                               is regulated by the thumb screw                                                            -t'*n"n  it is being stitched. It
                                                                        at the top of the Presser Bar. Turning the thumb screw to the
                                                                             right, increases the pressure. Turning it to the left, decreases
                                                                        the pressure. Reference to the Sewing Machine fnstruction Book
                                                                                             is helpful in locating this thumb screw.
                                                   The {abric determines the amount of pressure needed for
                                                                  smooth, even feeding of the several thicknesses that form a seam'
                                                               Heavy.materials require a heavy pressure and light materials
                                                   a light pressure. Medium weights of fabric require a pressure
                                                     midway betWeen the light and heavy extremes' Smooth, even f.r\rEDlRECrloNinwhichthefabricmovesunderthepresser
   I  foot can be reversed by raising the stitch regulator lever     handling results when the pressure is regulated to the correct
 to its highest point. While some SINGER Sewing Machines      degree. Too heavy pressure causes the machine to run "heavy"
 provide only for back-tacking, others provide for a reverse stitch    and seam edges to be joined unevenly in soft spongy fabrics,
  of the same length as the forward stitch' Several of the economy       or, the mark of the feed to appear on smooth-surfaced  fabrics'
 models have no facilities for reverse stitching' The greatest     Too light pressure results in an irregular stitch length and irregu-
 convenience lies with the machine having the controlled reverse       lar joining of seam edges'
                                                                                         It is advisable to test for pressure adjustment on a lengthwise  stitch, since almost every seam is finished at both ends by reverse
  stitching, to produce added strength and non-ravelling qualities      scrap of fabric by stitching without thread. When all seam edges
  so helpful while assembling the garment'                           are handled evenly the correct pressure adjustment has been
                                         5f' seam allowance      reached.   The staying of a seam occurs within the
 on both the beginning and end. The procedure is to drop the         Pile fabrics, such as velvet, velveteen and corduroy, require
                                                    so that the     a pressure adjustment somewhat lighter than for a flat woven needle into the fabric about rf" from the edge and
  fitll'ft'seam allowance falls to the operator's right of the needle'      fabric of the same thickness. The rule for stitching pile fabrics
  Lift the stitch regulator lever to its highest point and make four        is to use a light pressure and stitch in the direction of the pile'
  or five stitches in reverse and without necessarily stopping the   A garment is usually cut with the pile standing up, resulting
  machine, press the lever down to produce forward stitching to       in seams being stitched from the lower edge upward'
  the end of the seamrwhere again the stitch regulator lever is        Pressure is often regulated heavier when stitching seams that
  raised to its highest point to produce four or five stitches in      cross, since they create Sreater thickness' When SINGER*
                                                                   Fashion Aids and Attachments are used, the regulation of pres-  reverse.
    In addition to staying the ends of seams, reverse stitching is      sure is an important factor in producing good results'
                                    A clear understanding of pressure and its application to  used to make bar reinforcements, for darning and mending, and
                                                                                                                    easier to produce  in many delicate steps of assembling garment sectjons where     weights and textures of fabrics makes it
  one seam stitching must end at a given point so that it might     smoothly constructed Sarments from the many fabrics available
  join smoothly and securely to another' The joining of the tailored      to the woman sewing at home.
View original page 8Page 9 · Read text
When the upper teneion ia heavier than the lower The Funetion and, Ad,jastrnent
                                                          teneion the needle thread will Iie straight along the
 of Tension                                    upper surface of the material, ae illustrated below.


                                          When the upper teneion ia lighter than the lower
                                                          teneion the bobbin tlread will lie straight along the
                                                     under eide of the material, aa illuetrated below.


                                                         The perfectly locked stitch is usef, for all construction seams
                                                                         in garments and fabric furnishings. Unbalanced tensions, used
                                                                  only for decorative effects and SINGER* Fashion Stitches, are
                                                                presented as a separate subject. The durability of a garment
                                                                       or a slip cover is closely related to the strength of its seams.
                                              A seam stitched with a perfectly locked stitch is doubly strong
                                                                         in comparison with a line of stitching made with an unbalanced
                                                                                stitch. This point is easy to verify by stitching diagonally across
 -IIENSToNS control the threads that interlock to form the     a square of material. Holding the stitching tightly at each end
  I  sewing machine stitch. The lower thread tension is found     between the thumb and finger, pull with an even and gradual
on the bobbin case where control is exerted by the spring under      force until the thread breaks. The broken thread is always the
 which the thread passes. The point of adjustment for this tension     one with the heavier tension which under strain must carry the
 spring is the small screw nearest the center of the tension spring.      whole weight. Where a line of stitching is made with a perfectly
By turning the screw right the tension is increased, and by turn-     locked stitch both threads break together and require more
 ing it left the tension is decreased. A one-eighth or one-quarter      force to break indicating the strength of a balanced stitch.
turn of this tension screw changes the weight of the tension         Inspection of the line of stitching is the only proof of correct
adjustment considerably. Therefore this adjustment is always      tension adjustment. Tensions must be set at a point where the
made discreetly.                                                thread is handled lightly enough that the stitching does not
  The upper thread tension is familiar to everyone and can be     draw the fabric, yet heavily enough that the stitch is drawn into
located by referring to the Instruction Book for the machine.      the fabric and is regular arid constant.
Tension is exerted by the closely fitted discs between which the       The flexibility of the sewing machine is materially broadened
upper thread passes. The point of adjustment for this tension is    when a practical understanding of tension regulation has been
the thumb screw on the ex-                                         acquired.
treme end of this tension unit.                                                     It must be remembered that none of the factors that influence
A graduated dial further sim-                                    the stitch, actually stands alone. All work together to produce
plifies the control of the upper                              an appropriate line of stitching. Based on the fabric, the kind
tension. Turning the thumb                                and size of thread is chosen, then the needle size, stitch length,
                                                                    pressure adjustment, and finally the stitch is inspected for itsnut right dials a higher num- T
ber and increases the tension.                                    appearance and accuracy of tension.
Turning the thumb nut left                                                 It is a good practice to test the stitch on a scrap of the fabric
dials a lower number, decreas-                                           to be used, and with the needle and thread with which the gar-
ing the tension.                                            ment is to be made.
                                                                              It is seldom necessary to change the bobbin tension when
                                                                 changing from one kind or size of thread to another. By varying
  A perfectly locked stitch results when the relationship
                                                                the upper tension slightly a wide variety of weights and types
between the upper and lower tension ie euch that the
                                                                       of threads and fabrics are accommodated.
threads are drawn into the fabric equally, ae illuetrated
                                                         Record the upper tension reading that produces a perfectbelow.
                                                                                stitch with 50 Mercerized thread and then return to this number
                                                                                                           if a change in bobbin tension has been made to accommodate a
                                                                              different thread or fabric, or for SINGER Fashion Stitches. Then
                                                                      readjust the bobbin tension to regain the same perfect stitch.
View original page 9Page 10 · Read text
Stitchins for Line

 The Struight Seam
 I INE IN DRESS CoNSTRUCTION is expressed through seams,
 I-r  some of which must be emphasized by special treatment,
while others are meant to be almost invisible.
  The established steps for forming seams are to first pin seam
edges at each end, at notches and at center,. finally working
toward the edges. The second step is to hand baste, the third,
to stitch, the fourth, to pink and the fifth to press. Hand
basting is often eliminated on easy-to-handle fabrics and when       The Seam Guide is attached to the sewing machine with the
sufficient skill in stitching has been developed. The Seam Guide      thumb screw in either of the two threaded holes provided and is
aids in guiding the seam stitching straight and parallel to the      adjustable for spacing stitching at any distance between an
                                                                                    |f" and l)\" fuom an edge.edge. The Hinged Presser Foot rides freely over the pin points.      approximate
                                                                In addition to its use in guiding the stitching of seams, thePins are placed with the points toward the seam edge and nip
into the fabric at the stitching line.                         Seam Guide is used when stitching the edges of facings, lapels
                                                      and the like with either single or multiple rows, placing stay  Many cottons, woolens, and spun rayons lend themselves to
                                                                             stitching where edges might stretch, and in many other stitchingthis handling. However, smooth textured fabrics, pile fabrics,
                                                                      steps where exactness  is required.delicate fabrics and fabrics with a surface finish like satin re-
quire more careful handling and do not lend themselves to pin-
ning and stitching without hand basting. Neither should they                                          Sea,tn* that Cro*sbe machine-basted.


            j-r


                   I
              I
        i

                   l


              i
               tlt,
              I
              l

             I
             !
                 !                !                                                                                                                              il

                                                                  FINE HAND sEwrNG NEEDLE placed at the junction of cross-                                A
                                                                           I  \  ing seams ensures accurately crossed seams, that are so
                                                                       indicative of well-made clothing. Perhaps seams that cross are
                                                          most noticed when they occur on the shoulder line-as in the
                                                                    princess line jacket or dress. When these four seams form a
                                                                    perfect cross, the effect is pleasing; otherwise, the poor work-
                                                          manship destroys the beauty of the garment.
                                            A fine needie is used exactly at the junction of the seams and
                                                                 only its point nips into the fabric at the stitching line. The fine
                                 "*: I                       needle does not mar the most delicate fabric and prevents one
                                                                                                                                                                                             rl                   seam from stipping beyond the other while hoiding the seam
                                                                                                  i\
                                                                            lines exactly as pinned. Where the fabric is heavy, the pressure
                                                                          ,.,
                                                                                            is increased for stitching over the area where the seams cross.
                                                                   Further smoothness of fit is accomplished by blending away
                                                                                                                                       ll
                                                                    the excess seam allowance at the point where the seams cross.
View original page 10Page 11 · Read text
rl" in length.                                                          seam and texture of the fabric, but is usually t4" toSlip-Bosting for Stripes'
                                                       The Material Gripper serves as a third hand in holding the seam
Plaid,s, Prints                                           firmly while basting.


                                                        The sewing machine stitching is placed from the inside of the
                                                            garment just as is done for a plain seam. Slip-basting is especially
                                                               easy to follow since the exact stitching line is established by the
                                                                small crosswise stitches that result from basting through the
           MATcHED sr.srs for stripes, plaids or prints are      folded seam edge.1)ERFECTLv
I  simple to achieve if the seam is slipbasted before being
stitched. The procedure is to fold under one seam allowance
exactly on the seam line. Working from the right side of the
fabric, overlap the seam edges, pin, then slip-baste. This method                                  Slip-Basting for lDeeoratiae
permits careful matching of the details of the fabric and is a
                                   Seannsmark of expensive.clothing.  Perfectll'matched piaids and stripes
are not found among economy garments since they require
individual cutting and assembling, which are costly manufac-
turing processes.


                                                                                                                                                                                                             ,l


  The formation of the stitch in slip-basting is simpie and rapid.          ECoRATIVE cuRvED sraus that carry no top stitching and
Using a "Strarv" needle, bring the point up through the fold of            that are so often found on custom-made dresses and suits
the seam. The stitch begins from this position. Direct the needle      are formed in much tEe same way. The seam allowance  is con-
down through the single thickness at the side of the point where      trolied by a line of stitching placed just outside the stitching
the thread nolv emerges and carry it up through the fold of the       line and is then folded under and pressed. This section is slip-
seam some distance alray to complete the stitch with a single      basted in place to hold the shaping of the seam while it is being
stroke. The length of the stitch may vary with the shape of the      stitched on the inside.
View original page 11Page 12 · Read text
Seam,s   In*id,e CuroesPlain Sea,rns with In*id,e Caroe    Faeing                                                        -


                                                                     /-f\rrE TNSTDE crrRvE occurs when applying facings at the neck-T)vERy cARMENT has curved seams as well as straight seams
                                                                                                             lirre, collars, shaped yokes and pockets, and often in decora- F' and these require additional treatment in handling and        I
shaping. The stitch is shortened when stitching curves. A fabric       tive details so important in smart clothes. This curve is treated
where a No. 12 stitch is used for straight seams requires a No' 15     somewhat differently than the fitted curve in that both seam
stitch length for curved seams to provide the added elasticity     edges are blended to uneven widths, the facing to rA" and the
                                                                                  rl" so that when they are folded to their insideand strength needed. The Seam Guide is positioned advan-     garment to
 tageously at an angle for guiding a uniform seam allowance'          position the edges are almost indiscernible.
  Seam edges support the seam line but must not restrict or       These blended seams are slashed at evenly spaced intervals
                                                                           rf"  of. the stitching to release the edges and prevent restrain its shaping. Seams that curve inwardly have a tendency      to within
 to draw if the edges are not released by blending.                       pulling. The seam edges of a heavy fabric or one that frays might
                                                                                                    rf" and rf"   .                                                            be blended to r7(" and fi"  instead ol


                                      5,:,
                                  Plain Scatn with Out*ide Curoe

                                                                                         &ffi\-:e
                                                                                        . ,/   ,l*t                                                                                        .'.  \  't1
                                                                      'li    )''r.
                                                                                       ,-,"*i

                                                                                                                                                                                                                                                                                                                                                                                                                                                                                                                                                                                                il


 r  )-. LENDTNG THE TNSIDE cuRvE on a fitting seam requires slash-
 lJ   lrg into the seam allowance far enough to release the strain
 imposed by the edges, but never within less than fu" of' the
 stitching. If the fabric tends to fray these slashes are reinforced
 by stitching or overcasting. Such seams are usually pressed open,
 edges are usually pinked or finished as required by the fabric.      /T,*E ourstDE cunvp that occurs in fitting seams over the
                                                                                          seams, requires the same   The inside curve is found as a fitting seam at the shoulder line        I  bustline, hipline and in yoke
 where the neckline is built up, at the waistline side seams and      shorter stitch length as the inside curve and the same handling
 at styling seams in overblouses, suit jackets, and princess line      of the Seam Guide, but the blending of the edges is different'
 bodices as well as in creating all concave effects'                 The seam edges of the outside curve are in excess and unless cut

                                                                10
View original page 12Page 13 · Read text
away, the bulk forms folds that press through, marking the out-
 side of the seam area.
   The degree to which an outside curved seam requires blending
 depends upon the amount of curve and the firmness of the                                              Si,
                                                                                                                                      Lit.?
 fabric. Where the curve is slight and the fabric flexible, quite                                                                          .,fi1,1
 often blending  is unnecessary. However, on frrmly woven fabrics,
 or where the curve is pronounced, blending is essential.
   Blending the outside curve requires cutting narrow wedges
 from the seam allowance at evenly spaced intervals sufficient
 only to remove the portion that might overlap when the seam
 presses open. Avoid cutting out large wedges that might produce
 a saw-tooth effect since these irregular edges press through to
 the right side in an unsightly way. The aim is to provide a
 smooth and even seam edge.                                            foot after the needle has been brought to its upward stroke and
                                                                         just before the needle point leaves the fabric. Turn the fabric,
Faeing Searns-Oat*idc Carae           pivoting on the needle. Take one stitch in reverse and then                                                                   continue stitching in a forward direction. Blend the seam edges
                                                                                                         and cut the                                                                        of the facing to \"  and the garment section to rr1"
                                                                   corner diagonally very close to the cross stitch at the corner.
                                                       The square is now ready to press and turn.


,T,"t  oursrDE cr.rRvE occurs often on collars, lapels, pockets
 I  and decorative seams. The stitching of the seam and blend-
ing of tlle seam edges are the same for the outside curve as for       Narrow collar points require a diagonal stitching across the
the inside curve, except instead of slashing, wedges are cut at      point to allow space to smoothly enclose the seam edges that
even intervals to remove the bulk that would otherwise fall on      turn to the inside. The number of diagonal stitches varies with
the inside when the facing is turned. It is important that only     the weight of the fabric. Heavy fabrics require morestitches
enough is cut away to permit the seam edges to lie evenly and      diagonally than light-weight fabrics.
smoothly and that a saw-tooth effect is avoided in the seam edge.       Back stitching is also used at both ends of the diagonal stitch-
                                                                   ing for reinforcement and to permit very close blending of the
                                                      seam edges. The procedure is to stitch to within about 2 or 3
                                                                          stitches of the intersection of the seam allowance. Pivot with
Stitehing Square Corners                     the needle in the fabric but on its upward stroke and turn the
                                                            work so that the stitching  is directed diagonally across the corner.
         coRNERS occur often in the facing of a neckline,     Then reverse the stitch and make one stitch backward, thenQouenr
U  collar, lapel, or pocket and are effectively accomplished in      three, four, or five stitches forward and another backward.
the following way, which reinforces, yet eliminates unattractive     Pivot again on the upward stroke of the needle and continue
bulk at the corner.                                                         stitching along the seam line. Blend the seam edges of the facing
  Stitch along the seam line to a point one stitch beyond the      to Lf' and the garment tof"  and cut away the seam allowance
intersecting seam line at the corner. Then reverse the direction     at the point close to the diagonal stitching. The work is now
of the stitch and make one stitch backward. Lift the presser     ready for pressing and turning.

                                                              l1
View original page 13Page 15 · Read text
Stitchins for Oontour
                          {sf  -.d


                                                                                                                                                                                               r      \--r':

                                                                                                                          I\,      ,
                                                                                                                                                                                                                                                                                \,.                                                                                                  ./ |                                                                                     ^'
                                                                                                                                                                                                               '' ',, ),,ll1           \                                                                                                                                                                   l-.l,


       G-{R}rENrs are given fit and contour through carefully      tour of the figure because it creates a curve in the garment that ALL
I  \  positioned darts, tucks, or gathers. Were it not for the     provides ease and fit over a body curve. Fit the pattern and
shaping that these constructions afford, our garments would be     adjust it so the darts are placed to suit the body contour.
uncomfortable and bulky. Darts are preferred for shaping smooth     An important point to remember in fitting darts is this                                                                                                                      -
firm fabrics, tucks are adapted to smooth drapable fabrics, and     darts must point toward the fullest curve of the figure, but
gathers to soft sheer fabrics.                                        never reach quite as far as the curve or extend beyond it. Very
  These constructions must be carefully formed and positioned     often darts extending from waistline to bustline are moved
since they have a close relationship to the curves of the figure      either closer to the center front or are separated more to bring
as well as to the beauty of the design. Often a dart is meant to    them directly under the fullest part of the bustline. The dart
providq shape and fit and yet be nearly invisible, since it, in itself,     extending toward the bustline from the under arm seam is often
does not contribute to the beauty of the garment. At other times     adjusted lower than is indicated on the pattern if the figure re-
the dart is intended to be emphasized as a style detail while      quires positioning for a lower bustline
providing contour and fit. The single thread dart with the fold      The length of darts in the skirt and blouse back are sometimes
to the outside is often the means of achieving this emphasis.        shortened to accommodate figure proportions. A dress might
  The handling of the fabric when forming and stitching a dart     appear to be too small when the problem lies only in better
has a direct influence on its efiect. A dart intended to be invisible       fitting and positioning of the contour forming darts.
must be stitched so that the point tapers so gradually there is       Positioning tucks and gathers is based on exactly the same
no bulge or fold where it terminates. Its position when the      principles as positioning darts, but because of their softness,
garment is worn must be in the proper relationship to the con-       fitting is simplified.

                                                           l3
View original page 15Page 16 · Read text
I

      How to Stiteh a lDart                            very edge of the fold at the point of the dart. Take the slack out
                                                                                            of the upper threading of the machine by turning the spool, but
                                                                     do not draw the thread so taut as to raise the take-up spri.ng.


       A DARr is usually stitched from the seam edge to the point,     Then, drop the presser foot and stitch carefully shaping the
                 I  \ and is reinforced with back stitching at the seam edge.      tapered point of the dart. Back stitch the dart at the seam edge
            The point of the dart is skillfully handled when it tapers gradu-      for reinforcement.
                 ally and when the final three or four stitches parallel the fold
                of the dartiust a thread's w'ilth from the fold and, then, con-
               tinues off the fabric to form a thread chain lto  }{ inches in
               length. This thread chain is tied into a simple single knot that   The Single Thread, Taels
                   is set close to the end of the dart.


                                                                                                                 TA(E.UP LEYER
                                                                                                                        AT TOP POSITION
        Single Thread, I)art                                                  TAKE.UP SPRINC


                                                                             FoRMING ruCKS are used as frequently with the                                                          l^oNrouR
                                                                                           \-,t fold to the outside as they are with the fold concealed.
                                                                 Where the fold of the tuck is to the outside of the garment, the
                                                                                             stitching must be perfectly regulated and show no backstitching.
                                                                         Threads can be drawn to the inside and tied, but the single
                                                                                 thread method of stitching  is much more durable and attractive.
                                                                    The stitching begins from within and is finished at the seam
         ,T,m sTNGLE THREAD oanr is always used where the fold of     edge with backstitching. Position the tuck under the needle and
                  I  the dart is on the outside of the garment and for inside      lower the presser foot. With the right hand turning the balance
               darts where the fabric is sheer, since there are no thread ends to     wheel, form a single stitch while holding the needle thread.
                  tie. The stitching begins at the point rather than at the seam    Draw the bobbin thread up through the fabric and then re-
            edge as in the conventional dart, and the sewing machine is      thread the needle in the reverse direction with the bobbin thread.
               rethreaded for each dart. The thread from the bobbin is threaded      Tie the upper and lower threads together and rewind the spool
            through the needle, in the opposite direction from usual       until the knot has passed the last thread guide nearest the spool
               threading.                                                              far enough to provide sufficient thread for stitching the tuck.
              Tie the bobbin and upper threads together and rewind the     With the needl,e up and the take-up lever at its highest point,
              spool until the knot has passed the last thread guide nearest     draw the upper thread taul enough to raise the take-up spring.
               the spool a sufficient distance to afford thread for stitching the     Then begin stitching slowly and continue to the seam edge, where
                  full length of the dart. Position the tip of the needle into the      backstitching  is used for reinforcement.
                                                                         l4
View original page 16Page 17 · Read text
Prossing and, Blending lrart*             edge. Neither of these rows of stitching will be visible in the
                                                                              finished garment. Then place as many rows, rf or /4 inch apart,
                                                                    as are desired.

                                                              q:?
                                    x


             further shapes darts and tucks when stitching  is DRESSTNG
 I   completed. The curved surface of the press mit is ideal for
 shaping darts. Press darts first flatly as stitched, carrying the      Draw the threads through to the inside at only one end. Tie
 crease only as far as the stitching. Protect the fabric with a press     by forming a single loop of the two strands of thread and set
 cloth. Steam as required by the fiber content of the fabric. Then      the knot tightly against the fabric. Holding these thread ends,
 press the dart over the press mit, protecting the garment from     form a fold at the end of the rows of stitching. Then stitch a pin
 being marked by placing a paper strip under the dart.              tuck using a No. 20 stitch, starting at the seam edge and ex-
                                                                   tending to the last row of stitching. Reverse the stitch to rein-
                                                                            force. Cut off ends of gathering threads to )linch. Anchor the
                                                                  threads at the second end of the stitching on the right side of
                                                                    the garment by forming a figure 8 around a pin.


  Darts face center in the skirt back, blouse back and front,                              .,
                                                                                                                             :-
and on the shoulder and downward at the underarm. Frequently
darts are slashed and pressed open to better distribute thickness.
A dart that fits the waistline and tapers at both ends is released
                                                           There remains one thread for each row of stitching on theby slashing from the fold to within r,1 inch of the stitching at its
                                                                        inside of the garment. Lightly twist these threads together anddeepest point.
                                                                                 pull, working the fabric back on the stitches (at the same time)
                                                              forming uniform gathers. Adjust the amount of fullness to the
Gathering to Control Fallnes*           requirementsing all .threadsofthrgughthe patternto theandinsidefinishandthistying.secondThenendcrossby draw-with
                                                            a pin tuck.
    ANy pArrERNs for soft or sheer fabrics indicate gathering      The gathering should now fall into uniform channels, stitch
      to control fullness at the shoulder, waistline-at yoke     by stitch, especially if care were exercised in placing the rows
joinings in skirts and at styling points. The styling of the gar-     one under the other at the first stitch. When joining this type
ment and personal preference influence how many rows of      construction to its corresponding seam, the first two rows of
stitching are used. A No. 8 or No. 10 length stitch is used for      stitching are concealed.
medium rveight fabrics, but a No. 12 or No. 15 stitch is often       Often one or two rows of stitching are used to control eased
more suitable for a fine or filmy fabric.                                 fullness in the cap of a sleeve, at the top of a hem in a flared or
  Place the first row of stitching just outside the seam line,      circular skirt, in the sleeve seam for elbow fullness, around a
usually slightly less than fu irch from the seam edge. Place a      patch pocket, curved applied bands, lapped decorative seams and
second row of stitching slightly less than /2 inch from seam      elsewhere. The pin tuck is eliminated in these applications.
                                                           l5
View original page 17Page 18 · Read text
Fashion l)etails


                                                              Measuring from a selvage or straight edge, at several points, is IDeeoratioe Tueking
                                                                  another method sometimes used.
                                                                         Press the fold before stitching. Test the stitch and the setting      orHER EASHToN DETATL has better sustained fashion
 NTo                                                              of the Edgestitcher or Tucker on a scrap of the same material I  \  interest than tucking. Whiie interest in tucking for dress
                                                                    before proceeding. A pin tuck is very narrow and is only "as detail fluctuates, tucks are always fashion right and lovely for
                                                                  wide as a pin." If the Tucker is used, a mark will appear for the blouses, lingerie and children's clothes.
                                                                           fold of the second tuck. When the Edgestitcher is used, threads  The opportunity for self-expression  is unlimited since tucks
                                                                      are usually drawn to position each tuck. may be made as narrow as the stitching itself or bold and heavy.
                                                                 Pin tucks are often used for crossed tucking and in combina- Spacing between tucks allows for a variety of effects. Tucks lend
                                                                       tion with lace insertion. When making crossed pin tucks, stitch themselves to cross tucking, to smocked effects, pineapple tuck-
                                                                                         first on the lengthwise grain, then on the crosswise grain. The ing, shirred tucking and many other interesting and original
                                                                    pin tucking is then cut into bias strips for bands or insertion, or applications in combination with insertions.
                                                                                                    it may form a whole yoke or collar sections. Further details re-   There are two aids for tucking, one the SINGER Tucker, and
                                                                   garding the Edgestitcher are given on pages 22 and 23, and in the other, the SINGER Edgestitcher. The Tucker guides both
                                                                     the Instruction Book accompanying your sewing machine. the spacing and width for tucks up to 1 inch, while the Edge-
 stitcher guides only the width for tucks up to I  inch.
  When                          perfect          stitching                   tucks                                 tension                                    adjustment                                                                   is essential,                                    Straight Tueks of Varving Width as    well as                        as                           designated         a short stitch                                           for                                       top stitching.                                                    Refer to
 the Fabric, Thread and Needle Chart on page 3. The thread   and, Spaeing
 should blend perfectly with the fabric in color and texture, or
 should be in decided contrast.
   Tucks are usually made along the lengthwise thread of the
 fabric, but occasionally a design calls for crosswise tucking to                                                                                           =,\
 emphasize style lines. The lengthwise grain of the fabric is
                                                                                                   Y-\i\ always more firm and for that reason lends itself to tucking.
                                                                                                       *l
     %
Pin Tueks


                                      n  UARTER-rNCH rucKs with quarter-inch spacing are tlpical
                                V   of good proportion in tucking. The Edgestitcher guides a
                                                                   quarter-inch tuck best through Slot No. 5. When the iug of the
                                                             attachment is drawn to the left, and the fabric is in S-er \o. 5
                                                                 the attachment is set for its deepest tuck, approrimtel-r  ri'-
                                                                                                                                                                                -:he                                                                           Slots Nos. 1 and 5 are used most frequently for tu&=g:. t::
                                                                    others can be used as well. Select a pattern desigaec 11;':;rring
                                                                                   detail, or use a plain pattern, cutting the section afte:    1,-i:ng                                                                                       =e
                                                                           detail has been completed.
                                                                                r\l                    Where tucks and spaces are equal, fabric oi !E:G ---= -=5ed
                                                             width is required. Where the fold of the tuck:.:,'jir- -:                                                                                                      =rch-,T,rru SINGER Tucker or Edgestitcher may be used in     ing of the previous tuck, as in blind tucl,-S. --:-: -_*   '.-he
 I  making pin tucks. A single thread is drawn from the fabric      finished width is required. Tucks are alrrar-=                                                                                                   =-:,-:  s: -:,:: ie
to locate the first tuck straight with the grain of the fabric.       stitching uppermost under the needle is ri.ible r-.   -5e gert

                                                               l6
View original page 18Page 19 · Read text
is worn. Since the beauty of tucking lies in its being done exactly
 on the woven thread of the fabric and in its explicit accuracy,
  the Edgestitcher and Tucker contribute greatly to the attractive-
  ness of the work.
   The SINGER Tucker is a'time-saver for making half-inch
 tucks as well as tucks of other widths. It carries two scales, the
 smaller, nearest the needle, is numbered from 1 to 8, expressing
 in eighths of an inch the width of the tuck. The larger scale ex-
 presses in quarters of an inch the spacing between tucks. The
 tucking scale is set by loosening the tuck guide adjusting screw,
 which releases the guide for setting to any width tuck up to one
 inch. The setting for a half-inch tuck is at No. 4.


                                                                     the attachment is equal. Rows of stitching are made across the
                                                                 tucks from alternate directions and the exact width apart as
                                                                    indicated by the distance from the needle point to the edge of
                                                                     the attachment. When the stitching is completed and the work
                                                                  pressed with steam from the wrong side, the shaped garment
                                                                          section is then cut according to the plain pattern.


                                      Sealloped, Taeking


. The space scale is set after the width of the tuck has been
 established by loosening the space scale adjusting screw and
 moving the space scale to align at the same number the tuck
 scale is set for with the needle point. This setting makes blind
 tucks where the fold of one tuck touches the stitching of the
previous tuck. When space between tucks is desired, add the
 space in quarter inches to this number. Thus half-inch tucks
spaced a half inch apart require the tuck scale to be set at 4
and the space scale at 6. The 6 is in line with the needle point.
 the rule is to match the tuck scale setting and add the space.
  When making the final tuck of a series, release the lever that
 contacts the needle clamp by merely bringing it forward out of
contact with the needle clamp. Return the lever to its original       NTERESTTNG \,,\RrArroN to plain tucking is achieved by giving                                                                                                            I.
position after the final tuck has been made.                             I  design to the erlge of the tuck in the form of points or scal-
                                                                               lops. Plastic rulers are available for such markings, or interesting
                                                                                       scall<-rped, curve<l, or pointed patterns can be cut from cardboard.
Srnoeked Tueking                               Traceing a seamthe clesignof notto.theless thanr,lfabric, foldedinch fromrightthesidesfold.together, allow-
                                                                      Stitch with a very short stitch, No. 20 on medium weight
qMocKED rucKrNG is a simple variation of straight tucking that       fabrics. The Quilting Foot facilitates stitching small scallops
LJ is especially suited to yoke treatments for dresses and     due to its open construction and its short toes.
blouses of plain fabrics. It provides a texture contrast that, in    A lighter than regular pressure adjustment enables the
itself, is rich and smart. Tuck the fabric on the lengthwise grain      operator to turn the fabric more freely.
making !(inch tucks spaced 171 inch apart. The SINGER Tucker      To prevent pulling at the point between scallops in the fin-
is set with the tuck scale at No. 1 and the space scale at No 2.      ished work, when stitching allow one stitch for width between
  The crosswise stitching is made with the Edgestitcher ad-     each scallop. This spacing provides the width needed when cut-
justed so that the distance from the needle point to each side of      ting and produces a smoothly turned seam. Seams are blended
                                                            t7
View original page 19Page 20 · Read text
to a scant 1l ir,ch on small scallops and a generous ){ inch on        Soft sheer fabrics, voile, batiste, silk georgette and others of
larger scailops. One edge is blended shorter tha.n the other on       similar texture lend themselves to all-over shirring for the whole
all scallops except the very small. Wedges are cut from the      bodice section or for a blouse front.
seam edges at evenly spaced intervals when blending. Then the
 scallops are turned and the seam edges are worked between the
thumb and the finger to bring the stitching to the very edge.
  A silk thread basting is often used to retain the shaping until
after pressing. If the finished scallop is not smoothly shaped,
 inspect the stitching for exactness, and review the blending of
seam edges and the cutting of wedges. Smooth, even scallops
are lovely and expensive looking when used with tucking or as
an edge finish.


I)eeoratioe Shiming


                                                              Threads are drawn on the crosswise of the fabric at 1 inch
                                                                               intervals, or at whatever spacing is selected. Shirring, using the
                                                             Gathering Foot, is placed on each of these lines where the
                                                                       thread has been drawn. The fabric is then pinned closely together
                                                   on all edges to a slightly damp sheet and is allowed to dry
                                                                      thoroughly. This procedure blocks the shirred fabric so that the
                                                                      soft fullness falls in graceful lines and prepares it for cutting
                                                                 according to a plain pattern.


                                                                                  q-  *F"                                                                                                                  ... -l*

                                                                                                                                                        ..:r   l
                                                                                           {*',**      '
                                                                                                               /!

,T,rru SINGER Gathering Foot produces a variety of fashion
 I   details. The foot is designed to lock fullness into each
stitch. Therefore, a long stitch produces more fullness than a
                                                                             ("short stitch. Balanced tensions are always required, but heavy                                                                                                                        ,'        '   !: {
                                                                                                           ,, Itensions, both upper and lower, produce more fullness than light,                      I                                                                             ,ltt*l     l;{balanced tensions.                                                              \,',t!  Shirring is usually done on the crosswise grain of the fabric.                   \.                                                                                                                                                                                                                                                                                                                                                                                              l                                                                          *<=.,/         I
Soft fabrics lend themselves to shirring better than firm fabrics.                     =ss\L *Crisp sheer fabrics are often steam pressed and stitched while
still damp to soften the finish enough for shirring. Matching
thread is usually used, but if a bold decorative effect is wanted,
contrasting thread or heavy embroidery type threads are used      The Gathering Foot is used to produce machine smocking by
in the bobbin.                                                       following a design when stitching and b1- using hearv duty
  Many lovely effects are accomplished with simple rows of      thread for both bobbin and upper threading or bv using pearl
evenly spaced shirring. A yoke section, insert, or trimming band      cotton or an equivalent thread on the bobbin and regular sew-
of self fabric affords an interesting contrast of texture when      ing thread on top. Ilachine smocking is most a:tracti\-e when
stitched with the Gathering Foot in rows \,y'" apart. The groove    made separately and applied as a band to the skirt that has
at the front of the Gathering Foot is a guide for stitching.           been gathered very full.
                                                           l8
View original page 20Page 21 · Read text
*,he Gathering Foot and elastic thread are used Waffle Shiming                                     ing Foot. Often
                                                                     together to produce more fullness than elastic thread gives with
                                                                    the regular presser foot.
                                                                             Elastic thread is a Bobbin Thread and is wound on the bobbin
                                                                  without stretching, which usually requires the thread to be held
                                                                           loosely in the hand while being wound. It is not carried between
                                                                    the discs of the bobbin winder tension.
                                                                                 It is advisable to test the stitching with elastic thread on a
                                                                scrap of the same fabric before any tension changes are made.
                                                                  Quite often no tensiort changes are required. Inspect the stitch.
                                                                              If the upper thread loops, tighten the upper tension until the
                                                                                 stitch locks tightly into the fabric. If the elastic thread breaks or
                                                                             frays, the lower tension must be loosened. The length of stitch
                                                                     regulates the amount of fullness. A long stitch gives more full-
                                                                   ness than a short stitch.
                                              A whole bodice section, or girdle section of a garment is some-
                                                           times elasticized by multiple rows of stitching or by waffie
                                                                           stitching. Shell Puffing is accomplished by stitching in a scallop
qMoorH sURTACED FABRrcs are given texture interest by      design, the point between each scallop overlaps just one stitch
L-, stitching with the Gathering Foot first on the crosswise and      into the center of the scallop of the row above.
then on the lengthwise grain of the fabric, with the stitch length
adjusted short enough to give only slight fullness. The edge of
the Gathering Foot serves as a convenient guide for width be-
tween rows of stitching. Waffie shirring has a broad application
on cottons, silks, woolens or rayons and is particularly interest-
ing for details on children's dresses, girls' dresses, blouses, and
lingerie.                             Appropriate Seams

Dlastie Shiming                    Flat Felled, Sea,rns


                                                                                                                                                                                                                       $-" 6&
                                                                                                                                                                                                                                                                                                       t ft'.'


                                                                                    I


                                            -'>                                                    l-1,r iy,                                                                                       ^                                                                                                                                                       -.i-.
                     "}ff')
                            fi                              1,,'

                                                                     EN's wEen usually calls for Flat Felled Seams accurately
                                                                  formed and stitched to produce the tailored appearance
                                                                          characteristic of men's clothing. It is a matter of preference
   LASrrc THREAD affords a flexible shirring. It is applied in a     which side of the seam is made to the right side. The conven-
   way similar to the shirring effects produced by the Gather-       tional method afiords an inside seam paralleled by stitching. The
                                                            t9
View original page 21Page 22 · Read text
reverse side reveals a top-stitched seam edge, paralleled by a   Braid,ing with Singer Braid,ing
 row of stitching.
                                   Feet   The full seam allowance is taken with the first stitching. The
 seam is pressed flatly as stitched, pressed open and then pressed
 with both seam edges together.
  The inside seam edge is blended to slightly less than the
 width of the finished seam, the upper seam edge is turned evenly
 and is top stitched.
   Manufacturers  differ in their handling of Flat Felled Seams,
 but usually the seam edges that are blended are the back seam
                                                                   BLI\D STITCH edge on side seams, the back seam edge on sleeve seams, the
                                                                         BRAIDER sleeve seam edge on armhole seams, the garment section on yoke
 seams and the front seam edge on shoulder seams.

                                          s?
                                                                                                                                                                                (1tl-l
                                                                                            /1.
                                                  \D"
The Slotted, Seam                                BRAIDINC
                                               PRESSER FEET


                                                                 Jta
                                                                                                     t.!


                                    UNDER BRAIDER
                                              WITH
                                            QUILTINC FOOT

                                            DRAID is quickly applied with any of the SI\GER Braiding
                                                             I-Dpss1. There is a variety of Braiding Feet available to ac-
                                                          commodate different kinds and thicknesses of braid. The Braiding
                                                                    Presser Foot is designed to carry the braid to the needle point
                                                      so that the needle stitches directll' through its center. The'
                                                                 Braiding Presser Foot is available in rvidths Yr6" , rr4", and /16".
,T,"t  sLorrED sreu adds quality and smartness to simple      The Blind Stitch Braider carries the braid so that the needle
  I  dresses and suits that rely on the emphasis of good style      catches only the underneath threads of the braid, blindstitching
lines for interest. Fashion Magazines prove the point that often         it to the fabric.
the expensive dress is simple in line, impeccable in fit, made      The LInderbraider is a plate that is attached to the bed of the
of the best quality fabric and carries only such detail as the     machine and has a channel through which the braid is fed to
slotted seam for accent. Seldom is this detail used on inexpensive      the needle point. The Quilting Foot is used with this plate. The
dresses. The construction is simple.                                 needle stitches entirely through the braid and unlike any of the
  The seam is stitched into a plain seam with machine basting.      other braiders, the braid appears on the underneath. The right
Pressing is carefully done first as the seam is stitched, then the      side of the garment faces downward and the design is traced on
seam is pressed open sharply. All except one thread end are cut      the wrong side of the fabric.
away close to the fabric. The opposite thread is then clipped      Due to the harshness and denseness of some types of braid in
evet f!ilrr or five stitches apart along the length of the seam.     comparison to the fabric, paper or tarlatan must be used while
An underlay of the same or contrasting fabric is carefully po-       stitching to prevent puckering. Continuous designs are best for
sitioned under the seam and is basted securely before stitching       braiding. Where an end occurs within a design, it is drawn
is done on each side of the seam. The basting is quickly removed      through to the under side, carried back against.the braiding
by pulling the single thread end left un-cut.                          pattern, and caught invisibly by several hand stitches.

                                                        20
View original page 22Page 23 · Read text
SINGEN SEWTNG Sf,II,IS
Le*son 2   stitehinfr Method,* and Fushion Details          -
                                         First Practice Session- Seuing Jor Contour
                                          1. Darts and Tucks. Stitch to illustrate an incorrect dart with
                                          a heavy point, stitch one dart correctly following teacher,s
                                                         instruction and stitch one single-thread dart.

                                                         Stitch two tucks, one with back- stitching for reenforcement
                                             and one employing the single-thread  principle.

                                        2. Gathering to control fullness. Place 5 rows of No. 10 length
                                                             stitch and proceed as instructed.

                                      Second. Practice Session- Fashion Details

                                          3. Tucks-Using a 10 inch square of fabric, make pin tuck and
                                                                             rz{, inch tucks on Iengthwise grain with Edgestitcher. The
                                                 Tucker is required for the rlinch tucks with rlinch spacing.

                                        4. Scallops-Mark with ll   inch scallop ruler, stitch with No.
                                          20 stitch length using the Quilting Foot. Notch and blend
                                               seams before turning.

                                        5. Multiple shirring with the Gathering Foot on white batiste
                                                          will provide practice in stitching and guiding fabric when
                                                              shirring.

                                        6. Flat Felled Seam.

                                          7. The Slotted Seam.

                                        8. Braiding with Braiding Presser Foot, the Underbraider
                                            and the Blindstitch Braider.

                         Yoar Dfetnoranda,
View original page 23Related documents and language editions
SingerPDF
1800s Singer Sewing Machine Catalog
Product catalog
36 pages · EnglishRead →
SingerPDF
1896 Singer Sewing Machine Catalog
Product catalog
254 pages · EnglishRead →
SingerPDF
1910 Singer Sewing Machine Catalog - Australiasia
Product catalog
20 pages · EnglishRead →
SingerPDF
1912 Singer Sewing Machine Catalog
Product catalog
242 pages · EnglishRead →
SingerPDF
1924 Singer Sewing Machine Catalog
Product catalog
319 pages · EnglishRead →
SingerPDF
1926 Singer Sewing Machine Catalog
Product catalog
12 pages · EnglishRead →
SingerPDF
Singer Student Handbook
Reference guide
66 pages · EnglishRead →
From the ISMACS International. Original publisher and archive notices are retained.
Check the model and edition against your equipment.
PDF verified 2026-10-11.