Sewing catalogs & reference
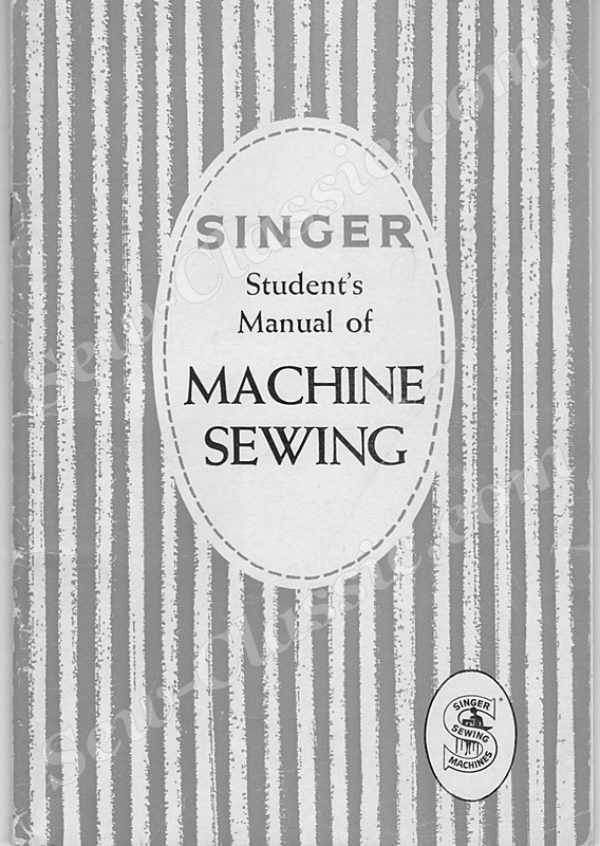
Singer Student Handbook — Reference guide
Reference guide for Singer Student Handbook. 66 pages in English. Read the original PDF, download or print a copy without registration.
66 pagesEnglish13.8 MB PDF
Loading your manual…Open PDF directly
Document details
- Brand
- Singer
- Model / document
- Singer Student Handbook
- Document type
- Reference guide
- Language
- English
- Pages
- 66
- File size
- 13.8 MB
- Category
- Sewing catalogs & reference
- Document date
- Not specified in catalog
Search available document text
Find a term, then jump to its page in the original PDF. Image-only pages may not be searchable; check the PDF for exact wording and diagrams.
Page 2 · Read text
A CompIeIe listing of

SINGER EDUCATIONAL PUBLICATIONS

      For Home Economics Classes

        may be obtained

           by writing to

SINGER SEWING MACHINE COMPANY

        Educational Depaflment.

            Singer Building,

           149 Broadway

        New York 6, N. Y.
View original page 2Page 3 · Read text
S l N G E R*

     Student's Manual

                    OF
       Machine Sewing


                    «w


                            SPECIALLY PREPARED

                            FOR STUDENTS
                          IN SCHOOLS AND COLLEGES


‘                               PUBLISHED DY
                ”NOR! SEWING MACHINE COMPANY
                       EDUCATIONAL DEPARTMENI
                SINGER lUlLDING, 149 BROADWAY, NEW YORK


                 TH! SINGER MANUFACTURING COMPANY

    ‘A Ivodcmorl of THE SINGER MANUFACTURING COMPANY                                E


     Form 1689—R0viud (658)                                      Prim-d In U.S.A.
View original page 3Page 4 · Read text
PREFACE

   One aim in education is to equip the scholar for his or her future
career. To the girl interested in Household Economics the sewing ma-
chine offers wonderful  possibilities. This booklet  is  to instruct her
regarding the care and operation of the Family Sewing Machine
to obtain best results.

  A large part of the family income is usually spent by the woman, and
her knowledge of how to plan and make proper clothing for the family
has a great influence on the purchasing power of the income.  By making
garments at home  it  is possible to provide wearing apparel for herself
and for those for whom she must provide, at a cost that will not only be
in keeping with her purse but  it  will give satisfaction and pleasure to
the wearer.

   Success in home sewing depends greatly on the ability to use to the
fullest  extent the modern sewing machine and  its various attachments.
The  cost of material for making a garment  is usually one-half  to one-
third the amount asked  for a  similar one ready made.  The  styles of
today can easily be followed and, with the help of charts that are fur-
nished with many of the patterns, the cutting  is very simple.  The modem
electric sewing machine takes away  all the labor of stitching.  By using
the attachments furnished  with   it, fashion touches may very quickly be
added without previous basting or preparation.

  When one considers that the  stitching  for a garment may be done
very quickly and entirely without effort on the electric machine,  is  it any
wonder the woman of today  is becoming more and more interested  in
home sewing?

     It  is our hope that the instructions contained  in this booklet will enable
you  to learn the proper care and operation  of your sewing  machine,
so that you can obtain the greatest benefit from  its use.

             SlNGER SEWING MACHINE COMPANY


                Copyright @ l957 by The Singer Manufacturing Company
View original page 4Page 6 · Read text
Needle Bar—the vertical bar to which the needle  is attached and
       which  moves  the  needle  with  the  upper  thread down
       through the fabric at each  stitch.
 Presser Bar—the vertical bar to which the presser foot  is attached.
         This bar passes through a coil spring which exerts a pressure
       on the bar and holds the fabric down against the feed dog
      when sewing. The presser bar and foot may be raised by
      means of the presser bar lifter.
 Face Plate—the vertical plate on the  left of the arm which may be
       removed to give access to the needle bar, presser bar and
        take-up.
 Throat Plate—the plate in the bed directly under the needle through
       which the needle passes and through which the feed dog
         proiects upward.
Feed Dog—the toothed part which  proiects upward through  slots
          in the throat  plate, moving the fabric at each  stitch. The
        stroke of the feed dog  is controlled by the  stitch regulator
         to give the desired length of stitch.
Bed Slide—the flat plate at the left of the bed which may be opened
         to give access to the shuttle or bobbin case and other parts
        of the lower stitch-forming mechanism.
Bobbin—the metal spool on which thread  is wound to furnish the
       lower or under thread supply.
 Shuttle or Bobbin Case-the container in which the bobbin  is placed
      and around which the loop of the needle thread  is passed to
       form the lock  stitch.
Rotary or Oscillating Hook—the part which enters a loop of needle
       thread and carries  it around the bobbin case to form the
         lock  stitch.  In the long bobbin machine (SINGER No. 127)
         this function  is performed by the shuttle, which also acts as
       a bobbin case.
lower Tension—the spring on the shuttle or bobbin case which con-
         trols the delivery of thread from the bobbin.
Motor—the electric motor drives the machine by means of a  belt.
             It is attached by a single screw to the back of the arm.
Sewing Light—the electric lamp and reflector which throws  its rays
       on the bed of the machine.
Three-Pin Terminal—the plug and socket arrangement which con-
        nects the electric supply cord  to the motor, light and con-
         troller.
   The 66 Class Machine. the principal parts of which are illustrated
and described  in the foregoing,  is used extensively in schools and
colleges throughout  the  country. However, newer  types  of  lock
stitch electric machines, that sew backward as well as forward, are
now being  sold  to schools, and some of  their features  (different
from those described above for the 66 Class Machine) are shown
on page 5. The machine illustrated  is the 15-91, while the deluxe
rotary 201-2 Machine also possesses  all the features mentioned.
View original page 6Page 8 · Read text
Formation of the lock  Stitch
    The lock stitch made by sewing machines consists of an upper
 or needle thread and an under or bobbin thread locked together
  in the material which  is being stitched, the lock being formed by
 passing  the upper around the lower thread and  tightening them
 together  in the middle of the fabric.
                  We      “2 TY-Tf'Tf'"
           L2?155le ,. zwlfi
                                  Fig. 3. Formation of the lock  Stitch
   When a  stitch has been completed and before each succeed-
 ing  stitch  is started, the fabric being  stitched  is carried from  the
 needle by the feeding mechanism and upon the length of  its move-
 ment depends the length of the  stitch.
    The presser foot holds down the fabric, prevents  it from  rising
 with the needle and holds  it in contact with the feed dog while the
 feeding takes place.
                 Wind the Bobbins Evenly
   A bobbin must be wound evenly to work pr0perly  in the ma-
 chine. Great care should be taken  in winding bobbins to have the
 thread placed on the bobbin smoothly and evenly, and the bobbin
 should never be wound so fully that  it  is tight  in the bobbin case
 or shuttle. See Fig. 4. A correctly wound bobbin will insure a smooth-
                           -                                                                                                                        .        running thread from the bobbin case and
                               will prevent an uneven  stitch which may
                          occur   if  the  thread   is  placed  on  the
                        bobbin unevenly.
                                                     If,  on  bobbin  winders  of  the  type
                     shown  in Fig. 6, the thread winds to one
                                                                                   '                                "          side  of  the  bobbin,   call  the  nearest
        "9-                 ‘~  l'l'             “hm"     SINGER Shop and an adiuster will be sent          Incorrectly              Wound
            Rig," Bobbin          to correct the trouble.
          Correctly Wound         Always make  it a point to have a suf-
                                                                                                                  ~  iicient  quantity  of  bobbins on hand  so
                            that   it  is unnecessary  to wind one color
                            of thread on a  partly wound bobbin of
                        another color. Bobbins wound in this man-
                          ner are often uneven, and  the ends  of
                           the threads become tangled, causing con-
                          siderable trouble  in the bobbin case.
                      On  Machines  which  have  bobbin
                       winder thread guide A, Fig. 5 fastened to
                      bed of machine, bobbin winder  is some-
                     what  different.   If thread does not wind
                         evenly  on  bobbins  of  these  machines,
                          loosen screw which holds thread guide A,
                                                .   Fig. 5  in position and  slide guide to the
“9 5_ Bob“, Winder Adiw'mnt right  or  left as may be  required,  then
       on Hot Machine       tighten screw.

                                     6
View original page 8Page 9 · Read text
Increasing the Pressure on the Bobbin Winder

       If the pressure of the rubber ring against the hub of the hand
wheel  is  not  sufficient  to wind  the bobbin,  loosen  the adiusting
screw  (see  Fig.  6) and  press the bobbin winder  lightly  until  the
rubber  ring   is  in  contact with  the hub  of  the hand wheel, then
tighten the screw. This type of bobbin winder  is found on Class 66
(on most varieties), 99, ”5 and 1530 Machines.

     If  the  rubber  ring  becomes
worn or  if  oil has been allowed
 to  come   in  contact  with  the
 rubber,  the  ring  will  not have
 the  proper   contact  with   the
wheel  and  will  slip when  at-
 tempting  to wind  a  bobbin. A
worn or oily ring should be re-
 placed.

   The  bobbin  winder  on  most
 of the SINGER family machines
 has  an  automatic  stop  which  re-
 leases the winder from the hand             Fig.  6. Adiusling Pressure on                                                         Bobbin Winder
wheel when the bobbin has been
 fully wound.

   On  machines  having  the  type  of  bobbin  winder shown  in
 Fig. 7,  if the pressure of the bobbin winder pulley against the hub
of  the hand wheel   is  insufficient
for winding the bobbin, press down
the bobbin winder  until  the  latch
A, Fig. 7 drops down and holds  it,
then  loosen  the  adiusting  screw
 F, Fig. 7. With the forefinger, push
back the upper end of the  slotted
 plate  E  as  far  as   it  will  go,  as
shown  in  Fig.  7, and  at the same
time press the bobbin winder pul-
ley against  the hub  of the hand                                    .                        .
wheel,  then  tighten  the adiusting        F'ggggz'wflfi: °l
screw  F.
View original page 9Page 10 · Read text
Importance of Correct Needle and Thread

  A perfect stitch can be obtained only when the thread is selected
to suit the fabric which is to be stitched and the needle is the correct
size for the thread.  If the needle  is too fine for the thread and the
material  to be sewn,  it  is quite  likely to break when crossing a
seam.  If a large needle  is used on fine material, the perforations
made by the needle  will show on the finished work. A table of
correct needles for the various sizes and types of thread  is given on
page 63  of this book as well as  in the instruction book for each
machine. This table should be followed carefully when ordering
needles and when changing them for various classes of work.
    Note: For best results, use needles sold by Singer Sewing Machine
Company.

                          Testing a Needle

   An important essential for good work  is that the needle be per-
fectly straight.
  A straight needle can be determined by placing the flat side of
                                    the needle on the slide plate of
                                     the machine or any other  per-
                                        fectly flat solid surface. Hold the
                                 needle flat against the plate and
                                  hold the plate up to the light as
                             shown   in   Fig.  8. A  straight
                            needle  will show an even
                            amount of light under it and the
                                   point  will be  in  line  with  the
                                 shank,  while  the  point  of  a
        Fig.  3. Testing a Needle for       crooked or bent needle  will be
              Straightneu                closer  to  or  further  from  the
                                       plate.


  You will note from Fig. 9 that the
side of the needle with the flat on
the shank has a short groove at the
eye, while  the  other  side  has  a
long groove. On all machines, the
thread must lie in this long groove
when sewing.  If the needle  is not
placed correctly in the machine,  it
will not sew.

                                                                 Fig. 9. Flat and Grooved
                                                      Sides of Needle (Enlarged)
View original page 10Page 11 · Read text
To Set the Needle Correctly
    Turn the hand wheel over toward you  until needle bar  rises
to  its highest point. loosen thumb screw of needle clamp and  re-
move  the old needle from machine.  Place new needle  in needle
clamp, making  sure  that  flat side  of needle faces  in  the  correct
direction, which can be determined as follows:

                              NEEDLE


           <— FLAT    FLAT —> THREAD                        EAD
                SIDE     SIDE      THRRIGHT

  RIGHT

              £21393                                             £21394

                      Fig.  10                                                Fig.  11
  On  all machines  having  the    On  all machines having  the
needle bar  slot  at  the  left, as   needle bar slot at the  right, as
shown in Fig. 10, the flat side of  shown in Fig. 11, the flat side of
needle must face the right and   needle must face  the  left and
needle must be threaded from   needle must be  threaded from
left  to  right (from  long groove   right  to  left (from  long groove
side).  This applies  to Machines   side).  This  applies  to Machines
15-30,   15-86,   15-87,   15-96.   15-88, 15-89, 15-90, 15-91, 201,
1598, 66, 99, 101, 127 and 128.   221 and  3011‘.
               The Necessity for Proper Tensions
    The tensions on the sewing machine must be adjusted to  suit
various fabrics. There are two tensions, the upper and the lower.
The upper tension controls the needle thread, while the lower ten-
sion controls the thread from the shuttle or bobbin case,
   The definition of the word tension as given in the dictionary  is:
”stress by  pulling.”  It  is the pulling together of the threads that
completes a stitch on the sewing machine. After the needle thread
has passed around the bobbin case, the slack thread must be taken
up and some tension placed on both upper and lower threads as
they are drawn into the material and locked together.
the needle clamp on Machine 301  will not permit needle to be inserted incorrectly.

                                          9
View original page 11Page 12 · Read text
If  both  threads  are  under
                                proper tension,  the  lack occurs
                                           in center of material being sewn
                             and a perfect stitch is formed as          Fig.  I2. Beth Tensions Correct
                                          in  Fig.  12.
                                                           If tension on needle thread  is
            ~  >  _—-'<,- 4: w-e—frwem.       too  tight, or   if  that on bobbin
   “ELEMELELBN—‘Er—lg;    thread is too loose, needle thread
                                                                                   ‘ “      will  lie along upper surface of
     "e 13-179“ Upper Tendon       material as illustrated in Fig. 13.
                                                             If tension on bobbin thread  is
    q       _7_                               _                 . A           too  tight,  or  if that on needle
   flfifi.ifiuv‘fl.'7fitlfllfi    thread  is too lease, bobbin
     “-‘—"“*‘  1‘“  "‘”‘-       ‘ W-  ~ʼ.ʼ::     thread  will   lie  straight  along
           Fig. 14. Tight lower Tension      under side of material as shown
                                          in Fig. 14.
    Fine materials require a  light tension, while heavy materials
require more tension to produce a perfect stitch.
      If too tight a tension  is used on fine material, the threads may
break when material is pressed flat. A bias seam will pucker  if ten»
sion  is tight. if tension on a flat seam  is too loose, there  is danger of
thread being pulled out. A long stitch and a loose tension are often
used when  basting, so that  stitches may easily be  pulled from
material.


              How to Adiust the Tensions
      1.  Turn hand wheel until take-up lever is at its highest position.
     2.  Pass upper thread between tension discs into thread take-up
spring and through hole  in take-up lever.
     3.  lower presser bar, as needle thread tension is released when
presser bar  is raised.
     4.  Turn tension thumb nut B, Fig. 15
counter-clockwise until there is no tension
on thread.
     5.  Draw sufficient thread from spool
to provide a slack thread between spool
and tension so as to remove weight of
spool from thread while tension  is being
adiusted.
    6.  Turn tension thumb nut B, Fig. 15                 ‘   mm
clockwise to tighten tension while lightly                 Fi      .  15. Adiutt‘n
drawing thread through take-up  lever.       m3 upp" 1.0.23.
until take‘up spring  is lifted and thread
can be held  in a straight line between take-up lever and tension
discs without taking thread through tension discs.
    7.  Complete threading of machine for sowing.
View original page 12Page 13 · Read text
After upper tension  is
                                           adjusted, bobbin thread
                                            tension   spring  should
                                       be  adiusted  for  about
                                   some tension, comparing
                                             tensions  as  shown   in
                                                   Fig. 16.
                                         Bobbin thread tension
                                                              is  adjusted  by  turning
                                           small screw near center
            Fig. 16. Testing Upper and lower
                                             of  spring  under which
                  Tensions Together               thread  passes on  long
shuttle or round bobbin case. With a small screwdriver, turn screw
to right to tighten or to  left to loosen tension. Then a few stitches
should be taken  in a practice piece of material to see  if stitch  is
locked in center of material. If bobbin thread shows on top, Fig. 13,
under tension is too loose. If bobbin thread shows on bottom, Fig. 14,
under tension is too tight.
   With under thread tension properly adiusted, a variety of dif-
ferent sizes of needle threads can be used without disturbing tension
on under thread, as the required change  in tension  to  suit ma-
terial being sewn can be made by adiusting  tension on upper
thread only.
   Machines 15-88 to 15-9], 66-16, 201, 221 and 301 have gradu-
ated scales D, Fig.  ‘IS so that, when correct tension  is found for a
particular kind of work, it is only necessary to note number on scale
to obtain some tension at any time.

       Preparing to Sew
   Pull sufficient thread through
needle to start sewing, hold end
of thread in left hand and, with
right, turn hand wheel over un-
til needle goes down and up
again  and  under  thread   is
pulled up through needle hole

                                                                                                                                                                                                                                                                                                                                                                                                                                                                                                                                                                                                                                                                                                                                                                                                                                                                                                                                                                                                                                                                                                                                                                           r                .in throat plate. See Fig. 17.                               ,,
  lay bo'h lhreads boc“ under            fig.  I7. Pulling up Under Thread
presser foot diagonally across
                       feed as shown in Fig. 18, to the right or left
                      depending upon which side of needle the
                         material  is  to be  located,  so  that when
                         presser foot  is lowered, the threads will be
                          firmly held between feed and presser foot.
                        Note: On some classes of family sewing ma-
                          chines, throat plate has distinct markings,
                       as shown  in  Fig.  18, which are  to guide
                                               -              3   -   edges of seams and hems. These markings.
  Hg' 12; ?;7?‘§2J3,:°”'°"  at 1/8" intervals from 1/4" to 3/4” in dis-
tance from right of needle, assist in guiding fabric uniformly. Cross-
                                                                     i'l
View original page 13Page 14 · Read text
lines on throat plate indicate pivot point of needle when turning
 square corners.
    Edge of garment to be stitched should be placed iust far enough
 under presser foot so that first stitch may be taken in material. Never
 place material so far  in front of
 needle that first stitch will not be
 taken  in  material,  as  this may
 cause thread  to become caught
 in bobbin case and material may
 not feed under foot properly un-
 less edge has been caught with
 needle. Position needle into fab-
 ric where  first  stitch   is  to  fall.
 Holding   thread   ends,   lower
presser  foot,  bringing  tension
 into  operation.   This  prevents
thread  from  being  caught   in                                  [Hi-YD
bobbin  case.  See  Fig.  19  for
proper starting of material under             Fig.  l9. Beginning a Scam
 presser foot.
                          Finishing a Seam
   When finishing a seam, never sew beyond end of material. Stop
machine by placing hand on hand wheel shortly before end of seam
 is reached. This will prevent thread from becoming caught  in bob-
bin case. See  Fig. 20.
   Do not attempt to release material from machine until take-up
lever  is at  its highest point. See T, Fig. 27. When take-up  is  in  this
position and presser foot  is raised, the tension  is released.
   Always  take  material  from
machine  by  pulling    it  straight       rr   '—'
back or away from you. This will
prevent  needle from  becoming
bent or broken.
   Always have  a  sufficient
length  of thread  to prevent   its
pulling through needle when you
start to sew next seam. Pull ma‘
terial back from you far enough
to  allow  upper  and  lower         Fig.20.iinishinga$eom
threads  to  enter  thread  cutter
A, Fig. 17. Hold thread with both hands and cut with a quick down-
ward motion.

                   Hints for Sewing Various Seams
   Always keep material to the  left of presser foot, allowing seam
to extend to the right. This helps to prevent machine oil from soiling
goods and allows greater freedom of feeding than when garment
is allowed to pass under arm of machine.
View original page 14Page 15 · Read text
ln stitching a skirt, all patterns are made so that the seams must
be  stitched from the top down. This  is true of every seam  in a
garment.  In  stitching a  blouse,  the shoulder seams are  stitched
from the neck down, and the under-arm and  sleeve seams are
stitched from the armhole down. This is also true when sewing bias
seams on a skirt.  It should be stitched from the waist line down in
order that the pattern will come together correctly, However, there
are exceptions. For example when  stitching  pile fabrics such as
velveteen and corduroy, always stitch with the pile, or from lower
edge of skirt to waistline, etc.
   When sewing a bias edge to a straight edge, place the straight
edge against the feed. Hold the bias edge toward you in order to
adiust and ease the fullness in to prevent  its stretching.


                      The Seam Guide

  The seam guide  is a help  in straight
stitching. The guide  is fastened  to  the
machine by means of the thumb screw,
as shown  in Fig. 2].  It can be adiusted
to various distances from the needle as
desired.
  The  first  practice with  the machine
after understanding the threading, ten-
sions,  etc.,  is straight stitching. At  first,
use strips of paper without thread and
then  saw  on  muslin,  stitching  several
rows  close  together.  Always  use  a      ”9.”  5.0,“ GM.
double  piece  of  material when  prac-                                 '
ticing stitching.


                 Regulating the length of Stitch

   The length of stitch should be regulated to suit the thread and
material that  is to be used.  In other words, after giving  all other
conditions careful attention, do not spoil your sewing by using a
stitch that  is too long and coarse.
   When stitching fine material, use a fine needle, fine thread and
a short stitch. Heavy material requires a coarse needle and thread
and a longer stitch.
   Between I2 to 15 stitches to the inch makes a desirable stitch
for ordinary sewing. To count the stitches, with machines on which
the stitch length  is not shown, sew on a double thickness of muslin,
measure off one inch with a ruler and count the stitches.

                                        I3
View original page 15Page 17 · Read text
Machine  221-1.  To  change  the  length  of
stitch, turn the thumb nut B, Fig. 25 away from
the  stitch indicator plate A as far as  it will go.
Then move  the  stitch  regulator lever C  until   it
is  in  line with  the number designating the de-
sired length of  stitch and turn the thumb nut B
inward  until   it touches the indicator  plate. The
machine will then make the indicated number of
stitches to the inch in either a forward or reverse
direction, depending upon whether the lever C
is at  its lowest or highest position.

    To  feed  the  material   in  reverse  direction,
raise the  stitch regulating lever C as high as   it
will go. The direction of the feed can be reversed                      .                                                        _
                                      .               .                                                .                                             .                 Stitch Regulatingat any  potnt  tn a seam Without removmg  the    In“ on 22“
work from  the machine.                                    Machine

                       Machine 30]. To change  the  length  of
                                 stitch,  turn  the thumb screw on  the  stitch
                         regulator  lever Y,  Fig. 26 away from  the
                               stitch indicator plate X as far as necessary.
                      Then move the  stitch regulator  lever  until
                                                it   is  in  line with  the  desired number  of
                             stitches  to  the  inch and  turn  the thumb
                       screw inward only until  it touches the stitch
                          indicator plate, The machine will then make
                          the indicated number of stitches to the inch
                                 ,                                  _              in  either  a  forward  or  reverse  direction,
         l'gʼ 26'     Regulator                leversm‘h on      depending on whether the lever Y  is at  its
        30! Machine         lowest or highest position.
    To feed the material  in reverse direction, raise the  stitch regu~
lator  lever Y as high as   it will  go. The direction  of feed can be
reversed at any point of a seam without removing the work from
the machine.
   On Machines of Classes 66 and 99, fitted with reverse feed, the
reverse feed should be used only for back tacking and not for con-
tinuous reverse feeding.
    The direction of feed and length of stitch are regulated as in-
structed above for Machine 221, except that there  is no thumb nut
B on the regulating lever.
                Reverse Feeding on Fine Materials
   Although  long seams may be made  in medium and heavy
materials on Machines 15-88  to 15-91, 201, 221 and 301, while
feeding toward the operator. the reverse feed should be used only
for short back tacking  in  thin or sheer goods. Such  fine material
will tend to pucker  if the reverse feed  is used for more than about
1/2 inch.

                                       15
View original page 17Page 18 · Read text
Adiusting the Pressure on the Presser Bar
                       The presser foot rests on the feed dog, hold-
                       ing the cloth in position while the machine  is
                     sewing. The pressure should be regulated ac-
                      cording  to  the  fabric  to be  stitched, heavy
                   enough  to prevent  the material from  rising
                      with the needle and  still enable the work to
                      feed along smoothly. A pressure that  is too
                   heavy will cause the machine to run hard and
                          will leave the print of the feed on fine mate-
                             rials.
                         increase the pressure by turnlng the adiust-
                       ing screw, at the top of the presser bar, to the
                          right. lighten the pressure by turning the ad-
                         iusting  screw  to  the  left. See  Fig.  27. The
                     heavier the material, the more pressure  is re-
                     quired except with pile fabrics (corduroy and
                      velveteen) when a  lighter pressure  is advis-
    fig.  27. Regulating      able, Fine materials require a  light pressure.
       the Pressure
                                Cleaning and Oiling
                     Sewing machines require daily oiling and
cleaning  if they are used continuously all day.  If used moderately,
a few hours a day, oiling and cleaning once or twice a week  is
sufficient. A sewing machine, like all other machinery, will not give
proper satisfaction  if the working parts are allowed to become dry
or gummed with a poor grade of  oil. A sewing machine that has
not received the proper care will run hard and considerable energy
 is wasted by using a machine in this condition. Always remove dust,
lint, threads,  etc., before oiling any part of the machine or stand,
especially  in and around the shuttle race.

                                           Oiling the Machine Head

                                          The equipment neces-
                                           sary   for   the   proper
                                          cleaning of the machine
                                                consists  of  a  piece  of
                                         cheese   cloth,  a   large
                                    screwdriver, a small
                                          screwdriver and a   stil-
                                                    etto.

                                         Care should be taken
                                                 to  use  high-grade ma-
                                           chine  oil and one drop
                                         should  be applied  to         Fig. 28. Cleaning and Oiling the Head
                                       each bearing and each
point where there  is any friction.  it  is poor economy to use  oil of
doubtful quality, as it may gum on the working parts.
                                         lo
View original page 18Page 19 · Read text
It  is best to be safe and purchase oil from the sewing machine
manufacturer, who  is interested in having  it specially prepared for
sewing machines. Many household oils are not suitable for sewing
machine use.
   When planning a thorough  oiling, remove the upper thread.
slide plate, bobbin, bobbin case, needle and presser foot. Take out
the screws in the throat plate (the plate, A, Fig. 28, directly under
the presser foot, through which the needle passes) and remove the
throat plate. This will enable you to clean and  oil the shuttle race.
On the 66 and 99 Class Machines, the oscillating hook  is lubricated
by oil from a piece of red felt C, Fig. 28, which touches the top of
the hook. This felt wiper should be kept moist with oil at all times.
if ”H-     ~                                                  .   ~      The face plate should also be removed
                        by taking out screw 8, Fig. 28 to give ac-
                             cess  to the ailing  points on the needle
                            bar,  presser  bar and  thread  take-up.
                            Put one drop of oil into each oil hole and
                                  joint.

                             Release the belt from the band wheel
                       by turning the lever of the belt shifter.
                                Fig. 29, to the  left while the machine  is
                           running. To replace the belt after releas-
                              ing, place the  feet on the treadle and
                                                  _                       start the band wheel in the proper direc-
                                                              l    —                    -   tion. The  belt  will  be thrown on  the
    ”9- 29.11" ”‘l' Shll'"     wheel  automatically.  Never throw  the
belt off to the left side of the band wheel, as  it is difficult to replace
it from this side.
    After releasing the belt, turn back the head of the machine  in
Order to reach the ailing points on the under side. By turning the
hand wheel slowly you will be able to observe all working parts.
Place a single drop of oil at each point, as this  is sufficient to lubri-
cate the machine. After oiling all points on the under side, lower the
head into sewing position and  oil each point on top of the arm.
Wipe away all surplus  oil, thread up the machine and  stitch on a
waste piece of material until all surplus oil that might drip onto the
goods being sewn has been worked out.
   When a machine  is used frequently,  it  is not necessary to re-
move the throat plate, slide, bobbin and bobbin case each time the
machine  is  oiled; but  this should be done whenever a thorough
cleaning and oiling  is required.
   Do Not Lubricate Motor on any machine except 15-91, 15-125,
201-2 and 221-1. To lubricate these motors, see  instruction book
accompanying these machines.
View original page 19Page 20 · Read text
Oiling the Bobbin Winder

  To insure smooth running of the bobbin
winder,  the  ailing  points  should  be  ob-                           in
served and care taken to see that they are                          turns”
not neglected when the rest of the machine
is oiled. See Fig. 30.  if the winder  is to be
used immediately after oiling, do not sit in
front of  it.  If too much oil has been applied,
it  is  liable  to  be thrown and  sail  your
clothes. Do not allow oil to come in contact
with the rubber ring on the bobbin winder,
as  oil softens the rubber and causes   it  to
slip on the hub of the hand wheel. When
this happens, the only remedy is to replace            fie- 30. om” H"
"W fing-                                                    Bobbin Winder

                  Removing Gummed  Oil
      lf the machine has been idle for several weeks and runs hard,
 it  is probably due  to gummed  oil. When a machine has become
gummed,  all  working  parts  should  be  thoroughly  oiled  with
SINGER‘ Sewing Machine Oil. Thiswill loosen the old oil  if not too
badly gummed. Run the machine rapidly for a few minutes and
wipe thoroughly with a piece of cheese cloth.  if the machine does
 not run  freely after  this treatment,  it should be examined by a
 skilled sewing machine adiuster.

       COMMON CAUSES OF MACHINE TROUBLES
                Causes of Upper Thread Breaking

    Machine improperly threaded (see instruction book).
    Tensions too tight (see page  TO).
    Needle bent or having blunt point (see page 8).
    Thread too coarse for size of needle (see instruction book).
    Needle too fine for size of thread and material to be sewn (see
      chart on page 63).
     Burr on needle hole in throat plate (caused by breaking needle
    when pulling material from machine).
     Burr on needle hole in presser foot (caused from sewing aver
      pins or breaking needle).
    Needle incorrectly set (see page 9).
    Needle too long for machine, or not all the way up in clamp.
    Take-up spring bent or broken (send for adiuster to repair).
    Tension discs worn  so that thread works  in groove (send for
      adiuster to repair).
View original page 20Page 21 · Read text
Causes of lower Thread Breaking
b  Improper threading of bobbin case or shuttle (see instruction
 ookL
    Tension too tight (see page 10).
    Thread wound unevenly on bobbin or bobbin wound too  full
(see page 6).
    Spring on bobbin case or shuttle worn to sharp edge.
    Burr on under side of throat plate (sometimes caused by sewing
over pins or breaking needle).

                  To Avoid Breaking Needles

   Do not sew heavy seams with too fine a needle.
    Use proper site of needle for thread and material to be sewn
(see chart on page 63).
    See that the presser foot or attachments are securely fastened
to the presser bar and that the needle does not strike the edge of
the hole or slot  in the presser foot or attachment.
   Do not pull the material  to one side when taking  it from the
machine. The needle may become bent and strike the side of the
hole in the throat plate when starting to sew (see page  8).
   Do not  pull material when sewing. The needle may become
bent and strike the back of the needle hole.
   Do not bend the needle when pulling out the material before
cutting thread (see page 12).
   Do not use a needle that is too long.  It  is liable to come in con-
tact with the bobbin case and break, probably spoiling the case
and  requiring  replacement.  (Use warranted SINGER  needles  in
SINGER machines. See page 63).
   Do not leave pins in the material after basting and do not sew
aver them with the machine.

                        Skipping Stitches

   Needle blunt, bent or not correctly set into the needle bar.
   Needle too small for the thread used.
   Needle too short for the machine.

                             Stitches looping

   Looped  stitches are usually caused by an improper tension.  If
the loop is on the upper side,  it may be corrected by tightening the
under tension.  If the leap occurs on the under side,  it may usually
be corrected by tightening the upper tension (see page  10).
   See that both  the upper and lower threading  is correct, that
the thread  is of good quality and the correct size for the needle.
    Test both tensions and stitch on the same material to be sewn.
   looping of stitches  is sometimes caused by the placing of the
bobbin  in the bobbin case or shuttle so that the thread pulls from
the wrong side of the bobbin, or by the bobbin being wound too
fully. (See instruction book.)

                                           19
View original page 21Page 22 · Read text
Machine Not Feeding Properly
   Improper feeding  is often due  to the pressure being too  light
for the material to be sewn (see page 16).
   The feed dog may be worn smooth. This may be determined by
running the finger over the feed dog teeth.  If they are not sharp,
the feed dog should be replaced with a new one by a competent
adjuster.
   The stitch regulator may have been set so that the feed  is en-
tirely out of action.
   On machines having a feed throw-out device, the feed throw-
out thumb screw may not be tightened  all the way.
   Heavy accumulation of  lint on top of feed dog or underneath
throat plate. Remove throat plate to clean.

                  Machine Working Heavily
      If  the machine works  heavily  after  standing,   it  is probably
gummed and needs a general cleaning (see page 18).
   The belt may be too tight and hence putting excessive pressure
on the bearings.
   Accumulation of gum and dirt around treadle and wheel bear-
ings will cause treadle to work heavily.
   Sometimes thread becomes wound around the hub of the hand
wheel and  the ends  of  the band  wheel  crank.  With  constant
running and contact with  oil the thread works in next to the bear-
ings so tightly that  it makes the machine run heavily. When  this
happens, remove the thread with a  stilletto or other sharp instru-
ment.

                        Puckered Seams

    Tension  is too tight.
     Stitch  too  long  for  material  being  sewn,  especially on  fine
material.
   Wrong  presser  foot  used.   It  is always  best  to use  only  the
presser foot provided for each machine, as they are, in some cases,
not interchangeable.

                         Noisy Treadle
      if the treadle  is noisy, the screWs on which  it  is pivoted need
tightening. Release one of the screws by backing of? the nut one or
two turns with a wrench, place a screwdriver  in  the  slot of the
screw and advance the screw toward  the treadle  iust enough  to
take up the slack. Tighten the nut and test the treadle.  If  still noisy.
repeat the operation on the other side.
      If the types of sewing machine used  in your school are  dif-
ferent from those described  in  this book, refer to the  instruction
book accompanying the machine for particular details.
View original page 22Page 23 · Read text
Threading Vibrating or long Shuttle Machine No. 127

     Upper Threading                                     Under Threading
                                             Hold the shuttle be-
                                       tween the thumb and
                                                  fingers   of   the   left
                                      hand as shawn. Place
                                               the  bobbin  into  the
                                         shuttle  with  the
                                            thread drawing  to-
                                     ward  the  right from
                                                 the  side  of  the bob-
                                                 bin nearest you.


                                                 Place the forefing-
                                                 er of the left hand on
                                                the end of the bobbin
                                       and draw the thread
                              downward  into the
                                             long slot in the shuttle
                                              as far as  it will go.


                                     Then  draw  the
                                            thread straight up-
                                    ward and under  the
                                                tension  spring  until
                                                the bobbin begins to
                                          unwind.
  Turn   the  hand  wheel  ever  toward
you  until  the  thread  take-up  lever 4   is
raised  to  its highest point. Place the spool
of thread on the spool pin at the top of
the  machine,  lead  the  thread  into  the
thread  guide   1  at  the  top  of  the  face
plate, down, under and from right  to  left
between the tension discs 2, into the small
wire  spring 3  at  the  left  of  the  tension         Drawing Up the Under Thread
discs, up and from front to back through         With the  left hand held the end  of
the hole  in the end of the thread take~up        the  needle  thread,  leaving   it  slack
lever 4, down into the eyelet 5  in front of       from the hand to the needle, turn the
the face plate, into the lower wire guide      hand  wheel  over  toward  you  until
                                                       the needle moves down and up again
6, then from  left to right through the eye        to  its highest point, thus catching  the
of the needle 7.                               under  thread;  draw  up  the  needle
                                                thread and the under thread will come
  Draw  about  two   inches  of  thread      up  with   it  through  the  hole  in  the
through the eye of the needle with which       throat  plate.  lay  both  threads  baclr
to start sewing.                                under the presser foot.
View original page 23Page 24 · Read text
Threading Oscillating Hook Machine No. 66

         Upper Threading                         Under Threading


                                         Hold  the bobbin between  the thumb and
                                         forefinger of the left hand, the thread lead‘
                                             ing on top from  the  right toward  the  left.


  Raise the thread takevup lever 5  to
its   highest   point  by   turning   the      Place the bobbin into the bobbin can and
hand wheel over toward you. Place the   draw  the thread  into the  slot  in the bobbin
spool of thread on the spool pin; lead    case at the  left (see  1).
the thread into the thread guide  1  at
the  left and near the top of the arm,
down,  under and  from  right  to  left
between the tension discs  2, into  the
small wire spring 3 at the  left of the
discs,  under  the  thread  regulator  4
at the loft (not through the eye of the
thread regulator 9 which  is used only
let darning and embroidery). op and
from right to left through the eyelet 5
in the end of the thread take~up lever,
down  into the eyelet  in front of the
face plate 6, into the lower wire guide     Draw  the  thread backward between  the
7, then from  left to right through the   bobbin case and  the  tension  spring  until  it
eye of the needle 8. Draw about two    reaches the notch (see 2), then pull the thread
inches  of thread  through  the  needle    with the  left hand toward the right as  illus-
with which  to start sewing.                trated, and close the slide.

                                      22
View original page 24Related documents and language editions
SingerPDF
1800s Singer Sewing Machine Catalog
Product catalog
36 pages · EnglishRead →
SingerPDF
1896 Singer Sewing Machine Catalog
Product catalog
254 pages · EnglishRead →
SingerPDF
1910 Singer Sewing Machine Catalog - Australiasia
Product catalog
20 pages · EnglishRead →
SingerPDF
1912 Singer Sewing Machine Catalog
Product catalog
242 pages · EnglishRead →
SingerPDF
1924 Singer Sewing Machine Catalog
Product catalog
319 pages · EnglishRead →
SingerPDF
1926 Singer Sewing Machine Catalog
Product catalog
12 pages · EnglishRead →
SingerPDF
Singer's Sewing Skills Reference Book
Reference guide
60 pages · EnglishRead →
From the ISMACS International. Original publisher and archive notices are retained.
Check the model and edition against your equipment.
PDF verified 2026-10-11.