Film cameras
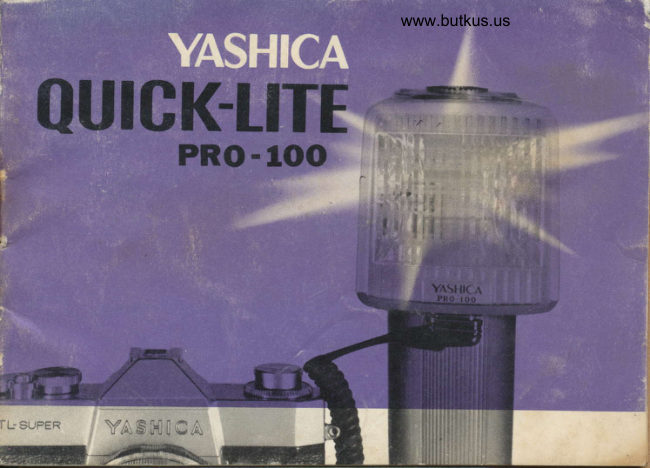
Yashica Quick-lite Pro 100 User manual
User manual for Yashica Quick-lite Pro 100. 15 pages in English. Read the original PDF, download or print a copy without registration.
15 pagesEnglish3.6 MB PDF
Loading your manual…Open PDF directly
Document details
- Brand
- Yashica
- Model / document
- Yashica Quick-lite Pro 100
- Document type
- User manual
- Language
- English
- Pages
- 15
- File size
- 3.6 MB
- Category
- Film cameras
- Document date
- Not specified in catalog
Search available document text
Find a term, then jump to its page in the original PDF. Image-only pages may not be searchable; check the PDF for exact wording and diagrams.
Page 3 · Read text
www.butkus.us


The Yashica Quick-Lite pRo-1oo is a powerful, sturdy electronic
flash unit with transistorized circuit for low battery drainage,
extra-high light output balanced fpr daylight color film. This
unit features self-contained, easy-accessible battery cartridge,
easy-to-read exposure calculator dial. Uses eight 1.5v AA.size
dry or alkaline batteries and also operates on A.C. household
current. The PRo'100 recycres in five to seven seconds and
emits fast 1/1000 second flash covering an illuminating angle
of 60 degrees.
View original page 3
Page 4 · Read text
Venmo @mike-butkus-camera  Ph. 2083
PayPal Name  Lynn@butkus.org      www.PayPal.me/lynnbutkus
View original page 4
Page 5 · Read text
ATTACHING TO THE CAMERA


                                                                       -J
                                                                                        i
Attach Camera Bracket to the base of flash unit with Mounting Screw, and
mount camera on the bracket. Then, insert Synchro-Cord in the flash
unit and in the synchro-terminal of the camera.
lmportant: Adjust the position of Flash Head by loosening the mounting
screw and by turning the unit so that the flash head is placed parallel
with the camera lens.
View original page 5Page 6 · Read text
FLASHING ON A.C.               www.butkus.us
  For your first  f lash photography, use the flash unit on your  A.G. household current toctrirj6 ttre main condenser!


                                                                                    gl


                                   Mike Butkus      Digitally                                                                                                                                                                                                            DN:ou=butkus.org,Date:cn=Mike2022.07.26signedButkus,email=mike@butkus.org,by20:04:23Mikeo=ButkusButkus-04'00'camera manuals,c=US
ln the first flash picture-taking after purchase of this unit or prolonged stor_
age, make sure to use it on your househord current. when the voltage of the
main condenser of the unit has dropped owing to naturar erectric power
drainage, the pilot lamp and flash will fail to turn on, even though the fullcapacity of the batteries is used.
1.  Place D.c. Push Button in "oFF" position by pressing it ail the way, and
     insert A.c. Adapter into A.c. cord socket. Then, connect A.c. cord plug
    with the plug receptacle of your household current. The flash unit acti-
    vates charging and the pilot ramp turns on in five to seven seconds. The
    flash unit is ready for  f lashing.
View original page 6Page 7 · Read text
\

                                     ".a


               -t,),nIlfu        .-      -"*:*     _                                                                          &x*"'':"ffi'il                                                                                                  I                                                                                                             c
2. The picture shows that the changing tap is set at "115V" position'
   When it's necessary to change the voltage, remove the cover of A'C'
    adapter by unscrewing the mounted screws.
3.  Pull out the changing tap of voltage and turn  it over, and replace  it, then
    the red part of the tap is set at "230V" position'
Note:
  Current usuable: 11OV-120V on 115V tap; 22OY-24OV on 230V tap' The
  operation of the unit on t2OV*130V or 23OV-24OV should not be made
   in case of continuous flashing for more than one hour' Never use the flash
  unit on more than 24OV.
View original page 7Page 8 · Read text
www.butkus.us
    DETERMINING EXPOSURE


I
t
         1.  Turn Exposure calculator Dial to align ths triangle index mark with the
        ASA/DlN film speed in use. The correct exposure for camera-to.subject
          distance is shown on the F-stop scale.
        2.  For example, when color film with ASA film speed 1oo is used, the
          camera-to-subject distance is 10 feet, then the f-stop is f/1L.
View original page 8Page 10 · Read text
TESTING                               www.butkus.us


$
T
       When oN/oFF Button is pressed half-way, a slight emitting tone is
         heard. In a few seconds, Pilot Lamp turns on.
          Depress open Flash Button for flash. when oN/oFF Button is depressed
              all the way, it will return to " OFF " position.
View original page 10Page 11 · Read text
FLASHING ON D.C.

Set f-stop obtained from Exposure Calcu-
lator Dial. Press the On/Off button half-
way, and a slight emitting tone will be
heard, which means charging has started.
When the pilot lamp turns on, the Quick'
Lite PRO-1OO is ready. Depressing the                      I
shutter release button, and  it gives a flash
and the pilot lamp goes off.
                                        flashFor                           the          Flash,              do not                      connect   Open                                                                    !    T',*Y                                                                                                  n,:t  l                                 and         $',d. *$,.,''l                  ON                   Switchunit          camera.                                        it     to the
wait until the pilot lamp is lighted.         DETERMINING SHUTTER SPEED                                                In case of lens shutter camera,After the flash picture is taken, the button                                                perfect synchronization is obtained
must be set at "OFF" position. Keep the        if the synchro-cord  is attached to the
On/Off button on "ON" position until the   X synchro-terminal of the camera.
shutter release button is depressed.         You may determine your own shutter
                                               speed according to the picture situa'
                                                     tion. With regard to the focal pldne
                                                shutter camera, unless the shutter
                                                          dial is set at the X mark, the shutter
                                                                   is not properly synchronized.
View original page 11Page 12 · Read text
www.butkus.us
       CAUTIONS:
          1.  Unless D.C. PUSH button is set at "OFF" position, A.C. current will not
             be supplied.
          2.  Be sure to remove the A.C. cord after use on A.C. household current.
          3. Remove the batteries before storage of the.,Unit.
          4.  Charging with batteries can be acknowledged by a low buzzing sound.
              Replace batteries if charging takes more than 30 seconds.

I
View original page 12Related documents and language editions
YashicaPDF
YASHICA CS-201 instructions
User manual
22 pages · German, French, SpanishRead →
YashicaPDF
Yashica Cs 201
User manual
19 pages · German, French, SpanishRead →
YashicaPDF
Yashica ES-14 / 20 instructions
User manual
36 pages · German, French, SpanishRead →
YashicaPDF
Yashica Cs 250 AF
User manual
68 pages · German, French, Spanish, EnglishRead →
YashicaPDF
Yashica CS-221
User manual
11 pages · Not specifiedRead →
From the M. Butkus archive. Original publisher and archive notices are retained.
Check the model and edition against your equipment.
PDF verified 2026-10-10.