Film cameras
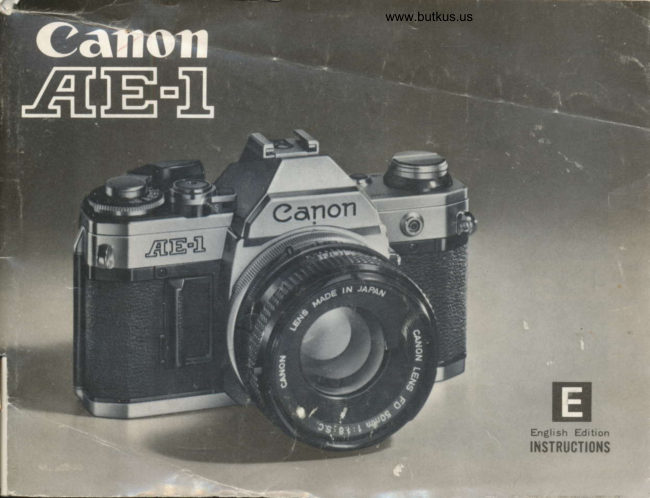
Canon AE-1 User manual
User manual for Canon AE-1. 75 pages in English. Read the original PDF, download or print a copy without registration.
75 pagesEnglish16.6 MB PDF
Loading your manual…Open PDF directly
Document details
- Brand
- Canon
- Model / document
- Canon AE-1
- Document type
- User manual
- Language
- English
- Pages
- 75
- File size
- 16.6 MB
- Category
- Film cameras
- Document date
- Not specified in catalog
Search available document text
Find a term, then jump to its page in the original PDF. Image-only pages may not be searchable; check the PDF for exact wording and diagrams.
Page 5 · Read text
www.butkus.us
PICTORIAL OUTLINE FOR USING THE CAMERA
    Set the aperture ring of the lens to   11 I the "A" mark.           Z Load the battery.


    Set the ASA film speed.          q Look into the viewfinder.7l'T Select a shutter speed.            J Compose the picture and focus.
         ffi*@Out of Focus                                      I n Focus  i^[r
View original page 5Page 8 · Read text
www.butkus.us
Photography with the Canon Power
Winder A
1. Remove the Battery Pack A.
2.  Load the batteries into the Battery Pack A.
3.  Attach the Battery Pack A to the Power
    Winder A.
4.  Take off the winder coupler cover.
5.  Attach the Power Winder A to the AE-l.
6. Turn the main switch on.'
7.  Focus and press the shutter button.                 Winder Coupler Cover
View original page 8Page 9 · Read text
TABLE OF CONTENTS                   Stopped-Down Metering Index Mark
SPEC|FTCAT|ONS             . . 8-11      and Manual Aperture Control                                       "M"Signal ..                  ....40PRELIMINARY PREPARATION  . . . . 12
Mounting the Lens and Setting the                   Effects of Changing the Shutter                                          Aperture           41-42Aperture Ring to the "A" Mark        . . 13      Speed and theLoading the Battery and                   Depth-of-Field                    . . 43-44
BatteryCheck             ..14-16      Shooting against the Light and                                                                                                                                  . . . . .45Loading the Film and Setting                     Manual Override
                                                Exposure Compensation by Changing thethe ASA                              . 17-20                                      ASA Setting and Using the Self-Timer  . .46-47OPERATION FOR
                                                                                                                                  . .48GENERAL PHOTOGRAPHY ...23       Long Exposures and "B" Setting                              Stopped-DownMetering    ..49SelectingtheShutterSpeed   . . . .25                                             Lock for Manual Aperture Control . . b0-51Focusing and Dioptric                              Lenses                                . . b3-S6AdjustmentLenses      ...27-28
HoldingtheCamera        ...31      ACCESSORIES, CARE OF THE CAMERA,
                                                                                  57RewindingtheFilm       .....33      MAINTENANCE, AND MISCELLANEA                               CanonSpeedlitel55A         ...  b9Double-Check Before Shooting       . .34
                                                                                  60DETAILED OPERATION OF                      Flash Photography with the AE-l  . . . . .                                 A                   . .  .' 61THEAE-1 ..                  ....35       Canon Power Winder
Viewfinder Information and                    Canon Data Back A
Meter Sensitivity Pattern               . . 37    andAutoBellows           ...63AE Coupling Range and                  OtherAccessories        ..64-65
                                                                                      66-69OverexposureWarningMark  . . . .38       Characteristics .                                                 Care and Storage of the Camera    71-72Underexposure and
                                                    Using the Camera inCoupling Range Warning LED Lamp    39                                              Very Cold Conditions               73
View original page 9Page 10 · Read text
www.butkus.us
SPECIFICATIONS                               index mark which also serves as battery
Type: 35mm SLR  (Single-Lens-Reflex)           charge level check mark. Besides, there are                                          two red zones at the top of the aperture    camera with electronically controlled AE
                                                                          overexposure.    (Automatic Exposure) and focal plane           scale to warn of
                                            Below the aperture scale, a red warning     shutter.
                               LED lamp blinks to  indicate under-Picture Size: 24 x 36mm
lnterchangeable Lenses: Canon F D  series           exposure.This lamp also indicates that the
with full aperture metering and AE coupling.           selected shutter speed is outside the AE
   Canon F L  series with stopped-down           coupling range with respect to the ASA
                                                          of the film being used.     metering.
                                      Above the aperture scale, a manual
                                                                               signal (red LED)Standard Lenses: Canon FD 55mm f 11.2          aperture control "M"
                                                                                           aperture     s.s.c.                                            blinks as a warning that the
                                                                    AE    Canon FD 50mm t|I.4 S.S.C.                       ring is not set at the "A" mark for
    Canon FD 50mm f/l.8 S.C.                       photography.
Lens Mount: Canon Breech-Lock mount.         Viewfinder Attachments: Angle Finder A2
   Canon FD, FL and R lenses can be used.        and B, Magnifier S, Dioptric Adjustment
Viewfinder: Fixed eye-level pentaprism.                 Lenses (10 kindsi, and Eyecup 45.
Fief d of View: 93.5% vertical and 96Yo     Mirror: Instant-return, large reflector'mirror
    horizontal coverage of the actual picture           with shock absorbing mechanism.
     area.                      AE Mechanism: Shutter priority, electro-
                                                                                        systemMagnification: 1:0.86 at  infinity with a           nically controlled AE metering
    standard 50mm lens.                                 incorporating two lCs and one LSI equi-
                                                                            12 L (lntegrated Iniection Logic)Viewfinder lnformation: Split-image/micro-         pped with
    prism rangef inder, aperture scale with      Light Metering System: TTL  (Through-
    meter needle and stopped-down metering           The- Lens) Central Emphasis Metering
View original page 10Page 11 · Read text
method employing a Silicon Photocell as            lever. The number 2 lor two seconds is
     photosensitive element.                        marked in orange; other numbers as well
Exposure Meter Coupling Range: With ASA            as X synchronization are in white.
    100 film, EVI (t11.4 at one second) to         There is a shutter dial guard to prevent
                                                                                                                    dial.   EV18 fflti at 111000 second).                     unintentional movement of the
Film Speed Range: ASA 25 to ASA 3200.          The ASA dial is located underneath
Exposure Correction: By pressing the back-           the shutter speed dial.
                                                                                                            is a large, button     light control switch, exposure  is corrected       Shutter Release Button:  lt
   by the automatic opening of the dia-          type magnetic release switch. Depressing
                                                                                    halfway   phragm 1.5 stops more on the aperture        the shutter release button
     scale than the actual setting,                        switches on the light metering circuit,
Exposure Preview: The meter needle will           while full deoression releases the shutter.
    indicate in the viewf inder when the        The shutter release button has a locking
                                                                                                   cable    shutter release button is depressed half-           '    device, besides a socket for the
   way or the exposure preview switch  is            release in the center.
     depressed.                                   Self-Timer: Electronically controlled  self-
                                                          timer. After the self-timer lever is pushedShutter: Cloth focal plane shutter with four                                                      forward, the self-timer  is activated by the    spindles. Shock and noise damping                                                  shutter release button. The self-timer    mechanisms are incorporated. All shutter                                                             releases the shutter after a time lag of 10    speeds are electronically control led.                                                   seconds. A self-timer lamp (red LED)Shutter Speeds: 1/1000, 1/500, 1/25O,                                                         blinks on and off to indicate when the    11125, 1160, 1130, 1115, 118, 114, 1/2, 1,                                                              self-timer is in operation.   2 (seconds) and B. X synchronization  is                                             Stopping-Down the Lens: Stopping-down the    at 1/60 seconds.                                                     lens can be performed by pushing theShutter Speed Dial: The shutter speed dial is                                              stopped-down lever after setting the   on the same axis as the film advance
View original page 11Page 12 · Read text
www.butkus.us

     aperture ring.                                           trolled for correct  f lash exposure.
Power Source: One 6V silver oxide battery      Back Cover: The camera's back cover has a
    (Eveready No.544, UCAR No.544, JIS       memo holder for your convenience. The
    4G13, or Mallory PX28) or alkaline man-          cover can be removed for attaching the
    ganese battery (Eveready No.537, UCAR        Canon Data Back A. To open, pull the
    No.537).The battery lasts approximately           rewind crank up.
    one year under normal use.                  Film Loading: Easy film loading with multi-
Battery. Check: Battery power level can be             slot take-up spool.
   checked by the meter needle in the      Film Advance Lever: Single stroke with 120o
     viewf inder when the battery check         throw and 30" stand-off . The film can be
    button is pressed.                        wound with several short strokes. The
Flash Synchronization: X synchronization  is        Canon Power Winder A also can be
    at 1/60 second.                             mounted for automatic winding of the
  M synchronization  is at 1/30 second and             film.
    below.                        Frame Counter: Additive type.  Auto-
Flash Terminal: The accessory shoe has a          matically resets when the back cover is
    direct flash contact and automatic flash          opened. While rewinding film, it counts
    control contacts. On the  f ront of the          back the frame numbers.
   camera body is the flash terminal, JIS-B     Film  Rewinding: Performed by pressing
    type for flash units with a cord. lt has a          the rewind button on the bottom and by
    built-in protective rim to prevent elec-          using the rewind crank on the top. The
     trical shock.                              rewind button is automatically reset
Automatic Flash: With the exclusive Canon        when the film is advanced with the film
    Speedlite 155A, the shutter speed and          advance lever.
    aperture are automatically set. The
   amount of light is automatically con-
View original page 12Page 13 · Read text
Safety Devices:
   o The shutter does not drain battery
    power when not released.
   o The film cannot be wound while the
    shutter is in operation.
Size:. 141 x 87 x 47.5mm (5-9/16" x 3-7116"
   x 1-7 /8"t.body only.
Weight: 5909 (20-13/16 ozs.) body only.
   7909 (27-7 /8ozs.l with the 50mm
     t/1.8 S.C. lens.
   8959 (31-9/16 ozs.) with the 50mm
     f/l.4 S.S.C. lens.


           Subject to change without notice.
View original page 13Page 14 · Read text
www.butkus.us

PRELIMINARY PREPARATION
Attaching the Neckstrap
    Attach the Canon AE-l's neckstrap by
threading it through the rings and adiusting it
to the desired length as indicated in the
photos. A case Jor a spare battery can be
attached to the neckstraP.


Handling the Lens Cap
   The lens cap can be removed from the
front of the lens after pressing in the tabs on
both sides of the cap. The rear dust cover can
be removed by turning the bayonet ring in the
direction of the arrow. To attach the dust
cover, align its slot with the positioning pin
below the red dot of the bayonet ring, and
press it in. When the dust cover is removed,
the bayonet ring is locked.
   For an explanation of how the lens
mechanisms function, see page 52.
View original page 14Page 15 · Read text
Mounting the Lens1  I  Remove the body cap and mount the lens
onto the camera. The lens is mounted by
aligning the red dot of the body with the red
dot of the bayonet ring, and then turning the
bayonet ring clockwise, pressing gently until it
locks into position. Reverse the procedure to
dismount the lens.
FD series lenses must not be mounted on the
camera when the film is partially advanced'

             the. Aperture Ring to the)  settingL  "A" Mark
   The AE-l delivers perfest AE photo-
graphy when the apenure ring is set for
automatic exposure. The "A" mark on the
aperture ring should be set to the EE position.
Hold in the EE lock pin while turning the
aperture ring to the "A" mark. This can be
done either before or after the lens is
mounted on the camera. This setting can be
 unlocked by pressing the EE lock pin in and
turning the aperture ring away from the
 "A" mark.
View original page 15Page 16 · Read text
www.butkus.us
                  Q Loading the Battery                                                 This camera will not function without                                                     -r                                                 battery power. A 6V silver oxide battery  is
                                                  loaded into the battery chamber after opening
                                              the battery chamber cover. lt can be opened
                                          more easily by using the viewfinder cover that
                                                                               is inserted into the accessory shoe.
                                        Be careful to load the battery correctly
                                        with the "+" side up as indicated in the
                                              diagram. Load the battery by inserting first
                                      the "-"  contact in the battery chamber.
                                         The battery can be unloaded in a similar way
                                     by pulling it out from the top. The battery.iL.:c.:I    E.5                                    can be loaded and untoaded more easily
                                    when the lens is dismounted. The battery
                                                should last for approximately one year under
                                          normal use. Refer to page 73 about the
                                                         details of the battery when the camera is used
                                                             in extremely cold conditions.
View original page 16Page 17 · Read text
A Checking the Battery'T  Since the AE-1 is an electronically con-
trolled camera, the shutter will not function
without sufficient battery power.
   The battery requires checking in the
fol   I owing  ci rcumstances   :
1. When a new battery is loaded.
2. When the shutter does not function.
3. When long exposures are  f requently
    performed.
4. When the camera is used very  f requently.
5. When the camera is used after  it has been
     stored for a long period.                         www.butkus.us
6. When the camera is used in extremely         ryAlkaline Manganese    cold conditions.                                                                          Silver Oxide BatterY                                                                Battery
t-                                        -----l   I          Usable Batteries                                                                                                                                                                                                                                                                                                                                                                                                                                                           I
 Silver 0xide
 Battery (6V )         JIS 4G13, Mallory PX28
 Alkaline Manganese
 Battery (6V)
View original page 17Page 18 · Read text
www.butkus.us
How to Check the Battery
    To check the charge level of the battery,
press the battery check button on the top of
the camera while watching the meter needle
in the viewfinder. lf the meter needle rests
below or coincides with the index opposite
the 5.6 f/stop, the power level is sufficient.
lf the needle rests above the index, replace
the battery with a new one of the prescribed
type. When a new battery with full voltage  is
used, the needle will swing below the 4
f/stop. The weaker the battery, the closer
the needle comes to the index.
I     lf the meter needle fails to stabilize
within about three seconds, the battery is
near exhaustion and should be replaced.
View original page 18Page 19 · Read text
(  Loading the Film
J  The Canon AE-l uses color or black and
white film in standard 35mm cartridges.

Opening the Back Cover
   To load a cartridge of film into the
camera, first open the camera's back cover.
Pull up the rewind crank and the back cover
will pop open. The back cover can be securely
closed simply by pressing it until it locks.
    The Canon Data Back A, an accessory for
imprinting data such as the day, month and
year, can be attached to the AE-1 in place of
the back cover. (See page 63.1
How to Load the Film
   Avoid direct sunlight when loading or
unloading the film.
    Put the cartridge into the film cartridge
chamber and press down while rotating the
rewind knob until it drops securely into
position. The protruding part of the cartridge
should be on the bottom. Pull the film leader
across and insert the end into one slot of the
multi-slot take-up spool. Turn the film ad-
vance lever and wind the film around the take-
                                                                                                  17
View original page 19Page 21 · Read text
Checking Film Winding
    Operate the film advance lever while
watching the film rewind knob. lf it rotates,
the film is properly loaded. lf the rewind
knob does not rotate, open the back cover
and load the film again from the start.

                      Speedfi  Setting the ASA Film\,, After loading the film, set the ASA film                                       www.butkus.us
speed according to the ASA speed of the film
in use. To set the ASA, first push the film
advance lever out to its 30" stand-off position
away from the camera body, then lift up the
ASA ring around the shutter dial and rotate it
in either direction until the proper number  is
aligned with the green index mark. ASA is a
numerical rating of a film's sensitivity to light.
A higher ASA number indicates a faster film
which is more sensitive to light. On the other
hand, a lower ASA number indicates a slower
film which is less sensitive to light. The ASA
rating recommended by the manufacturer  is
printed on the film box, e.9., ASA 100.
View original page 21Page 22 · Read text
www.butkus.us

                                  The following ASA ratings can be set on
                                 the camera. Figures in parentheses indicate
                                        intermediate  f ilm speeds.

                            ASA25  '1'' 'to' 50 '9' '1' 100"3u'  1r.601 200(2:0) '1''400
                                                           r{, '{) 36f t9) ,lnol600rT, ,,P,3200


                               Use of the Memo Holder
                                  The memo holder on the camera's back
                                  cover is useful for keeping data like film
                                       speed, location, shooting. For example, after
                                        tearing off the part of the film box which
                                           specifies the type of the film being .used, it
                               can be inserted into the memo holder as a
                                       constant reminder.


   36 EXPOSURES
c 135-36
View original page 22Page 23 · Read text
Film Advance and Shutter Release
    Turn the film advance lever until it stops,
so the film will advance one frame all in one
motion. The shutter will cock, and the dia-
phragm and mirror will be ready for the next
shutter release, while the frame counter
advances simultaneously to the next number.
By pushing the film advance lever lightly with
the tip of your thumb, it will open to its
30o stand-off position away from the camera
body for easy film advance.
While the film is advancing, the shutter will
not be released. Film winding can also be ac-
complished by advancing the lever in short
strokes,                                                                 Shutter Button Lock
    Canon has developed the Power Winder A
to be used with the AE-l for automatic film
winding. lt greatly increases the automation
and mobility of the AE-l. (See page 61.)
View original page 23Page 24 · Read text
www.butkus.us
Shutter Button and Shutter Lock             shutter release button is turned to the "L"
   The shutter release button is designed to       position, the shutter button will be locked to
function as the main switch of the camera to      prevent unintentional shutter release. Keep
activate the AE meter and shutter operation.     the shutter release button locked while
The shutter has a magnetic release, so the       carrying the camera to prevent film waste.
meter can be read by pressing the shutter        When the power level of the battery is
button halfway with light pressure. By de-        insufficient, a safety mechanism will keep the
pressing  it further, the shutter will be released.       shutter from being released.
The magnetic release shutter button enables
faster metering for shooting in succession than     Frame Counter
the mechanical release method does. There is        The frame counter is an additive type
also less chance for camera shake.                which counts one frame every time the film
   When the shutter lock lever around the     advance lever winds the film. When the
                                            camera's back cover is opened, the  f rame
                                               counter automatically resets itself to the "S"
                                                         position.
                                                While rewinding film, the frame counter
                                             counts back the frame numbers. The starting
                                                    position "S", 0, and the even numbers 2 to 38
                                                    are displayed by the counter. Numbers 20 and
                                          36 are marked in orange to call your attention
                                                   to the end of film cartridges such as are today
                                              commercially available. The frame counter
                                               cannot count higher than 38.
View original page 24Page 25 · Read text
The AE-1 is an Automatic Exposure       for catching fast-moving subjects, especially at
camera with a shutter speed priority system       the decisive moment.
which electronically controls the aperture          Furthermore, the shutter speed priority
for the given shutter speed to ensure the      system allows you to control image blur at
optimum exposure. Canon's shutter speed       will and to emphasize the movement of the
priority system has been used in this camera       subject. For action or other such situations,
in the idea that a photograph is an instant     you can realize all photographic aspirations.
snatched from elapsing time.
    The shutter speed priority system is ideal
View original page 25Page 27 · Read text
1  Setting the Shutter Speed         I The shutter dial controls the length of
       time that light is allowed to reach the film. On
     the shutter speed dial, shutter speeds from
      1/1000 to "B" are marked in white, while the
      2-second speed is marked in orange. Each
      shutter speed gradation is twice or ap-
     proximately twice the preceding speed,
       beginning with 1/1000 sec. (1000).
I.l         Thus, the light reaching the  f ilm ar 11250
      second is half the light reaching it at 11125.
    The numbers on the shutter speed scale
      represent the corresponding fraction of a        www.butkus.us
      second 1125 = 1/'l 25), with the exception of 1       rotated between "8" and "1000"
     and 2 (marked in orange) which stand for 1                                                                                                                rutter Spe     and 2 seconds respectively.                                         Brightness                                      ( Seconds)
        The "B" setting is for long exposures. At                                        I ndoors                           I/3orot/60
     the "B" setting, the shutter remains open          Outdoors                           r/125to1/250
                                                                         Mid-summer                                                                                              Beacn' 5now-covereo     l/5OOtot/1oOO      while the shutter button is depressed and                                                                       Moun tai ns      closes when it is not depressed. See page 48
       for more details concerning long exposures.         Selecting the Shutter Speed
        To set the shutter speed, rotate the dial in          Shutter speed is determined in accord-
      either direction until the desired number      ance with the brightness of the scene and the
                                                                                                                                     is moving.      clicks into place next to the white index       speed with which the main sublect
      mark. An in-between setting should not be     You can use the above table as a general guide
      used, and the shutter speed dial cannot be      to help you select an appropriate shutter
View original page 27Page 28 · Read text
www.butkus.us
   Overexposure                           than 1l2OO second, therefore the shutter
   Warning Marki                                speed in this particular case should be set at
   Underexposure and                           1/250 sec. lmage blur can also arise if the
    Coupling Range                               camera is not properly held. See page 31.   Warning Lamp
                                                )   Reading the Exposurespeed when using a standard 50mm lens. For    L  This camera incorporates a magnetic
indoor photography, with no special illumi-        release system using an electromagnetic switch
nation, choose 1/30 of a second and 1/60 of a     to effectively perform instantaneous  light
second in a brightly lit room.                        metering. The shutter release button activates
    For outdoor photography, select 11125        light metering and exposure in succession and
second when cloudy and 11250 second in        practical ly simulta neously.
sunshine. To take pictures in particularly          This is a two-step shutter button. The
bright sunshine such as at a beach in mid-      exposure can be confirmed by the meter
summer or in snow-covered mountains, use      needle inside the viewfinder by pressing the
shutter speeds of 1/500 sec. or 1/1000 sec.           shutter button halfway.
   The above mentioned shutter speeds        When the meter needle inside the view-
apply when using a standard 50mm lens, but       finder stays within the proper range and the
it is necessary to choose faster shutter speeds      underexposure warning LED lamp below the
when using lenses of longer focal lengths       aperture scale inside the viewfinder does not
because they are more diff icult to hold       blink, the exposure is correct. See page 3gsteady. lt is generally said that the shutter      about the underexposure warning lamp..
speed figure should be greater than 1 divided                                     When the underexposure warning lamp
by the focal length of the lens in order to ob-       inside the viewfinder blinks, or when the
tain sharp images.                           meter needle moves into the upper over-
    For example, when using a 200mm tele-      exposure warning zone in red, the exposure  isphoto lens, shutter speed should be faster                                                    incorrect. When this is the case, turn the
View original page 28Related documents and language editions
CanonPDF
Canon AE-1 Gebruiksaanwijzing
User manual
78 pages · DutchRead →
CanonPDF
Canon AE-1 Quick Start
Quick start guide
22 pages · EnglishRead →

CanonPDF
Canon AE-1 Quick Start
Quick start guide
42 pages · EnglishRead →

CanonPDF
Canon AE-1
User manual
78 pages · GermanRead →

CanonPDF
Canon Edicion an Espanol
User manual
75 pages · SpanishRead →
CanonPDF
Canon AE-1 Bruksanvisning
User manual
78 pages · SwedishRead →
From the M. Butkus Camera Manual Library. Original publisher and archive notices are retained.
Check the model and edition against your equipment.
PDF verified 2026-10-10.