Film cameras
Canon AE-1 Quick Start Quick start guide
Quick start guide for Canon AE-1 Quick Start. 22 pages in English. Read the original PDF, download or print a copy without registration.
22 pagesEnglish4.5 MB PDF
Loading your manual…Open PDF directly
Document details
- Brand
- Canon
- Model / document
- Canon AE-1 Quick Start
- Document type
- Quick start guide
- Language
- English
- Pages
- 22
- File size
- 4.5 MB
- Category
- Film cameras
- Document date
- Not specified in catalog
Search available document text
Find a term, then jump to its page in the original PDF. Image-only pages may not be searchable; check the PDF for exact wording and diagrams.
Page 1 · Read text
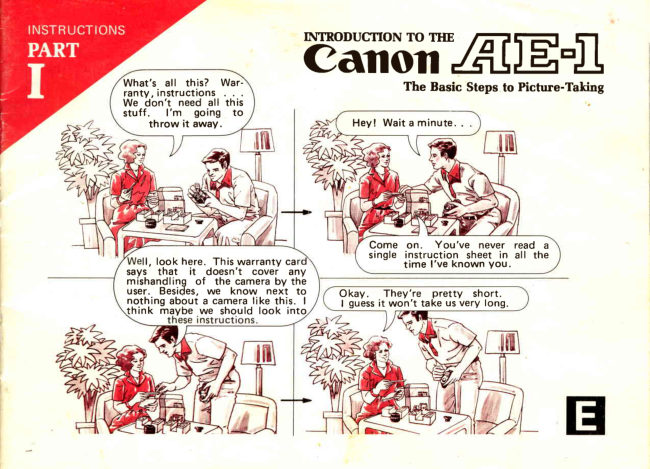
What's           all  this?  War-   Udf'lil1t4trflfhe Basic Steps to Picture-Takingranty, instructions
We don't need all this
stuff .   l'm  going  to
     throw  it away.                      Hey! Wait a minute. .


                                 Come on.  You've  never read a
                                              single instruction sheet in  all the
      ll, look here. This warranty ca                    time l've known You. says  that    it  doesn't cover any
 mishandling of  the camera by the
 user. Besides, we know  next  to      Okay.  They're  pretty  short.
 notlling about a camera like this.  I             I guessit won't take us very long.
 think maybe we should look into
View original page 1Page 2 · Read text
Congratulations on your Pur-      CONTENTS
chase of a Canon AE-1. We          1 .  A t t a c h t h e l e n s                                  . r . .               . p P . 3 - 4
know that you are anxious to                                              2.  Set the lens for AE photography                        .  .  .  . p.5
start taking pictures with   it.                                              3.  Load the battery                                                          .  . P.6Our first hint for taking great
                                              4.  Check the battery                                                           . P.7ones is to  read these instruc-
tions.  Follow  the  steps  in            5.  Before loading f ilm, learn to operate
order  and become well  ac-             b a s i c c o n t r o l s                                              . . . .  P . 8
quainted  with   the  camera.          6.  Set the ASA                                                             . p.9
Then, once you have a good                                   7 .  Loadthe film                        pp.10-12understanding of  PART    l,
move on to PART  ll.   lt con-           8.  Learnto hold the cameracorrectly            p.13
tains a lot of information you           9.  Oneshotat a time                     pp.14-15
won't     f ind  elsewhere. The        1 0 .  At the end of the roll, rewind
brief  time  spent  in  reading                                                                                       t h e f i l m                                       p . 1 6
these instructions is a sound                   * DedicatedFlash Photography                                  . p.17investment in satisfaction and
                                                            * Self-Timer.                             pp.18-19enjoyment.
                                                            * Carryingthe Camera                        p.2O
Symbols                                                 * Pre-ShootingChecklist. .                      P.2"1
         an importantDO. ffiSignals
@ Signatsan importantDON'T.

 Copyrighto 1980by CanonInc.

                                  Camera parts are labeled on the insides of the foldout All rights reserved.                                            flaps at the beginningand end of PART ll.
              Printed in Japan
2                    www.butkus.us

                                               t  .
View original page 2Page 3 · Read text
1. Attach the Lens


  Remove the rear lens cap by    Removethe body cap.
  turning  it  in the direction of
  the arrow until  it stops and
   p u l l i n gi t o u t .


  To reattach the rear lens cap,
  align  it  with  the  lens as  il-
   lustrated. Then  lightly push
    it in and turn it clockwiseuntil
    It StOpS.
View original page 3Page 5 · Read text
www.butkus.us

To mount the lens, first align   Then  turn  the  lens  in  the
the rounded red positioning    direction of  the arrow until
point on the lens with the red        it stops and the lens release
dot above the camera mount    button pops out with a click.
as illustrated.
A    lf your camera looks like
     this, with a red dot show-
    ing  inside the  camera
    mount, do not mount the
    lens yet.   First press in
    the small ch rome button                                    ffiWfren film  is loaded, make sure
    as shown  to  release the                                                                    it  is completely advanced to
    stop-down  slide.   Then                                      the next  f rame before mou nt-
   mou nt  the  lens.   Leave                                      ing the lens.
    the stop-down slide as it is.4
View original page 5Page 6 · Read text
2.Setthe Lens for AE(3:J:[?:")Photography

                                     anon
               N


                        Mike Butkus   Digitally                                                                                                                                                              DN:email=mike@butkus.org,Date:cn=Mike2024.12.06signedButkus,by14:22:17Mikeo, ou=Butkus.org,Butkusc=US-05'00'
Remove the f ront lens cap.        While pressingin the AE lock pin, turn the aperture ring in the
                                  direction of the arrow until "4"  click-stopsat the apertureindex.
                                  "A"  will be in line with the red dot on the camera. lf you forget
                                     to do this, automaticexposurewill be impossible.


                            NiliT?lH
To remove th e lens, tu rn  it in     1. AE photography is possibleonly with a Canon FD lens. See PART  ll,
the  direction  of  the  arrow,       p.24 for how to use a non-FD lens on the AE-1 .
wh ile pressingthe lens release   2. Some Canon FD lenseshave a green circle in place of the " A" mark.  lt
button, until it stops.              meansthe sameth ing as the "A" mark.
                      www.butkus.us
View original page 6Page 8 · Read text
Insert the negative end  f irst.     Pressthe battery check button          lf  the  battery  is good,  the
Then push down and insert    while  looking  through  the    meter needle will rest at or be-
the  positive end. Close the     viewf inder. The meter needle    low the battery check index.
chamber cover.                       in  the viewf inder will move.        lf  there is not enough power,
                                                                                                                        it  will  rest above the  index.
                                                             Replace the battery.


    Don't  touch                  the                      batteryA
   poles.        Wipe them                  and                         the                  rNilqlF
   camera contacts with  a                            1. With normal use, the battery should last about one                                                            year.   clean, dry  cloth  before                                                                  2.   lt  is necessaryto take special precautions with the
   loading to  prevent poor                             battery when you ar_eshooting in very low tempera-
   contact from dirt.                                            tu res (below OoC , 32" Fl . See pRRT  | | , p.30
                      www.butkus.us
View original page 8Page 9 · Read text
5. Before Loading Film, Learn to Operate Basic Controls


                                                                                                                        )


Turn the shutter button  lock    Turn the film advancelever in    The  AE- 1  has  a  two-step
lever to "A".                       the  direction  of  the  arrow     shutter  button. Press it  half -
                                         until  it stops. You may turn  it    way to turn the meter on and
                                         in one continuous stroke or in      to get a meter reading in the
                                  several short  strokes. When     viewfinder. Gently squeeze it
                                                                  f i I m  is loaded, th is wi | | ad-      all the way down toreleasethe
                              vance it to the next frame.          shutter. You  cannot  release
 -g:Turn                                                           the shutter againuntil the film
          the  shutter button                                                   is advanced.                                  t '    lock lever to   L"  to pre-
  '    vent   accidentaI  shutter
    re lease o r  battery  d ra i n
   whenever  you  are  not                  @ NEVER JAB the shutter button!  Pressingit gently is im-
    usingthe camera.                 portant for getting sharp pictures.
View original page 9Page 10 · Read text
Lift the knurled ring around the shutter speeddial and turn it until the ASA speedof your film is
alignedwith the green index. This is absolutelynecessaryfor gettrngcorrectexposure.


                                The  top  of  the   f ilri
                                     carton    f its  in  there.
                                     That  way we can  re-
                             member what  kind of
                                                                         f il m   is loaded. Wh at
                                            a conven ient memo
                                            holder!
 lf the shutter speeddial turnS while                             uiit
you are setting the ASA, turn  it to
"8"  or "1000" and then set the
ASA.
                       www.butkus.us
View original page 10Page 11 · Read text
7. Load the Film


                                                                                                www.butkus.us
                                                                                                                                                                                                                                                                                                    Itiliiiriifirillliirri           iiiliiiiiitii:ii,ii', i,':'. ltrii''   rlrli'.. r{rxti'i,#iifiiiii:'|i: iiirliiii'itiiidii  riiiii
P u l l  t h e   r e w i n d  k n o b  u p u n t i l    The AE-1 uses color (negative    Pull the film leader acrossthe
the back cover pops open.           or  slide) or black and wh ite    camera and insert  it into any
                                       film  in  standard 35mm car-     slot of the take-up spool.
A  plastic insr -t  is attached to the     tridges. Place the cartridge in
pressure plate of  a new AE-1  to     the   f ilm chamber as shown.
protect    it   in  transport.  Before    Then push the rewind knob
loading the first film  cartridge, it    down, rotating it until it drops                            this insert. is   important               to remove                                      into its normal position.               away. It may      be thrown


                                                         Bshield  the film from direct
                                                               sunlightwhileloading.

1 0
View original page 11Page 12 · Read text
=j'fi

                                                                                                                                                                                           ;:::;:!i:iii:i:l:::ii;:.j;::!j:.ni:!'.,::.ii:iiiil:iiiii:ii:ii:iiiii.ii.;.lH:|i|:ii;i:|i|:.i|:ii;j:.',|iiii.i,.::'::ri:
Advance the film once. Check   The film should be taut.   lf there is slack, gently
that the  f ilm perforations are    crank  in th e d irection of the arrow u n t i l  i t sto ps.
engagedin the teeth of the f ilm    cover.
transport  sprocket  and  the
take-up spool.


@ Wfrlteloading the film, take
   care not to touch the shut-
     t e r  c urt a in ,  t h e   f ilm  rails
   or the pressure plate ( parts
   in red).            www.butkus.us                                                                   1 1
View original page 12Page 13 · Read text
Take several blank shots, raleasingthe shutter     Each time you advance the  film, the frame
and advancingthe  f ilm, until the f rame counter      counter also advancesto the next frame.  lt can
reads"1" (the dot following zero). While doing      count up to 38 frames. The numbers 20 and
this, keep an eye on the rewind knob.   lf  it      36 are in orange to  call your attention to the
rotates in the direction of the arrow, the f ilm is            f act th at  rol ls with  those nu m bers of  f rames
loadedcorrectly.                                  are or are almost finished.


1 2
View original page 13
Page 14 · Read text
B. Learn to Hold the Camera Correctly


  v   /x)                   t\/\      i{l
The slightest movement of your body during shutter releasemay
cause blur  in the picture.  To reduce chances of this, hold the
camera as steady as possible with you r  left hand supporting the
camera and lens.  Press both elbows to your body and lightly
press the camera to your cheek or forehead. For a vertical shot,
steady at least one elbow against you r body.  Spread you r  f eet
slightly apart, one foot ahead of the other, and relax.  lf a wall or
a tree is available,lean against it.

NF?Iil
There is, of course, no one correct way to hold the camera. Experiment to find the                                                          '!.+'i,i,ft
most comfortable way for you of holding  it steady.  lt may help to practice in
front of a mirror.
                       www.butkus.us                                                         1 3
View original page 14Page 15 · Read text
9. One Shot at a Time


Set a shutter speed bY turning   Then  look   into  the  view'        lf  the  meter needle Points
the  shutter speed dial  until        f inder and press the shutter    to the red zone at the top  of
a number from 60 to 1000 is    button HALFWAY.  The meter    the scale or   if  the  red LED
alignedwith the index.          needle will move to  tell You    (Light-Emitting Diode) Utinks
                              whether the shutter sPeed You    below the scale,turn the shut-
                             have set will give correct ex-     ter speeddial as shown. Other-
                             posure.                           wise, exposure will be correct
                                                                               at the shutter sPeed You have
                                                                             set.
                            A  Do not set the shutter speed dial between the click-stop set-
                                         tings. Note that it does not turn past "1000" or "8"  .
                             Nriql!
                               See PART   I l, p.14,  if you must set the shutter speed dial to a number
                    500     | 000    below "60".    lf action is a particularly important element in the shot, you
                             may wish to refer to PART  ll, p.13, for more information on choosinga
                                        shutter speed.
View original page 15Page 17 · Read text
',.i:it'i,;:,;;:i!'iir,iri":itji:i:ri;,it'it,lRoll,

www.butkus.us

     @:


You can tell you have reached   Then turn the rewind crank in    Then open the back cover, re-
the e nd  of  the   f ilm by  the    the d i rection of the a rrow u nti I   move the  f ilm cartridge, place
frame counter and the  film    the      f rame  cou nter,  wh ich        it back in its canisterand have
advancelever. Either the film    counts backwards as you  re-       it developed as soon as pos-
advance  I ever wi | |  n of  tu rn    wind, reaches"S".                     sible.
at all or  it will not tu rn all the
way. F irst press in the rewind
button. You may immediately
let go of  it.
                                           Nh?EI
A  DO NOT open the back cover until you have rewound the f ilm    Therewindrewindthe  film.button Whenrotatestheas filmyou
   back into the cartridge.  lf you do, light falling on the film       is completely  rewound,   it  stops
   may ruin all of the pictures.                                             rotating.
1 6
View original page 17Page 18 · Read text
*   Dedicated Flash


 Load the flash with  batteries   Turn the Speedlite'sASA film    Tu rn   th e  SpeedI ite's  ma i n
and slide  it  into the AE-1's   speed dial to the correct ASA    switch oN.   After the  pilot
accessory shoe.  Tighten the    speed and push the aperture   lamp glows, press the shutter
lock nut.                          selection switch to  tire green    button to take the picture.
                                     or red  A" position.EUE                                                            'tCan   on off          ers f ou                          r Speed                                             I ites                                            ( 1                           33A,
155A,      177A,            199A)                        for                        the                        AE-1                                                                .     'g  For correct exposure, the subject must be within a certainWith slight differences,all four are                                   range of distances from the camera. The required distanceused in almost the same way. See
PART  ll, p.33, and the Speedlite's       range is shown on the flash by the curve which  is the same
instructionsfor more details.               color as the setting of the aperture selectionswitch. After you
 g  Makesurethe AE-1'sshut-        focus, check the lens'distancescale to make sure the focused
    ter speed dial is not on         distance is within the rangeshown by the curve.
    "8".  Any other setting      Do not shoot before the pilot lamp glows or exposure may be             a     is o kay.                                        rncorrect.                      www.butkus.us                                                                                            1 7
View original page 18Page 19 · Read text
*Self-Timer


                                                                                    www.butkus.us
Advance the film to the next   Push the self-timer lever for-    To  start the  self-timer, Press
frame.                       ward to uncover the self-timer   the shutter button.  The self-
                                                                                  l a m p .                                                      t i m e r  l a m p w i l l b e g i n t o b l i n k .
                                                When   it  stops blinking ten
                                                         seconds later, the shutter will
                                                           be releasedautomatically.
 lg  Use the viewfinder cover
    to   cover  the  eyepiece  @ fne  AE-1  sets the  ex-
   whenever your eye is not       posure  the moment You
     to   it  at the moment You       press the shutter button.     Nif!{?t    take a shot.   lf   it  is un-      Do not stand in front  of                                                                        Following exposure, unless you
    covered, stray light enter-       the lens while pressingthe     want  to use the self-timer for the
    ing   f rom  th e  rear may        button  or exposure may      next  frame,  reset the  self-timer
   causeu nderexposure.           be incorrect.                     lgvgrto "A"  or "L"  .
1 8
View original page 19Page 22 · Read text
*Carrying           the Camera


                                                                                tittiXtuilii*it
Th read the ends of  th e strap    Fo r  carrying the camera,  in   To remove the top cover, turn
through  the  rings on  the     particular, insert  it  into  its      it down, then push it straight
cameraas shown.                semi-hard case (optional acces-  up and out.  Turn the lens'
                                 sory ) as shown. You can still   focusing ring to  infinity  (*)
                                take a picture while the camera      f or closingthe top cover.
                                            is in the case by turning the
                                  top cover down.

rSFItF
1. Do not forget to turn the shutter button lock lever to "L"  to prevent accidental shutter releasewhile carrying
   the camera,
2. The cameracasemust be removed for loading and rewinding film.
                       www.butkus.us                                                   20
View original page 22Related documents and language editions
CanonPDF
Canon AE-1 Gebruiksaanwijzing
User manual
78 pages · DutchRead →
CanonPDF
Canon AE-1
User manual
75 pages · EnglishRead →
CanonPDF
Canon AE-1 Quick Start
Quick start guide
42 pages · EnglishRead →
CanonPDF
Canon AE-1
User manual
78 pages · GermanRead →
CanonPDF
Canon Edicion an Espanol
User manual
75 pages · SpanishRead →
CanonPDF
Canon AE-1 Bruksanvisning
User manual
78 pages · SwedishRead →
From the M. Butkus Camera Manual Library. Original publisher and archive notices are retained.
Check the model and edition against your equipment.
PDF verified 2026-10-10.